Technics SUX 520 D Owners Manual

This is the 48 pages manual for Technics SUX 520 D Owners Manual.
Read or download the pdf for free. If you want to contribute, please mail your pdfs to info@audioservicemanuals.com.

Page: 1 / 48
left right
Technics SUX 520 D Owners Manual

Extracted text from Technics SUX 520 D Owners Manual (Ocr-read)


Page 1

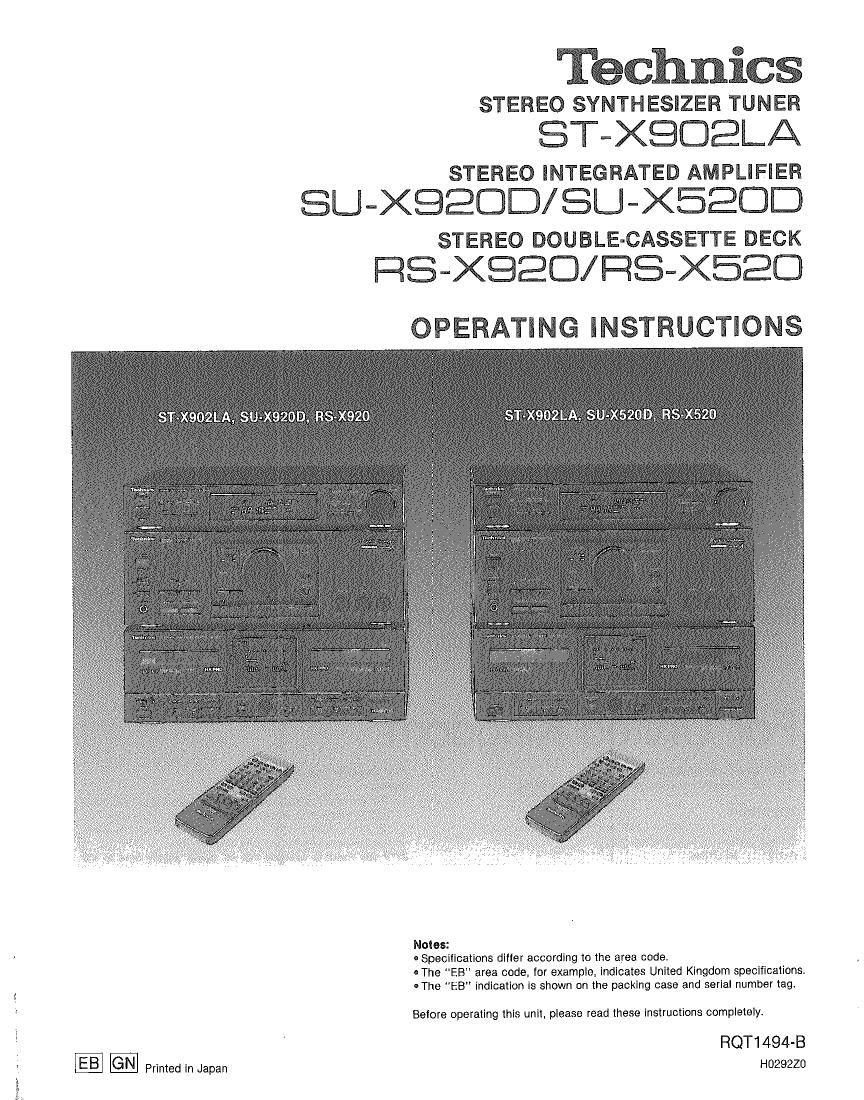
Technics

STEREO SYNTHESIZER TUNER
ST-XQDELA

STEREO INTEGRATED AMPLIFIER
SU-XBED 3/ SU -X520 3

STEREO DOUBLE-CASSETTE DECK

ZlS-XSED/ S-XBED
OPERATING lNS'I'UCTiONS

Sl X920D. RS-XQZO

Notes:
- Specifications diller according to the area code.

-The "EB area code. for example indicates United Kingdom specifications.
-The EB" indication is Shown on the packing case and serial number tag

Belore operating this unil. please read these instructions completely.

RQT1494-B
H0292ZO

Printed in Japan

Page 2

We want to thank you for selecting this product and
to welcome you to the growing family of satisfied
Technics product owners around the world.

We feel certain you will get maximum enjoyment

from this new addition to your home.

Please read these operating instructions carefully,
and be sure to keep them handy for convenient
reference.

These operating Instructions are applicable to the IoIIowlng models.

These operating Instructions. however, fundamentally explaln the operation at models ST-XBDZLA, SU-X92OD and RS-X920.

Tuner Amplifier Cassette Deck

ST-X902LA SU-X920D PIS-x920
SU-X52OD RS-X520

Contents

0 For United Kingdom ...................... 2
0 Suggestions for Safety ................... 3
0 Accessories ............................. 4
. Connections ............................. 5
o Front Panel Controls and Functions ...... 10
- Basic Operating Procedure ............... 15
0 Setting the Time ......................... 17
0 Listening to Radio Broadcasts ........... 18
0 Listening to Tapes tttttttttttttttttt . .21
0 Recording ............................... 25

- Tape-to-Tepe Recording .................. 29
0 To Use the Timer ......................... 31
0 Using an External Unit .......... .. 37
- Remote-Control Transmitter. . . . 36
o Remote-Control Operation. . .. ..39
0 About Cassette Tapes ........ . . 41
0 Maintenance ................. . . 42
0 Technical Speclllcatlons ..... ..43
0 Troubleshooting Guide ................... 45

THIS TUNER/RECEIVER IS CAPABLE OF RECEIVING THE NEW AM STEREO BROADCASTS FROM THE AM BAND RADIO STATIONS.
HOWEVER LIKE MANY TUNERS AND RECEIVERS CURRENTLY AVAILABLE ON THE MARKET IT WILL REPRODUCE THIS AM STEREO
SIGNAL ONLY IN AM MONOl WHICH, IN EFFECT, IS OF NO LESSER QUALITY THAN YOUR EXISTING AM MONO TUNER/RECEIVER.

(EB" area code model only)
The EB indication is shown on the serial number tag.

Important

THE WIRES lN THIS MAINS LEAD ARE COLOURED IN ACCOR-
DANCE WITH THE FOLLOWING CODE.

BLUE: NEUTRAL

BROWN: LIVE

As the colours of the wires in the mains lead of this apparatus
may not correspond with the coloured markings identifying the
terminals in your plug proceed as follows. The wire which is coi-
oured BLUE must be connected to the terminal which is marked
with the letter N or coloured BLACK.

The wire which is coloured BROWN must be connected to the ter-
minal which is marked with the letter L or coloured RED,
Under no circumstances must either of the above wires be con-
nected to the earth terminal of a three pin plug.

For United Kingdom

(For ampliller and cassette deck)

Notes:

1. The AC power supply cords supplied With these units have
both the appliance connector and the AC plug at its ends. The
AC power supply cord is intended to be used with other
system components. such as tuner or etc.

2. It you need to connect this AC power supply cord to the
household AC outlet, follow the instruction below:

(1) Cut off and dispose the plug at the end where the caution
label is attached.

AC power supply cord AC plug

Appliance connector Caution label

(2) Fit a suitable plug to the AC power supply cord following
the instruction indicated on the caution label.

Page 40

iycfiamaaa
DISC) .
. .m . « »., G


[snicker Press this key to use numeric keys (1-0 and "00
>10")
Also. the Input selectors of the amplifier will be switched
to the "CD position by pressing this key.

r Press this key to select the desired tune.

Q Playback begins from the track selected.
To select two-digit track number over 10, tlrst press the CD
>10 key and then press the desired track numbert
The selection oi a twoAdigit track number greater than 10 is
available with the following Technics CD players: SL-PJ28, SL-
PJ28A, SL-PJ38, SL-PJSSA.

Press this key to start play.

EllJ Press this key to temporarily stop play.
_ Press the play key to resume play.

Press this key to stop play.

Em Press this key to select the desired time mode during
play.
The display information will change as follows each time
the button is pressed.
G) Number of track in play and elapsed time
(2) Total remaining time on disc
6) Time remaining in track in play
@ Total elapsed time since beginning of disc
(Only applicable to a Technics compact disc player
SL-PJ28. SL-PJZBA, SL-PJ38 and SL-PJ38A)

E Press momentarily to search for the beginning 01 the
track now playing Repeat this step the necessary
number oi times to search tor a previous track.

E) Press momentarily to search tor the next track,

demote-Co lTiOI Operation

m Press this key to select the program play mode.

To specify the desired tracks. press the CD 10 KEY"

and then press the numeric keys (1 -0. CD >10) in the

desired order.

To cancel program mode in the stop mode, press the

stop key( Cl] ),

To cancel program mode during play, press this key.

For Techntcs multI-compnot disc player (SL-PKZG):

OThe selection of a two-digit track number greater than
10 is not possible.

ITo cancel program mode in the stop mode, press the
program key (% ).

-To cancel program mode during play. press the stop
key ( C] ) and then press the program key (6% ).

Press this key to select the program cancel mode.

To cancel the programmed tracks, first press this key
and then speciiy the tracks to be cancelled by pressing
appropriate numeric keys (1 -0, CD >10).

Press once again to cancel the program cancel mode.
(Only applicable to a Technics compact disc player
SL-PJQS. SL-PJ28A, SL-PJSB and SL-PJSBA)

W Press this key to open the disc holder.

l To close the disc holder, press this key once again,
(Only applicable to a Technlcs compact disc player
SL-PJ28. SL-PJZBA. SL-PJSB and SL-PJSBA)

IE Soundiproeesser

E Press this key to switch the equalizer correction 0N.
Press once again to switch to the flat setting}

[15. Press this key to retrieve a memorized curve or fixed
curve.

- Press this key to switch the DIGITAL SPACE
CONTROL iunctlon ON,
Press once again to switch the lunction OFF.

Press this key to retrieve a memorized mode
or fixed mode.

|§| Lcaesettejapéde¢kék
new": Press this key to select the deck (DECK 1" or DECK
- 2") to be controlled.
. > B»: For the "forward (A)" side ot the tape
D D 4: For the "reverse (8)" side ot the tape
Press one oi these keys to begin playback or recording. pressing

the key corresponding to the side ot the tape to be played back
(or recorded).

r
[f3] Press this key to stop tape movement.

Press this key to make a silent interval during recording.

(Alter 4 seconds, the tape deck will automatically change to the
recording stand-by mode.)

To start the recording again, press the playback key.

Note: For some Technics tape decks (RS-X520. etc.). DECK 1
has no recording capability.

@-

Press this key to advance or rewind the tape while the unit is in
the stop mode.
Press this key to select the desired tune while the unit is in the
play mode.

Press this key to temporarily stop playback or recording.
E Press the playback key to resume playback or recording.

fi Press this key to change to the recording stand-by mode.

Note: For some Technics tape decks (RS-X520, etc.) "DECK 1
has no recording capability.

Page 45

Troubleshooting Guide

Before requesting service ior this unit, check the chart below for a possible cause of the problem you are experiencing. Some simple checks or
a minor adjustment on your part may eliminate the problem and restore proper operation.

It you are in doubt about some oi the check points, or it the remedies indicated in the chan do not solve the problem, refer to the directory oi
Authorized service centers (enclosed with this unit) to locate a convenient service center, or consult your Technics dealer tor instructions.

|

Problem

I

Probable cause(s)

Suggested remedy

Problems noted at all times

No sound ls heard when the
power Is switched ON.

The power cord plug is not completely inserted.

-Contirm that the power cord plug is connected
completely.

Connections are incomplete or incorrect to the
speaker systems. etc.

I Check to be sure that all connection wires are
correctly connected.

The incorrect input selector has been pressed.

-Check to be sure that the correct selector is
pressed.

The speaker selector is set incorrectly.

- Set it to the correct position.

When listening to stereo
sound, the sound locks
depth (Le. thln buss, tlnny
sound).

One ol the speakers is connected out at phase
[(+)-*(-). (-)' '(+)l-

. Reconnect the speakers, maintaining proper
poiarity[i.e.. t-i')t+). (-') 4-)].

When listening to stereo
sound, the left and right
sounds are reversed.

The leit and right speaker connections. source
connections, or stereo sound processor
connections are reversed.

«Check a connections and correct them It
necessary.

A low-pitched nolao (hum"
or lbur.z") I: heard.

The power cord or a fluorescent light. etc.. Is near
the connection wires.

- Try separating this unit as tar as possible lrom the
electric appliance.

Sound I: not heard lrom
one at the speaker
systems.

The speaker wires are disconnected.

OCheck and correct the connections at the speaker
wires.

The balance control is set too tar to one side.

OSet so that sounds are heard at the center,
between the speaker systems,

Sound step: during a
pertormonce, or no sound
to heard when the power ls
switched ON.

The protection circuitry has iunctioned because
the positive and negative speaker connection
wires are shorted" or speaker systems with an
impedance less than the indicated rated
impedance oi the amplitler are used.

sswitch OFF the power. and. alter determining and
correcting the cause. switch ON the power once
again.

0 Use speaker systems 01 the proper impedance
rating.

While using the tape deck

Tape moves but no sound Is
heard.

The volume control of the amplilier is set to its
minimum position.

OAOiust the volume control to the desired level.

Distorted sound.

The recording level is too high.

~Selecl the appropriate recording levelL

Previously recorded sound
has not been erased.

Erase head is dirty.

vClean the head.

Sound output to hoarse or
unsteady.

WHeads are dirty

OClean the heads.

Tape is damaged.

- Try operation with a new cassette; ll there is no
problem with the new cassette, discard the
damaged cassette.

Poor sound quality
(especially In the high treble
and low base ranges)

The correct Dolby noise-reduction button is not
set.

0 Set it to the correct position.

Sound is low, poor tone,
Intermittent sound, noise.

Heads, capstan andlor pinch roller are dirty or
tape is damaged.

oClean the heads, capstan and/or pinch roller, or tryfi
a new cassette.

Recording Is not possible.

The recording level control is at the "0" position.

0 Select the appropriate recording level.

One at the edit-recording indicators is

illuminated.

'Switch OFF the indicator by pressing the tape-to-

tape recording tape-speed selector.