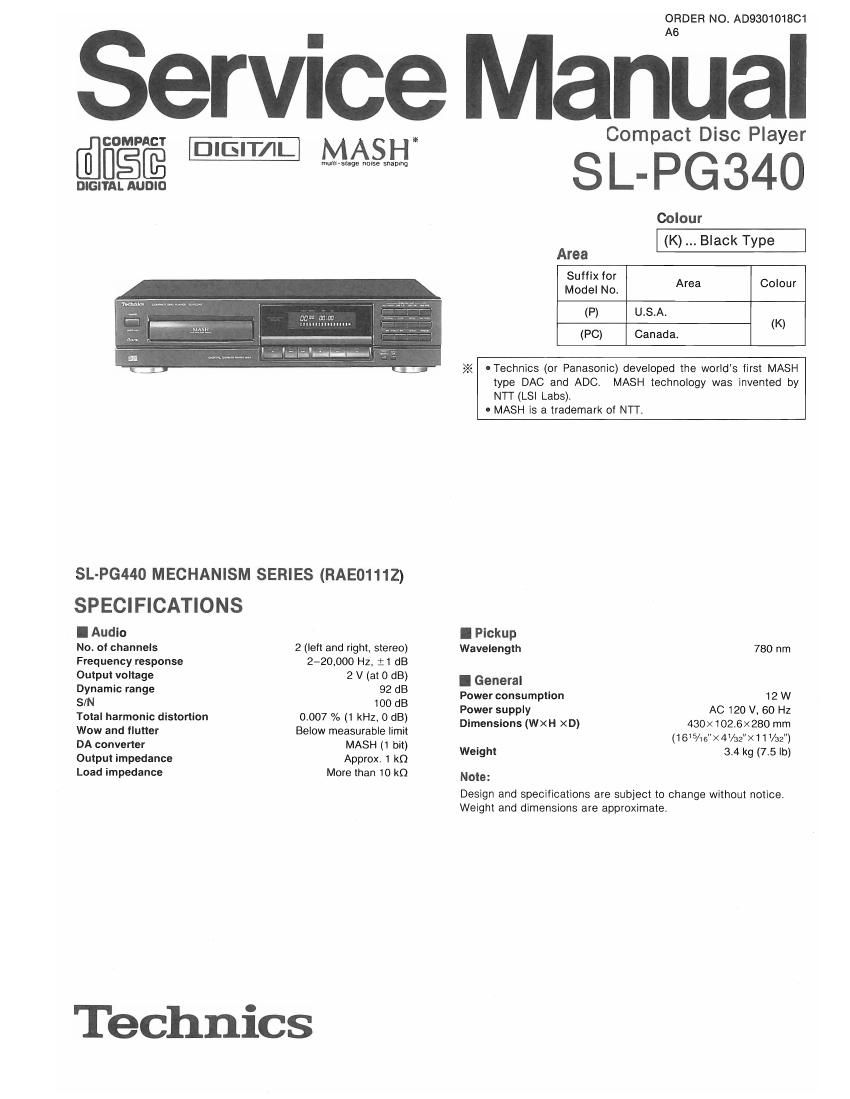
Technics SLPG 340 Service Manual

This is the 36 pages manual for Technics SLPG 340 Service Manual.
Read or download the pdf for free. If you want to contribute, please mail your pdfs to info@audioservicemanuals.com.

Page: 1 / 36
left right
Technics SLPG 340 Service Manual

Extracted text from Technics SLPG 340 Service Manual (Ocr-read)


Page 1

ORDER NO. AD930101861

S M A6 I
Corn act Disc Pla er
@figffi _lGlT/IL MA SH 9 y
DIGITAL AUDIO S L_ PG 340
Colour
(K) Black Type
Area
3:333; Area cm.
(P) u.s.A. (K)
(PC) Canada.

>Z< -Technics (or Panasonic) developed the worlds first MASH
type DAC and ADC. MASH technology was invented by
N'I'I' (LSI Labs).

- MASH is a trademark of MT.

SL-PG440 MECHANISM SERIES (RAE0111Z)

SPECIFICATIONS

I Audio I Pickup

No. of channels 2 (left and right, stereo) Wavelength 780 nm
Frequency response 220,000 Hz, :1 dB

Output voltage 2 V (at 0 dB) I General

gyNnamic range 13: 2: Power consumption 12 W
Total harmonic distortion 0.007 % (1 kHz, 0 dB) 3?::;;:::{wx H xv) 430 :fi);:0x2820:nf
Wow and flutter Below measurable limit (165/ie"><4/32"><11V32")
DA converter MASH (1 bit) Weight 3.4 kg (7.5 lb)
Output impedance Approx. 1 k0

Load impedance More than 10 km New:

Design and specifications are subject to change without notice
Weight and dimensions are approximate.

Technics

Page 2

SL-PG340

ICONTENTS

PRECAUTION OF LASER DIODE.
SAFETY PRECAUTION
ACCESSORIES...
CONNECTIONS..
FRONT PANEL CONTROLS AND FUNCTIONS
BASIC OPERATING PROCEDURE ....................
HANDLING PRECAUTIONS FOR TRAVERSE DECK.
DISASSEMBLY INSTRUCTION ...............
DISPLAY FUNCTION OF AUTOMATICA

RESULTS (SELF-CHECK FUNCTION)
DIGITAL SERVO SYSTEM...

MEASURMENTS AND ADJUSTMENTS
TERMINAL FUNCTION OF IC'S
BLOCK DIAGRAM .....
SCHEMATIC DIAGRAM
PRINTED CIRCUIT BOAR
WIRING CONNECTION DIAGRAM
INTERNAL CONNECTION 0F FL .
EXPLODED VIEWS

REPLACEMENT PA T.
RESISTORS AND CAPACITORS
PACKAGING ................................

TROUBLESHOOTING GUIDE

IPRECAUTION OF LASER DIODE

CAUTION: This unit utilizes a class 1 laser. Invisible laser radiation is emitted from the optical pickup lens when
the unit is turned on:

Do not look directly into the pickup lens.

Do not use optical instruments to look at the pickup lens.

Do not adjust the preset variable resistor on the optical pickup.

Do not disassemble the optical pickup unit.

If the optical pickup is replaced, use the manufactures specified replacement pickup only.

Use of control or adjustments or performance of procedures other than those specified herin may

result in hazardous radiation exposure.

@WPPJN.

I SAFETY PRECAUTION (This safety precaution" is applied only in U.S.A.)

Before servicing, unplug the power cord to prevent an electric shock.

When replacing parts, use only manufacturers recommended components for safety.

Check the condition of the power cord. Replace if wear or damage is evident.

After servicing, be sure to restore the lead dress, insulation barriers, insulation papers, shields, etc.

Before returning the serviced equipment to the customer, be sure to make the following insulation resistance
test to prevent the customer from being exposed to a shock hazard.

539.55.)?

0 INSULATION RESISTANCE TEST

1. Unplug the power cord and short the two prongs of the plug with a jumper wire.

2. Turn on the power switch.

3. Measure the resistance value with ohmmeter between the jumpered AC plug and each exposed metal cabinet
part, such as screwheads antenna, control shafts, handle brackets, etc. Equipment with antenna terminals
should read between 3M!) and 5.2M!) to all exposed parts. (Fig. A) Equipment without antenna terminals
should read approximately infinity to all exposed parts. (Fig. B)

Note: Some exposed parts may be isolated from the chassis by design. These will read infinity.

Antenna
terminal \

---L-J
01

Exposed 5 Exposed D
metal metal
part part
Onrnrneler Ohmmeter
(FIB Al (Fla 3)

Resistance = JMQ-S 2M9 Res-stance : Approx 00

4. If the measurement is outside the specified limits, there is a possibilty of a shock hazard. The equipment
should be repaired and rechecked before it is returned to the customer.

Page 4

SL-PG340

IFRONT PANEL CONTROLS AND FUNCTIONS

j

Control section

0 Power switch (POWER) 0 Stop button (I STOP)
9 Disc tray 0 Pause button (ll PAUSE)
0 Buttons for program function 0 Play button (P PLAY)
OProgram button (PROGRAM)
OClear button (CLEAR) m Search buttons ( SEARCH >>>
'Reca bum" (RECALL) (9 Peak search button (PEAK SEARCH)
0 Buttons for CD-Edit function 0 Auto cue button (AUTO CUE)
OTape length button (TAPE LENGTH)
OTape side select button (SIDE NB) 0 Repeat button (REPEAT)
ODisc link button (DISC LINK)
oTime fade button (TIME FADE) ® and 9' bum?" (RANDOM)

6 Time mode select button (TIME MODE)
9 Disc tray open/close button (A OPEN/CLOSE)
0 Skip buttons( I44 SKIP, m SKIP)

Display section
0 Disc linkindicator(LlNK) Q Playindicator(>)
@ Programindicator(PGM) £3 Pause indicator(l I)
Q Track number display 9 Peak search indicator(PEAK)
® Index/program sequence display @ Compact disc edit indicator (EDIT)
@ Auto cue indicator (A.CUE) ® Tape side indicator( ->A, ->B )
Q Timedisplay @ Track number indicator (1-16)
@ Repeatindicator( ) w Over"mark(>)
® A-B repeat indicator( ) @ Time fade/fade out indicator( )

Q Random play indicator( )

Page 9

SL-PG340

"92" Removal of the main P.C.B. ReféNc" Removal of the loading unit
Procedure Procedure.
1 -» 2 -~ 5 0 1 a 2 a 6 9

TCN4O4

CN404
1. Remove the 1 flat cable(CN1 1).
2. Remove the 1 connector(CN404). 1, Remove the 1 connector(CN404).
3. Remove the 4 screws(0 ~ 9). 2. Remove the 4 screws( 0 ~ 9).
62 Removal of the power supply P.C.B. 3" Removal of the clamp plate
Procedure Procedure
1 -> 2 -> 6 -> 7 9 1 -> 2 -» 8 9

> Tray holder

Clamp plate

1. Remove the 3 screws(0~ 9).

1. Remove the 1 flat cable(CN701). 2. Remove the clamp plate in the direction of arrow.
2. Remove the 3 screws)~ 9). 3. Remove the tray holder.
Ref.No. Removal of the fixed plate,magnet nef.No. Removal of the guide shaft and guide
9 and magnet holder assy 10 shaft holder
Procedure Procedure
1-»2->8->9 1»2->8#>1D

Fixed plate

Mag net

Claws
Magnet holder
assy
1. Remove the 3 screws) ~ 9).
2. Remove the guide shaft and guide shaft holder in the
0 Release the 3 claws. direction of arrow.

Page 14

SL-PG340

I DISPLAY FUNCTION OF AUTOMATICALLY-ADJUSTED RESULTS
(SELF-CHECK FUNCTION)

The unit contains a function which displays the result of the automatically adjustment of the servo circuits (tracking,
forcus servo, etc.) as an error code on the FL display.

The error code display serves as a repair guide showing the automatically adjustment circuit is at fault. The
procedures for displaying the error codes are given below

- Procedures to display the error code

1. Press the key to turn the unit ON. Next, press the key to open the disc tray, load the test
disc (SZZP1054C) on the tray, close the tray by pressing the key again, and finally press the
key to turn the unit OFF.

2. While simultaneously pressing and holding the three keys, erPE LENGTHl, lF'ROGRM, and l44 SEARcw, press the
key again. When the unit is turned on and the FL display is lit up, immediately release the three keys.
An error code will appear on the FL display (e.g. E-o).

3. The error code provides a rough indication of which servo circuit is malfunctioning.

- Error code based troubleshooting

X The unit is satisfactory if the error code is E-O of E2.
>I< Before testing, check that the test disc is free of scratches and dirt and optical pickup is clean.

. . Normal the values of i
FL error Signal to Check voltage and waveform
code Symptom Probable cause Signal
display name Location PLAY STOP
MDATA lC702 pin ill 7 ill: 4.8V
Focus and MCLK IC702 (D pin 'U' W: 4.8V
tracking offset (D Clocks X1 and X2, power supply VDD, and MLD IC702 ® pm

E-1 adjustments did reset/HST, all on IC702 SENSE IC702 ® pin 0V 0V
not complete in ® MDATA, MCLK, MLD, and SENSE signals IRST lC702 ® pin 4,9V 4.9V
the specified to/from the mechanism controller
time period. X1 '0702 @ pi .A..A..I mm:

x2 lC702 @ pin N\l\l" WWW"
FE IC702 ® pin Wis: 2.4V
TE IC702 ® pin with? 2.4V

53 , , u in HIV

E»5 ® Scratches or contaminants on disc .

E-7 surface FOD lC702 @ pin 2.4V 2.4V

E-Q Disc play © Focus and tracking servo circuits (check TRD K3702 @ Din 2-4V 2.4V

E-B unstable waveforms, voltages, and part constangs.) KICK IC702 ® pin 2_4V 2.4V

ED @ gpilfd'f df'ler WW" IFLOCK 10702 ® pin 0v 4.9V

E-F ® 9" W " lFtF DET IC702 63) pin ov 4.8V

RF TJ701 Win... 3.4V
W,
STAT iC702 @ pin 4.9V 0V
Focus gain ® Scratches or contaminants on disc surface - "" :va
. - FE IC702 ® In WI 2.4V

E-4 :gjtucsomerlie'tgiijn (0 Focus servo circuit (check waveforms, p waver?

E-6 the specified voltages, and part constants.) OFT IC702 ® pin 0V 0V
time period. © Opi'ca' PCkul lTLOCK IC702 @ pin ov ov
Tracking gain (D Scratches or contaminants on disc surface . M

. . TE IC702 ® in His? 2.4V

E-8 :gjuggrrgegtg'i ® Tracking circuit (check waveforms, p WWW

5/" the specFi>fied voltages, and part constants.) OFT lC702 33 pin 0V 0V
time period. @ 09"03' WW" ITLOCK IC702 (2) pin 0v ov

FE IC702 ® pin Wig? 2.4V

E-C Perform the same check as for error codes (EA, E6) and . W,

E-E

OFT IC702 @ pin 0V 0V
ITLOCK IC702 @ pin 0V 0V

714,