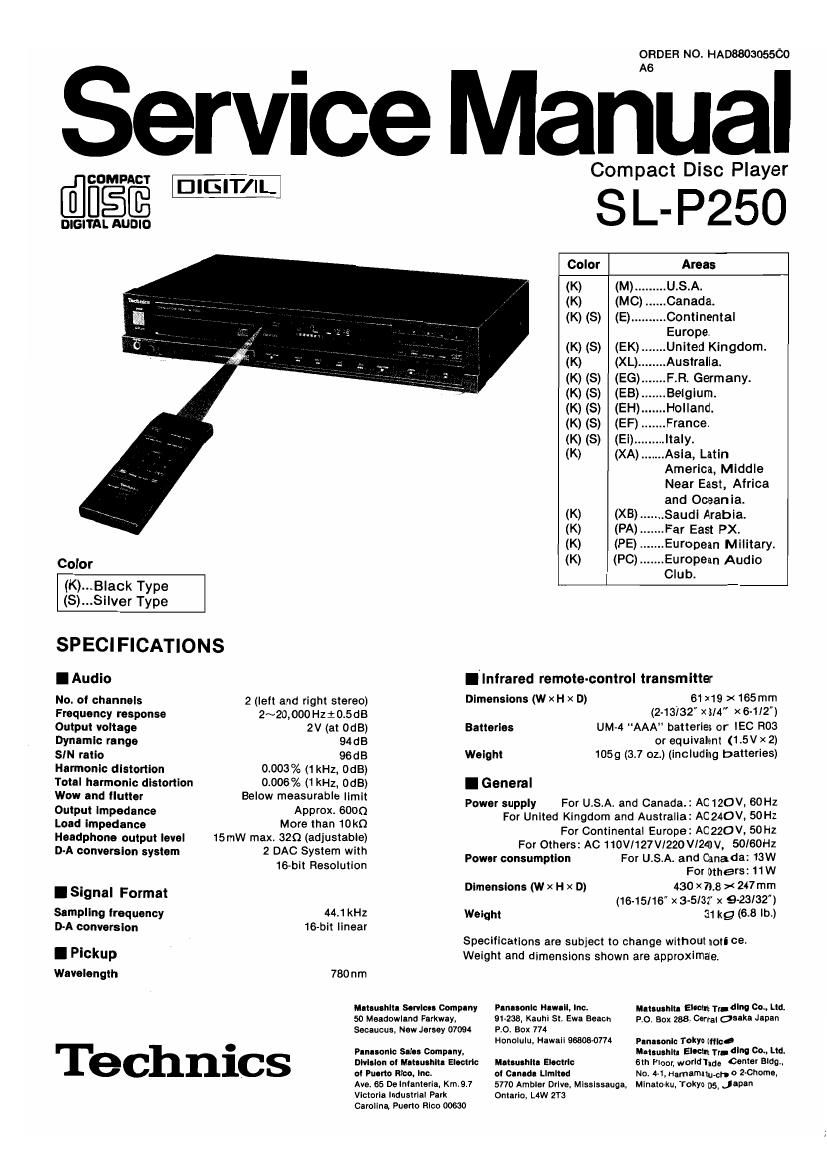
Technics SLP 250 Service Manual

This is the 56 pages manual for Technics SLP 250 Service Manual.
Read or download the pdf for free. If you want to contribute, please mail your pdfs to info@audioservicemanuals.com.

Page: 1 / 56
left right
Technics SLP 250 Service Manual

Extracted text from Technics SLP 250 Service Manual (Ocr-read)


Page 2

SL-P250

ICONTENTS

SAFETY PRECAUTIONS ..................................
PRECAUTION 0F LASER DIODE .. . .
BEFORE USING THIS UNIT . . . .
CONNECTIONS ................
CONCERNING COMPACT DISCS . . . . .
FRONT PANEL CONTROLS AND FUNCTIONS .......... 5,
REMOTE-CONTROL TRANSMITTER ................ .
HANDLING PRECAUTIONS FOR OPTICAL PICKUP .
INSTRUCTIONS FOR THE SZZOL31 .............
DISASSEMBLY INSTRUCTIONS ........
MEASUREMENTS AND ADJUSTMENTS

Pogo


TERMINAL FUNCTION OF LSI ............... 19~23
REPLACEMENT PARTS LIST (Electrical pads) 24, 25
PACKING .................... . . . 28
RESISTORS AND CAPACITORS ..................... 27, 28

I SAFETY PRECAUTION

.JPWNT

PRINTED CIRCUIT BOARD AND
WIRING CONNECTION DIAGRAM .. 29
PRINTED CIRCUIT BOARDS .
BLOCK DIAGRAM ...........
REMOTE-CONTROL UNIT PARTS .
SCHEMATIC DIAGRAM CF
REMOTE-CONTROL TRANSMITTER .
INTERNAL CONNECTION OF FL ........
TERMINAL GUIDE 0F ICS,
TRANSISTORS AND DIODES .
SCHEMATIC DIAGRAM ............

REPLACEMENT PARTS LIST (Mechan al parts) . .. 47
EXPLODED VIEWS ........ ~50
TROUBLESHOOTING GUI 51 ~54

(This safety precautions is applied only In U.S.A.)

Before servicing, unplug the power cord to prevent an electric shock.

When replacing parts, use only manufacturer's recommended components for safety.

Check the condition of the power cord. Replace if wear or damage is evident.

After servicing, be sure to restore the lead dress, insulation barriers, insulation papers, shields, etc.

Before returning the serviced equipment to the customer. be sure to make the foilowing insulation resistance test to

prevent the customer from being exposed to a shock hazard.

o INSULATION RESISTANCE TEST

1, Unplug the power cord and short the two prongs of the plug with a jumper wire,

2.
3.

Note:

Turn on the power switch.

Measure the resistance value with ohmmeter between the jumpered AC plug and each exposed metal cabinet part. such as
screwheads antenna, control shafts, handle brackets. etc, Equipment with antenna terminals should read between 3M0
and 5.2MS2 to all exposed parts. (Fig. A) Equipment without antenna terminals should read approximately infinity to

all exposed parts, (Fig. Bl

Antenna

Some exposed parts may be isolated from the chassis by design, These will read infinity.

terminal I

.

5
Exposed J Exposed
metal metal
part part

Ohmmeter Ohmmeter
(Fig-A) (Fig-B)

Resistance = 3MQ-5.2MQ

Resistance = Approx 00

4. if the measurement is outside the specified limits, there is a possibility of a shock hazard, The equiprrmt should be
repaired and rechecked before it is returned to the customers

I ACCESSORIES
'AC power supply cord 1 Ostereo connection cable ........... 1 ORemote-control oBatieies - ------ 2
SJA175-1 (M) (SJP2249-1) transmitter ttttt 1 353:?éxexf)
SJA172 (MC)
SJA187 (E, EB,
EH. EG. EF. Ei) ./
SJA173 (XL) xi
SFDACOSGOZ (EK)
SJA168 EUR64786 (M, MC)
(XAI PA- PE, PC) EUR64787 (others). . . .Blac iver9l°n

SJA183 (x3)

EUR64792 (others). .Silvaverslon

Page 23

SL-P250 SL-P250

ISCHEMATIC DIAGRAM OF REMOTE-CONTROL TRANSMITTER IINTERNAL CONNECTION OF FL


jumm I j 0 Grid connection diagram
* E
/ - 0% 3%] 12G 116 106 9f BG 76 66 SG 4G 3G 2G
ICI
1111172330 $213223; J L | I l I al
500111le - 5: =1 = [
n- 2 = 050 .0» 31,-»
3 i1 I-biv men I d 1 n
E snm rssvsvor m [3] m m] I>
8 )fi 0 a a n 1 1 g a n
:2 Enls; Grenerulim
E CHI. 4 I
If - Anode connection table
I E
Mndulallcn 12G 116 100 96

4

UN|23|

02,173

MAI54WK 1 7
, ,0 ,_Iz,*.1
,//
I-1 - IM,MCI lamersl
_ LLEVD D _ CI IOOP 4707
3 2m: / \ 02 m 1201:
/ N 5
m IMP I I WWII Izsm ITERMINAL GUIDE OF IC S, TRANSISTORS AND DIODES
. . .
Key number description and data code AN65525 a Pin SVILM833M I
Custom code 0.1; code Inverse cuuom code Inverse as"! code AN6554NS 14 Pin NJ M4560, 8 Pin MN1554PEP
Heua pulse (5 M) (a 0.0 (5 0m (5 011) AN8371 S 24 Pin SVIBA4558 ' , MN15261 1 PEN 64 Pin
0 0 I I D 0 0 0 0 0 0 l I 0 0 l l I | l | AN837US 42 Pin SVICXK5816M 24 Pin 0 Nn
MNGESS 10 PM
_4 I LM2940T5
*ar ar 21' r- I '
E. n SV|H8DN2175 5 Pin MN6623 42 Pin 5
I 2, 61 SV|M5218L a Pin MN6617S 84 Pin w."
' 2 2 two
1501 90., 3 3 V014!

f - x 011 - 0.420ms-0.°2Qms (U 30A and Cloud.)
: Head Pulse | 11 - D.5{ms~0.450ms (Europe ina 0mm) SRVF38 0TC124EST ( ZSD1450 2SA1547

I snums § % 2303311 2881238
| 01' k /

I Function Data Code Funcilon 0am Code Funcuon 0313 Code : I E C . 1245 2801862

01 1 2 c L a L 2531240
| I slop 000000 musicscan 001111 0 010111 1101: w B DTAHAEST / B
n I a ,
| 030:1 I skipH< 000010 1 010000 9 011000 ' 2w my, Es
! c
I T 8T I sklpbu 000011 2 010001 0 011001 E E B E
l' | seavcn<< 000100 3 010010 +10 011010 mg; mg:
- --2r | search>> 000101 4 010011 MA4330M
I program/
I me | pause on I0 5 010m, continua 0 ° MA165 MA4062
I I repeat 00 01 1 1 s 01 01 01 random play 0 1 1 1 11 Camode SVDISRSSZOOV 'Camafla 223223
: | play 001010 7 019110 timemode 101001 Cap-WA MPH-A
I 21 | *Custom Code: 01100
| I
1 _'1 T |
\ __________ J
7, 39 - i 40 -

Page 38

SL-P250

I MEASUREMENTS AND ADJUSTMENTS

Caution:

- It is very dangerous to look at or touch the laser beam. (Laser radiation is invisible.)
With the unit turned "on, laser radiation is emitted from the pickup lens.
Avoid exposure to the laser beam, especially when performing adjustments.

PREPARATION

1. Remove the cabinet (see Ref. No. 1 In the original Service
Manual).

2. Remove the disc clamper and magnet (see Ref. No. 2 of the
same).

3. Remove the disc holder and power switch rod (see Ref. No.
3 of the same).

4. Place the test disc and magnet on the turntable.

5. While holding the Open/Close switches (S101, 8102) In the
directions indicated by the arrows, switch the player power
ON.

6. After the test disc starts rotating, release the OpenIClose
switch (S101, 5102).

ADJUSTMENT POINTS

Power SW

- Servo P.C.B.
(25V) - Main P.c.B. LINE OUT
(L) (R)
VR106
(+12V)
Connect the red lead
VR106 wire of servo gain
VFltOl adjuster.
VR105 m1
VH104 614")
Connect the blue wire
of servo galn adjuster.
VR103
- Temporary setting of each VR
vmoz
GND vnioe vnrm vnioe vnm vniaz Vilma

RFoulput_ - [JIM

Adjusting I + + j * +

fixture

(FOCUSOIISS (Focus gain rackin offset ad .
adj.) adIJ (T g I)

4 , 7
: h (an CN102
(GND)

(Tracking (Tracking gain adj.)
balance adj.) (Best eye adj.)

replaced or require readjustment, temporarily set them

< Temporary VFl setting it any of the trimmer VFis are >
to the following positions.


Measuring instruments and Special Tools

Servo gain adjuster (SZZP1017F)
Test discs
. Playability test disc (SZZP1054C or SZZP1014F)
. Uneven test disc (SZZPIDSGC)
. Black band test disc (SZZP1057C)
Normal disc
Dual-beam oscilloscope with bandwidth of 30MHz or
better (with EXT trigger and 1:1 probe).
* Audio frequency (AF) oscilator
* Conversion connector (SZZP1032F)

**wl\)-Aba

Allen wrench (M20)
* Allen wrench (M127)
* 0.9 mm clearance gauge (R220297)

Perform adjustments depend on the part to be replaced
according to followings:
( 1) Spindle motor ..

(2) Turntable ..
(3) Optical pickup.

Items 1, 3 to 8
.ltems 1. 310 8
..... Items 2 to 8


Adjusting Procedure

If you have replaced the spindle motor or turntable. do
the following adjustment:

(1) TURNTABLE HEIGHT ADJUSTMENT

1, insert the 0.9mm clearance gauge (RZZ0297) between
the turntable and the loading base (see the figure at
right).

2. Tighten the turntable retention screw with the 1.27mm
allen wrench.

3. Connect the oscilloscope's CH. 1 probe across VR104s
(+) and VR106's (-) terminals via a
filter.

(Note: A voltage of 2.5V appears at the V. REF terminal.
Take care not to short the players chassis to the oscil-
loscope ground.)
Oscilloscope setting: VOLT .......... 50 mV

SWEEP ......... 1 ms.

Input coupling . .. DC

4. Adjust oscilloscope's DC zero balance.

5. Switch the player power 0N, and play the test disc
(SZZP1014F or SZZP1054C).

6. Measure the voltage amplitude of the signal on the
oscilloscope.

Note 1. if the measured amplitude is within a range of
+/- 15mV, the turntable height is correct. If it is
outside this range. adjust the turntable height by
using the clearance gauge as a pry.

if the amplitude exceeds +15mV, lower turntable.

It the amplitude is below -15mV. elevate the turntable.

Turntable

Clearance gauge
(R220297)

0.9 mm :

l
Spindle motor

Note 2. If the measured amplitude greatly surpasses or
falls short of the range above, set VR105 at oraround
the center, then try to adjust the height again. (Then
be sure to adjust the focus offset as well.)

(2) MECHANICAL ADJUSTMENT

1, Connect the oscilloscope's CH. 1 probe across
(+) and (-) on the Servo P.C.B.

Oscilloscope setting: VOLT .......... 100 mV
SWEEP ......... 0.5 us.
Input coupling . .. AC

2. Switch the player power 0N, and play track 9 on the
test disc (SZZP1056C).

3. Leave the player in Play mode, and place it on its right
side as shown at right.

4. Alternately adjust the two mechanical adjusting screws
with the 2.0mm allen wrench until the RF signal
amplitude variation on the oscilloscope is minimized.

5. After completing the adjustment, lock the mechanical
adjustments with lock paint (RZZOLOH.

tit Minimize the variation of amplitude.

Page 41

I TERMINAL FUNCTION OF le

I IC101(ANB373S): Servo amp.

0 IC102 (AN8374S): Servo processor

SL-P250

Pin . Pin l/O . Pin I/O . Pin IIO .
No. Mark Function No. Mark . FunctIon No. Mark Division F unction No. Mark Division Function
1 AMP1 l FIF signal input IXBO amp.) 22 TPO 0 Tracking error signal output 1 LSA l Phase difference input (A) 22 VDD | Power supply (+5 V input)
. , . , . T k t I t
2 PDAD I Photo detector current Input (A2) 23 FPO 0 Focus error signal output 2 L55 l Phase dItference Input (BI 23 SPCNT 0 oflgucmfirigfifiigz? ro 0" put
. Focus gain up signal input r . Selector output [track crossing
3 FDA I Photo detector current Input (All 24 FGC I [Not used, connected 0 GND] 3 TEOFS I Tracking offset adiustment 24 SENSE 0 state)
4 PDBD I Photo detector current input IA4) 25 T60 I RS??? ygigngggggflawé) '4 TE 0 _ . , 25 TRV 0 Traverse servo control output
. Focus/Irackln down sI nal in ut Trnkmg gal" adlutmem
5 P03 | Photo detector current Input (A3) 26 GD I (NM led, cognac, OOGNmP 5 TEG I 26 FLO K 0 Focus lock signal output
6 LPD I Non-inverting laser power input 27 PTO 0 Position detecting amp. output 6 TE OUT 0 Tracking error signal output 27 KICK 0 Track kick signal output
7 LD 0 Laser power auto control output 28 PTI | Position detecting amp. input 7 TE BPF | Rakfigdergg'efii" detecting filter 28 LDON 0 Laser power control output
8 FBLI I 29 P30 0 Position detecting buffer output 8 PEG I Focus gain adjustment 29 VDET o mCW/trgckina grin up output
PD balance adjustment In use , open
9 FBLZ I 30 POT l Position detecting buffer input 9 FE OUT 0 Focus error signal output 30 CNT1 | gregglllnglgngfigo Focus
10 iTBLI I 31 BDO 0 0,090: detection output In CLW O Triangular wave Oscillator 31 CNT2 I Control Input (TRON: Tracklng
Tracking balance adjustment capacitor output Zeno ON SQHSLKF K k
-1' F ' - ontrol Input ( : ic
11 TBL2 I 32 FIFDE 0 Fl detection sIgnal output II VFIEF I Reference voltage Input 32 CNT3 l direction (forward) command)
- - , Control Input (KICKR: Kick
12 FOOFS I Focus offset adlustment 33 SDO O Dropout detection pulse output 12 AFIF l RF signal rpm 33 CNT4 | dlreolion (reversal command)
13 IVA O gaggzntatltage converslon 34 C. SEDO l Dropout detecting capacitor input 13 CDSL I Data slice filter capacitor input 34 TRVF l Traverse forwardcornmand signal
14 WE O E:gmt(lgr)zltage conversion 35 ARF 0 RF signal output 14 FPC I Frequency difference signal input 35 TRVR I Traverse backwavd command signal
15 FE 0 Focus gain adjustment output 38 C. AGO I AGC detecting capacitor input 15 GND I Ground terminal 36 RFDET I RF detection signal input
16 FF! l Focus error signal Input 37 VCC l Power supply (+5 V input) 16 C. PLL I PLL loop filter constant 37 BDO I Dropout detection input
17 TPI l Tracking error signal input 38 LDON I Laser power control input 17 V55 l Ground terminal 38 VCC I Power supply (+5 V input)
. r Frequency pull-in clock signal
18 c TPL I Tracking error filter capacitor 39 RF IN I RF sIgnal input 18 CLK I (8-8.2 kHzl inDUt 39 TVPO O Traverse position oetecting
19 c. TPH '"p" 40 AMPO 0 HF signal outpm 19 5m: o 332;? d-cmzed RF signal 40 7va , res-stor/canac-ta Inputs
20 C. FPL 41 VREF 0 Reference voltage output 20 PCK 0 Clock output extracted from SRF 41 BFIOUT 0 Tracking drive control output
I Focus error filter capacitor input EFM . l t h
21 c. pm 42 GND I Ground terminal 21 EFM 0 Wm] 33: "9 5" °"°5 42 BRIN I Tracking error siInal input
1 .
- 9 - s 10 -

Page 51

SL-sto

ORDER NO. HAD 880305500-A

. FOKUS-VEHSTKRKUNGS-JUSTIERUNG
compaCt DISC Player 1. Den Servo-Verstérkungs-Jusfiereranschliefien. 5. Eine Testplatte (SZZP1014F oder SZZP1054C)
" 2. DenWahlschalterdesServo-Verstérkungs-Justierers einsetzen und den Netzschalter des Splelers
auf 2 und den ON-OFF-Schalter auf ON stellen. einschalten.
3. Den Niederfrequenz-Oszillatoraufeine Frequenzvon 6 Den Spieler auf Wiedergabe schalten.
DEUTSCH 825 Hz und eine Ausgangsspannung von 100 mVs-s 7. Den Wahlschalterdes Servo-Verstéirkungs-Justierers
einslellen. Dann den Oszillator an 050 (+) und GND von 2" auf "3" stellen.
(-)des Servo-Verstérkungs-Justierers anschlieBen. 8 Auf dem OSZillOSkOD werden 825 Hz-Signale an-
ELEKTRISCHE JUSTIERUNG 4, Kanal1 undKan§l2desOszil105kopsan""1undTP2 gezeigt. VR1£14 iUSfifirerj, bi_s die Wellenform-
des Servo-Verstarkungs-Justlerers anschlceraen. Amplltuden belder Kanale Identlsch smd.
(TP3 ist die Masseklemme.) 9, Den Wahlschalterdes Servo-Verstérkungs-Justierers
. Oszllloskop-Elnstellung: von 3" auf 2" s1ellen.
MeBmslrumeme und Spezialwerkzeuge VOLT .......... 100 mV (beide Kanéle)
-Servo-Verstérkungs-Justierer (SZZP1017F) 0Gew6hnliche Platte KIPP ...... 1 msec,
OTestplanen OZweikanaI-Oszilloskop (mil Trigger) von 30 MHz oder EINGANG ...... Gleichstrom
Testplaue (SZZP1014F) alter oder neuer Typ mehr
Inspektions-Testplatte (SZZP1054C) 0Niederfrequenz-Oszillator spunLAGEN.VERSTARKUNGs-JUSTIERUNG
Ungleichméeige Platte (SZZP1OSGC) OZwischenstecker (SZZP1032F) 1. Die Oszilloskop-Einstellung und der AnschluB sind 4. Auf dem Oszilloskop werden 1,0 kHz-Signale
Schwarzbandplatte (SZZP1057C) 'Filter die gleichen wie oben. angezeigt. VR102 justieren, bis die Wellenform-
2. Ben Niedertrequenz-OsziIlatoraufeine Frequenz von Amplituden beider Kanéle identisch sind.
Justierverfahren 1,0 kHz und eine Ausgangsspannung von 100 mVs-s 5. Den Wahlschalterdes Servo-Verstérkungs-Justierers
_ _ stellen. von1auf2"stellen.
Schrm 'I:D|e emzelnen Schrm 6:Fokus-Offset-Justierung 3, Den Wahlschaltef des Servo-Verstérkungs-Justierers
ReQelwidersténde von 2" auf "1 stellen.
provisorisch einstellen.
. . FOKUS-OFFSET-JUSTIERUNG
I sch 7:Sp"399"'°"se"Jse9 1. Kanal 1 des Oszilloskops an TJ101 (+) und GND BETRIEBSART~~-NORM
Schrm 2:Beste Augen-(PD-Balance)- | H der Servoplatine anschlieBen- Sscva'W 3; mm d d_
Justierun _ Kanal2des Oszillosko s an FEG + und GND - 2, Den Netzschalter des Pie 9T5 einsc a en U" '9
g Schrifl 3- SpurIagen-Offset-Balance- der Servoplatine anschrlieBen. ( I I ) Testplane (SZZP1057C) einsetzen.
I Jusherung Oszilloskop-Einstellung: 3. Den Spieler auf Wiedergabe schalten.
Schri 3:09" Servo-Verstérkungs- 1 VOLT ............. 200 mV (Kanal 1) 4, Die Wellenform von Kanal 1 und Kanal 2 agfndzfn
tierer anschlieBen. . V. 500 mV Kanal 2 Oszillosko rUfen und VR105 so justieren. a re
Jus Schrm 9: DenServo-Verstarkungs- KIPP .............. 0,5 msecI. I Wellenforr: Em den Triggerpunkt so wie in der
I Justlerer abtrennen. EINGANG ........ Wechselstrom (Kanal 1), Abbildung wird.
Schrm 42Fokus-Verstérkungs- I Gleichsvom (Kanal 2)
JUSI'emng Schrm 1o: PLL-Justierung
I sPURLAGEN-OFFSET-JUSTIERUNG
- : _ -- _ 1. Kanal 1 des Oszilloskops an TJ101 (+) und GND BETRIEBSART....NORM
8mm 5 ffiggfifif; ve'smkungs Schrifl 11: Nacn derJ__us1Ierung den (-) der Servoplatine anschlieBen. (Schaltgrifl auf Kanal 1)
Betrleb prufen. Kanal 2 des OSZHIOSKODS an TEG (+) und GND (-) 2. Den Netzschalter des Spielers einschalten und die
der Servoplatine anschlieBen. Testplatte (SZZP1057C) einsetzen.
OSIIIIOSKOP'EIHSQHUHQI 3. Den Spieler auf Wiedergabe schalten.
VOLT ............ 200 mV (Kanal 1) 4. Die Wellenform von Kanal 1 und Kanal 2 auf dem
500 mV (Kanai 2) Oszilloskop pn'ifen und VR103 so justieren, daB die
PROVISORISCHE JUSTIERUNG DER EINZELNEN KIPP .............. 0.5 msec. Wellenform lum den Triggerpunkt so wie in der
REGELWIDERSTANDE EINGANG ........ Weehselstrom (Kanal 1), Abblldung wurd,
Glelchstrom,(Kanal 2)
Hinweis:
Wenn bei einer Plane Uberspringungen auftreten oder
Wiedevgabe nicht méglich ist, die einzelnen Hegel-
widersténde wie abgebildet provisorisch einstellen. SPUHLAGEN-0FFSET-BALANCE-JUSTIERUNG
1. Den Niederfrequenz-Oszillatoraufeine Frequenz von 4. Dan Spieler auf Wiedergabe schalten.
1 kHz und eine Ausgangsspannung von 200 mVs-s 5, Den Wahlschalterdes Servo-Verstérkungsd ustierers
einstellen. Dann den Oszillator an osc (+) und GND V0n2"auf1"stellen
BESTEAUGEN (PD BALANCE) JUSTIERUNG (-) des Servo-Verstérkungs-Justierers anschlieBen. 6. V9106 SO justieren, daB die AusgangS-Wellen1orm
' . 2. Kanal 1 des OszilIosko s an 1.11 1 + GND wie abgebildetwird (Jitteristminimiert).
1. Kanal 1 des Oszilloskops an TJ101 (+) und GND 2- Elne Testplatte (SZZP1014F oder SZZP1054C) (_) derServoplafine angchnesemo ( ) und 7. Den WahlschalterdesServo-Verstérkungs-J ustierers
(-)der Servoplatine anschlieBen. einsetzen und den Netzschalter des Splelers Oszilloskop-Einstellung: von1auf2"steenr
Oszilloskop-Einstellung: elnschalten. VOLT .......... 500 mv 8. Den Netzschalter des Spielers ausschalten.
VOLT .......... 200 mV 3. Den Spieler auf Wiedergabe schanen. KIPP ......... 0.5 msec' g} Den Servo-Verstérkungs-Justierer abtreqnen.
KIPP ........... 0,5 usec. 4. VR101 so justieren. daB das Augenmuster des HF- EINGANG _____ Wechselstrom
EINGANG ...... Wechselstrom Signals maximal gestrecIfl ist. 3, Den Netzschalter des Spielers einschalten und eine
5 06 Newman 5 Sp'e'e's auss°hanenr Testplane (SZZP1014F oder 3221310540) einsetzen.

_2_