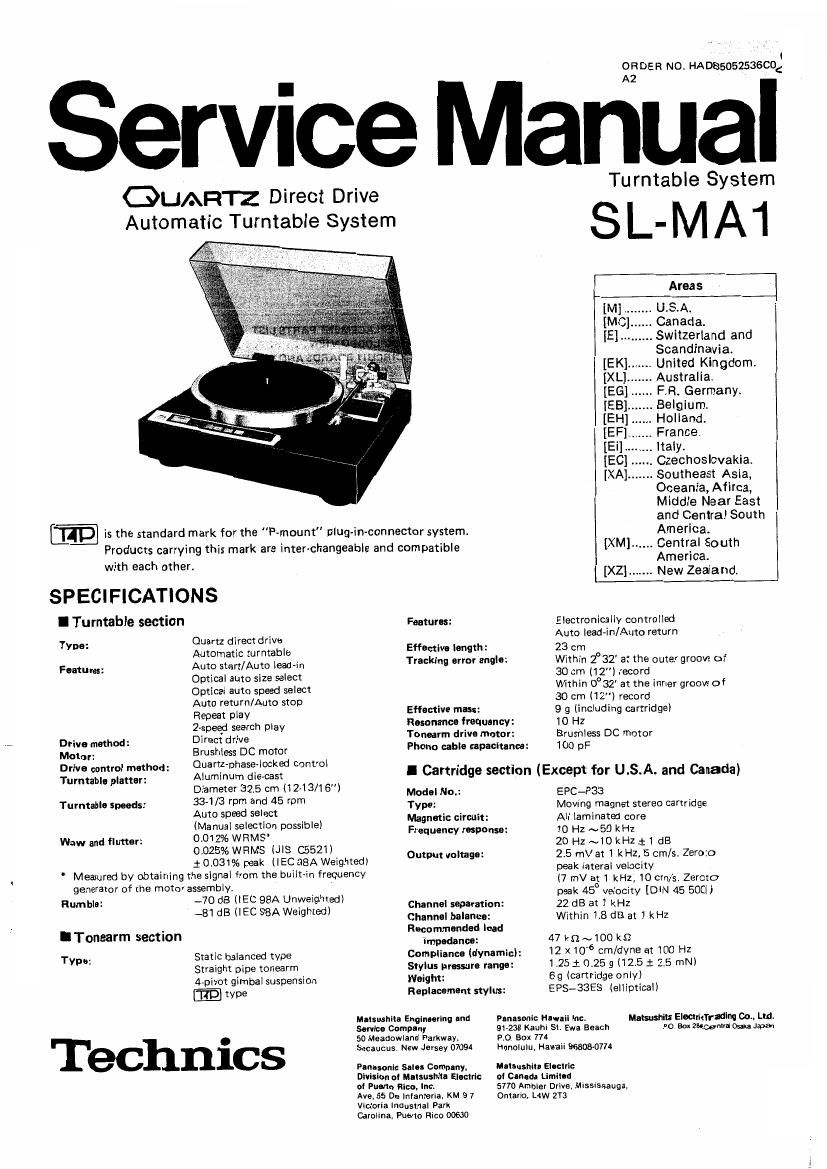
Technics SLMA 1 Service Manual

This is the 32 pages manual for Technics SLMA 1 Service Manual.
Read or download the pdf for free. If you want to contribute, please mail your pdfs to info@audioservicemanuals.com.

Page: 1 / 32
left right
Technics SLMA 1 Service Manual

Extracted text from Technics SLMA 1 Service Manual (Ocr-read)


Page 1

1
ORDER NO. HA085052535C0<

ervice Manua

QUA Direct Drive Turntable System

Automatic Turntable System 8 L_ M A1

Areas

. U.S.A.

. Canada.

. Switzerland and
Scandinavia.
United Kingdom.
. Australia.

. F.Fi. Germany.

. Belgium.

. Holland.

, France.

. ltaly.

. Czechoslovakia

. Southeast Asia,
Oceania, Afirca,
Middle Near East
and Central South

is the standard mark for the P~mount" plug-in-connector system. America.
Produms carrying this mark are inter-changeable and compatible [XM] ------ gem? South
- merica.
With each other. '
[XZ] ....... New Zeaiand.
I Turntable section Features: Electronically controlled
* ~ Auto lead-in/Auto return
Ty: i::;::s:::::g:le Effective length: 23 cm
Futures: Auto start/Auto lead-in Tracking error angle: 313:3: (210213 (3:23: outer groovz of
Optical auto Size select . o , e . f
Optical auto speed select $123823?) '12:: WW groove 0
A to turn/A to sto
Hepeateplay u p Effective mm: 9 9 (including cartridge)
2-speed search play Resonance frequency: 10 Hz
. ' . Tenearm drive motor. Brushless DC motor
Drive method: Direct drive . .
Motor: Brushless DC motor Phono cable capacitance. 100 pF
- h ; Quartz-phaselocked control . ,
$27,338.".Lilt'3? Dd Aluminum die-cast l Cartridge section (Except for U.S,A. and Canada)
Diameter 32.5 cm (12-13/16) Model No.: EPC-P33
Turntable Spud 334/3 re-emd arild [:5 rpm Type: Moving magnet stereo cartridge
Auto in 38 ac . Magnetic circuit: All laminated core
lManual selection possmle) Frequency mponse: 10 Hz ~60 kHz
0" 9" "um" 0'01 WRMS 20 Hz ~ 10 kHz 11(13
002596 WRMS '5 C552 Output voltage: 2.5 mV at 1 kHz, 5 crn/s, Zero:o

1 0.031% peak (IEC 98A Weighted)

. . kl lv loc't
Measured by obtaining the signal from the built-in frequency pea atera e ' y

(7 mV at 1 kHz, loom/s. Zeroto

generator of the motor assembly, a .
numb. -70 dB (IEC 98A Unweigmedi cm l . . geek? Elf)? 19' 45 5001)
-81 dB (IEC 98A Weighted) nna separation. 2c at t s 2
Channel balance: Within 1.8 dB at 1 kHz
- Recommended load
I Tonearm section imwmw 47 m ~1oo m
Typa- Static balanced type Compliance (dynamic): 12 x 106 cm/dyne at 100 Hz
V Straight pipe tonearm Stylus pressure range: 1.25 1 0.625 g (12.5 1 2.5 mN)
4-pivot gimbal suspension Weight: 6 g (cartridge only)
[E] type Replacement stylus: EPS-33ES (elliptical)
Muwsnih Enginhring ma Panasonic Harrell Inc. Matsushm Haunt-Trading Oct. Ltd.
Service Con-yam 51235 Kauni St. Ewa Beach PO Box ZMCemrIiDsfli-Jaoan

T . so Meadowland Parkway, Po. Box 774
echnlcs Secaucus. New Jersey 07094 Honolulu. Hawaii 96808-0774
Plnlwnlc Set Company. Mlhushih Ellmric
Division 0! Mitsushlte Electric oi emac- Limitlfl
o! Puma Rite, Inc. 5770 Ambler ome. Mississauga,
Ave. 85 De Intanlalia, KM 9.7 Ontarto, L4W 2T3

Victoria industrial Park
Caroline, PueIlD 10000530

Page 2

-

Dimensions: 45.3 x 17 x 40.8 cm
I General (w x H x m (17-27/32" x 6-11/16" x 16-1/16")
Power supply: For USA. and Cenaca Maximum height when dust cover is
AC 120V. 60 HZ open
For other countries 45.3 x 52 x 60 cm
~110v127/220-240V.50 or 60 Hz (17.27/32 x 20-1 5/32" x 23-5/8")
Power consumption: For U.S,A. Canada 15W/2W Weigh: 9 kg [19.8 |b.l
with the power switch OFF.
For other countries 18W/2W Specifications are subject to change without notice for further
. . improvement,
With the power swrtch OFF. Weight and dimensions shown are approximate.
I CC NT ENTS
P390 Page
LOCATION OF CONTROLS ...................... 3 REPLACEMENT PARTS LIST .................... 24
DISASSEMELY INSTRUCTIONS . . . . . . ............. 4 EXPLODED VIEW ........................... 25
MEASUREMENTS AND ADJUSTMENT . . CIRCUIT BOARDS AND WIRING
HOW TO CHECK EACH CIRCUIT. . . CONNECTION OF DIAGRAM .................. 28
TECHNICAL GUIDE ..... . . . . . . SCHEMATIC DIAGRAM . . . . . .

BLOCK DIAGRAM . . . . . . .................... 18 POWER SOURCE CIRCUIT .....

FUNCTION OF TERMINAL (MN1420FPSI ............ 21 RESISTORS AND CAPACITORS ...... . . . . . .
OPERATIONTIMINGCHAFIT ......... .........23 PACKING. ........ . ------ W38

I SAFETY PRECAUTION (This safety precuation" is applied only in U.S.A.)

Before servicing, unplug the power cord to prevent an electric shock.

When replacing parts, use only manufacturer's recommended components for safety.

Check the condition of the power cord. Replace if wear or damage is evident.

After servicing, be sure to restore the lead dress, insulation barriers, insulation papers, shields, etc.

Before returning the serviced equipment to the customer, be sure to make the following insulation resistance test to
prevent the customer from being exposed to a shock hazard.

@PWNT

o INSULATION RESISTANCE TEST

1. Unplug the power cord and short the two prongs of the plug with a jumper wire

2. Turn on the power switch.

3. Measure the resistance value with ohmmeter between the lumpered AC plug and each exposed metal cabinet part, such as
screwheads antenna, control shafts, handle brackets, etc. Equipment with antenna terminals should read between 3M9
and 5.2MSI to all exposed parts. (Fig, A) Equipment without antenna terminals should read approximately infinity to
all exposed parts, (Fig. Bl

Note: Some exposed parts may be isolated from the chassis by design. These will read infinity.

Antenna
terminal \

Exposed Exposed
metal metal
part part
Ohmmeter Ohmmeter
(Fig-A) (Fig. 3)
Fiestslance:3MQ-5.2 MS? Hesislance=Approx oo

4. If the measurement is outside the specified limits, there is a possibility of a shock hazard, The equipment should be
repaired and rechecked before it is returned to the customer.

Page 7

7 SL-MA

Raf' No How to remove the tonearm 1- Remme the semre 0 )-
2. Remove the 2 setscrews (Q , 9).

11
3. Shifting the tonearm down, remove it by turning in

Procedure
7-58-99 the direction of outer periphery.

910.;11

- Tonearm

1'2" How to remove the brake plunger

Procedure 1. Remove the setscrew ( o ).
7'9 12 2. Remove the setscrew i 0 ).

Brake lever Step 1

Step 2 R

emove the claw


Holder

Plunger
Ref. No. How to remove the display circuit board Ref. No. How to remove the record 5121
13 14 detection sensor
Procedure . R h 2 t Procedure . R h t
7 #13 emove t e se SCFEWS. 7 .19 emove t 6 se screw.

E?

Record size
sensor

Display circuit
board

Page 9

Adjustment Procedure

Adjustment of clock frequency

1. Short-circuit the |C401 side of R412 ~ R415 and
connect it to the jumper (+5V) near |0401 pin 40
(or short circuit |C401 pins 14 ~ 17, and connect it
to pin 39).

2. Connect the oscilloscope to the anode side of D401
(or IC401 pin 4).

3. Turn the power switch on.

4. Adjust VR401 so that the period of waveform is 30 :l:
iusec.

Set Oscilloscope

Anode of
Ground D401

i i

L_7__J I

- Oscilloscope setting . Waveform

VOLT, . w L T = 30 1 .
SWEEP. mus. H i m
INPUT ...... DC

JLJLH

Adjustment of offset voltage

1. Connect the DC voltmeter or oscilloscope to TP201 and
the plus (+) side of C203 (or connect it to lC301 pins
1 and 8).

2. Turn the power switch on.

3. Adjust VR201 so that DC voltage is 0 j: 20 mV.
If the voltage fluctuates, adjust it to minimize the
fluctuation.

Note: Put the set on a horizontal table and clamp the arm

when making the adjustment.

DC voltmeter

Set
-_- f
c203 m TP201 /\
* 0+
0_
Repair table

Adjustment of arm lift height

The arm-lift height (distance between the stylus tip and the
record surface when the tonearm is at the 1 position)
has been adjusted at the factory to approximately 5 to
7 mm (3/15 ~ 9/32").

If the clearance is too narrow or too wide, turn the adjust-
ment screw clockwise or counterclockwise

Clockwise rotation

-distance between the record and stylus tip is decreased.
Counterclockwise rotation

-distance between the record and stylus tip is increased.

5 mm-~7 mm (3/16"~9/32")

Adjustment
SCYBW

Adjustment of auto start position

If the stylus does not land in the lead-in groove, adjust as

follows.

1. Clamp the tonearm to the arm rest.

2. Remove the rubber cap.

3, Turn the auto-start adjustment screw with a screwdriver,
clockwise or counterclockwise as necessary.

If the stylus tip sets down too far in the recorded groove,

-tum counterclockwise.

Lf the stylus tip sets down outside of the record,

«turn clockwise.

Adjust so the stylus tip lands 1 ~ 2 mm in from the edge

of the record.

Rubber cap

Auto-start adiustmen
screw