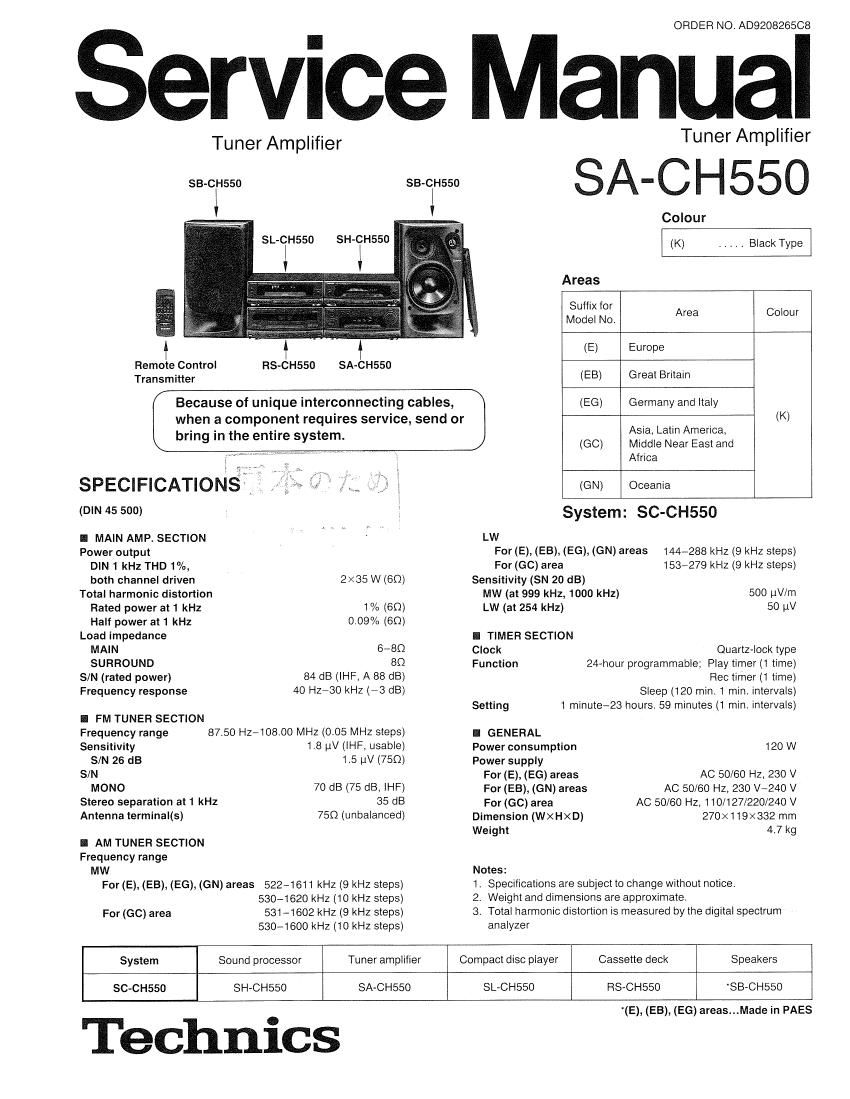
Technics SACH 550 Service Manual

This is the 24 pages manual for Technics SACH 550 Service Manual.
Read or download the pdf for free. If you want to contribute, please mail your pdfs to info@audioservicemanuals.com.

Page: 1 / 24
left right
Technics SACH 550 Service Manual

Extracted text from Technics SACH 550 Service Manual (Ocr-read)


Page 2

SA-CH550
l CONTENTS


Page Page
OBEFORE REPAIR ............................... 2 OPRINTED CIRCUIT BOARD DIAGRAM 21 ~25
'PROTECTION CIRCUITRY . .. 2 OWIRING CONNECTION DIAGRAM 26
OACCESSORIES ........... 3 ODESCRIPTION OF FL PANEL. ,, . 27
OLOCATION OF CONTROLS 4 OBLOCK DIAGRAM ........... 28N30
.STACKING THE COMPONENTS .. 5 OFUNCTION OF IC TERMINALS . . . . 31
OCONNECTIONS 7 OREPLACEMENT PARTS LIST 32~36
OSETTING THE TIME OF DAY . . . OCABINET PARTS LOCATION . . . r 37, 38
ODISASSEMBLY INSTRUCTIONS . . OPACKAGING ................... . 39, 40
OSCHEMATIC DIAGRAM ....................... 12~20

I BEFORE REPAIR

(1) Turn off the power supply. Using a 100, 10 W resistor, connect both ends of power supply capacitors (C701, C702) in order to discharge the
voltage.

(2) Before turning the power supply on, after completion of repair, slowly apply the primary voltage by using a power supply voltage controller to make
sure that the consumed current at 50/60 Hz in NO SIGNAL mode is mode should be shown below with respect to supply voltage 110 W127 V/

220 V/240 V.
Power supply voltage AC 110~127 V AC 220N240 V AC 230 V AC 240 V
Consumed current 50 H2 153~285 mA 106~158 mA 93~14O mA 106N158 mA

I PROTECTION CIRCUITRY

The protection circuitry may have operated if either of the following conditions is noticed:
No sound is heard when the power is switched ON.
'Sound stops during a performance,
The functions of this circuitry is to prevent circuitry damage if, tor example, the positive and negative speaker connection wires are shorted", or it
speaker systems with an impedance less than the indicated rated impedance of this unit are used.
if this occurs, follow the procedure outlined below:
1. Switch OFF the powert
2. Determine the cause of the problem and correct it.
3. Switch ON the power once again.
Note:

When the protection circuitry functions, the unit will not operate unless the power is first switched OFF and then ON again.

I ACCESSORIES


(RJA0019~1K) for (E), (E6) areas
(VJA0733) for (EB) area
(RJA0004) for (GO) area
(SJA173) tor (GN) area

t Remote control batteries
OAC power supply cord ............................. 1 pc. UM-4, AAA, R03 ................................. 2 pcs.

(RAK-sca10W) (SMA233-1 M)

ORemote control transmitter ......................... 1 pc. OAntenna holder ................................... 1 pc.

(nexo452) g? (y (XTN3+10AFZ)

CFlat cable ....................................... 1 pct ~Mounting screws ................................. 2 pcs.

Page 5

0External unit connection

SA-CH55O

DAT (digital audio tape deck) Surround speakers Analog player

DAT (not included)

Tuner amplilier Analog player (not included)

INPUT OUTPUT

sunnouup
L

(R) (Li (R) M 3 (Hi (Li
Q E

Stereo connection cable
Vina included)

Stereo connection cable
[not included)

use (our) PLAY (mi
DAY a (W) (L)
IL) 0 than
(R,__° $7., Sound processor
Sound processor 5ND PNouo
D O
Ftightspeaker Leltspeeker IE 0*
(not included) (not included)
GND termin'al
Notes: This terminal is tor a ground wire use.
oBe sure to connect both speaker systems. ll only one side is
connected. no sound will be heard. Note:
tinstall each speaker left and right at the back oi the listening For the set With AUX" terminal instead ol PHONO; Use an

space.

I SETTING THE TIME OF DAY

These instructions explain how to set the time for 16:25 (4:25 pm.)

on Wednesday.

1 24-68

3-5-7
Switch on the power.

1 Press CLOCK/TIMER to select CLOCK.
The display will show CLOCK.

The display will return to what was previously indicated if you
allow 7 or more seconds to elapse before you accomplish the

next operation

2 Press SET.

The day indicator will start to flash.
I

r
-SUN-
[\

analog player which has built-in phono equalizer.

3 Press one of the SELECT buttons to select
WED. i

Flashing
4 Press SET.
5 Press one of the SELECT buttons to select
16...

Going lrom 23:59 to 00:00 on the hour display will not change
the day display.

6 Press SET.

7 Press one at the SELECT buttons to select
25
Going from 59 to 00 on the minute display will not change the
hour display,

\ I /
ll_-
H37!

I
| .
Flashing

8 Press SET to finish setting the time.
After about 2 seconds. the display will return to what it were
before entering the clock setting mode.

To display the clock again. press CLOCK/TIMER. The display will
show CLOCK", and then clock will appear for 5 seconds.

E" appears on the display il the power cord has been once discon-
nected or there has been a power failure. If this happens. reset the
time.

Page 6

_ SA-CH550

I DISASSEMBLY INSTRUCTIONS

ATTENTION SERVICER"

Some chassis components may have sharp edges. Be careful when disassembling and sen/icing,

ReaNo. Removal of the Cabinet Hef'zNo' Removal of the Front Panel Assy
Procedure Procedure
1 Cabinet 162

Front panel assy

Gem»

1. Remove the 5 screws (o~e). 1. Remove the 2 screws (0, e).
2. Remove the cabinet in the direction of arrow. 2. Remove the front panel assy in the direction of arrow,
Ref. No. Removal of the FL P.C.B. Ref. No. Removal of the Headphones Jack
3 4 P.C.B.
Procedure Procedure
1 -.> 2) 3 1 ~>2-> 3-) 4


Volume knob

Headphones jack P.C.B.

. Pull out the volume knob.
, Remove the nut.

. Remove the 7 screws (ONO). . . . .
Release the 2 claws. ORemove the headphones Jack P.C.B. In the direction of arrow.

yam-n

Ref.5No. Removal of the Rear Grill Assy

Procedure
1a5

Rear grill assy

2. Remove the 2 ribs.

1- Remove the 9 screws (0N9)- 3. Remove the rear grill assy in the direction of arrow.

Page 19

I FUNCTION OF IC TERMINALS

OICGOI (M381 02M5221 S)

SA-CH550

Pin Terminal Pin Terminal .
No. Name I/O Function No_ Name l/O Function
1 VDD - Power supply (+5 V) 23 STB2 -~- No use
2 VP - Pull-down voltage 24 ED I Tuner/SD input
3 HP. SW I Headphone switch 25 REMOTE I Remote control input
4 AN IN | OR timer during backup 26 AC IN I Power down input
5 B.DATA OUT 0 Bus data output 27 RESET I No use
6 B.CLK OUT 0 Bus clock output 28 X0 IN --
No use
7 B.DATA IN | Bus data input 29 X0 OUT -
8 BtCLK IN l Bus clock input 30 X IN |
4.194304 oscillator
9 REAR VR. b | Rotary encoder input (for REAR) 31 X OUT 0
10 REAR VR. a | Rotary encoder input (for REAR) 32 V55 - Power supply (GND)
11 PLL DATA IN I Serial data input for PLL tuner 33 K3 I Key input
12 PLL CE 0 Serial chip enable output for PLL 34 K2 I Key input
tuner
35 K1 I Key input
13 CLK O Clock for M50253
36 K0 I Key input
14 DATA 0 Clock for M50253
37 12G 0 Digit 12 & key scan (lock switch)
Rotary encoder input
15 CENTER VR b ' (for CENTER) 38 1 1G 0 Digit 11 (No use) & RESET
Rotary encoder input 39 10G 0 Digit 10 (No use) & RESET
16 CENTER VR, 3 | (for CENTER)
40 9G 0 Digit 9
17 MAIN VR. b l Rotary encoder input (for MAIN)
41 8G 0 Digit 8
18 MAIN VR. a I Rotary encoder input (for MAIN)
42 KS3/7G 0 Digit 7 8t key scan
I: Starting clock adjustment
0: 131072 kHz (POWER OFF) 43 KS4/GG 0 Digit 6 & key scan
19 T OUT "0 Malfunction detection
(POWER ON) 44 KSS/SG 0 Digit 5 8t key scan
20 DATA 0 Eifroutput for LC7536 & PLL 45 KSG/4G 0 Digit 4 & key scan
46 KS7/3G O Digits & key scan
Clock output for LC7536 & PLL
21 CLK O tuner 47 KSB/ZG 0 Digit 2 8t key scan
22 STBi O Strobing for LC7536 (switched) 48 KSQ/i G 0 Digit 1 & key scan
49 81
Z I 0 Segment output
63 S15
64 NC - No use

-31-