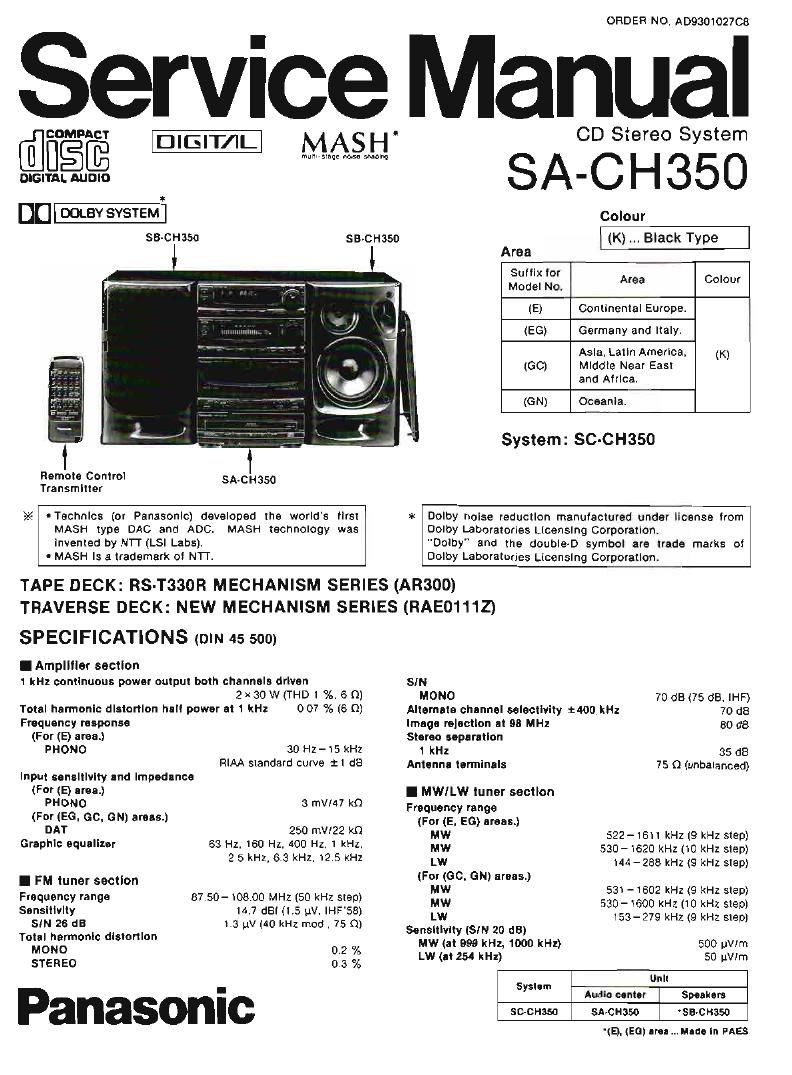
Technics SACH 350 Service Manual

This is the 60 pages manual for Technics SACH 350 Service Manual.
Read or download the pdf for free. If you want to contribute, please mail your pdfs to info@audioservicemanuals.com.

Page: 1 / 60
left right
Technics SACH 350 Service Manual

Extracted text from Technics SACH 350 Service Manual (Ocr-read)


Page 2

SA-CH350

I Cassene deck section
Track system
Heads
DECK 1 (playback)
DECK 2 (recordlplayback)
(erasure)
Molar
Recording syslem
Erase syslem
Tape speed
Frequency response
NORMAL
CrO,
METAL
SIN (Cro, type Iape)
Dolby NR all
Dolby NR on
Wow and Muller

4 lack. 2 channel

Permalloy head
Permalloy head

Double gap ielrlte head
DC servo moiol

AC buas,100 kHz

AC erase

4.8 crnfsec

4o Hz-M kHz (+3. -6 4a Hz-M kHz(+3. -5dB)
40Hz-15kHz(+3. -BdB)

52 dB (A-WTD)
Bl dB (0cm)
0.1 % (WRMS)

FasI lumen! and rewlnd lime
Approx. 110 seconds wilh 0-60 casseile laps

I Compacl disc player seclion

5m 95 dB Flllel (JIS A)
DIgiIaI filter 8 fs
MASH (I bit DAC)

DIA converlel

'CONTENTS

BEFORE USE"
PRECAUTION O LASER DIODE
ACCESSORIES ..........................
STACKING THE COMPONENTS.
CONNECTION-5..
LOCATION OF CONTROLS AND COMPONENT
REMOTE CONTROL UNIT CONTROLS AND FUNCTION
HANDLING PRECAUTIONS FOR TRAVERSE DECK.
DISASSEMBLY INSTRUCTION
PROTECTION CIRCUITRY .....
BEFORE REPAIR AND ADJUSTMENT.
MEASUREMENTS AND ADJUSTMENTS.
DIGITAL SERVO SYSTEML
TROUBLESHOOTING GUIDE


IBEFORE USE

(For (60) urea.)

Be sure to GISCDUHBCI the mains cord belore adjusting lire vollage
seTeclor,

Use a minus (-J screwdriver IO sel lhe vollage seleclor (on lhe rear
panel) lo lhe voltage selling for the area m which ihe uniI will be
used.

I General
Power consumption 180 w
Power supply
(For (ON) area.)
(For (E, E6) areas.)

AC SOIBO Hz. 230-240 V
AC 50/50 HZ. 230 V

(For (GO) area.) AC BINGO HZ. l10l127f2201240 V
Dimensions (WXHfl D) 215x329x335 mm
Welth 7.6 kg
I REMOTE CONTROL TRANSMITTER
Control key: 40 keys
Dimensions (W): H x D) 69.6 x266 x174 7 mm

Welght (wllhout bafleries) 106 9
Power source Two "AAA (R03iUM-4)

Noles:

1. Soeciiicallons are subject to change wilhoul nolice.
Welgnl and drmensrons are approximale.

2. Tolal harmonic dislorllon is measured by the dlgllal specllum
analyzer.

Page
BLOCK DIAGRAM .................................................................. 36~42
TERMINAL GUIDE OF ICS, TRANSISTORS AND DIODES ...... 43
SCHEMATIC DIAGRAM ..... . ~64
PRINTED CIRCUIT BOARDS
WIRING CONNECTION DIAGRAM
TERMINAL FUNCTION OF IC'S
PACKAGING ........................
REPLACEMENT PARTS LIST
MECHANISM PARTS LOCATION
REPLACEMENT PARTS LIST
LOADING PARTS LOCATION
CABINET PARTS LOCATION
REPLACEMENT PARTS LIST
RESISTORS AND CAPACITORS.


(II 1he power supply rn your area is 1ITV or 120 V. sel lo me
"127 V" posillon.)

Note Ihal Ihls unil wrll be seriously damaged II this selling is not
made correctly, (There [S no voilage seleclor Ior some counlries;
lhe correcl voltage is already sel.)

Page 6

SA-CH 350

2

3

Connect the LWIMW loop antenna.

1. Attach the antenna holder With screws (lncluded) to [I'll rear
paneL

2. Clamp the antenna to the antenna holder and connect the
antenna terminal to the rear panel.

3. Position the loop tor the pest reception

You may anach the LWIMW antenna holder to a rack or other
structure.

Notes:

OTo minimize noise pickup. keep the LW/MW loop antenna
away lrorn the speaker cable. power cord. and metal surr
laces.

IFor better reception, keep the LWIMW loop antenna cord
along the heal prevention cover.


Antenna
holder

terminal
stably.

W

Connect the speaker cables.

IBe Sure to connect the cable Irorn the right speaker to the
right terminal and the cable Irorn the Iett speaker to the left
terminal

'56 sure to connect only postlive (red) wires to positive [+)
terminals and negative (black) wires to negative (-) termi-
nals.

connection at speaker cables
1. Strip oft the outer
covering. and twist the
center conductor.

Make sure 1he bare ends ol the wires are not unraveled.
(ll they are. twist them tight again 1

2. Insert the two to the rear
panel and close the lever.

Notes:

0To prevent damage to circuitry.
never short-Circuit positive 4+]
and negative (-1 speaker wires.

4

Connect the AC power supply card after you
have connected all other cables and cords.

For (GC) area.
It the power plug Will not lit your socket, use the power
ptug adaptor (included).

KL: :

For areas except (G N) area:

Insertion of Connector

Even when the connector iS per-
lectly Inserted, depending on the
type of Inlet used. the lront part at
the connector may tut out as
shown In the drawrng,

However there is no problem
usrng the unit.


Approx. 6 mm\
Appliance Inlet

I Optional antenna connections

FM outdoor antenna (not Included)
If the FM indoor antenna does not provide satislactory reception of
FM broadcasts, use an outdoor antenna.

You may need an outdoor antenna It you use this system in a
mountainous region or inside a relnlorcedeooncrele buildlng. etc.
An outdoor antenna should be installed by a competent technician

only.

FM outdoor antenna


7s-ohm coaxial
cable (not lncluded).

FM ANY
75 0

Page 10

SA-C H350 SA-C H350

Cassette deck section

® Deckt cassette holder

® Fast-forwardrrewind/tape program sensor
(TF'S) buttons [44 (TPS), (TPS) PP]
Press to advance or rewind the tape. Or to qurckly search lor
the beginning at a track while the tape is being played.

Deck 2 cassette holder

@ Dolby noise reduction button (DOLBY NR)
Use to reduce the hissrrtg norse heard [ruin the tape. This
system has the Dolby B-type noise reductton system.

® Reverse mode select button
(REVERSE MODE)
Press to select the reverse mode (lor playback and recording)

@ Deck 1 cassette eject button (EJ ECT)
Press to open the deck I cassette holder

63 Deck tldeck 2 select button (DECK 1/2)
Press to select the deck to be operated.

3?) @

® One-touch tape edlt buttons
(ONE TOUCH TAPE EDIT, NORMAL, HIGH)

Press lo start the tape-to-tape recording

Q Reverse-slde playback button (<1)
Press to start the playback or recordtng (deck 2) in the reverse
direc1ion.

(i7) Stop button (El)
Press to stop the tape

® Fomard-side playback button (I>)
Press to start the playback or recording (deck 2) in the lorward
direction.

® Recordlrecord standby button (REC PAUSE)
Press to put deck 2 rnto the record standby mode.

® Tape counter reset button (COUNTER RESET)
Press to reset the tape c0unter indicator to 000.

® Deck 2 cassette eject button (EJECT)
Press to open the deck 2 cassette holder.

Compact disc player section

® Disc tray

m Disc tray openlclose button (A OPEN/CLOSE)
Press to open and close the disc tray.

@ Skiplsearch buttons( H4/« - w/bbt)
Press to move (onward or backward through the tracks on a
disc. or to hear drsc sound at hrgh speed while searching tn the
play mode

Headphones jack (PHONES)
Plug headphones cord InIO this jack.

Mlcrophone jack (MIC)

Press to stop the disc play.

Pause button (flu)
Press to stop the dISC play lemporaniy.

®
®
® Stop button (El)
®
GD

Play button (D)
Press to Stan disc play.

I REMOTE CONTROL UNIT CONTROLS AND FUNCTIONS

_..._.

Dfiéa'fit
OC'Jdc'tc')
ébtfiacaé

not?

. I n-..-

inductee @

' gather

($3
% 8555:3515
:3
fit

I
(E.
l
e eeo es 9

till)
90? eased e
69

Q-rét t:t lid-III tZICZJlZI
l; reset

I

L .2 ¥_J \_J

Common operation controls

The lunctton description at buttons Q. (a £9. 0, (D and ([3 IS as
dos-cubed under "Amplifier section" on pages 9 and 10.

@ Mutlng button (MUTING -20 d8)

Press to temporarily attenuate (mute) the volume level

. H r Iran.

"I vlu r:l.< .

. I..r,.t-.

r"-"'r.'t't'r'1IJitlt rl .lf

Tuner controls

The lunction descnphon ol buttons 0. 0 and (I) is as described
under "Tuner section" on page 8.

® Preset-tunlng buttons (1 -1 BIG)
Press to select the preset channel of the tuner.

Compact disc controls

The function description or buttons m. 6» at, w and (3 Is as
described underCompact otsc player section" on page It

Numeric buttons (1-1010, +10)
Use to spectty the compact discs track.

@ Program button (PROGRAM)
Press to activate the program play mode. You can then enter
speafic tracks USlng the numeric buttons.

@ Random button (RANDOM)
Press to play the area's tracks lD random order.

Repeat button (REPEAT)
Press to activate the repeat mode.

Cassette deck controls

The luncllon description of buttons (i). 6). Q. @. ® and GD is as
described under Cassette deck section" on page 11

Page 24

SA-CH350

I MEASUREMENTS AND ADJUSTMENTS

- Tuner section

Control positions and equipment used

- FM signal generator (FM-5G)
0 Stereo modulator

- Distortion analyser

- DC electronic voltmeter (EVM)

- Frequency counter
- Choke coll (100ij
- Resistor (100 kn)

- Dummy ANT (750)

Note:

For L2 (MWILW ANT and 050 coll), Z2 (MWILW-Ii-n they are supplied as adjusted parts.

cores of the parts.

If is not necessary to adjust the AM (MWILW) circuit.

80. do not turn the

4.

FM OFFSET VOLTAGE AND MONO DISTORTION
ADJUSTMENT

1.
2.
3.

Test equipment connection Ie shown In figure.

Set the unit to FM" mode.

Set the radio frequency display and signal generator
to 100.10MHz.

Apply a signal (10010101001 MHZ SOdB, Modulation
frequency: 1 kHz, Modulation: 100%) through the FM-
SG (FMSG output=72dB at 2.5750).

Adjust the core T1 so that the voltage measured In
signal mode is OrnV (01:2me In 300m'v renge.
Adjust T2 so that the distortion factor or L-CH and H-
CH Ie minimized. '
Repeat steps 4 and 5.

Make sure that the distortion factors of L»CH and Ft»
CH are nearly the same with each other to minimum.

Note: The adjusting screwdriver used should be made

of resin.

FM SIGNAL GENERATOR CONDITION

Moduiatlon ................. 100%
Modulation lrequency ..1kHz
Output level ................ 72dB
FM-SG
5 CI E'

seen an

Dummy ANT
UNIT
Distortion
analyser
Eggs) FM ANT
1 '5 "i I'm:-
: I i W702 .-
- . ,_ _ _ _.
I r. __ _ _ _.
----- SPEAKERS

§I_::©>D:l E

4.

FM MPX VCO ADJUSTMENT

1.
2.
3.

Test equipment connection is shown In figure.

Set the unit to "stereo" position.

Set the radio frequency display and signal generator
to 100.1OMHz.

Apply a signal (100.10 1-0.005 MHz 60dB, Modulation:
0%) through the FMSG (FMSG output=72dB at 2°
=75m.

Adjust VR301 Ior19kHzi30Hz on frequency counter
reading.

USING ALTERNATE SYSTEM

I.
2.

Receive the stereo broadcast.
Adjust VRI until stereo indicator lights up. Fix the
arm of VR1 as shown In Ilgure.

circuit

®-®,

®-© .t . . "Stereo" OFF position

.-® v..."Stereo" ON position
(Indicator Ilghting)

© ........ Adjust point of ptlot

FM SIGNAL GENERATOR CONDITION

Modulation ................. 0% (Non-modulation)

Output level ................ 72dE

FM-SG
E [:1 E'

u...
been NIT

Dummy ANT :

Frequency counter