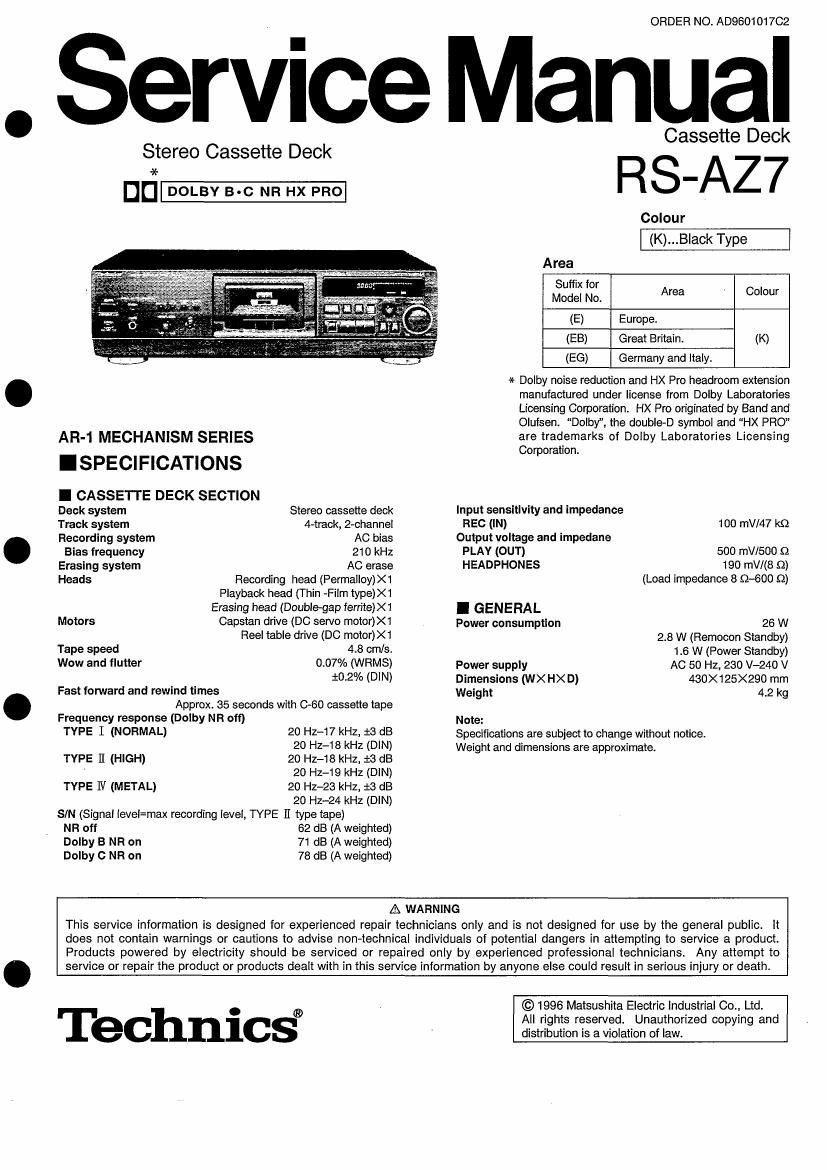
Technics RSAZ 7 Service Manual

This is the 61 pages manual for Technics RSAZ 7 Service Manual.
Read or download the pdf for free. If you want to contribute, please mail your pdfs to info@audioservicemanuals.com.

Page: 1 / 61
left right
Technics RSAZ 7 Service Manual

Extracted text from Technics RSAZ 7 Service Manual (Ocr-read)


Page 1

ORDER NO. AD960101702

.Service Manual

Stereo Cassette Deck

9(-
D_

AR-1 MECHANISM SERIES

I SPECIFICATIONS

I CASSETTE DECK SECTION

Deck system Stereo cassette deck

Track system 4-track, 2-channel

Recording system AC bias
Bias frequency 210 kHz

Erasing system AC erase

Heads Recording head (Permalloy)X1

Playback head (Thin -Film type)X1
Erasing head (Double-gap ferrite)X 1

Motors Gapstan drive (DC servo motor)><1
Reel table drive (DC motor)><1
Tape speed 4.8 cm/s.

0.07% (WRMS)
410.2% (DlN)

Wow and flutter

Fast toward and rewind times
Approx. 35 seconds with 6-60 cassette tape
Frequency response (Dolby NR off)
TYPE I (NORMAL) 20 Hz-17 kHz, 13 dB
20 Hz-18 kHz (DIN)
20 Hz-18 kHz, :3 dB
20 Hz-19 kHz (DIN)
20 Hz-23 kHz, fl dB
20 Hz-24 kHz (DIN)
SIN (Signal level=max recording level, TYPE II type ape)
NR off 62 dB (A weighted)
Dolby B NR on 71 dB (A weighted)
Dolby C NR on 78 dB (A weighted)

TYPE II (HIGH)

1'va 1V (METAL)

Cassette Deck

RS-AZ7

Colour

(K)...Black Type

Area
Suffix for
Model No. Area Colour
(E) Europe.
(EB) Great Britain. (K)
(EG) Germany and Italy.

* Dolby noise reduction and HX Pro headroom extension
manufactured under license from Dolby Laboratories
Licensing Corporation. HX Pro originated by Band and
Olufsen. Dolby", the double-D symbol and HX PRO"
are trademarks of Dolby Laboratories Licensing
Corporation.

Input sensitlvlty and impedance

REC (IN) 100 mV/47 kc
Output voltage and impedane
PLAY (OUT) 500 mV/500 Q
HEADPHONES 190 mV/(8 $2)
(Load impedance 8 (2-600 52)
I GENERAL
Power consumption 26 W

2.8 W (Remocon Standby)

1.6 W (Power Standby)

Power supply AC 50 Hz. 230 V-240 V
Dimensions (WX HXD) 430x125><290 mm
Weight 4.2 kg

Note:
Specifications are subject to change without notice.
Weight and dimensions are approximate.

A WARNING
This service information is designed for experienced repair technicians only and is not designed for use by the general public. It
does not contain warnings or cautions to advise non-technical individuals of potential dangers in attempting to service a product.
Products powered by electricity should be serviced or repaired only by experienced professional technicians. Any attempt to
service or repair the product or products dealt with in this service information by anyone else could result in serious injury or death.

Technics®

© 1996 Matsushita Electric Industrial Co.. Ltd.
All rights reserved. Unauthorized copying and
distribution is a violation of law.

Page 2

RS-AZ7

ICONTENTS

ACCESSORIES
CONNECTIONS
MAINTENANCE
CAUTION FOR AC MAINS LEAD.
FRONT PANEL CONTROLS .....
PLAYBACK .......
SELF-DIAGNOSTIC
OPERATION CHECKS AND MAIN COMPONENT

REPLACEMENT PROCEDURES ...................................... 12~21
ADJUSTMENT PROCEDURE .................
MEASUREMENTS AND ADJUSTMENTS

WIRING CONNECTION DIAGRAM.
TROUBLESHOOTING GUIDE
BLOCK DIAGRAM ......
SCHEMATIC DIAGRAM
PRINTED CIRCUIT BOARDS
TERMINAL GUIDE ................
REPLACEMENT PARTS LIST.
CABINET PARTS LOCATION .
MECHANISM PARTS LOCATION
RESISTORS AND CAPACITORS
PACKAGING ................................

I ACCESSORIES
AC power supply code ............................... 1 pc. Stereo connection cables ......................... 2 pcs.
(RJA0019-2K)...(E, EG) (RJA0049-K)...(EB) (RJL4P004Bos)

I CONNECTIONS
Stereo connection cable White (L)
Red (Fl)

Amplifier or receiver

Do not place this unit on top of an amplifier.

Heat radiated from the top of the amplifier may
cause damage to the tape.

Page 25

RS-AZ7

HEAD AZIMUTH ADJUSTMENT

1. Connect the measuring instrument as shown in Fig. 1.

2. Playback the azimuth adjustment portion (8kHz, -20dB)
of the test tape (QZZCFM). Vary the azimuth adjusting
screw until the output of the Rch are maximized. (Refer to
Fig. 2)

3. After the adjustment, apply screwlock to the azimuth
adjusting screw.

LINE OUT (PLAY)

Fig. 1

Azimuth adjusting screw

Fig. 2

TAPE SPEED ADJUSTMENT

1. Connect the measuring instrument as shown in Fig. 3.
2. Playback the middle portion of the test tape (QZZCWAT).
3. Adjust VR852 for the output value shown below.

Wjustment target: 3000i15Hz (NORMAL speed) |

Wandard value: 3000i45Hz (NORMAL spetfll

LINE OUT (PLAY)

UNIT

IIIIIJ

1..
o Lch a'-:::::::_ o
- - 0. ©
u

u Ftcho

Digital frequency
counter

Fig. 3

MR HEAD BIAS ADJUSTMENT

1. Connect the measuring instrument as shown in Fig. 4.

2. Short the section between the test points. (Lch: and
-. Rch: and -l

3. Playback the playback gain adjustment portion (315 Hz,
OdB) of test tape (QZZCFM).

4. Adjust the VR101 (Lch) and VR102 (Rch) until the distor-
tion is minimized.

LINE OUT (PLAY)

-0+ *0
v.@_o

Distortion analyser

Fig. 4

fiZS-

Page 27

RS-AZ7

ERASE CURRENT CONFIRMATION

1. Connect the measuring instrument as shown in Fig. 9.
2. Insert the Metal blank tape into the deck, and press the
REC PAUSE button.
3. Check if the output at this time between the erase current
confirmation point and (the output on both
edged of R321) is within the standard value. E'ase head
Notes: 0 The test tape is not required when confirming the R321 Io
erase current.
0 Please refer to the printed circuit board diagram
(I MOTOR P.C.B.) for test point locations. Fig- 9

TPS

EVM

Standard value EVM reading
Metal tape: 1901-20mA (190i20mA)

CONFIRMATION OF THE OVERALL GAIN AND OVERALL FREQUENCY RESPONSE

1. Connect the measuring instrument as shown in Fig. 1D.

2. Load a Normal blank tape into the deck, press the AT0 button, and then press the REC button. (automatic adjustment of
the Overall gain and Overall frequency response.)

3. In the Record Pause mode, and apply the reference input signal (1 kHz, -24dB) to the Rec. input. adjust the output to
320mV with the attenuator, and start recording.

4. While playing back the reference signal just recorded, verify that the output level falls in following range.

Standard value: 320mV:t0.5dB

5. AftenNard, apply a signal (frequency at the measured point in the range from 50Hz to 10kHZ), whose level is 20dB lower
than the reference signal level (1 kHz, -24dB=approx. 63mV), to the Rec. input. Then start recording with a Nomal blank
tape.

6. Play back the test signals just recorded and verify that the levels at the test frequencies fall In the ranges specified In
Fig. 11 with respect to the reference signal level. -

7. Repeat steps 5 and 6 above for CrOz blank test tape and Metal blank test tape, in these cases raising the upper end of the
test signal frequency range to 12.5kHz. Verify that the signal levels at the test frequencies fall in the ranges specified in
Fig. 12 with respect to the reference signal level.

0 Steps 1 through 4 above are concerned with overall gain; steps 5 through 7 pertain to overall frequency response.

LINE IN (REC) LINE OUT (PLAY)
NlT A

U l
A
3 6009 l i N
40- . n \123; Lott t:::::::;, o7®+oro+ (ID
0-0 .oooon I i oRcho -«2_\ _o-<>
' V V V
056 ATT L " EVM Oscilloscope
Fig. 1 0
Normal Overall frequency response chart (NR OUT) Cr02 Metal Overall frequency response chart (NR OUT)
was +ea5
was
+4dB 5 +4dB
+2dB +2115
MB 063 MB ads
-2dB _
-ads ads
-4dB 4.13 «as
-6dB -sas
5on 0on zoom soqu 1kHz 2kHz 1mm; 5on lOOHz zoom 50on em: 12.5w;
Fig. 1 1 Fig. 12

_27_