Tandberg RC 9 Owners Manual

This is the 2 pages manual for Tandberg RC 9 Owners Manual.
Read or download the pdf for free. If you want to contribute, please mail your pdfs to info@audioservicemanuals.com.

Page: 1 / 2
left right
Tandberg RC 9 Owners Manual

Extracted text from Tandberg RC 9 Owners Manual (Ocr-read)


Page 1

Tandberg Remote Control 9

Introduction.

The Tandberg Remote Control Unit 9 is designed
for use with the following tape decks:

9000K, 9100K, 9200X, 10X, lOXD and TCD 330.

The Remote Control Unit may be used in
connection with an automatic timer to start the
tape deck for recording or playback at any time.
only limited by the automatic timer setting time.
See next page.

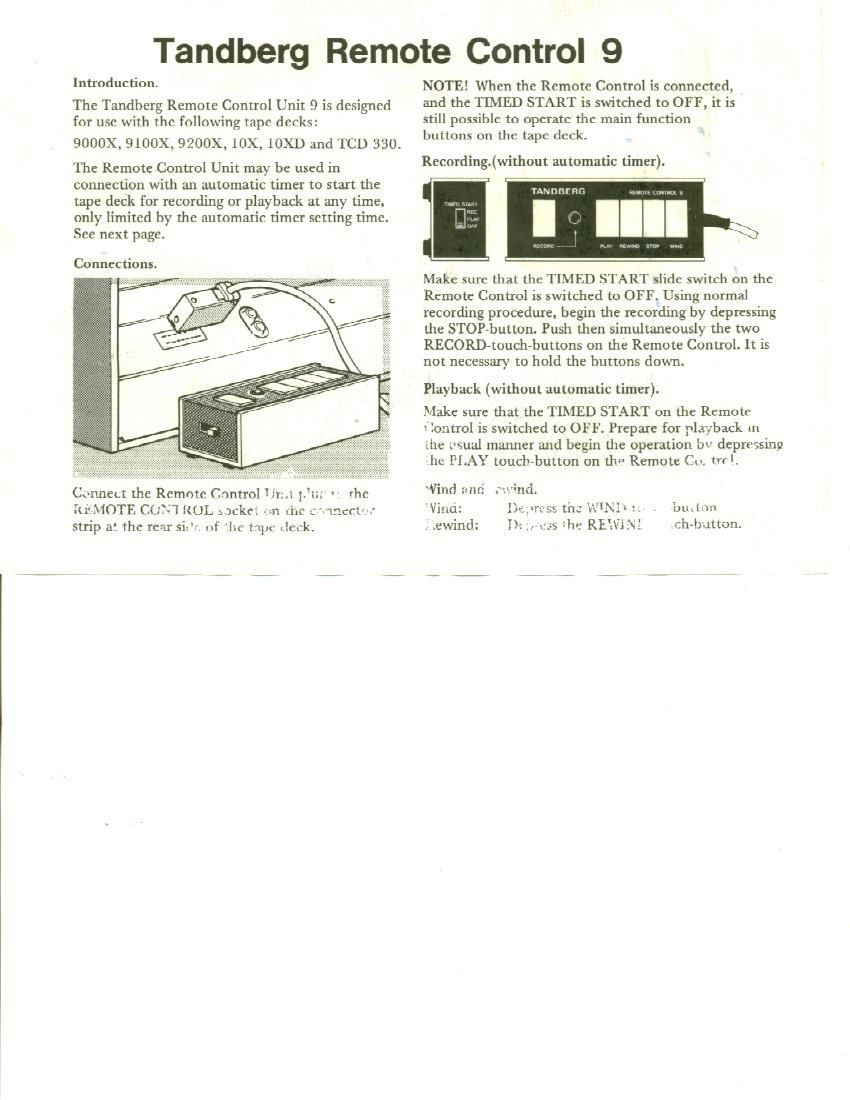
Connections.


Connect the Remote Control Um. ; . the
KLMOTE CU? ROL socks: an if? t 'mect-v
strip a! the rear si:" nf iie tape deck.

NOTE! When the Remote Control is connected.
and the TIMED START is switched to OFF, it is
still possible to operate the main function
buttons on the tape deck.

Recording.(without automatic timer).

on

Make sure that the TIMED START slide switch on the
Remote Control is switched to OFF. Using normal
recording procedure, begin the recording by depressing
the STOP-button. Push then simultaneously the two
RECORD-touch-buttons on the Remote Control. It is
not necessary to hold the buttons down.

Playback (without automatic timer).

Make sure that the TIMED START on the Remote

Control is switched to OFF. Prepare for playback in
ahe usual manner and begin the operation bv depressing
he PLAY touch-button on the Remote Cu. trr.

Vind 3an :wind.
Vino: Defies: tn: '»-."l\li'| to .
.ewind: U. ,M is fht: RENiNf

bu . l rm
Cir-button.

Page 2

Using the automatic timer.

NOTE! The automatic timer can only be used
together with the Remote Control Unit 9.

1
Recording. J

Connect the automatic timer to the mains and
the tape deck main plug to the automatic timer,
as shown in Figure.

Select the starting and switching off time , but
allow a few minutes extra to avoid loosing the
beginning or the end of the program. Then follow
the usual procedure for recording without
depressing the RECORD touch-button.

The Remote Control Unit must remain connected
to the tape deck and the slide switch TIMED
START must be set to the RECORD position.

I
Playback. d

Connect the automatic timer and select the
desired start and stop time as described for the
recording function. Then follow the usual
procedure for playback without depressing the
PLAY touch-button.

The Remote Control Unit must be connected to
the tape deck and the slide switch TIMED START
must be set in PLAY position.

./
-.

NOTE! When the tape (leek are not going to be
started or stopped with the automatic timer, the
slide switch TIMED START on the Remote
Control Unit shall always be in the position OFF.

1169 - 11 -75 Part No. 336444
Printed in Norway by Petlitz