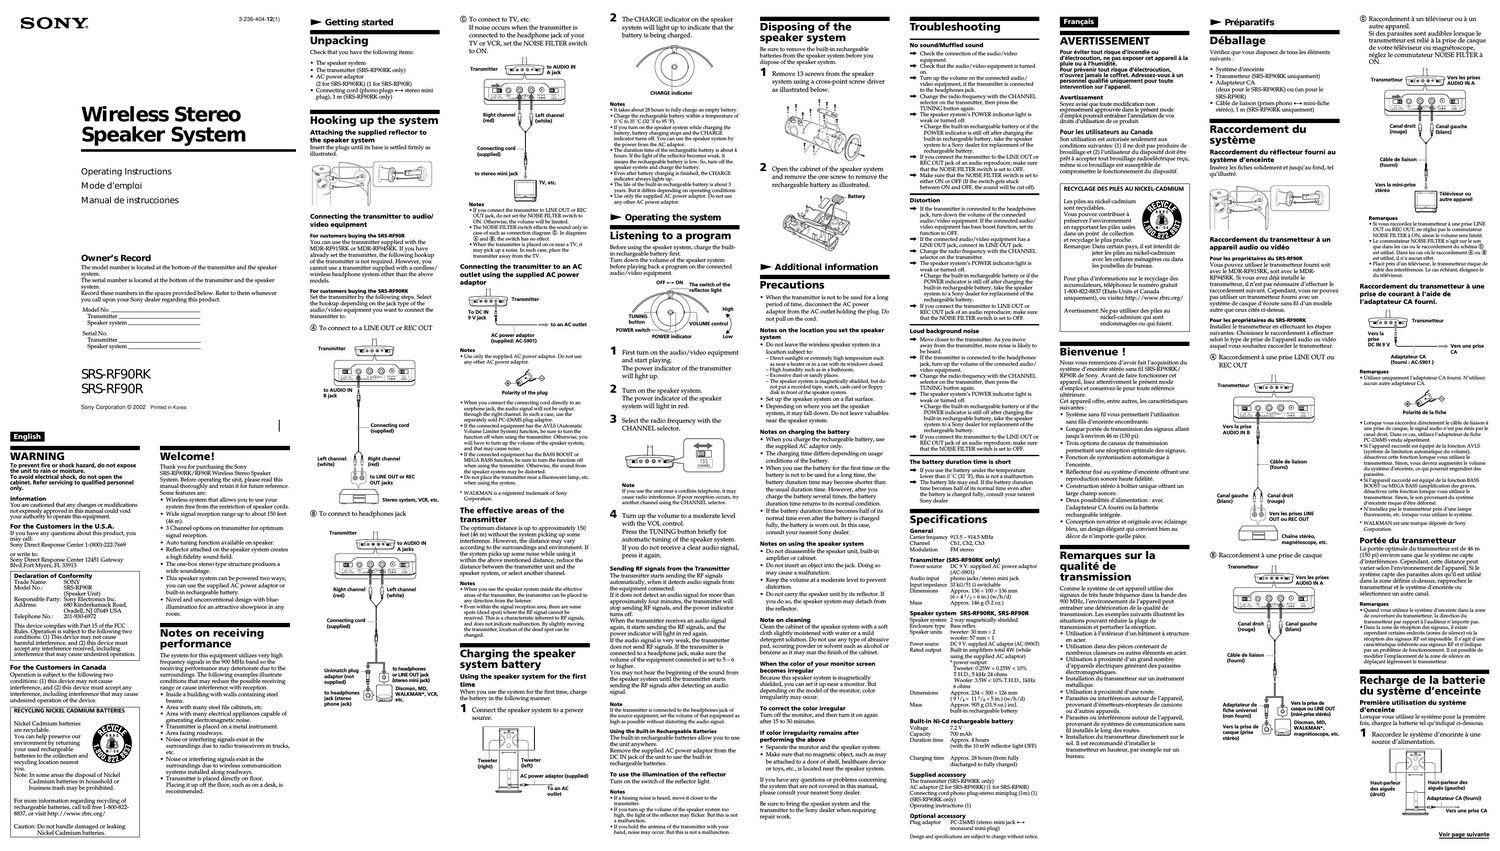
Sony srs rf 90 rk owners manual

This is the 2 pages manual for sony srs rf 90 rk owners manual.
Read or download the pdf for free. If you want to contribute, please mail your pdfs to info@audioservicemanuals.com.

Page: 1 / 2
left right
sony srs rf 90 rk owners manual

Extracted text from sony srs rf 90 rk owners manual (Ocr-read)


Page 1

SONYs

3-236-404-12(1)

Wireless Stereo
Speaker System

Operating Instructions

Mode d'emploi

Manual de instrucciones

Owners Record

The model number is located at the bottom of the transmitter and the speaker

system.

The serial number is located at the bottom of the transmitter and the speaker

system.

Record these numbers in the spaces provided below. Refer to them whenever
you call upon your Sony dealer regarding this product.

Model No.
Transmitter
Speaker system

Serial No.
Transmitter
Speaker system

SRS- RF90RK
SR5- RF90R

Sony Corporation © 2002 Primed In Korea

m
WARNING

To prevent fire or shock hazard, do not expose
the unit to rain or moisture.

To avoid electrical shock, do not open the
cal'liinet. Refer servicing to qualified personnel
on y.

Information

You are cautioned that any changes or modifications
not expressly approved in this manual could void
your authority to operate this equipment.

For the Customers in the U.S.A.

If you have any questions about this product, you
may call:

Sony Direct Response Center 1A(800)7222e7669

or write to:
Son Direct Response Center 12451 Gateway
Blv .Fort Myers, FL 33913

Declaration of Conformity

Trade Name: SONY

Model No.: SRSRF90R
(Speaker Unit)

Res onsible Party: Sony Electronics Inc.

Ad ress: 680 Kinderkamack Road,
Oradell, N] 07649 USA
Telephone No. : 201793076972

This device complies with Part 15 of the FCC
Rules. Operation is subject to the following two
conditions: (1) This device may not cause
harmful interference, and (2) this device must
accept any interference received, including
interference that may cause undesired operation.

For the Customers in Canada

Operation is subject to the following two
conditions: (1) this device may not cause
interference, and (2) this device must accept any
interference, including interference that may cause
undesired operation of the device.

RECYCLING NICKEL CADMIUM BATTERIES

Nickel Cadmium batteries

are recyclable.

You can help preserve our

environment by returning

your used rechargeable

batteries to the collection and

recycling location nearest

you.

Note: In some areas the disposal of Nickel
Cadmium batteries in household or
business trash may be prohibited.

For more information regarding recycling of
rechargeable batteries, call toll free 178008227
8837, or visit http://www.rbrc.org/

Caution: Do not handle damaged or leaking
Nickel Cadmium batteries.

-
Welcome!

Thank you for purchasing the Sony
SRSRFBURK/RFQUR Wireless Stereo Speaker
System. Before operating the unit, please read this
manual thoroughly and retain it for future reference.
Some features are:

D Wireless system that allows you to use your
system free from the restriction of speaker cords.
Wide signal reception range up to about 150 feet
(46 m).

D 3 Channel options on transmitter for optimum
signal reception.

Auto tuning function available on speaker.

D Reflector attached on the speaker system creates
a high fidelity sound field.

The oneebox stereo type structure produces a
wide soundstage.

D This speaker system can be powered two ways;
you can use the supplied AC power adaptor or
builtein rechargeable battery.

Novel and unconventional design with blue
illumination for an attractive showpiece in any
room.

-
Notes on receiving
performance

The system for this equipment utilizes very high
frequency signals in the 900 MHz band so the
receiving performance may deteriorate due to the
surroundings. The following examples illustrate
conditions that may reduce the possible receiving
range or cause interference with reception.

D Inside a building with walls containing steel
beams.

D Area with many steel file cabinets, etc.

D Area with many electrical appliances capable of
generating electromagnetic noise.

D Transmitter is placed on a metal instrument.

D Area facing roadways.

D Noise or interfering signals exist in the
surroundings due to radio transceivers in trucks,
etc.

D Noise or interfering signals exist in the

surroundings due to wireless communication

systems installed along roadways.

Transmitter is placed directly on floor.

Placing it up off the floor, such as on a desk, is

recommended.

> Getting started
-
Unpacking

Check that you have the following items:

D The speaker system

D The transmitter (SRS-RFQORK only)

D AC power adaptor
(2 for SRS-RF90RK) (1 for SRSeRF9OR)

D Connecting cord (phono plugs <-> stereo mini
plug), 1 m (SRSrRF90RK only)

Hooking up the system

Attaching the supplied reflector to
the speaker system

Insert the plugs until its base is settled firmly as
illustrated.

Connecting the transmitter to audio]
video equipment

For customers buying the SRS-RFBOR

You can use the transmitter supplied with the
MDReRF915RK or MDReRF945RK. If you have
already set the transmitter, the following hookup
of the transmitter is not required. However, you
cannot use a transmitter supplied with a cordless /
wireless headphone system other than the above
models.

For customers buying the SRS-RFBORK

Set the transmitter by the following steps. Select
the hookup depending on the jack type of the
audio/video equipment you want to connect the
transmitter to.

® To connect to a LINE OUT or REC OUT

Transmitter

to AUDIO IN
B jack

Connecting cord
(supplied)

Left channel Right channel

(White) M (red)

/:,'
to LINE our or REC
OUT jacks

_
Stereo system, VCR. etc.

To connect to headphones jack

Transmitter

Right channel Left channel
(red) (white)
Connecting cord 7
(supplied)
to headphones

or LINE OUT jack
(stereo mini jack)

Discman. MD.
WALKMAN. VCR.

Unimatch plug
adaptor (not
supplied)


to headphones
jack (stereo
phone jack)

© To connect to TV, etc.
If noise occurs when the transmitter is
connected to the headphone jack of your
TV or VCR, set the NOISE FILTER switch
to ON.

to AUDIO IN

Transmitter

I
h
\mOQDGml

Right channel Left channel
(red) (white)
Connecting cord .. .

(supplied)

to stereo mini jack

7 1 TV, etc.

2:

Notes

D If you connect the transmitter to LINE OUT or REC
OUT jack, do not set the NOISE FILTER switch to
ON. Otherwise, the volume will be limited.

D The NOISE FILTER switch effects the sound only in
case of such as connection diagram ©. In diagrams
® and ., the switch has no effect.

. When the transmitter is placed on or near a TV, it
may pick up a noise. In such case, place the
transmitter away from the TV.

Connecting the transmitter to an AC
outlet using the supplied AC power
adaptor

To DC IN "
9 Vjack E
l

AC power adaptor
(supplied: AC-S901)

so to an AC outlet

Notes
- Use only the supplied AC power adaptor. Do not use
any other AC power adaptor.

@

Polarity of the plug

- When you connect the connecting cord directly to an
earphone jack, the audio signal will not be output
through the right channel. In such a case, use the
separately sold PC-236MS plug adaptor.

- If the connected equipment has the AVLS (Automatic
Volume Limiter System) function, be sure to turn the
function off when using the transmitter. Otherwise, you
will have to turn up the volume of the speaker system,
and that may cause noise.

- If the connected equipment has the BASS BOOST or
MEGA BASS function, be sure to turn the function off
when using the transmitter. Otherwise, the sound from
the speaker system may be distorted.

- Do not place the transmitter near a fluorescent lamp, etc.
when using the system.

* WALKMAN is a registered trademark of Sony
Corporation.

The effective areas of the

transmitter

The optimum distance is up to approximately 150
feet (46 m) without the system picking up some
interference. However, the distance may vary
according to the surroundings and environment. If
the system picks up some noise while using it
within the above mentioned distance, reduce the
distance between the transmitter unit and the
speaker system, or select another channel.

Notes

- When you use the speaker system inside the effective
areas of the transmitter, the transmitter can be placed in
any direction from the listener.

. Even within the signal reception area, there are some
spots (dead spot) where the RF signal cannot be
received. This is a characteristic inherent to RF signals,
and does not indicate malfunction. By slightly moving
the transmitter, location of the dead spot can be
changed.

-
Charging the speaker
system battery

Using the speaker system for the first
time

When you use the system for the first time, charge
the battery in the following manner.

1 Connect the speaker system to a power

source.
e-w~o
{-9) Old-j
O \
I -i I
Tweeter Tweeter
(right) (left)
AC power adaptor (supplied)
-9
To an AC
outlet

2 The CHARGE indicator on the speaker
system will light up to indicate that the
battery is being charged.

CHARGE indicator

Notes

. It takes about 28 hours to fully charge an empty battery.

- Charge the rechargeable battery within a temperature of
O C to 35 C (32 "F to 95 F).

- If you turn on the speaker system while charging the
battery, battery charging stops and the CHARGE
indicator turns off. You can use the speaker system by
the power from the AC adaptor.

D The duration time of the rechargeable battery is about 4
hours. If the light of the reflector becomes weak, it
means the rechargeable battery is low. So, turn off the
speaker system and charge the battery.

D Even after battery charging is finished, the CHARGE
indicator always lights up.

D The life of the built-in rechargeable battery is about 3
years. But it differs depending on operating conditions.

- Use only the supplied AC power adaptor. Do not use
any other AC power adaptor.

> Operating the system
-
Listening to a program

Before using the speaker system, charge the builte
in rechargeable battery first.

Turn down the volume of the speaker system
before playing back a program on the connected
audio/ video equipment.

OFF H 0 The switch of the
reflector light


High
TUNING
button

POWER switch

VOLUME control

POWER indicator Low

1 First turn on the audio/video equipment
and start playing.
The power indicator of the transmitter
will light up.

2 Turn on the speaker system.
The power indicator of the speaker
system will light in red.

3 Select the radio frequency with the
CHANNEL selectorr


i E '3
CHANNEL]

Note

If you use the unit near a cordless telephone, it may
cause radio interference. If poor reception occurs, try
another channel using the CHANNEL selector.

4 Turn up the volume to a moderate level
with the VOL control.
Press the TUNING button briefly for
automatic tuning of the speaker system.
If you do not receive a clear audio signal,
press it again.

Sending RF signals from the Transmitter
The transmitter starts sending the RF signals
automatically, when it detects audio signals from
the equipment connected.

If it does not detect an audio signal for more than
approximately four minutes, the transmitter will
stop sending RF signals, and the power indicator
turns off.

When the transmitter receives an audio signal
again, it starts sending the RF signals, and the
power indicator will light in red again.

If the audio signal is very weak, the transmitter
does not send RF signals. If the transmitter is
connected to a headphone jack, make sure the
volume of the equipment connected is set to 5 a 6
or higher.

You may not hear the beginning of the sound from
the speaker system until the transmitter starts
sending the RF signals after detecting an audio
signal.

Note

If the transmitter is connected to the headphones jack of
the source equipment, set the volume of that equipment as
high as possible without distorting the audio signal.

Using the Built-in Rechargeable Batteries

The built-in rechargeable batteries allow you to use
the unit anywhere.

Remove the supplied AC power adaptor from the
DC IN jack of the unit to use the builtein
rechargeable batteries.

To use the illumination of the reflector
Turn on the switch of the reflector light.

Notes

D If a hissing noise is heard, move it closer to the
transmitter.

- It you turn up the volume of the speaker system too
high, the light of the reflector may flicker. But this is not
a malfunction.

D If you hold the antenna of the transmitter with your
hand, noise may occur. But this is not a malfunction.

-
Disposing of the
speaker system

Be sure to remove the builtein rechargeable
batteries from the speaker system before you
dispose of the speaker system.

1 Remove 13 screws from the speaker
system using a cross-point screw driver
as illustrated belowr

i

2 Open the cabinet of the speaker system
and remove the one screw to remove the
rechargeable battery as illustrated.

> Additional information

Precautions

D When the transmitter is not to be used for a long
period of time, disconnect the AC power
adaptor from the AC outlet holding the plug. Do
not pull on the cord.

Notes on the location you set the speaker

system

D Do not leave the wireless speaker system in a
location subject to:

- Direct sunlight or extremely high temperature such
as near a heater or in a car with its windows closed.

- High humidity such as in a bathroom.

- Excessive dust or sandy places.

- The speaker system is magnetically shielded, but do
not put a recorded tape, watch, cash card or floppy
disk in front of the speaker system.

D Set up the speaker system on a flat surface.

D Depending on where you set the speaker
system, it may fall down. Do not leave valuables
near the speaker system.

Notes on charging the battery

D When you charge the rechargeable battery, use
the supplied AC adaptor only.

D The charging time differs depending on usage
conditions of the battery.

D When you use the battery for the first time or the
battery is not to be used for a long time, the
battery duration time may become shorter than
the usual duration time. However, after you
charge the battery several times, the battery
duration time returns to its normal condition.

D If the battery duration time becomes half of its
normal time even after the battery is charged
fully, the battery is worn out. In this case,
consult your nearest Sony dealer.

Notes on using the speaker system

D Do not disassemble the speaker unit, builtein
amplifier or cabinet.

D Do not insert an object into the jack. Doing so
may cause a malfunction.

D Keep the volume at a moderate level to prevent
distortion.

D Do not carry the speaker unit by its reflector. If
you do so, the speaker system may detach from
the reflector.

Note on cleaning

Clean the cabinet of the speaker system with a soft
cloth slightly moistened with water or a mild
detergent solution. Do not use any type of abrasive
pad, scouring powder or solvent such as alcohol or
benzene as it may mar the finish of the cabinet.

When the color of your monitor screen
becomes irregular

Because this speaker system is magnetically
shielded, you can set it up near a monitor. But
depending on the model of the monitor, color
irregularity may occur.

To correct the color irregular
Turn off the monitor, and then turn it on again
after 15 to 30 minutes.

If color irregularity remains after

performing the above

D Separate the monitor and the speaker system.

D Make sure that no magnetic object, such as may
be attached to a door of shelf, healthcare device
or toys, etc., is located near the speaker system.

If you have any questions or problems concerning
the system that are not covered in this manual,
please consult your nearest Sony dealer.

Be sure to bring the speaker system and the
transmitter to the Sony dealer when requiring
repair work.

-
Troubleshooting

No sound/Muffled sound

-> Check the connection of the audio /video
equipment.

-> Check that the audio/video equipment is turned
on.

-p Turn up the volume on the connected audio/
video equipment, if the transmitter is connected
to the headphones jack.

-> Change the radio frequency with the CHANNEL
selector on the transmitter, then press the
TUNLNG button again.

I} The speaker systems POWER indicator light is
weak or turned off.

D Charge the built-in rechargeable battery or if the
POWER indicator is still off after charging the
builtcin rechargeable battery, take the speaker
system to a Sony dealer for replacement of the
rechargeable battery.

-> If you connect the transmitter to the LINE OUT or
REC OUT jack of an audio reproducer, make sure
that the NOISE FILTER switch is set to OFF.

I} Make sure that the NOISE FILTER switch is set to
either ON or OFF (If the switch gets stuck
between ON and OFF, the sound will be cut off).

Distortion

I} If the transmitter is connected to the headphones
jack, turn down the volume of the connected
audio/video equipment. If the connected audio/
video equipment has bass boost function, set its
function to OFF.

If the connected audio/ video equipment has a

LINE OUT jack, connect its LINE OUT jack.

Change the radio frequency with the CHANNEL

selector on the transmitter.

The speaker systems POWER indicator light is

weak or turned off.

D Charge the built-in rechargeable battery or if the
POWER indicator is still off after charging the
built-in rechargeable battery, take the speaker
system to a Sony dealer for replacement of the
rechargeable battery.

I} If you connect the transmitter to LINE OUT or

REC OUT jack of an audio reproducer, make sure
that the NOISE FILTER switch is set to OFF.

t

t

#

Loud background noise

I} Move closer to the transmitter. As you move
away from the transmitter, more noise is likely to
be heard.

-p If the transmitter is connected to the headphones
jack, turn up the volume of the connected audio/
video equipment.

-> Change the radio frequency with the CHANNEL
selector on the transmitter, then press the
TUNING button again.

I} The speaker systems POWER indicator light is
weak or turned off.

D Charge the built-in rechargeable battery or if the
POWER indicator is still off after charging the
built-in rechargeable battery, take the speaker
system to a Sony dealer for replacement of the
rechargeable battery.

-> If you connect the transmitter to the LINE OUT or
REC OUT jack of an audio reproducer, make sure
that the NOISE FILTER switch is set to OFF.

The battery duration time is short

I} If you use the battery under the temperature
lower than 0 C (32 F), this is not a malfunction.

I} The battery life may end. If the battery duration
time becomes half of its normal time even after
the battery is charged fully, consult your nearest
Sony dealer

-
Specifications

G eneral

Carrier frequency 913.5 ~ 914.5 MHz
Channel Ch1, Ch2, Ch3
Modulation FM stereo

Transmitter (SRS-RFSORK only)

Power source DC 9 V: supplied AC power adaptor
(AC-5901)

Audio input phono jacks / stereo mini jack

Input impedance 33 kfl/ 51 Q switchable

Dimensions Approx. 136 X 100 X 136 mm
(6 x 4 1/3 x 6 in.) (w/h/d)
Mass Approx. 146 g (5.2 oz.)

Speaker system SRS-RFSORK, SRS-RFSOR
Speaker system 2 way magnetically shielded
Enclosure type Bass reflex
Speaker units tweeter: 30 mm X 2
woofer: 57 mm X 1
Power source DC 9 V: supplied AC adaplor (AC-59()6T)
Rated output Built in amplifiers total 4W (while
using the supplied AC adaptor)
power output:
Tweeter: 0.25W + 0.25W < 10%
T.H.D., 5 kHz 24 ohms
Woofer: 3.5W < 10% T.H.D., 1kHz
6 ohms
Approx. 234 X 300 X 126 mm
(9 1/4 x11 7/5 x 5 in.) (w/h/d)
Mass Approx. 905 g (31.9 oz.) incl.
built-in rechargeable battery

Dimensions

Bull in Ni-Cd rechargeable battery
Voltage 7.2 V
Capacity 700 mAh
Duration time Approx. 4 hours
(with the 10 mW reflector light OFF)

Charging time Approx. 28 hours (from fully
discharged to fully charged)

Supplied accessory

The transmitter (SRS~RF9ORK only)

AC adaptor (2 for SRS-RF9ORK) (1 for SRS-RF90R)
Connecting cord phono plug-stereo miniplug (1m) (1)
(SRSRFJORK only)

Operating instructions (1)

Optional accessory
Plug adaptor PC-236MS (stereo mini jack H
monaural mini plug)

Design and specifications are subject to change without notice.

-
AVERTISSEMENT

Pour éviter tout risque dincendie ou
d'électrocution, ne pas exposer cet appareil a la
pluie on a l'humidité.

Pour prévenir tout ris ue d'électrocution,
n'ouvrez 'amais le cof ret. Adressez-vous a un
personne qualif uniquement pour toute
intervention sur l'appareil.

Avertissement

Soyez avisé que toute modification non
expressement approuve'e dans le present mode
d'emploi pourrait entrainer lannulation de vos
droits dutilisation de ce produit.

Pour les utilisateurs au Canada

Son utilisation est autorisée seulement aux
conditions suivantes: (1) il ne doit pas produire de
brouillage et (2) l'utilisateur du dispositif doit etre
pret a accepter tout brouillage radioelectrique recu,
meme si ce brouillage es susceptible de
compromettre le fonctionnement du dispositif.

RECYCLAGE DES PILES AU NICKEL-CADMIUM

Les piles au nickelecadmium
sont recyclables.
Vous pouvez contribuer a
préserver lenvironnement
en rapportant les piles usees
dans un point de collection
et recyclage le plus proche.
Remarque: Dans certain pays, il est interdit de
jeter les piles au nickelfadmium
avec les ordures me'nageres ou dans
les poubelles de bureau.

Pour plus d'informations sur le recyclage des
accumulateurs, téléph()nez le numéro gratuit
17800782278837 (Etats-Units et Canada
uniquement), ou visitez http:/ /www.rbrc.org/

Avertissment: Ne pas utilliser des piles au
nickelecadmium qui sont
endommagees ou qui fuient.

-
Bienvenue !

Nous vous remercions d'avoir fait l'acquisition du
systeme denceinte stéreo sans fil SRSeRFQORK/
RF9OR de Sony. Avant de faire fonctionner cet
appareil, lisez attentivement le présent mode
d'emploi et conserveZele pour toute référence
ulterieure.

Cet appareil offre, entre autres, les caractéristiques
suivantes :

D Systeme sans fil vous permettant l'utilisation
sans fils d'enceinte encombrants.

Longue portee de transmission des signaux allant
jusqu'a environ 46 m (150 pi).

Trois options de canaux de transmission
permettant une reception optimale des signaux.
Fonction de syntonisation automatique a
l'enceinte.

Re'flecteur fixe' au systeme d'enceinte offrant une
reproduction sonore haute fidelité.
Construction stere'o a boitier unique offrant un
large champ sonore.

D Deux possibilites d'alimentation : avec
I'adaptateur CA fourni ou la batterie
rechargeable intégree.

Conception novatrice et originale avec eclairage
bleu, un design e'le'gant qui convient bien au
de'cor de nimporte quelle piece.

-
Remarques sur la
quallté de
transmission

Comrne le systeme de cet appareil utilise des
signaux de tres haute frequence dans la bande des
900 MHZ, l'environnement de lappareil peut
entrainer une deterioration de la qualité de
transmission. Les exemples suivants illustrent les
pouvant réduire la plage de

ion et perturber la reception.

D Utilisation a linte'rieur d'un batiment a structure
en acier.

D Utilisation dans des pieces contenant de
nombreux classeurs ou autres éléments en acier.

D Utilisation a proximite' dun grand nombre
dappareils e'lectriques générant des parasites
e'lectromagnétiques.

D Installation du transmetteur sur un instrument
métallique.

D Utilisation a proximité dune route.

D Parasites ou interferences autour de lappareil,
provenant demetteursere'cepteurs de camions
ou dautres appareils.

D Parasites ou interferences autour de lappareil,
provenant de systemes de communication sans
fil installés le long des routes.

D Installation du transmetteur directement sur le
sol. Il est recommandé d'installer le
transmetteur en hauteur, par exemple sur un
bureau.

> Préparatifs
-

Déballage

Vérifiez que vous disposez de tous les elements

suivants :

D Systeme d'enceinte

D Transmetteur (SRSRFQORK uniquement)

D Adaptateur CA
(deux pour le SRSeRF9URK) ou (un pour le
SRSeRFQOR)

D Cable de liaison (prises phono <-> miniefiche
stereo), 1 m (SRSARF9ORK uniquement)

-
Raccordement du
systéme

Raccordement du re'flecteur fourni au
systeme d'enceinte

Insérez les fiches solidement et jusqu'au fond, tel
quillustré.

Raccordement du transmetteur a un
appareil audio ou video

Pour les propr ' aires du SRS-RFSOR

Vous pouvez uti ser le transmetteur fourni soit
avec le MDReRF915RK, soit avec le MDRe
RF945RK. Si vous avez de'ja i talle le
transmetteur, il nest pas ne'cessaire deffectuer le
raccordement suivant. Cependant, vous ne pouvez
pas utiliser un transmetteur fourni avec un
systeme de casque de'coute sans fil d'un modele
autre que ceux cités ciedessus.

Pour les proprietaires du SRS-RFSORK

Installez le tra metteur en effectuant les étapes
suivantes. Chois \ z le raccordement a effectuer
selon le type de prise de l'appareil audio ou vidéo
auquel vous souhaitez raccorder le transmetteur.

® Raccordement a une prise LINE OUT ou
REC OUT

Vers la prise
AUDIO IN B

Cable de liaison

(fourni)
Canal gauche Canal droit
(blanc) (rungs)

if
,. ts
a».

it,
j@ ©j Vers les prises LINE
2 OUT ou REC OUT

_
E Chaine steréo,

magnetoscope. etc.

Raccordement a une prise de casque


Transmetteur

h .
l-J Vers les prises
AUDIO IN A

Canal gauche

(rouye) (blanc)

Cable de liaison
(fourni)

Vers Ia prise de

casque ou LINE OUT

(mini rise stereo)
Discman. MD.
WALKMAN".
magnetoscope. etc.

Adaptateur de

fiche universel

(non fourni)

Vers la prise de
casque (prise

stereo)

© Raccordement a un téléviseur ou a un
autre appareil.
Si des parasites sont audibles lorsque le
transmetteur est relié a la prise de casque
de votre téléviseur ou magnetoscope,
reglez le commutateur NOISE FILTER a
UN

Vers les prises

Transmetteur AUDIO IN A

h
[-1

Canal gauche
(blanc)

Cable de liaison
(fourni)

Vers Ia minisprise é
stereo

Televiseur all
j autre appareil

Remarques

D Si vous raccordez le transmetteur a une prise LINE
OUT ou REC OUT, ne réglez pas le comrnutateur
NOISE FILTER a ON, sinon le volume sera limite.

D Le commutateur NOISE FILTER nagit sur le son
que dans les cas ou le raccordement du schema
est utili . Dans les cas ou le raccordement ® ou
est utilise, il na aucun effet.

- Place pres dun televiseur, le transmetteur risque de
subir des interferences. Le cas échéant, eloignez-le
du téléviseur.

Raccordement du transmetteur a une
prise de courant a l'aide de

I'adaptateur CA fournl.
Transmetteur
Vers Ia
prise E
DC IN 9 V (as Vers une prise
CA
Adaptateur CA

(fourni : ACAS901 )

Remarques
. Utilisez uniquement I'adaptateur CA fourni. Nutilisez
aucun autre adaptateur CA.

W

Polarité de la fiche

- Lorsque vous raccordez directement le cable de liaison a
une prise de casque, le signal audio nest pas emis par le
canal droit. Dans ce cas, utilisez Iadaptateur de fiche
lC-236MS vendu séparément.

- Si l'appareil raccordé est equipe de la tonction AVLS
(systeme delimitation automatique du volume),
desactivez cette fonction lorsque vous utilisez le
transmetteur. Sinon, vous devrez augmenter le volume
du systeme denceinte, ce qui pourrait engendrer des
parasites.

- Si Iappareil raccorde est equipe de la fonction BASS
BOOST ou MEGA BASS (amplification des graves,
desactivez cette fonction lorsque vous utilisez le
transmetteur. Sinon, le son provenant du systeme
denceinte risque d'etre déformé.

- Ninstallez pas le transmetteur pres dune lampe
fluorescente, etc. lorsque vous utilisez le systeme.

* WALKMAN est une marque deposee de Sony
Corporation.

Portée du transmetteur

La portee optimale du transmetteur est de 46 m
(150 pi) environ sans que le systeme ne capte
dinterfe'rences. Cependant, cette distance peut
varier selon l'environnement de lappareil. Si le
systeme capte des parasites alors qu'il est utilisé
dans la zone defiriie cied sus, rapprochez le
transmetteur et le systeme d'enceinte ou
se'lectionnez un autre canal.

Remarques

D Quand vous utilisez le systeme denceinte dans la zone
de couverture du transmetteur, la direction du
transmetteur par rapport a l'auditeur nimporte pas.

. Dans la zone de reception des signaux, il existe
cependant certains endroits (zones de silence) oh la
reception des signaux RF est impossible. ll sagit dune
caracteristique inherente aux signaux RF et nindique
pas un probleme de fonctionnement. 11 est possible de
modifier lemplacement de la zone de silence en
deplacant legerement le transmetteur.

-
Recharge de la batterie
du systéme d'enceinte

Premiere utilisation du systeme
d'enceinte

Lorsque vous utilisez le systeme pour la premiere
fois, chargez la batterie tel quindique' cindessous.

1 Raccordez le systeme d/enceinte a une
source dalimentationr

s
p 0 fl
[ ./ Op ]
e-«a

Haut-parleur Haut-parleur des
des aigués r\ a ues (gauche)
(droit) i _

fl Adaptateur CA (fourni)

go- n

": Vers une prise CA

E

Voir page suivante