Sony srf hm 03 v owners manual

This is the 2 pages manual for sony srf hm 03 v owners manual.
Read or download the pdf for free. If you want to contribute, please mail your pdfs to info@audioservicemanuals.com.

Page: 1 / 2
left right
sony srf hm 03 v owners manual

Extracted text from sony srf hm 03 v owners manual (Ocr-read)


Page 1

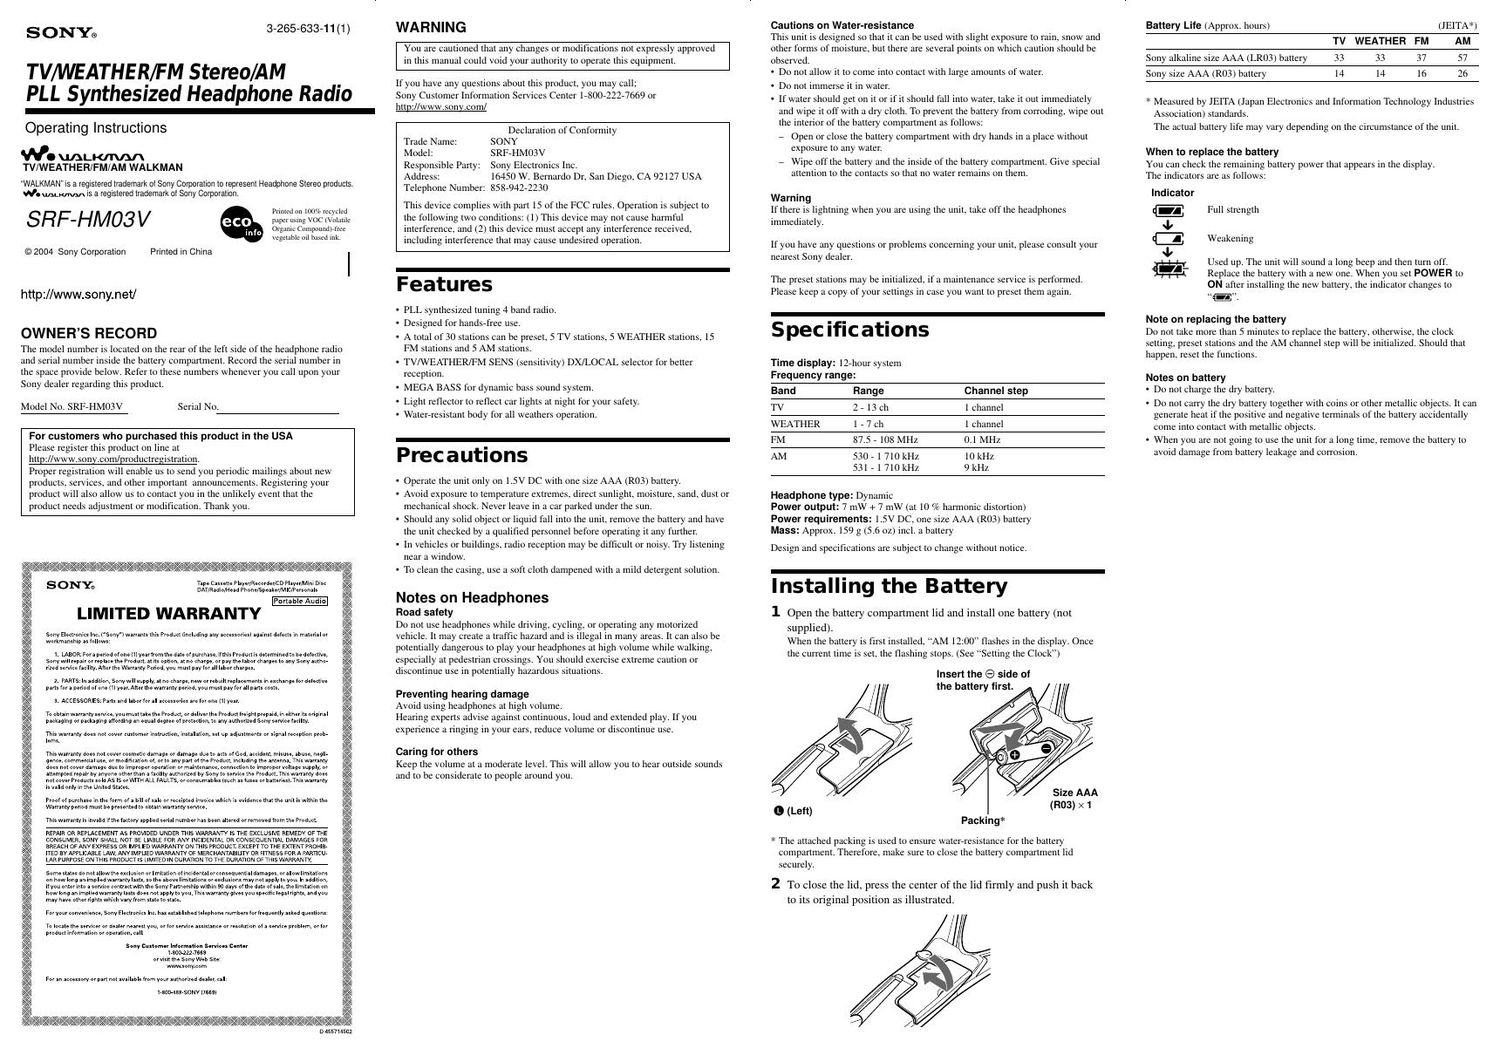
S ONYQ 3-265-633-1 1 (1)

TV/WEATHER/FM Stereo/AM
PLL Synthesized Headphone Radio

Operating Instructions

w. \mLW
TV/WEATH E R/FM/AM WALKMAN

"WALKMAN" is a registered trademark ol Sony Corporation In represent Headphone Slereo products.
.mtm is a registered trademark oi Sony Corporation,

SRF-HM03V

© 2004 Sony Corporallorl

Rental in. HIV/r rmytlcd
pupa Mung vac ivinuule
argued c lpotlndi tree
rugeluhlc oil based Ink

Printed in China I

http://www.sony.net/

OWNERS RECORD

The model number is located on the rear ofthe left side of the headphone radio
and serial number inside the battery compartment. Record the serial number in
the space provide below, Refer to these numbers whenever you call upon your
Sony dealer regarding this product.

Model No, SRFVHMOSV Serial No.

For customers who purchased this product in the USA

Please register this product on line at

htrp. lwww orly.coln/productreg slmtlon.

Proper registration will enable us to send you periodic mailings about new
products. seniices. and other important announcements. Registering your
product will also allow us to contact you in the unlikely event that the
product needs adjustment or modification. Thank you.

ripe CaueIle PlavevRecovdeF/CD rloyernnirn one
DAT/Radlu/Hnd Phone/Splakar/MlC/Pavsonals

LIMITED WARRANTY

SonyElzclvonicx in r sony lwununuinis Product lineluoinc anyamonesl against detect, in material or
werrmnsnip is iollowr

i LABOR For-periodMarie(livelvmmthztlntedlommnn.Nthquodliaistlaterminedlobedetznive,
Sonywill reooirorieelscein. mover, it 5 option, at monomer" paying labor :hargeslu any Sonvauthu'
rind romeo lacrlify Anorrnowansniv pcnod you nurtpay iorall looorcnarorr

z PAWS lnzddnlun $nnywrll$upply,arnushlrge neworrebuiltreoloeernenirinerononoeluroeteouye
Darts ior. oonod oiom: iii year Aluvumwarunly ocnoovou must payror all parts con:

3 ACCESSDRiES ammo laooriersll secesyonessreior one in year

Toobmirlwarnnlvnrviceiyw musiomnevrodrrcrordeliwrrrneFoouotrerempremio, inclinerur original
worsen; or worming «using on eouoloeoeeoteroieorronno .nyauinenren sonyseoioeoeiluy

inn waviamv does not covercustomu inrrniciion, lnxullntiunr set up Idluumem or signal rcCEDIinn woo
lent:

This WIHI'IW Gm not cover coxmuic trim-m or darn-cc dire to am or God, accident, rnirwe, abuse, n l7
ounce, ounnnemisl use, or inoriinosnon at into my psri elite product inelonineiue .ntenn. rrnrwon.
door not cover damage due) nnoroocr operation or inaniionsnro, connccrlunm .niurooor Velma: runolv or
attempted WWW by anyone othzrmm a tuciluv authorized by sony to sen/Rx me Product nus wuvvlnly don
noioevei PrudumxsoldAS is urWlTH ALL was,eroensornsolesisuon.srusesorbsiienen miswononfy
ir valid only in tho united States

gruororpuronose in in. ionn or. bill oi all or rammed invoioewtnon is mdencelhztlhe uni iswunin in,
Wavvzlllv period niusi be presented to obtain warranlymrvio:

rnirwsnonfy isinyslio nmelaeiriny applied renol numbavhisbeen ilimo or removed noniin. mood

REPAIR OR newcrtnsm As PROVlDED unorn THlS WARRANW is THE rxctuslvr REMEDY or THE
CONSUMER sow SHALL um GE UABLE mg AW iNCiDENTAL on cousrootryrlat DAMAGES mg
BREACN or ANY EXPRESS on lMPLlED WARRANTV am this Pnooucr ExcEPrTo TNE EXTENT FRDMEV
lrro BY AFFUCAELE LAW, atvv lMFUED WARRANW or Mencmnraaluw on FiYNESs FOR a mom
LAR wages; 0N VHlS vacuum is LlMlIED lN buiwlou to we DURAHDN o: THlS WARRANW

some rotesoo notallovvine exclusion oriirniiriionotinciiierml oi wanuemialdamages,ovnllawlimitltions
on noolone on implieawononivlsassoineseowlnnimiiens orerolusionr my noiseolyioyou in molten,
itvoii cntcvintoz serviceconvact wilhthc sony Fannmshipwithinsfldays otthudatcolsaleJhc limitation on
now long an implied wannrilv lmnrioer notIPPlY to you. this mvvflmywvex you specific legal nghrx, and you
may have oiner nonir which my tiern state to stare

Fowouvconvenience. sonyrlroronicr inc nnzrurolisnedielcpnona numbers tor tiequenilyasxroouerrionr

To locate inc rorvicsr or dealer llsamsr you, or to. some: assistance or mmluttun oi a service Dlohlcm or tor
Product intorrnrtion proper-Klan, call

sorry Customer informnon Suvlns Cantu
rowan rats

or will the sony Web site
may rony Loni

rerun snowy or part not available worn youuuinoroen dealer, call

lacrosse sow nasal

u tssri out

WARNING

You are cautioned that any changes or modifications not expressly approved
in this manual could void your authority to operate this equipment.

If you have any questions about this product. you may call:
Sony Customer lnforination Services Center 17800722277669 or
llttp /ww nycom/

Declaration of Conformity
Trade Name: SONY
Model: SRl-tHMosv
Responsible Party: Sony Electronics Inc.
Address: 16450 W. Bernardo Dr, San Diego. CA 92127 USA
Telephone Number: 858794272230

This device complies with part 15 of the FCC rules. Operation is subject to
the following two conditions: (1) This device may not cause harmful
interference. and (2) this device must accept any interference received,
including interference that may cause undesired operation,

Features

PLL synthesized tuning 4 band radio.
Designed for handset'ree use.

A total of 30 stations can be preset. 5 TV stations, 5 WEATHER stations. 15
FM stations and 5 AM stations,

TV/WEATHER/FM SENS (sensitivity) DX/LOCAL selector for better
reception.

MEGA BASS for dynamic bass sound system

Light reflector to reflect car lights at night for your safety.

WaterereSistallt body for all weathers operation.

Precautions

Operate the unit only on 1.5v DC with one size AAA (R03) battery.
Avoid exposure to temperature extremes. direct sunlight moisture. sand, dust or
mechanical shock. Never leave in a car parked under the sun.

Should any solid object or liquid fall into the unit, remove the battery and have
the unit checked by a qualified personnel before operating it any further.

in vehicles or buildings. radio reception may be difficult or noisy. Try listening
near a window.

To clean the casing. use a soft cloth dampened with a mild detergent solution.

Notes on Headphones

Road safety

Do not use headphones while driving. cycling. or operating any motorized
vehicle. [I nlay creme a traffic hazard and is illegal in many areas, [I can also be
potentially dangerous to play your headphones at high volume while walking,
especially at pedestrian crossings. You should exercise extreme caution or
discontinue use in potentially hazardous situations.

Preventing hearing damage

Avoid using headphones at high volume.

Hearing experts advise against continuous, loud and extended play. If you
experience a ringing in your ears, reduce volume or discontinue use.

Caring tor others
Keep the volume at a moderate level. This will allow you to hear outside sounds
and to be considerate to people around you.

Cautions on Water-resistance

This unit is designed so that it can be used with slight exposure to rain, snow and

other forms of moislure, but there are Several points on which caution Should be

observed.

- Do not allow it to come into Contact with large amounts of water.

- Do not immerse it in water.

- If water should gel on it or if it should fall into water, take it out immediately
and wipe it off with a dry cloth. To prevent the battery from corroding, wipe out
the interior of the battery compartment as follows:

7 open or close the battery conipartmeut with dry hands in a place without
exposure to any water.

7 Wipe off the battery and the inside of the battery compartment. Give special
attention to the contacts so that no water remains on them.

Warning
lfthere is lightning when you are using the unit. take off the headphones
immediately.

if you have any questions or problems concerning your unit, please consult your
nearest Sony dealer

The preset stations may be initialized. if a maintenance service is performed.
Please keep a copy of your settings in case you want to preset them again.

SpeCIflcations

Time display: lzehour system
Frequency range:

Band Flange Channel step

TV 2 , 13 ch 1 channel

WEATHER l , 7 ch 1 channel

FM 87.5 , 108 MHZ 0.] MHz

AM 53071710kHz 10 kHz
53ll710kHZ 9kHz

Headphone type: Dynamic

Power output: 7 mW + 7 mW (at 10 % harmonic distortion)
Power requirements: 1.5V DC, one size AAA (R03) battery
Mass: Approx. 159 g (5.6 oz) incl, a battery

Design and specifications are subject to change without notice.

Installing the Battery

1 Open the battery companment lid and install one battery (not
Supplied).
When the battery is first installed. AM 12:00" flashes in the display, Once
the ciirreut time is set, the flashing stops. (See Setting the Clock")

Insert the (9 side of
the battery Iirst.

/ Size AAA

9 (Left) (R03) ><1

Packing*

* The attached packing is used to ensure waterereSiStnnce for the battery
compartment Therefore. make sure to close the battery compartment lid
securely,

2 To close the lid, press the center of the lid firmly and push it back
to its original position as illustrated.

Battery Lite (Approx. hours) (JEITA*)
TV WEATH ER FM AM

Sony alkaline size AAA (LROS) battery 33 33 37 57

Sony size AAA (R03) battery l4 14 16 26

f Measured by JEITA (Japan Electronics and information Technology industries
Association) standards.
The actual battery life may vary depending on the circumstance of the unit.

When to replace the battery
You can check the remaining battery power that appears in the display.
The indicators are as follows:

Indicator

Eull strength

Weakenin g

Used up. The unit will sound a long beep and then turn off.
Replace the battery with a new one. When you set POWER to
ON after installing the new battery. the indicator changes In

Note on replacing the battery

Do not take more than 5 minutes to replace the battery, otherwise. the clock
Setting. preset stations and the AM channel step will be initialized. Should that
happen, reset the functions.

Notes on battery

- Do not charge the dry battery.

- Do not carry the dry battery together with coins or other metallic objects. it can
generate heat if the positive and negative terminals of the battery accidentally
come into Contact with metallic objects.

When you are not going to use the unit for a long time. remove the battery to
avoid damage from battery leakage and corrosion.

Page 2

0 (Left)

POWER ON/OFF

Light reflector (L)
This retlector
reflects car lights
at night tor your
satety.

Driver Unit

* There is a tactile dot beside volume to show the
direction to turn up the volume.
*2 The TUNE + button has a tactile dot.

Battery
compartment lid
0 (Right)

- TUNE 152/-

TV/WB/FM SENS

DX/LOCAL
VOL

Light reflector (R) -

BAND -
MEGA BASS/CLOCK -

MODE
ENTER

PHESETI III
'13 MB 'L
TV WE'ATH'ER
FM I It.

tilt 13-0.-

Setting the Clock

The clock time display of this unit is a erhour system,

When the battery is first installed, AM 12:00" flashes in the display.

1 Set POWER to OFF to turn off the power.

2 Hold down MEGA BASS/CLOCK for more than 2 seconds
until AM 12" starts flashing.

3 Press TUNE + or - to adjust the hour, then press MEGA BASS]
CLOCK.
if you hold down TUNE + or -. the digit changes rapidly.
AM 12:00 '4: midnight. "PM 12:00 "= noon.

4 Repeat step 3 above to adjust the minute.

starts flashing and the clock stai1s operating.
To set the current time exactly to the second, adjusl liie ntiuute and then press
MEGA BASS/CLOCK to synchronize with a tune signal (such as the

telephone time signal).

Note
If you do iioi press TUNE + or -, or MEGA BASS/CLOCK within otie minute.
the clock setting mode will be canceled.

Wearing the Headphone
Radio
(See fig I)

1 Wear the 0 side driver unit iii your left ear and the 9 side in your
right ear as illustrated.
2 Adjust the position of the driver units for a comfonable fit.

Playing the Radio
- Manual Tuning

1 Set POWER to ON to turn on the power.
2 If PRESET is displayed, press MODE so that "PRESET"
disappears.

Pressing MODE will switch over between manual tuning mode and preset
tuning mode,
3 Press BAND to select the band.

Each press changes the band as follows:

EAM -> M -> TV -> WEATHER]

4 Press TUNE + or - to select the desired frequency.
If yott hold down TUNE + or -. the frequency or channel changes rapidly.
When the frequency matches the broadcast frequency. the broadcast will be
received.

5 Adjust the volume using VOL.
To turn off the radio. set POWER to OFF,

Improving Radio Reception

TV/WEATHER/FM: Set TV/WB/FM SENS to LOCAL ifinterfereiice is
prevalent when radio wave intensity is dramatically stronger,

Under normal conditions. set to DX.

AM: Move around to obtain better reception.

Obtaining Powerful Bass
Sound

Press MEGA BASS/CLOCK.
"MB" appears in the display.

Iflhe sound is distorted, or if you want to reduce the bass tone. press MEGA
BASS/CLOCK again to tutti off this function.
The MEGA BASS setting is iiOI canceled even if the radio is turned off.

Changing AM Channel Step

The AM channel step differs depending on areas. The channel step of this unit is
factoryrset to 10 kHz. Change the seltings as shown below to be able to listen to
the radio.

Area Channel step
Norlh and Solith American countries 10 kHz

Other countries 9 kHz

Note

When the AM channel step is changed, only the preset stations on the AM band
will be initialized.

1 Set POWER to OFF to turn off the power.

2 While holding down MODE, hold down TUNE + or - for more
than 5 seconds.
The channel step will change and "9" kHz (or 10" kHz) will flash for 3
seconds in the display.
If you proceed to step 2 again. the channel step changes again.

Presetting your Favorite

Stations
- Preset Tuning

You can preset up to 5 stations each tot rv. WEATHER and AM. and 15
stations for FM. Also. you can delete the preset station whether it is factoryrsel or
preset by yourself,

Presetting a Station

1 Follow steps 1 to 5 in Playing the Radio" aiid manually tune into
the station you wish to preset.

2 Hold down ENTER until the preset number flashes.
If there is a preset number that has no preset station. that preset number
flashes.
When all the presel nlimbers are set to cerlain stations (factoryrset), l"
flashes and PRESET appears.

3 Press TUNE + or - to select the number you wish to preset, then
press E NTE R.
When you select the preset number using TUNE + or-, PRESET appears
ifihat number has a preset station, If it has no preset station. only the number
flashes and PRESET does not appear.
When you press ENTER, the selected preset number lights up in the display,

Example: Display window when you preset FM 90.0 MHz in preset
number 2.

To preset another station. repeat these steps.
To change the preset station, preset a new station. The previous station will
be canceled.

Note
If yott do not press TUNE + or -. or ENTER within one minute. the preset
tuning mode will be canceled.

Tuning in to a Preset Station

1 Set POWER to ON to turn on the power.
2 Press MODE so that "PRESET" and preset number appear.
3 Select the band with BAND.
4 Press TUNE + or - to select the desired preset number.
5 Adjust the volume using VOL.
To turn off the radio, set POWER to OFF.
Note

It you hold down MODE for more titan 2 seconds. the ttntt enters the preset
station deleting mode. Press MODE again to retttrn to the previous tnode.

Deleting a Preset Station

1 Follow steps 1 and 2 in Tuning in to a Preset Station.

2 Select the band with BAND.

3 Press TUNE + or - to select the preset number to be deleted.

4 Hold down MODE for more than 2 seconds until PRESET,
"dEL" and the preset number flash.

preset number to
be deleted

5 While the letters and the preset number are flashing, press
E NT E R.
The station set to the preset iillinber just before the deleted station Will be
displayed.
To delete other stations. repeat steps 2 to 5,
If all the preset stations are deleted. PRESET appears in the display,

To cancel deleting. press MODE while PRESET, dEL" and the preset number
are flashing.