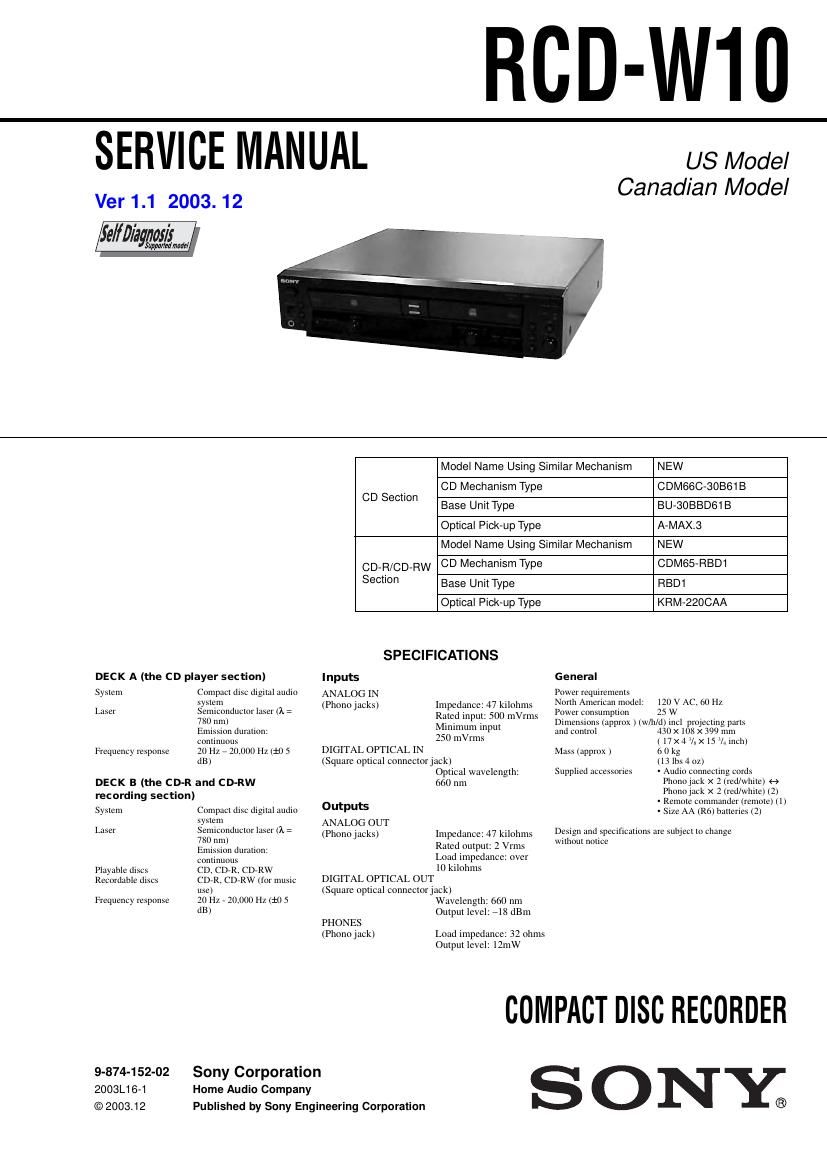
Sony RCD W10 Service Manual

This is the 100 pages manual for Sony RCD W10 Service Manual.
Read or download the pdf for free. If you want to contribute, please mail your pdfs to info@audioservicemanuals.com.

Page: 1 / 100
left right
Sony RCD W10 Service Manual

Extracted text from Sony RCD W10 Service Manual (Ocr-read)


Page 1

2 This appliance is classified as a CLASS 1 LASER product. The CLASS 1 LASER PRODUCT MARKING is located on the rear exterior. T he following caution label is located inside the apparatus. Laser component in this product is capable of emitting radiation exceeding the limit for Class 1. CAUTION Use of controls or adjustments or performance of procedures other than those specified herein may result in hazardous radiation exposure. Notes on chip component replacement - Never reuse a disconnected chip component. - Notice that the minus side of a tantalum capacitor may be damaged by heat. Flexible Circuit Board Repairing - Keep the temperature of soldering iron around 270หšC during repairing. - Do not touch the soldering iron on the same conductor of the circuit board (within 3 times). - Be careful not to apply force on the conductor when soldering or unsoldering. RCD-W10 SAFETY-RELATED COMPONENT WARNING!! COMPONENTS IDENTIFIED BY MARK 0 OR DOTTED LINE WITH MARK 0 ON THE SCHEMATIC DIAGRAMS AND IN THE PARTS LIST ARE CRITICAL TO SAFE OPERATION. REPLACE THESE COMPONENTS WITH SONY PARTS WHOSE PART NUMBERS APPEAR AS SHOWN IN THIS MANUAL OR IN SUPPLEMENTS PUBLISHED BY SONY. ATTENTION AU COMPOSANT AYANT RAPPORT ร- LA Sร‰CURITร‰! LES COMPOSANTS IDENTIFร‰S PAR UNE MARQUE 0 SUR LES DIAGRAMMES SCHร‰MATIQUES ET LA LISTE DES PIรˆCES SONT CRITIQUES POUR LA Sร‰CURITร‰ DE FONCTIONNEMENT. NE REMPLACER CES COMPOSANTS QUE PAR DES PIรˆSES SONY DONT LES NUMร‰ROS SONT DONNร‰S DANS CE MANUEL OU D ANS LES SUPPร‰MENTS PUBLIร‰S PAR SONY. After correcting the original service problem, perform the following safety checks before releasing the set to the customer: Check the antenna terminals, metal trim, metallized knobs, screws, and all other exposed metal parts for AC leakage. Check leakage as described below. LEAKAGE T he AC leakage from any exposed metal part to earth ground and from all exposed metal parts to any exposed metal part having a return to chassis, must not exceed 0.5 mA (500 microamperes). Leakage current can be measured by any one of three methods. 1. A commercial leakage tester, such as the Simpson 229 or RCA WT-540A. Follow the manufacturers instructions to use these instruments. 2. A battery-operated AC milliammeter. The Data Precision 245 digital multimeter is suitable for this job. 3. Measuring the voltage drop across a resistor by means of a VOM or battery-operated AC voltmeter. The limit indication is 0.75 V, so analog meters must have an accurate low-voltage scale. The Simpson 250 and Sanwa SH-63Trd are examples of a passive VOM that is suitable. Nearly all battery operated digital multimeters that have a 2V AC range are suitable. (See Fig. A) SAFETY CHECK-OUT To Exposed Metal Par ts on Set 0.15 ยต F 1.5 k-„ฆ AC V oltmeter (0.75 V) Earth Ground Fig. A. Using an AC voltmeter to check AC leakage. MODEL IDENTIFICATION - BACK PANEL - Parts No. PA R TS No. MODEL 4-238-401-5 ฯ- 4-238-401-6 ฯ- US Canadian

Page 2

3 RCD-W10 TABLE OF CONTENTS 1. SERVICING NOTE ยทยทยทยทยทยทยทยทยทยทยทยทยทยทยทยทยทยท\ ยทยทยทยทยทยทยทยทยทยทยทยทยทยทยทยทยทยท\ ยทยทยทยทยทยทยทยทยทยทยทยทยทยทยทยทยท 4 2. GENERALยทยทยทยทยทยทยทยทยทยทยทยทยทยทยทยทยทยท\ ยทยทยทยทยทยทยทยทยทยทยทยทยทยทยทยทยทยท\ ยทยทยทยทยทยทยทยทยทยทยทยทยทยทยทยทยทยท\ ยทยทยทยทยทยทยทยทยทยทยทยทยท 5 3. DISASSEMBLY ยทยทยทยทยทยทยทยทยทยทยทยทยทยทยทยทยทยท\ ยทยทยทยทยทยทยทยทยทยทยทยทยทยทยทยทยทยท\ ยทยทยทยทยทยทยทยทยทยทยทยทยทยทยทยทยทยท\ ยทยทยทยท 6 3-1. Case (409538) ยทยทยทยทยทยทยทยทยทยทยทยทยทยทยทยทยทยท\ ยทยทยทยทยทยทยทยทยทยทยทยทยทยทยทยทยทยท\ ยทยทยทยทยทยทยทยทยทยทยทยทยทยทยทยทยทยท\ ยทยทยทยทยทยทยทยทยท 7 3-2. Loading Panel (1CD) ยทยทยทยทยทยทยทยทยทยทยทยทยทยทยทยทยทยท\ ยทยทยทยทยทยทยทยทยทยทยทยทยทยทยทยทยทยท\ ยทยทยทยทยทยทยทยทยทยทยทยทยทยทยทยท 7 3-3. Loading Panel (CDR) ยทยทยทยทยทยทยทยทยทยทยทยทยทยทยทยทยทยท\ ยทยทยทยทยทยทยทยทยทยทยทยทยทยทยทยทยทยท\ ยทยทยทยทยทยทยทยทยทยทยทยทยทยทยท 8 3-4. Front Panel Section ยทยทยทยทยทยทยทยทยทยทยทยทยทยทยทยทยทยท\ ยทยทยทยทยทยทยทยทยทยทยทยทยทยทยทยทยทยท\ ยทยทยทยทยทยทยทยทยทยทยทยทยทยทยทยทยทยท\ ยท 8 3-5. DISPLAY Board ยทยทยทยทยทยทยทยทยทยทยทยทยทยทยทยทยทยท\ ยทยทยทยทยทยทยทยทยทยทยทยทยทยทยทยทยทยท\ ยทยทยทยทยทยทยทยทยทยทยทยทยทยทยทยทยทยท\ ยทยทยทยทยท 9 3-6. CDR Mechanism Deck (CDM65-RBD1) ยทยทยทยทยทยทยทยทยทยทยทยทยทยทยทยทยทยท\ ยทยทยท 9 3-7. Tray ยทยทยทยทยทยทยทยทยทยทยทยทยทยทยทยทยทยท\ ยทยทยทยทยทยทยทยทยทยทยทยทยทยทยทยทยทยท\ ยทยทยทยทยทยทยทยทยทยทยทยทยทยทยทยทยทยท\ ยทยทยทยทยทยทยทยทยทยทยทยทยทยทยทยทยทยท\ ยทยทยทยทยท 10 3-8. CDR Board ยทยทยทยทยทยทยทยทยทยทยทยทยทยทยทยทยทยท\ ยทยทยทยทยทยทยทยทยทยทยทยทยทยทยทยทยทยท\ ยทยทยทยทยทยทยทยทยทยทยทยทยทยทยทยทยทยท\ ยทยทยทยทยทยทยทยทยทยทยท 10 3-9. Holder (MG) Sub Assy, Dust Cover ยทยทยทยทยทยทยทยทยทยทยทยทยทยทยทยทยทยท\ ยทยทยทยทยทยทยทยทยท 11 3-10. Optical Pick-Up (KRM-220CAA) ยทยทยทยทยทยทยทยทยทยทยทยทยทยทยทยทยทยท\ ยทยทยทยทยทยทยทยทยทยทยทยท 11 3-11. Motor Assy (Loading)(M201) ยทยทยทยทยทยทยทยทยทยทยทยทยทยทยทยทยทยท\ ยทยทยทยทยทยทยทยทยทยทยทยทยทยทยทยทยทยท\ 12 3-12. Cam (CH) ยทยทยทยทยทยทยทยทยทยทยทยทยทยทยทยทยทยท\ ยทยทยทยทยทยทยทยทยทยทยทยทยทยทยทยทยทยท\ ยทยทยทยทยทยทยทยทยทยทยทยทยทยทยทยทยทยท\ ยทยทยทยทยทยทยทยทยทยทยทยทยทยท 12 3-13. CD Mechanism Deck (CDM66C-30B61B) ยทยทยทยทยทยทยทยทยทยทยทยทยทยทยทยท 13 3-14. Tray (66) ยทยทยทยทยทยทยทยทยทยทยทยทยทยทยทยทยทยท\ ยทยทยทยทยทยทยทยทยทยทยทยทยทยทยทยทยทยท\ ยทยทยทยทยทยทยทยทยทยทยทยทยทยทยทยทยทยท\ ยทยทยทยทยทยทยทยทยทยทยทยทยทยทยท 14 3-15. BD Board ยทยทยทยทยทยทยทยทยทยทยทยทยทยทยทยทยทยท\ ยทยทยทยทยทยทยทยทยทยทยทยทยทยทยทยทยทยท\ ยทยทยทยทยทยทยทยทยทยทยทยทยทยทยทยทยทยท\ ยทยทยทยทยทยทยทยทยทยทยทยทยทยท 15 3-16. Optical Block Section ยทยทยทยทยทยทยทยทยทยทยทยทยทยทยทยทยทยท\ ยทยทยทยทยทยทยทยทยทยทยทยทยทยทยทยทยทยท\ ยทยทยทยทยทยทยทยทยทยทยทยทยท 15 3-17. MAIN Board ยทยทยทยทยทยทยทยทยทยทยทยทยทยทยทยทยทยท\ ยทยทยทยทยทยทยทยทยทยทยทยทยทยทยทยทยทยท\ ยทยทยทยทยทยทยทยทยทยทยทยทยทยทยทยทยทยท\ ยทยทยทยทยทยทยทยทยท 16 4. TEST MODE ยทยทยทยทยทยทยทยทยทยทยทยทยทยทยทยทยทยท\ ยทยทยทยทยทยทยทยทยทยทยทยทยทยทยทยทยทยท\ ยทยทยทยทยทยทยทยทยทยทยทยทยทยทยทยทยทยท\ ยทยทยทยทยทยทยทยทยทยทยทยทยทยท 18 5. ELECTRICAL ADJUSTMENTS ยทยทยทยทยทยทยทยทยทยทยทยทยทยทยทยทยทยท\ ยทยทยทยทยทยทยทยทยทยทยทยทยท 21 CD SECTION ............................................................. 21 CD-R/RW SECTION .................................................. 22 6. DIAGRAMS ยทยทยทยทยทยทยทยทยทยทยทยทยทยทยทยทยทยท\ ยทยทยทยทยทยทยทยทยทยทยทยทยทยทยทยทยทยท\ ยทยทยทยทยทยทยทยทยทยทยทยทยทยทยทยทยทยท\ ยทยทยทยทยทยทยทยทยทยทยทยทยทยทยทยท 53 6-1. Block Diagrams -“ CD-R Section -“ ยทยทยทยทยทยทยทยทยทยทยทยทยทยทยทยทยทยท\ ยทยทยทยทยทยทยทยทยท 54 -“ CD Section -“ ยทยทยทยทยทยทยทยทยทยทยทยทยทยทยทยทยทยท\ ยทยทยทยทยทยทยทยทยทยทยทยทยท 55 -“ POWER/DISPLAY Section -“ ยทยทยทยทยทยท 56 6-2. Printed Wiring Board -“ BD Section -“ ยทยทยทยทยทยทยทยทยทยทยทยทยทยทยทยทยทยท\ ยทยทยทยทยทยท 57 6-3. Schematic Diagram -“ BD Section -“ ยทยทยทยทยทยทยทยทยทยทยทยทยทยทยทยทยทยท\ ยทยทยทยทยทยทยทยทยท 58 6-4. Printed Wiring Board -“ CD-R Section (Side A) -“ ยทยทยทยทยทยท 59 6-5. Printed Wiring Board -“ CD-R Section (Side B) -“ ยทยทยทยทยทยท 60 6-6. Schematic Diagram -“ CD-R Section (1/4) -“ ยทยทยทยทยทยทยทยทยทยทยทยทยทยท 61 6-7. Schematic Diagram -“ CD-R Section (2/4) -“ ยทยทยทยทยทยทยทยทยทยทยทยทยทยท 62 6-8. Schematic Diagram -“ CD-R Section (3/4) -“ ยทยทยทยทยทยทยทยทยทยทยทยทยทยท 63 6-9. Schematic Diagram -“ CD-R Section (4/4) -“ ยทยทยทยทยทยทยทยทยทยทยทยทยทยท 64 6-10. Printed Wiring Board -“ MAIN Section (Side A) -“ ยทยทยทยทยท 65 6-11. Printed Wiring Board -“ MAIN Section (Side B) -“ ยทยทยทยทยท 66 6-12. Schematic Diagram -“ MAIN Section (1/2) -“ ยทยทยทยทยทยทยทยทยทยทยทยทยท 67 6-13. Schematic Diagram -“ MAIN Section (2/2) -“ ยทยทยทยทยทยทยทยทยทยทยทยทยท 68 6-14. Printed Wiring Board -“ DISPLAY Section -“ ยทยทยทยทยทยทยทยทยทยทยทยทยท 69 6-15. Schematic Diagram -“ DISPLAY Section -“ ยทยทยทยทยทยทยทยทยทยทยทยทยทยทยทยท 70 6-16. IC Block Diagrams ยทยทยทยทยทยทยทยทยทยทยทยทยทยทยทยทยทยท\ ยทยทยทยทยทยทยทยทยทยทยทยทยทยทยทยทยทยท\ ยทยทยทยทยทยทยทยทยทยทยทยทยทยทยทยทยท 71 6-17. IC Pin Function Description ยทยทยทยทยทยทยทยทยทยทยทยทยทยทยทยทยทยท\ ยทยทยทยทยทยทยทยทยทยทยทยทยทยทยทยทยทยท\ ยทยทยท 74 7. EXPLODED VIEWS ยทยทยทยทยทยทยทยทยทยทยทยทยทยทยทยทยทยท\ ยทยทยทยทยทยทยทยทยทยทยทยทยทยทยทยทยทยท\ ยทยทยทยทยทยทยทยทยทยทยทยทยทยทยทยทยทยท\ 84 7-1. Case Section ยทยทยทยทยทยทยทยทยทยทยทยทยทยทยทยทยทยท\ ยทยทยทยทยทยทยทยทยทยทยทยทยทยทยทยทยทยท\ ยทยทยทยทยทยทยทยทยทยทยทยทยทยทยทยทยทยท\ ยทยทยทยทยทยทยทยทยทยทยทยท 84 7-2. Front Panel Section ยทยทยทยทยทยทยทยทยทยทยทยทยทยทยทยทยทยท\ ยทยทยทยทยทยทยทยทยทยทยทยทยทยทยทยทยทยท\ ยทยทยทยทยทยทยทยทยทยทยทยทยทยทยทยทยทยท\ ยท 85 7-3. Chassis Section ยทยทยทยทยทยทยทยทยทยทยทยทยทยทยทยทยทยท\ ยทยทยทยทยทยทยทยทยทยทยทยทยทยทยทยทยทยท\ ยทยทยทยทยทยทยทยทยทยทยทยทยทยทยทยทยทยท\ ยทยทยทยทยทยทยท 86 7-4. CDR Mechanism Deck Section (CDM65-RBD1) ยทยทยทยทยทยทยทยท 87 7-5. CD Mechanism Deck Section (CDM66C-30B61B) ยทยทยทยทยท 88 7-6. Base Unit Section (BU-30BBD61B) ยทยทยทยทยทยทยทยทยทยทยทยทยทยทยทยทยทยท\ ยทยทยทยทยทยทยทยทยทยท 89 8. ELECTRICAL PARTS LIST ยทยทยทยทยทยทยทยทยทยทยทยทยทยทยทยทยทยท\ ยทยทยทยทยทยทยทยทยทยทยทยทยทยทยทยทยทยท\ ยทยทยท 90 Unleaded solder Boards requiring use of unleaded solder are printed with the lead- free mark (LF) indicating the solder contains no lead. (Caution: Some printed circuit boards may not come printed with the lead free mark due to their particular size.) : LEAD FREE MARK Unleaded solder has the following characteristics. - Unleaded solder melts at a temperature about 40 ยฐC higher than ordinary solder. Ordinary soldering irons can be used but the iron tip has to be applied to the solder joint for a slightly longer time. Soldering irons using a temperature regulator should be set to about 350 ยฐC. Caution: The printed pattern (copper foil) may peel away if the heated tip is applied for too long, so be careful! - Strong viscosity Unleaded solder is more viscous (sticky, less prone to flow) than ordinary solder so use caution not to let solder bridges occur such as on IC pins, etc. - Usable with ordinary solder It is best to use only unleaded solder but unleaded solder may also be added to ordinary solder.

Page 75

76 RCD-W10 - IC101 AK8567 S/H & MATRIX, MPX (CDR Board) Pin No. 1 2 3 4 5 6 7 8 9 10 11 12 13 14 15 16 17 18 19 20 21 22 23 24 25 26 27 28 29 30 31 32 33 34 35 36 37 38 39 40 41 42 43 44 45 46 47 48 49 50 I/O - O O O O O O I O O O I I/O O O - I I I/O O I I I/O O - - O I I O O O O O - I I I O O O O O O O O O I I - Pin Name A VDD3 BCENT PHBETA BHBETA PHBTC BHBTC MPP TEIN TE FE SBAD TZCLVL VREF A GND1 BIAS VSS FVREF FPDO RREF VRDC VRDCN VRDCN2 WREF WDAO AVDD2 AV SS2 VWDC VWDCN2 VWDCN ATFM A GC1C AGC2C AGC3C AGND2 VSS SGAINDN GAINUP A GCON ATFG XTOR XTAND TZC RECD2 RECD1 RC DFCT MIRR MCLK1 MCLK2 D VSS Description Power supply (analog) Center signal output ฮฒ signal top level signal output ฮฒ signal bottom level signal output Extrenal capacitor teminal for PHBETA droop rate setting Extrenal capacitor teminal for BHBETA droop rate setting Main push-pull signal output Not used (open) Tr acking signal processing input Tracking error signal output Focus error signal output SBAD signal output Not used (open) Tr acking zero cross comparate level input Decoupling teminal for internal reference voltage / internal reference voltage input terminal Decoupling teminal for internal reference voltage Bias resistor connection terminal BIAS = 4.7k -„ฆ Ground terminal (analog) APC reference voltage input terminal Laser monitor voltage input Power setting voltage input for read APC / internal DAC setting voltage output Read laser driver control signal output Read laser driver control amplifier (-) teminal Read laser driver time constant setting terminal Power setting voltage input for write APC / internal DAC setting voltage output Power setting internal DAC voltage output for write APC Not used (open) Power supply (analog) Ground terminal (analog) Write laser driver control signal output Write laser driver time constant setting terminal Write laser driver control amplifier (-) teminal Wobble signal output External capacitor terminal for AGC response speed setting External capacitor terminal for AGC response speed setting External capacitor terminal for AGC response speed setting Decoupling teminal for internal reference voltage Ground terminal (analog) Gain selection signal input CD-RW selection control signal input Wo bble AGC enable signal input H : AGC ON, L : AGC reset ATIP FG signal output (Wobble signal after formation of 2 values) Tr acking amplitude detection signal output Tracking failure detection signal output Tracking zero cross detection signal output Recorded block detection signal output 2 H : recorded block, \ L : unrecorded block Recorded block detection signal output 1 H : recorded block, \ L : unrecorded block RC signal output DFCT signal output MIRR signal output Main clock input 1 (sine wave input) 34.5744MHz Main clock input 2 (sine wave input) fixed at L Ground terminal (digital)