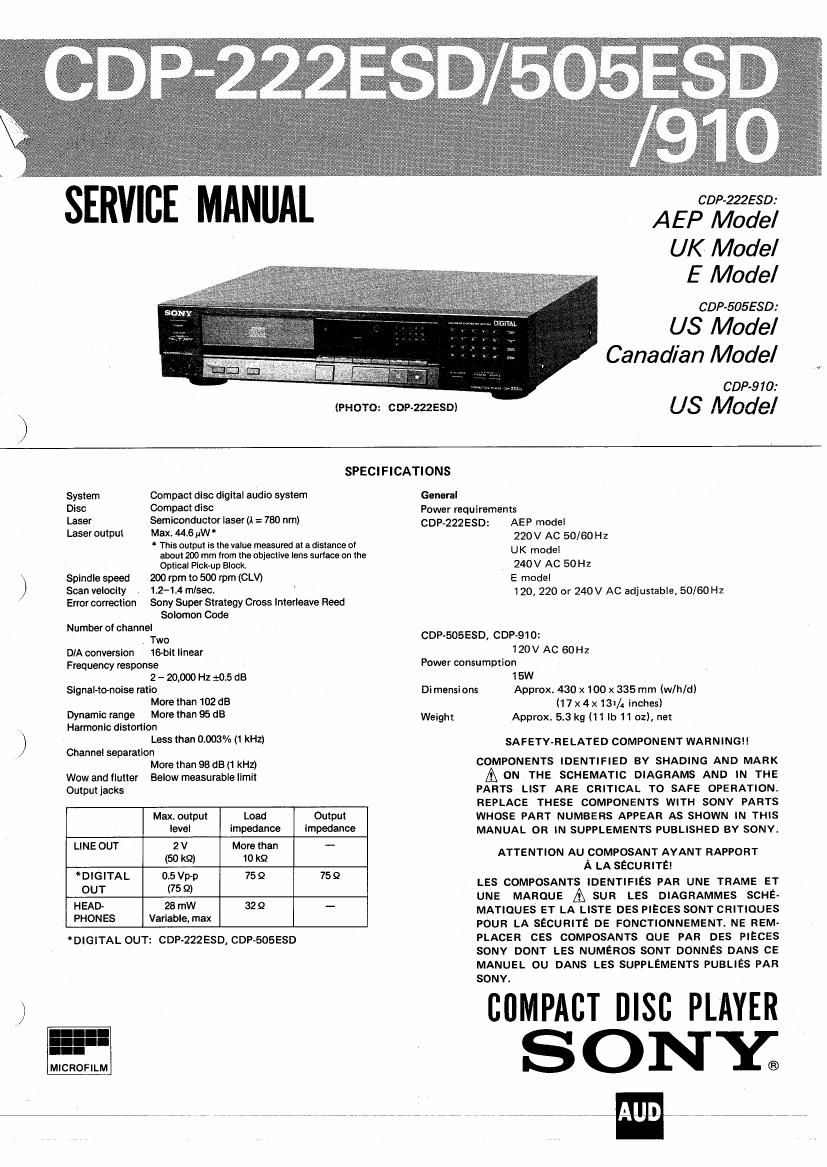
Sony CDP 910 Service Manual

This is the 27 pages manual for Sony CDP 910 Service Manual.
Read or download the pdf for free. If you want to contribute, please mail your pdfs to info@audioservicemanuals.com.

Page: 1 / 27
left right
Sony CDP 910 Service Manual

Extracted text from Sony CDP 910 Service Manual (Ocr-read)


Page 1

\v/

\_/

SERVICE MANUAL

(PHOTQ:

C DP-222 ESDI

GDP-222580:

AEP Model
UK Model
E Model

CDP-505ESD:

US Model
Canadian Model

GDP-910:

US Model

SPECIFICATIONS

System Compact disc digital audio system
Disc Compact disc

Laser Semiconductor laser (A = 780 nm)
Laser output Max. 446 yW

* This output is the value measured at a distance of
about 200 mm from the objective lens surlace on the
Optical Pick-up Block.
Spindle speed 200 rpm to 500 rpm (CLV)
Scan velocity 12-14 mlsect
Error correction Sony Super Strategy Cross lnterleave Reed
Solomon Code

Number of channel
. Two

D/A conversion 16bit linear
Frequency response

2 - 20,000 HZ :05 dB
Slgnal-to-noise ratio

More than 102 dB
Dynamic range More than 95 dB
Harmon ic distortion

Less than 0.006% (1 kHz)
Channel separation

More than 98 dB (1 kHz)
Wow and flutter Below measurable llmit
Output jacks
Max. output Load Output
ievei impedance impedance
LINE OUT 2 V More than -
(50 k9) 10 k9
DIGITAL 0.5Vp-p 759 759
OUT (75 9)
HEAD- 28 mW 32 Q --
PHONES Variable, max

*DIGITAL OUT: CDP-222ESD, CDP-SOSESD

MICROFILM

General
Power requirements
CDP»222ESD: AEP model
220V AC 50/60Hz
UK model
240V AC SOHZ
E model

120, 220 or 240V AC adjustable, 50/60Hz

CDP<505ESD, GDP-910:

1 20 V AC 60 Hz
Power consumption

15W

Dimensions Approx. 430 x 100 x 335 mm (wlh/dl
(17 x 4 x 131/. inches)
Weight Approx. 5.3 kg (11 lb 11 oz), net

SAFETY-RELATED COMPONENT WARNINGI!

COMPONENTS IDENTIFIED BY SHADING AND MARK

& ON THE SCHEMATIC DIAGRAMS AND IN THE
PARTS LIST ARE CRITICAL T0 SAFE OPERATION.
REPLACE THESE COMPONENTS WITH SONV PARTS
WHOSE PART NUMBERS APPEAR AS SHOWN IN THIS
MANUAL OR IN SUPPLEMENTS PUBLISHED BY SONV.

ATTENTION Au COMPOSANT AYANT RAPPORT
A LA SECURITE!

LEs COMPOSANTS IDENTIFIES PAR uNE TRAME ET
UNE MAROUE A sun LES DIAGRAMMES SCI-IE-
MATIoUEs ET LA LISTE DES PIECES SONTCRITIQUES
POUR LA SECURITE DE FONCTIONNEMENT. NE REM-
PLACER ces COMPOSANTS ouE PAR DES PIECES
SONY DONT LES NUMERos SONT DONNES DANS ce
MANUEL ou DANS LES SUPPLEMENTS PUBLIEs PAR
SONY.

CliMPACT nlsc PLAYER
SONY;

Page 2

tbaznssn/sosisn/mo

CONTENTS

Section Title Page
SPECIFICATIONS ..................... 1
GENERAL DESCRIPTION ............... 2
SAFETY CHECK-OUT (US model) ......... 2
PROTECTION OF EYES FROM LASER BEAM
DURING SERVICING ................. 3
LASER WARNING LABEL .............. 3
TROUBLE CHECKS ................... 4
NOTES ON HANDLING THE OPTICAL
BLOCK (KSS-lSiA) ................... 5
LOCATION OF CONTROLS ........... 7-8
SECTIONI DISASSEMBLY ........... 9*]0
SECTION2 ADJUSTMENTS .......... 11-13
e SEMICONDUCTOR LEAD LAYOUTS . . . . l4
0 CIRCUIT BOARD LAYOUT .......... 14
SECTION3 DIAGRAM

3-1. MOUNTING DIAGRAM ........ 15718

3-2. SCHEMATIC DIAGRAM ....... 19-21
SECTION4 EXPLODED VIEWS AND PARTS

LIST .................. 23-27
SECTION 5 ELECTRICAL PARTS
LIST .................. 28-32

GENERAL DESCRIPTION

Dlrect selection
You can play a desired selection simply by pressing the
corresponding numeric button (1-20).

Program play
You can play up to 20 selections in the desired order.
Selections can be programmed even after play begins.

Variety of playing modes
Disc, program, shuffle and repeat playing modes.

Large and sasy-to-read window display

Shows the elapsed playing time, the remaining time of the
selection being played, the remaining time of the whole disc
or remaining programmed selection numbers.

SAFETY CHECK-OUT (US Model)

After correcting the original service problem,
perform the following safety check before releasing
the set to the customer:

Check the antenna terminals, metal trim, metallized
knobs, screws, and all other exposed metal parts for
AC leakage. Check leakage as described below.

LEAKAGE TEST

The AC leakage from any exposed metal part to
earth ground and from all exposed metal parts to any
exposed metal part having a return to chassis, must
not exceed 0.5 mA (500 microampers). Leakage
current can be measured by any one of three
methods.

1. A commercial leakage tester, such as the
Simpson 229 or RCA WT-540A. Follow the
manufacturers instructions to use these instru-
ments.

2. A battery Precision 245 digital multimeter is suitable for
this job.

3. Measuring the voltage drop across a resistor by
means of a VOM or battery-operated AC volt-
meter The limit indication is 0.75 V, so
analog meters must have an accurate low-
voltage scale. The Simpson 250 and Sanwa
SH-63Trd are examples of a passive VOM that
is suitable. Nearly all battery operated digital
multimeters that have a 2 V AC range are
suitable. (See Fig. A)

To Exposed Metal
Part: on Set

/ AC
voltmeter

0.15M '[ g 1.5m
, (0.75 w
._l

T Earth Ground

Fig. A. Using an AC voltmeter to check AC leakage.

'1';

Page 9

SECTION 2
ADJUSTMENTS

REFERENCE

Focus/Tracking Gain Adjustment

ELECTRICAL ADJUSTMENTS

Focus Bias Adjustment E-F Balance Adjustment The following1
1. Perform adjustments in the order given.

This adjustment should be made after replacing
the Optical Pick-up Blockt

This adjustment should be made after replacing
the Optical Pick-up Block.

A frequency response analyzer is necessary in
order to perform this adjustment exactly.
However, this gain has a margine, so even if it is me: 51 a

2. Use YEDS-l disc unless otherwise indicated. T Simple Adjufl

3. Use the oscilloscope with more than IOMQ im-

pedancet Procedure: Procedure: oscilloscope slightly off, there is no problem. Therefore, this ad- Eggutgfngzii
oscilloscope 1 DC "99, justment is not recomended generally to be per- ment are 0;
{DC range} R formed the original _
1 main boar d Focus/tracking gains determine the pick-up follow-
mal. board l TP (TE! + up (vertical and horizontal) relative to mechanical Procedure:
r-'- ' c I noise and mechanical shock when the 2-axis device -
Tn (RF) °-|°+ TP (6ND) °_____L operate mam in
TP ND ~ ~ -
RF PLL F Ad' t/L k F (G I I- . _ However, as these reciprocate, the adjustment is at no (FEIO-
requency jus men oc requency 1 Connect the oscilloscope to the test pomts TP the point where both are satisfied.
Check 1. Connect oscilloscope to the test points TP (RF) (T-E) and TP (GND)- . . . t ,
and TP (GND) . 0 When gain 15 raised, the notse when the 2-ax1s TP (TEIO-i
Procedure: . 2. Ground TP (GND) to set an adjustment mode. device operates increases.
frequency counts! 2. Turn POWER switch on.
main board [- 3' Turn POWER SWItCh 011 0 When gain is lowered, it is more susceptible to 1 Keep the 55
TP IPLCK) O--O 3 Put the dlsc (YEDSJ) m and press D button. 4- Put the diSC (YEDS-l) in and press D button. mechanical shock and skipping occurs more easily. If the Eel
l . . cannot e
TP (6ND) 0-10___a 4- AdJUSt RV102 for an optimum waveform eye pat- 5 Adjust RV101 so that the traverse waveform is 0 When gain adjustment is off, the symptoms below the 2 axisdpe
tern, Optimum eye pattern means that shape 0 symmetrical above and below. appear.
~ can be clear] distin uished at the center f the 2- Insert the L
1- Ground St pomt TP (ASY)- waveform y g o 6. After adjustment, cancel the adjustment mode. button
2, Connect the frequency counter to the test points 6" Focus Tracking I
TP (PLCK) and TP(GND). RFsianaI waveform A Symptoms 3- Come the
3 Turn POWER SWitCh on. A = B o The time until music starts (GND)' >
4 Ad RV 3 - 5 becomes longer for STOP 4 Adjustment
. just 20 so that the reading on the fre- *DPLAY or automatic low low or high shown in tin

quency counter is 4.3218 MHz 1 30 kHz VOL T/DIV: 1 V
(RF PLL frequency adjustment) TIME/DIM 7"
Adjustment Location: main board

selection (Md. Mbuttons
pressed. (Normally takes
about 2 seconds.)

ment)

5. Remove the grounding wire from TP (ASY). Adjustment Location: main board

6. Put the disc (YEDS-l) in and press button.

0 Music does not start and
disc continues to rotate
for STOPtbPLAY 0r 7 low
automatic selection (N4.
»| buttons pressed.)

(REAR)

7. Confirm that the reading on the frequency counter
is locked at 4.3218 MHZ,

ODisc table opens shortly

. . . . h h 7
Adjustment Location. main board am! STOP->DPLAY. low or 1g
(REAR) 0 Sound is interrupted dur- . Incorrent E
ing PLAY. Or time count- 7 low from the adj
er display stops progress-
ing.
a More poise during 2-axis high high
device operationi
D D D
o TPrASY) SLED MOTOR OFF-SET ADJUSTMENT
TP (GNDI TP (RF) COMPONENT S'DE This adjustment should be made after replacing
the Optical Pick-up Block.
Procedure: oscilloscope 1 Keep the set flat'
(DCrangEl 2. Connect the oscilloscope to TP (SLED) and TP
l COMPONENT SIDE (GND),
TP (GND) 0 3. Turn Power switch on,
main board
TP (SLEDIO~--O+ 4. Ajust RV204 so that the reading of the oscillo-
TP (6ND) o-J-O- scope will be within iSOmV.

i11i *12i