Shure m68 owners manual

This is the 4 pages manual for shure m68 owners manual.
Read or download the pdf for free. If you want to contribute, please mail your pdfs to info@audioservicemanuals.com.

Page: 1 / 4
left right
shure m68 owners manual

Extracted text from shure m68 owners manual (Ocr-read)


Page 1

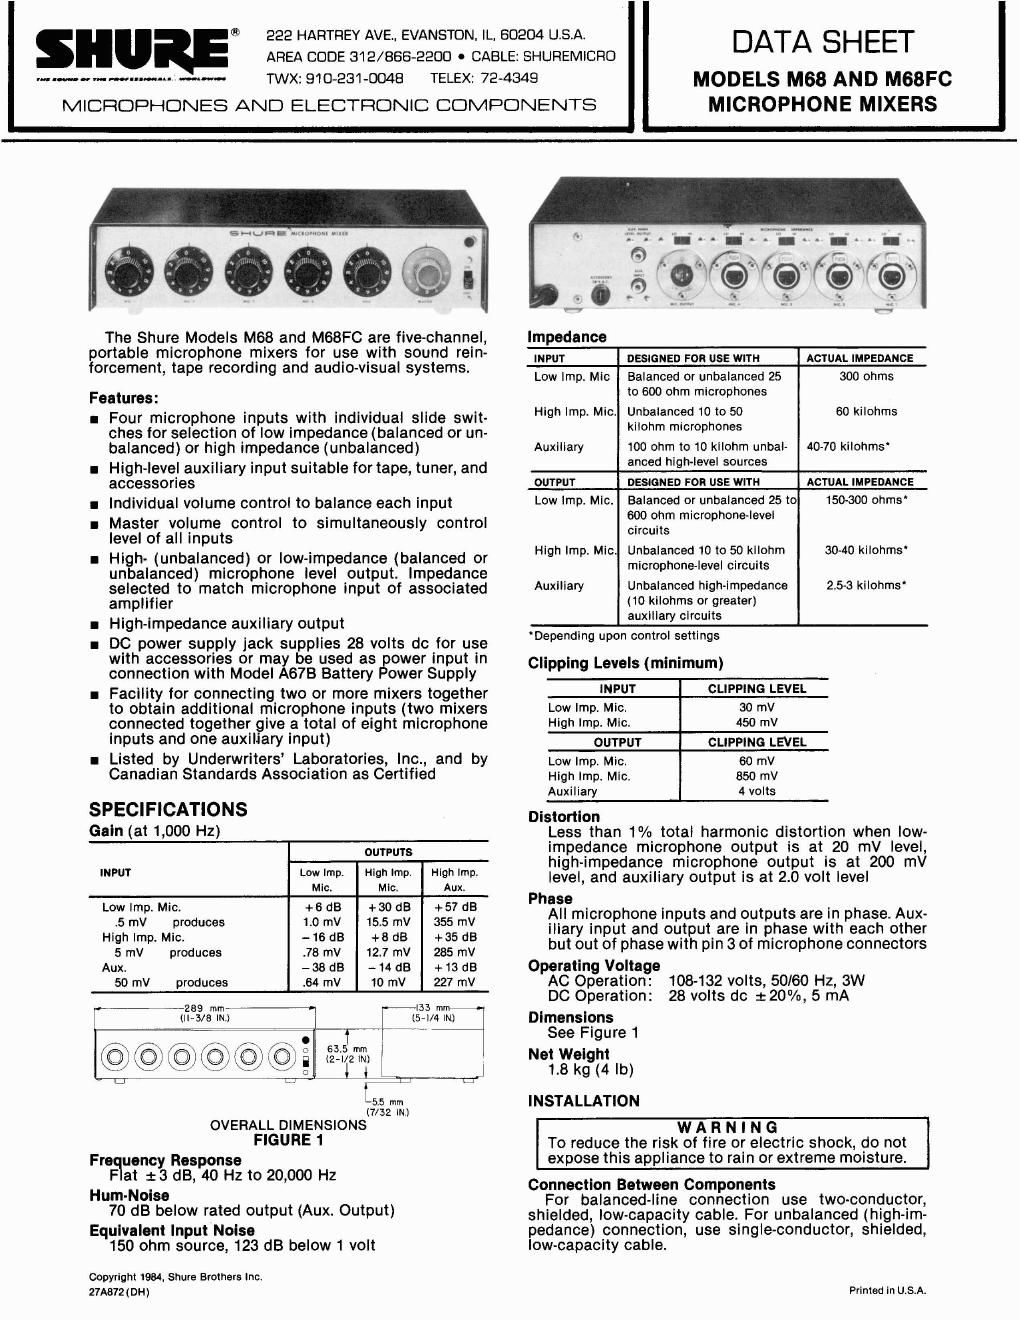
Grounding If there should be objectionable hum, connect the metal chassis of the mixer to a good ground such as the metal frame of a wall outlet, or a water or steam pipe. This is normally accomplished automatically through the ground wire of the power cord. INPUT CONNECTIONS Microphones Up to four low- or high-impedance dynamic, ribbon, or condenser microphones can be connected to recep- tacles marked Mic 1, Mic 2, Mic 3, Mic 4. The inputs are designed for low-impedance microphones with 25 to 250 ohms impedance or high-impedance microphones. Both low-impedance or high-impedance microphones can be used simultaneously. The unit is not recom- mended for use with crystal or ceramic microphones. The impedance is selected by a slide switch above the input receptacle. The input receptacles are professional audio connectors (three-pin on the M68 and three- socket on the M68FC)*. See Figure 2 for low- and high- impedance connections to receptacle. PICTORIALLY - PINS I AND 2. INPUTS ONLY, REVERSED FOR MODEL M68FC AND M68FCE , C:7%IEL.Qq ------ .,- - - - - 2' MICROPHONE MIXER INPUT MICROPHONE MIXER INPUT LOW IMPEDANCE HIGH IMPEDANCE (BALANCED LINE) MICROPHONE INPUT CONNECTIONS SHIELD SHIELD c----;? m-------;TJ xu----- MIC OUTPUT----- MIC. OUTPUT LOW IMPEDANCE HIGH IMPEDANCE (BALANCED LINE) MICROPHONE OUTPUT PLUG CONNECTIONS MICROPHONE CONNECTIONS FIGURE 2 NOTE: Some condenser microphones produce very high output signals which may overload the mixer input. A Shure Model A15AS Microphone Attenuator placed between the microphone and the mixer input will eliminate this problem. Auxiliary The phono jack on the rear of the panel marked Aux lnput will accept output from a high-impedance, high- level source such as a tape recorder, am-fm tuner, or phono cartridge preamplifier. The Model A68M Microphone Preamplifier can be connected to this jack to provide a fifth microphone input. OUTPUT CONNECTIONS Microphone The receptacle marked Mic Output is a dual- impedance output selected by the switch above the receptacle. This output is the "mixed" output of all the input sources and is designed to work into a 25 to 600-ohm microphone line or into a high-impedance amplifier or tape recorder microphone input. The recep- tacle is a professional three-pin audio connector*. See Figure 2 for output receptacle connections. Auxiliary The phono jack marked Aux High Level Output is a high-impedance high-level output designed primarily to feed a power amplifier requiring 0.5 to 2 volts, or the auxiliary or tuner input to an amplifier or tape recorder. Accessory 28-volt DC The rear panel jack, marked Accessory 28 V.D.C. pro- vides 28 Vdc open circuit (20 Vdc at 5 mA max.) for ac- cessories such as the Model A68M Microphone Preamplifier. The jack is also used as a power input when using the Model A67B Battery Supply. CAUTION: The 28 Vdc input circuit of the M68 is not fused. An external 28 Vdc source should be provided with a 0.125A, 250V in-line fuse as a safety precaution. OPERATION Power Connect the mixer power cord to the proper ac power outlet (see Operating Voltage under Specifications). 'Designed to mate with Cannon XL series, Switchcraft A3 (Q.G.) series or equivalent connector. Volume Controls The Master gain control and individual gain controls for each of the five channels are identified on the front panel. The individual gain controls should generally be set near maximum (fully clockwise) and the Master gain control adjusted to required output. Individual channel gain controls not being used should be kept at minimum gain (fully counterclockwise). CONNECTING TWO UNITS Two M68 mixers may be combined to give a total of eight microphone channels plus an auxiliary input as follows. 1. Connect Aux High Level Output of Unit 1 to Aux lnput of Unit 2. 2. Connect microphones to mixers and set each microphone input control to "O". 3. Take output signal for recorder of PA amplifier from appropriate output jack on Unit 2. 4. Set Master control on Unit 1 to 4. 5. Set Aux control on Unit 2 to 10. 6. Master control on Unit 2 is now Master for all inputs. 7. Advance Master control (Unit 2) to about 5 and adjust individual microphone controls for proper level. If overall gain is too low or too high, Master control (Unit 2) can be adjusted. 8. If input to auxiliary channel is needed, such as for tape recorder or tuner, use Aux lnput on Unit 1. Use Aux control on Unit 1 for level adjustment of Aux source. Master gain control for entire system is Master control on Unit 2. GUARANTEE This Shure product is guaranteed in normal use to be free from electrical and mechanical defects for a period of one year from date of purchase. Please retain proof of purchase date. This guarantee includes all parts and labor. This guarantee is in lieu of any and all other guarantees or warranties, express or implied, and there shall be no recovery for any consequential or incidental damages. SHIPPING INSTRUCTIONS Carefully repack the unit, have it insured, and return it prepaid to: Shure Brothers Incorporated Attention: Service Department 222 Hartrey Avenue Evanston, Illinois 60204 If outside the United States, return the unit to your dealer or Authorized Shure Service Center for repair. The unit will be returned to you prepaid. OPTIONAL ACCESSORIES Battery Power Supply .................. Model A67B Locking Panel ........................ Model A68L Rack Panel Kit ................... Models A68R, -BL Microphone Preamplifier ............... Model A68M Microphone Attenuator ............... Model A15AS