Shure fp16 owners manual

This is the 6 pages manual for shure fp16 owners manual.
Read or download the pdf for free. If you want to contribute, please mail your pdfs to info@audioservicemanuals.com.

Page: 1 / 6
left right
shure fp16 owners manual

Extracted text from shure fp16 owners manual (Ocr-read)


Page 1

@222 HARTREY AVE., EVANSTON, IL 60202-3696 U.S.A.
AREA CODE (312)866-2200 - CABLE: SHUREMICRO
TELEX: 4330191 - FAX (312)866-2279

SHURE

THE SOUND OF THE PROFESSIONALS'E

PROFESSIONAL PRODUCTS

SPECIFICATIONS

Frequency Response (ref 1 kHz)
30 to 20,000 Hz, :2 dB

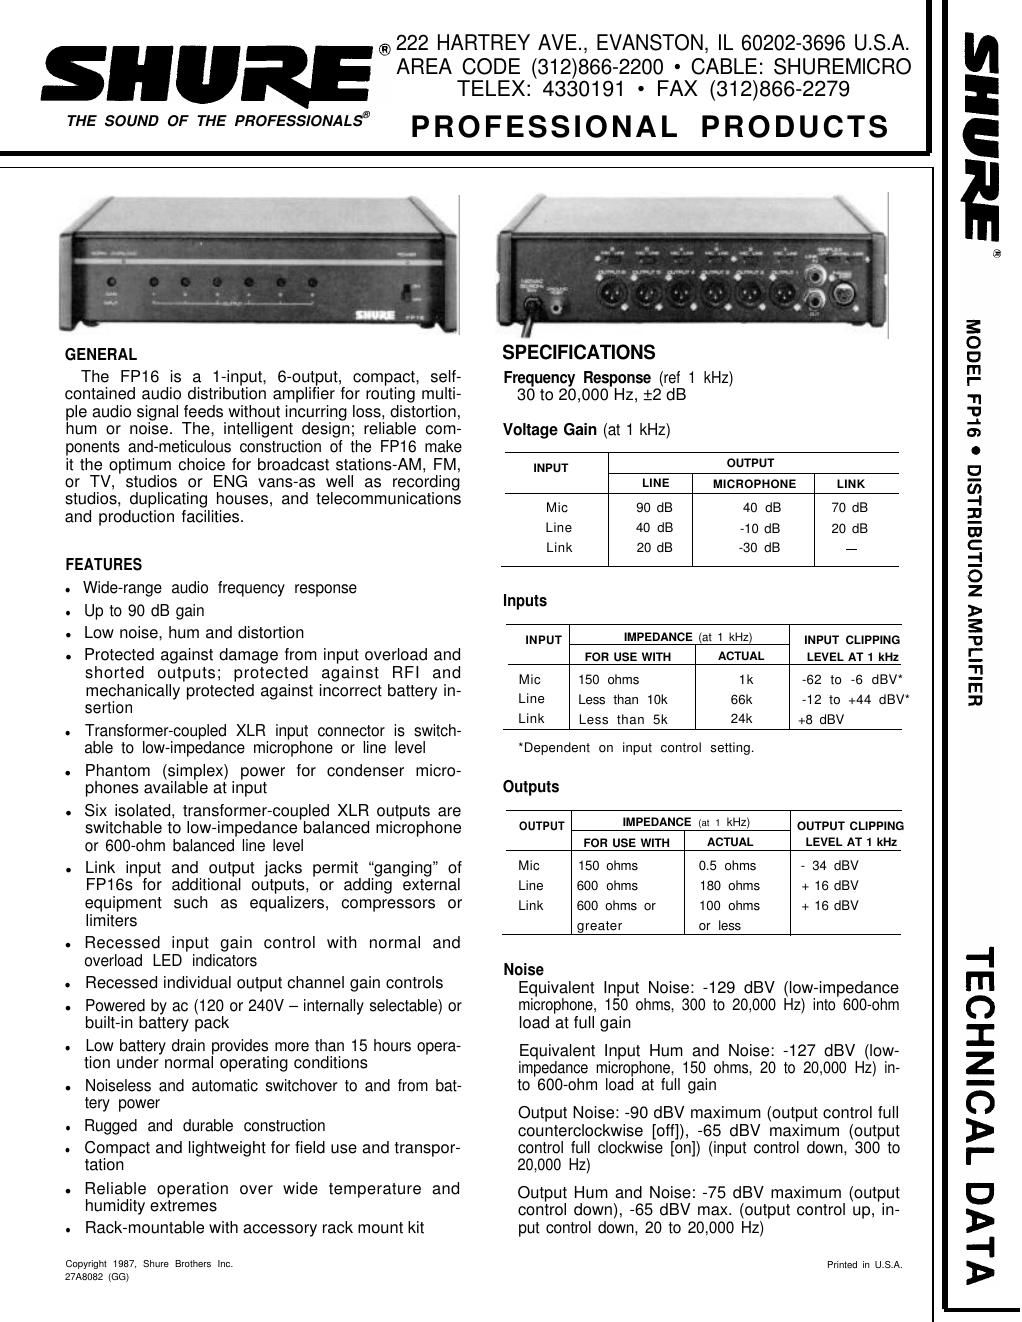
GENERAL

The FP16 is a 1-input, 6~output, compact, self-
contained audio distribution amplifier for routing multi-
ple audio signal feeds without incurring loss, distortion,
hum or noise. The, intelligent design; reliable com»

Voltage Gain (at 1 kHz)
ponents and-meticulous construction of the FP16 make

it the optimum choice for broadcast stations-AM, FM, mpur OUTPUT
or TV, studios or ENG vans-as well as recording LINE MICROPHONE LINK
:tnugliorsadcllJtéfigtrzatgtgmhggses, and telecommunications Mic 90 dB 40 dB 70 dB

p ' Line 40 dB -10 dB 20 dB

Link 20 dB -30 dB 7
FEATURES
. Wide-ran e audio tre uenc res onse
Q q y p Inputs

. Up to 90 dB gain

. Low noise, hum and distortion INPUT IMPEDANCE (at 1 kHz) INPUT CLIPPING
. Protected against damage from input overload and FOR use WITH ACTUAL LEVEL AT1 kHz
shorted outputs; protected against RFI and MC 150 0th 1k _62 to _6 dBV,
gheefigranically protected against incorrect battery in- Line Less than 10k 66k _12 to +44 dBV,
Link Less than 5k 24k +8 dBV

. Transformer-coupled XLR input connector is switch-
able to lowimpedance microphone or line level

. Phantom (simplex) power for condenser micro-

*Dependent on input control setting.

phones available at input Outputs
. Six isolated, transformer-coupled XLR outputs are
switchable to low-impedance balanced microphone OUTPUT 'MPEDANCE 3 kHz) OUTPUT CLIPPING
or 600.0hm ba|anced |ine |eve| FOR USE WITH ACTUAL LEVEL AT1 kHz
. Link input and output jacks permit ganging of Mic 150 0th 0-5 0th - 34 dBV
FPtes for additional outputs, or adding external Line 600 ohms 180 ohms + 16 dBV
equipment such as equalizers, compressors or Link 600 ohms or 100 ohms + 16 dBV
I'm'ters greater or less
. Recessed input gain control with normal and
overload LED indicators Noise

. Recessed individual output channel gain controls Equivalent Input Noise: .129 dBV (low»impedance

.9 HERBS

HEIHI'IdWV NOILDSIHLSICI o 9Ld:l 'IBGOW

Powered by ac (120 or 240V - internally selectable) or
built-in battery pack

Low battery drain provides more than 15 hours opera-
tion under normal operating conditions

Noiseless and automatic switchover to and from bat-
tery power

Rugged and durable construction

Compact and lightweight for field use and transpor-
tation

Reliable operation over wide temperature and
humidity extremes

Rack»mountable with accessory rack mount kit

Copyright 1937. Shure Brothers Inc.
27A5082 (GG)

microphone, 150 ohms, 300 to 20,000 Hz) into BOO-ohm
load at full gain

Equivalent Input Hum and Noise: -127 dBV (low-
impedance microphone, 150 ohms, 20 to 20,000 Hz) in-
to 600-ohm load at full gain

Output Noise: -90 dBV maximum (output control full
counterclockwise [oft]), ~65 dBV maximum (output
control full clockwise [on]) (input control down, 300 to
20,000 Hz)

Output Hum and Noise: ~75 dBV maximum (output
control down), -65 dBV max. (output control up, in»
put control down, 20 to 20,000 Hz)

Printed in U.S.A.

l VLva "IVOINHOEIJ.

Page 2

Distortion
0.4% THD, 30 to 20,000 Hz at + 15 dBm output; 0.5%
or less IM distortion at + 15 dBm output
Common Mode Rejection
65 dB minimum with input of ~20 dBV at 100 Hz
Control Interaction
Less than 1 dB with any control combination

Overload and Shoning Protection
Shorting outputs, even for prolonged periods, will
cause no damage; microphone input will not be
damaged by signals up to 3V

Phase
All outputs in phase with input. Pin 2 is high" with
respect to pin 3; pin 1 is ground. Tips of link input and
output phone jacks are in phase with pin 2 of XLR con-
nectors.

Phantom Power
30 Vdc nominal, 3.3k series resistance, automatically
disabled with input switch in Line position
Operating Voltage
Ac Operation: 120 or 240 Vac : 10% (internally selec-
table), 50/60 Hz, 5.5W

DC Operation: 27 Vdc nominal at 16 mA typical no»
signal, 22 mA typical at 0 VU (+4 dBm) output; 21.5
Vdc minimum; battery life approximately 20 hours
with alkaline batteries at +4 dBm output in con»
tinuous use; three 9-volt batteries, type NEDA 1604A
(Duracell MN1604 or Eveready 522 recommended)
Temperature Range
Operating: -18° to 57°C (0° to 135°F)
Storage: 29" to 71°C (20" to 160°F)
Dimensions
79.5 mm H x 310 mm W x 230 mm D (3-1/8 in. x 12-7/32
in. x 9-1/16 in.)
Weight
Net: 2.75 kg (6 lb 1 02)
Packaged: 3.15 kg (6 lb 15 oz)
Certifications
Listed by Underwriters Laboratories, Inc.; listed by
Canadian Standards Association as Certified

CONTROLS AND CONNECTORS

On-Oft Switch: applies power to the FP16 circuitry.
Power LED: Indicates unit is on.

Input Gain Screwdriver Control: adjusts input signal
level.

Output 1-6 Screwdriver Control: adjusts individual out-
put channel signal levels.

Norm LED: indicates when signal level is approximately
20 dB below clipping.

Overload LED: indicates when input signal level ap-
proaches clipping.

Three-Pin XLR 1-6 Output Connectors: provide for con-
nection to either Iow~impedance microphone or line-
level inputs of power amplifiers, mixers, or other signal-
processing equipment.

Mic/Line 1-6 Slide Switches: select microphone- or line-
level output signal levels.

Phantom On-Off Slide Switch: applies 27 Vdc (nominal)
phantom (simplex) power to pins 2 and 3 of the input
connector for use with condenser microphones. IMPOR-
TANT: Make certain any condenser microphone used is
compatible with the FP16 simplex circuit, and that the
FP16 input Mic/Line switch is in the Mic position. Do
not turn the Phantom switch on when using unbalanced
low-impedance microphones; objectionable hum will
result, Turn the Phantom switch off when phantom-
simplex power is not required.

Three-Socket XLR Input connector: provides for con-
nection to microphone- or line-level input signal
sources.

Input Mic/Line Slide Switch: selects microphone~ or
line-level input signals.

Link In, Out Phone Jacks: provide for connecting more
distribution amplifiers for additional outputs, or adding
external equipment such as equalizers, compressors, or
limiters. When connecting two or more FP16s together
for additional outputs, connect the Link Out jack of the
master unit to the Link In jacks of the others. Any
number of FP16s can be tied together in this way. The
Link In jack is input-only, and has switching contacts to
disconnect the input signal amplifier from the output
channel volume controls.

Connect an equalizer, limiter or compressor to the
FP16 by connecting the FP16 Link Out jack to the exter-
nal units input, and the external units output to the
FP16 Link In jack.

Signals at the Link jacks are typically 10 dB below
line level. The Link In input impedance is greater than 20
kilohms and may be considered a bridging impedance.

INSTALLATION AND OPERATION

Battery Operation

In addition to 120- or 240-volt ac operation, the FP16
can be operated from an internal battery pack. Current
drain is typically 22 mA at +4 dBm output level. Battery
operation is recommended for remote, on-location
operation, and as an emergency backup source in case
of ac power failure.

Access to the battery compartment is through the
bottom of the chassis. Three 9-volt transistor radio bat-
teries power the FP16 at full rated output. Use alkaline
batteries for maximum life. Duracell MN1604 or
Eveready 522 are recommended. Battery life is approx-
imately 20 hours at +4 dBm continuous use. Note that
simplex power loading will increase battery drain.

With batteries in the battery compartment, the FP16
will automatically and silently switch to battery opera-
tion should the ac voltage fall below a suitable level.

Connections

Connect the signal source to the three-socket XLR In-
put connector and set the input Mic/Line switch for the
proper level. Connect the three-pin XLR 1-6 Output con-
nectors to low-impedance microphone or line-level in-
puts of power amplifiers, mixers, etc. Set each Mic/Line
switch for the appropriate signal level.