Shure beta green bg 1 2 3 4 5 user guide

This is the 4 pages manual for shure beta green bg 1 2 3 4 5 user guide.
Read or download the pdf for free. If you want to contribute, please mail your pdfs to info@audioservicemanuals.com.

Page: 1 / 4
left right
shure beta green bg 1 2 3 4 5 user guide

Extracted text from shure beta green bg 1 2 3 4 5 user guide (Ocr-read)


Page 1

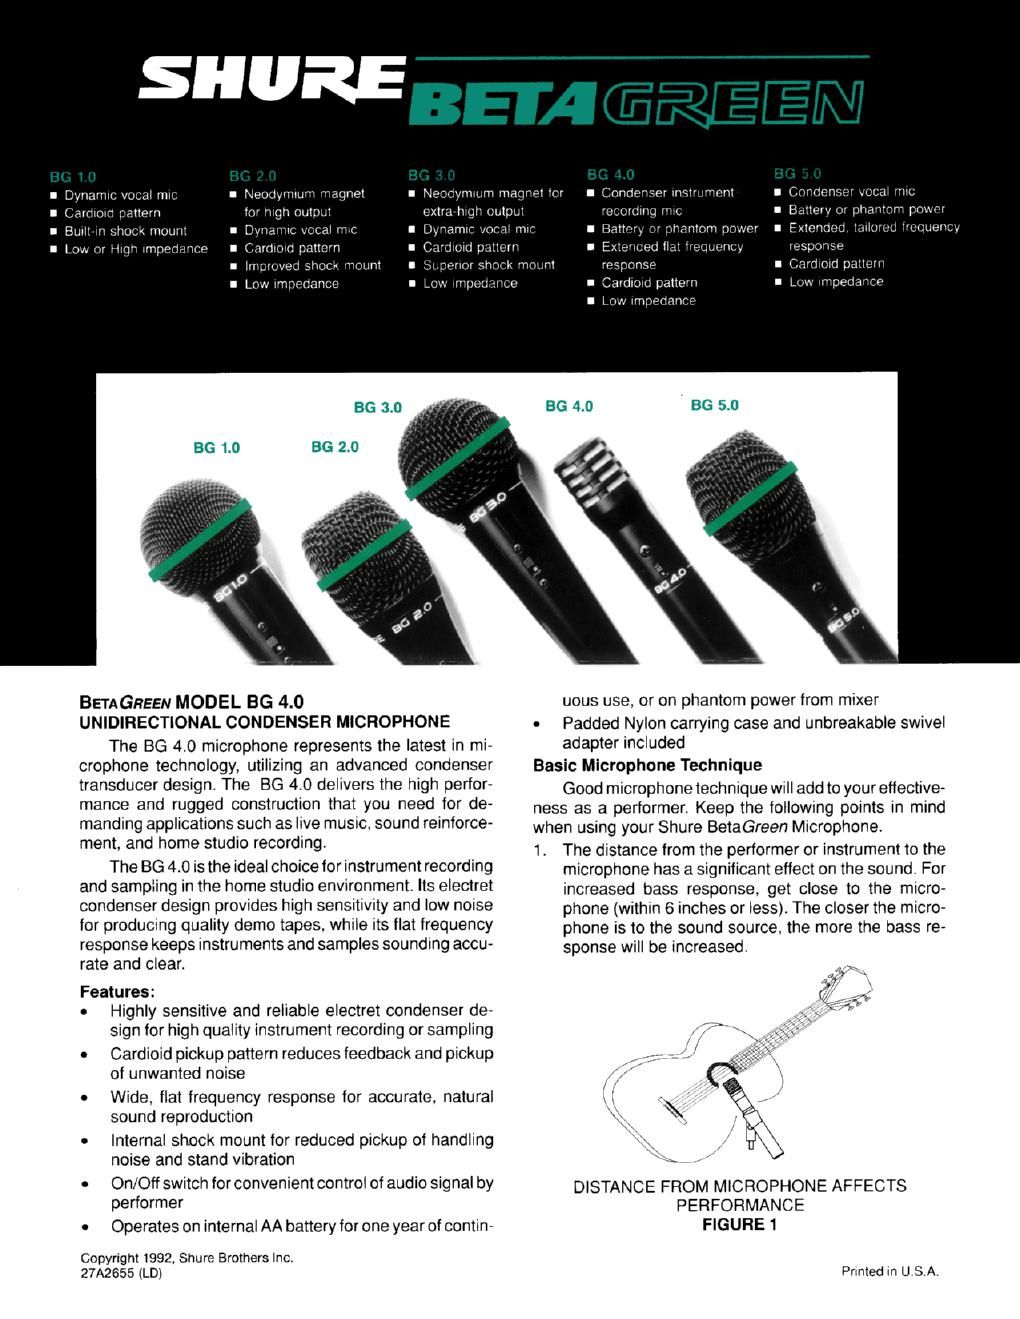
SHUREaaea

fjfl... L__1 i. _,

. :al mlr. \leonymium magnet
Cardioid pattern oi 'ilgii output ext
Built in shock mount '3 namii: vocal mt
low or High impedance \ rd old pattern

improved oukmount
ow rnuettance

Cardioid

BETAGREEN MODEL 86 4.0
UNIDIRECTIONAL CONDENSER MICROPHONE

The 86 4.0 microphone represents the latest in mi
crophone technology, utilizing an advanced condenser
transducer design. The 86 4.0 delivers the high perfor-
mance and rugged construction that you need for de-
manding applications such as live I'TiUSIC. sound reinforce-
ment, and home studio recording.

The BG 4.0 is the ideal choice for instrument recording
and sampling in the home studio environment. Its electret
condenser design provides high sensitivity and low noise
for producing quality demo tapes. while its flat frequency
response keeps instruments and samples sounding accu-
rate and clear.

Features:

. Highly sensitive and reliable electret condenser de-
sign for high quality instrument recording or sampling

. Cardioid pickup pattern reduces feedback and pickup
of unwanted noise

- Wide. flat frequency response for accurate. natural
sound reproduction

- Internal shock mount for reduced pickup of handling
noise and stand Vibration

. On/Off switch for convenient control of audio signal by
performer

. Operates on internal AA battery for one year of contin-

Copyright 1992, Shure Brothers lnc
27A2655 (LD)

N odyntium nagiet lcr
gr octout
tam; vocal rm.

Grindenser
Battery Ll' ;

Condenser iiist'u'nm:
rr nrdiro i'llL
-ry u' phantom pnwer
an it flat lrpqupntw resuon
nsc I laid pattern
Cardiriid pattern
Low irripiydanci?

aw impedance

uous use. or on phantom power from mixer

- Padded Nylon carrying case and unbreakable swivel
adapter included

Basic Microphone Technique
Good microphone technique will add to your effective»

ness as a performer. Keep the followrng points in mind

when using your Shure BetaGreen Microphone.

1. The distance from the performer or instrument to the
microphone has a significant effect on the sound. For
increased bass response, get close to the micro-
phone (within 6 inches or less). The closer the micro-
phone is to the sound source. the more the bass re-
sponse will be increased.

DISTANCE FROM MICROPHONE AFFECTS
PERFORMANCE
FIGURE1

Printed in U S A

Extended ifllitlH-d in ur: .i

Page 2

2. Beneficial changes in the level and characterof sound
coming from the loudspeakers can be achieved by
changing your distance from the microphone. For
instance, working up close can provide maximum
bass enhancement without feedback. Practice and
experience will develop your skill in varying your dis-
tance to achieve the desired effects.

3. For maximum isolation from other sound sources and
background noise, position the microphone as close
to the source as practical, and aimed at the sound
source.

Feedback and Directional Microphones

A performers worst enemy in using a microphone is
feedback. This is a harsh howl orsqueal that occurs when
the microphone picks up sound from the loudspeakers,
reamplifies and reproduces it over and over again (see
Figure 2). This vicious circle results in feedback.

we WITH cmororo Poun more an
iSHADEDI onisnrzo mam
LOUDSPEAKE RS RESULTS m
FEEDBACK

AMPLIFIER

FEEDBACK LOOP
FIGURE 2

A directional microphone with a cardioid pickup pat-
tern aids in preventing feedback because it rejects sound
that originates from the sides and rear (see Figure 3).
Sound pickup from the Sides is reduced by about one half.
and pickup from the rear is reduced by about nine tenths.
You can demonstrate this reduction in pickup by speaking
into the microphone as you rotate it from front to back.

It you use your directional microphone close to the
performer or instrument, you will ensure that the direct
sound will be much louder than the feedback-producing
amplified sound. Because less amplifier gain is required
to achieve the desrred overall loudness, the amplified
sound will likely remain below the volume that triggers
feedback.

Other hints in preventing feedback are: keep the loud-
speakers as far to the sides as possible; be sure that the
microphones point toward the performers and away from

the loudspeakers; and make certain that any stage moni-
tor speakers are positioned in front of the performers and
face the insensitive rear of the microphone.
MIC WlTH CARDlOlD POLAR
PATTERN [SHADED] ORlENTED AWAY

FROM LOUDSPEAKERS REDUCES
FEEDBACK

\

AMPLlFIER

CARDIOID MICROPHONE MINIMIZES POSSIBILITY
OF FEEDBACK
FIGURE 3
Directional Microphones and Proximity Effect

Because of their usefulness in reducing the likelihood
of feedback, directional microphones are best in sound re-
inforcement and public address.

When directional microphones are used close to a
musical instrument or vocalist. there is an increase in bass
(low-frequency) output called proximity effect. Typical in-
creases due to proximity are shown in Figure 4.
Proximity effect can be used to improve your sound.

1. With instruments, it allows the user to change bass
output without tone controls, simply by changing the
distance between source and microphone. In addi-
tion, close miking improves acoustical isolation by
minimizing pickup of other instruments.

2. With vocalists, it increases bass response, giving a
fuller, more powerful quality to the voice. Proximity ef-
fect can be especially effective during soft passages
where extra emphasus is needed.

The cardioid directional characteristics of your more-
phone are provided by means of rear sound entry ports
that cancel sounds originating from the sides and back of
the microphone. It is therefore important that these ports
not be covered at any time.

Most Shure directional microphones are designed to
provide satisfactory response at low frequencies yet still
allow proximity effect to be used advantageously when
desired. To learn how to use proximity effect, you need to
hear the amplified result. Use monitor speakers or head-
phones, and, just as you practice your instrument, practice
your microphone technique to get the precise sound you
want.