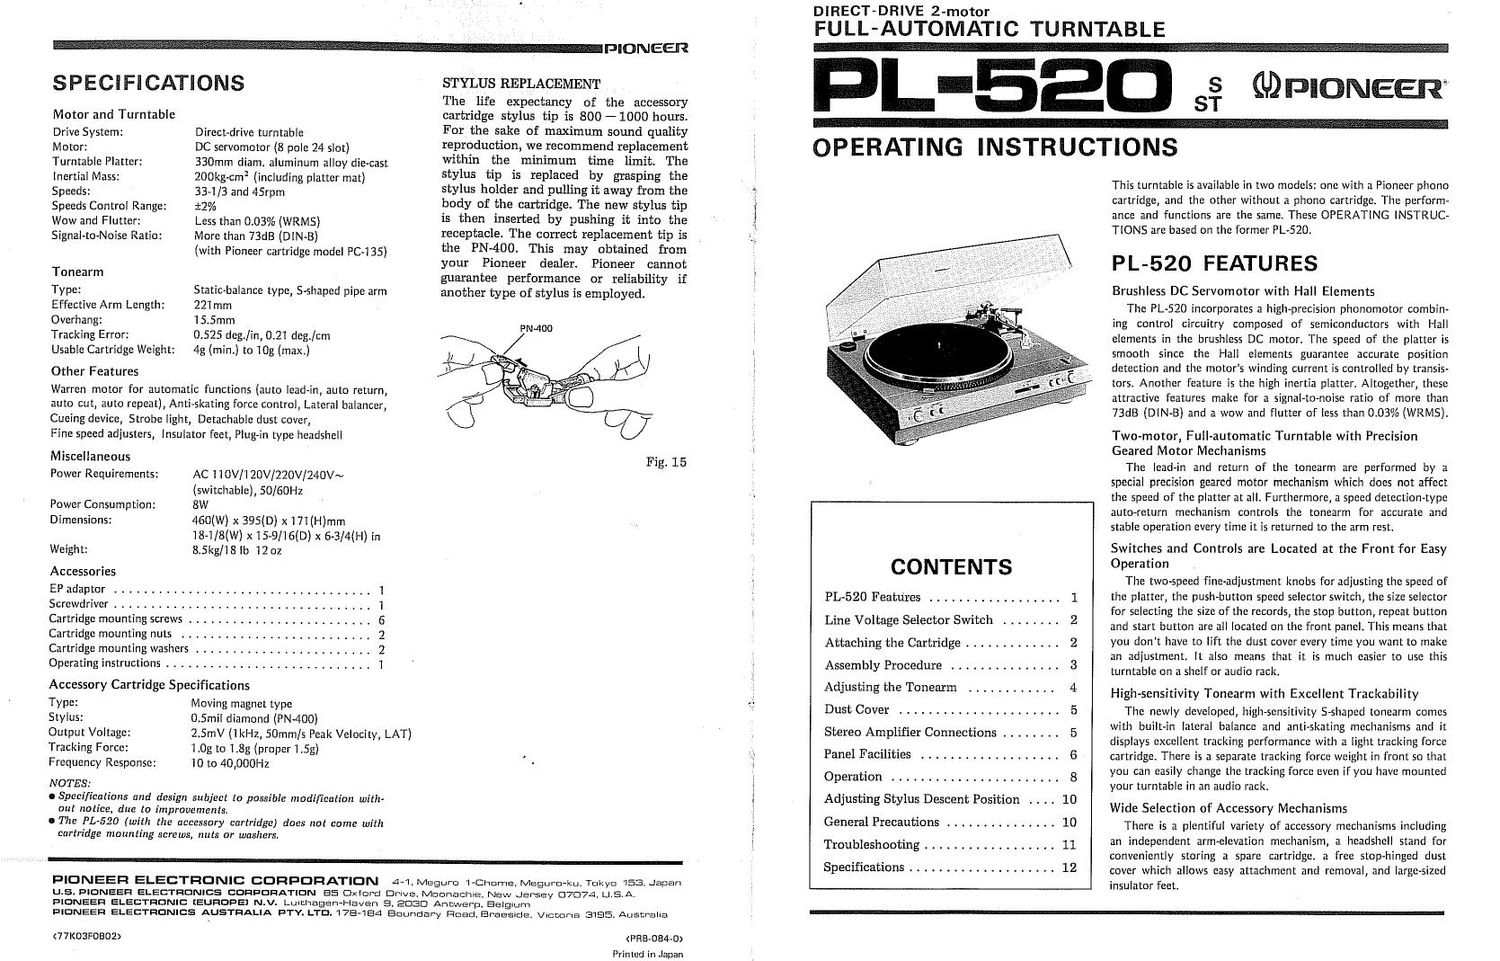
Pioneer pl 520 owners manual

This is the 11 pages manual for pioneer pl 520 owners manual.
Read or download the pdf for free. If you want to contribute, please mail your pdfs to info@audioservicemanuals.com.

Page: 1 / 11
left right
pioneer pl 520 owners manual

Extracted text from pioneer pl 520 owners manual (Ocr-read)


Page 1

SPECIFICATIONS

Motor and Turntable

Drive System: Direct-drive turntable

Motor: DC servomotor (8 pole 24 slot)
Turntable Platter: 330mm diam. aluminum alloy die-cast
inertial Mass: 200kg-cm2 (including platter mat)
Speeds: 33-1/3 and 45rpm

Speeds Control Range: i2%

Wow and Flutter: Less than 0.03% (WRMS)
Signal-to-Noise Ratio: More than 73dB (DlN-B)
(with Pioneer cartridge model PC-135)

Tonearm

Type: Static-balance type, S-shaped pipe arm
Effective Arm Length: 221 mm

Overhang: 15.5mm

Tracking Error: 0.525 deg/in, 0.21 deg/cm
Usable Cartridge Weight: 4g (min.) to 10g (max.)

Other Features

Warren motor for automatic functions (auto lead-in, auto return,
auto cut, auto repeat), Anti-skating force control, Lateral balancer,
Cueing device, Strobe light, Detachable dust cover,

Fine speed adjusters, Insulator Feet, Plug-in type headshell

Miscellaneous
Power Requirements: AC 110V/120V/220V/240V~

(switchable), 50/60Hz

Power Consumption: 8W

Dimensions: 460(W) x 395(0) x 171 (H)mm
18-1/8(W) x15-9/16(D)x 6-3/4(H) in

Weight: 8.5kg/18 lb 1201

Accessories

EP adaptor ................................... l

Screwdriver .................................. 1

Cartridge mounting screws ......................... G

Cartridge mounting nuts .......................... 2

Cartridge mounting washers ........................ 2

Operating instructions ............................ 1

Accessory Cartridge Specifications

Type: Moving magnet type
Stylus: 0.5mil diamond (PN-400)
Output Voltage:
Tracking Force:
Frequency Response:

NOTES:

0 Specifications and design subject 10 possible modification with-
out notice, due to improvements.

0 The PL-520 (with the accessory cartridge) does not come with
cartridge mounting screws, nuts or washers.

1.0g to 1.8g (proper 1.5g)
10 to 40,000HZ

2.5mV (lkHz, 50mm/s Peak Velocity, LAT)

PIONEER

STYLUS REPLACEMENT

The life expectancy of the accessory
cartridge stylus tip is 800-1000 hours.
For the sake of maximum sound quality
reproduction, we recommend replacement
Within the minimum time limit. The
stylus tip is replaced by grasping the
stylus holder and pulling it away fi'om the
body of the cartridge. The new stylus tip
is then inserted by pushing it into the
receptacle. The correct replacement tip is
the PN-400. This may obtained from
your Pioneer dealer. Pioneer cannot
guarantee performance or reliability if
another type of stylus is employed.

PN-400

Fig. 15

PIONEER ELECTRONIC CORPORATION 4-1.MEguI-o l-ChurnE, MEQUID-ku. Tokyo 153,Japan
1.1.5. RIONEER ELECTRONICS CORRORATION ES Oxforci Drwe, MOOnachIe, New Jersey 07:17.4. USA.
PIONEER ELECTRONIC (EUROPE) N.v. Luilzliagen-Haven 9. 203a Antwerp. Eelglum

RIONEER ELECTRONICS AUSTRALiA RTv.LTO.17EI-1E4 Boundary FlOacl. EIraEEIde. mammal 3195. Australia

<77l(03FOEOZ)

Printed in Japan

DIRECT-DRIVE 2-motor

FULL-AUOMATIC TURNTABLE

L-EED 3, Wm

OPERATING INSTRUCTIONS

CONTENTS

PL-520 Features .................. 1
Line Voltage Selector Switch ........ 2
Attaching the Cartridge ............. 2
Assembly Procedure ............... 3
Adjusting the Tonearm ............ 4
Dust Cover ...................... 5
Stereo Amplifier Connections ........ 5
Panel Facilities ................... 6
Operation ....................... 8
Adjusting Stylus Descent Position . . . . 10
General Precautions ............... 10
Troubleshooting .................. 11
Specifications .................... 12

This turntable is available in two models: one with a Pioneer phono
cartridge, and the other without a phono cartridge. The perform
ance and functions are the same. These OPERATING INSTRUC-
TIONS are based on the former PL-SZO.

PL-520 FEATURES

Brushless DC Servomotor with Hall Elements

The PL-52O incorporates a high-precision phonomotor combin-
ing control circuitry composed of semiconductors with Hall
elements in the brushless DC motor. The speed of the platter is
smooth since the Hall elements guarantee accurate position
detection and the motor's winding current is controlled by transis-
tors. Another feature is the high inertia platter. Altogether, these
attractive features make for a signal-to-noise ratio of more than
73dB (DIN-B) and a wow and flutter of less than 0.03% (WRMS).

Two-motor, Full-automatic Turntable with Precision
Geared Motor Mechanisms

The lead-in and return of the tonearm are performed by a
special precision geared motor mechanism which does not affect
the speed of the platter at all. Furthermore, a speed detectionltype
auto-return mechanism controls the tonearm for accurate and
stable operation every time it is returned to the arm rest.

Switches and Controls are Located at the Front for Easy
Operation

The two-speed fine-adjustment knobs for adjusting the speed of
the platter, the push-button speed selector switch, the size selector
for selecting the size of the records, the stop button, repeat button
and start button are all located on the front panel. This means that
you don't have to lift the dust cover every time you want to make
an adjustment. ll also means that it is much easier to use this
turntable on a shelf or audio rack.

High-sensitivity Tonearm with Excellent Trackability

The newly developed, high-sensitivity S»s|1aped tonearm comes
with built-in lateral balance and anti-skating mechanisms and it
displays excellent tracking performance with a light tracking force
cartridge. There is a separate tracking force weight in front so that
you can easily change the tracking force even ifyou have mounted
your turntable in an audio rack.

Wide Selection of Accessory Mechanisms

There is a plentiful variety of accessory mechanisms including
an independent arm-elevation mechanism, a headshell stand for
conveniently storing a spare cartridge. a free stophingcd dust
cover which allows easy attachment and removal, and large~sized
insulator feet.

Page 2

LINE VOLTAGE
SELECTOR SWITCH

This turntable is equipped with a line voltage
selector switch which allows this turntable to be
used in locations where the power voltage is 110V,
120V, 220V or 240V.
Before your turntable is shipped from the factory,
the switch is set to the power requirements of the
turntables destination, although you should check
that it is set properly before plugging the power
cord into the outlet. If the voltage is not properly
set or if you move to an area where the voltage
requirements differ, adjust the selector switch as
follows:

1. Disconnect the power cord.

2. Provide yourself with a medium-sized screw-
driver. Insert the tip of the screwdriver into the
groove of the selector switch and turn it to the
voltage indication corresponding to the power
voltage of your residence.

You can tell when it clicks into place.

Screwdriver


Line voltage
selector switch

Fig. l

ATTACHING THE
CARTRIDGE

You can attach any cartridge to this turntable as

long as it weighs between 4g and 10g. Follow the

procedure outlined below for attaching the car-
tridge.

1. Take out the headshell, cartridge mounting
screws, nuts, washers and small-sized screwdriver
from the accessory box.

The screws come in three different lengths so
choose the screws according to the height of the
cartridge you intend to attach.

2. The terminals on the accessory headshell are
aligned as shown in Fig. 2. Check the location
and polarity of each of the cartridges terminal
pins and then connect the lead wires, taking care
not to get the polarities mixed up.

Right channel (red)
Right channel ground (green)
Left channel (white)


Headshell

Cartridge

Stylus holder x,

Nuts
Fig. 3
NOTE:

Do not solder when you connect the lead wires to the
cartridge. If the lead wire lugs are loose, use a pair of
tweezers or a similar device to push in the and lightly.

3. Attach the cartridge lightly to the headshell
using the screws, nuts and washers (Fig. 3).

4. Adjust the position of the cartridge so that the
stylus and the connector section of the headshell
are 49mm apart and tighten up the screws. Make
sure that the cartridge does not tilt to one side
when you attach it (see Fig. 4).

Fig. 4

ATTACHING HEADSHELLS NOT MADE BY
PIONEER

You can attach headshells made by other com-
panies as long as the coupling portion has the same
dimensions as the headshell supplied with your
PL-520. However, you should check whether the
terminals on the other headshell are aligned in the
same way. When attaching, make sure that you do
not neglect to carry out the four steps described
above.

TROUBLESHOOTING

Sometimes, an operational fault can be mistaken for a malfunction or failure. Check the following points and

see if the symptoms of the trouble are outlined below before you get in touch with the servicemen. If you

cannot locate the symptoms, contact your nearest Pioneer Service Center, Service Station or authorized

Pioneer dealer.

Symptom

Possible trouble

Remedy

Platter does not rotate.

Power cord is unplugged.

Plug cord securely into wall outlet.

No sound

1.

Phone cables are not connected properly.

1.

Connect cables securely to the PHONO termi-
nals on the amplifier (see page 5).

2. Headshell is not properly attached. 2. Firmly secure tonearm locking collar (see page
3).
3. Cartridge lead wires are IUDSE. 3. Attach lead wires inside headshell properly
(see page 2).
4. Amplifier is not being operated properly. 4. Read the operating instructions that come with
(Function switch, tape monitor switch, speaker amplifier.
switches, etc. not set correctly).
Musical tempo is off. 1. Platter speed is not set properly. 1. Refer to 'Panel Facilities' and their uses on
page 6.
2. Strobe dots appear to move. 2. Refer to 'How to finely adjust the platter speed'

on page E.

Strobe dot movement
cannot be stopped.

Speed fine adjustment knob not set properly in
accordance with the platter speed.

Refer to How to finely adjust the platter speed'
on page E.

Excessive noise.

1.

Ground lead is not connected.

. Tracking force is not correct.

3. Dust or dirt has collected on the stylus tip.

1.

Connect properly to the amplifiers ground
terminal (see page 5).

. Refer to tracking force adjustments on page 4.

3. Clean the stylus tip with a soft brush.

tion.

4. Dust or dirt has collected on the record. 4, Clean the record with a good quality cleaner.
Sound is distorted. 1. Dust or dirt has collected on the stylus tip. 1. Clean the stylus tip with a soft brush.
2. Tracking force is not correct. 2. Refer to tracking force adjustment on page 4.
3. Stylus is worn. 3. Replace with new stylus.
4. Amplifier's tone controls set too high. 4, Set tone controls to lower position.
Tonearm does not 1. Arm elevation lever is set to UP position. 1. Set to DOWN position.
descend wrth auto play. 2. Tracking force is not correct. 2. Refer to tracking force adjustment on page 4.
Tonearm does not 1. Arm clamp is still fastened. 1. Release arm clamp.
move Wm] auto play. 2. Record size selector is set to MANUAL posi- 2. Set selector in accordance with size of record

on platter.

Intermittent sound.

. Tracking force is not correct.

2. Stylus is worn.

. Record is scratched or warped.

. Refer to tracking force adjustment on page 4.

2. Replace with new stylus.

3. Replace record.

Stylus does not
descend to correct

position with auto-play.

See stylus descent-position adjustment on page 10.

If you detect any trouble when playing records, the fault may not lie with the turntable but with another hi~fi component. Be sure to
check the amplifier, speaker systems, and any other electrical equipment which you are using in the vicinity of the turntable.

PIONEER