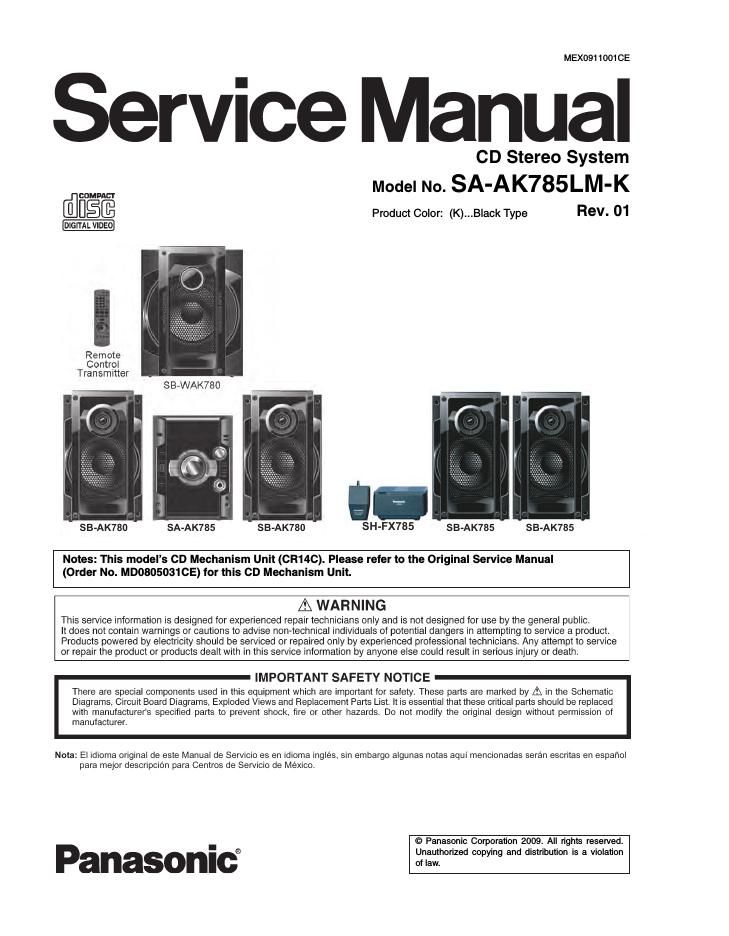
Panasonic sa ak785lm k rev 01

This is the 143 pages manual for panasonic sa ak785lm k rev 01.
Read or download the pdf for free. If you want to contribute, please mail your pdfs to info@audioservicemanuals.com.

Page: 1 / 143
left right
panasonic sa ak785lm k rev 01

Extracted text from panasonic sa ak785lm k rev 01 (Ocr-read)


Page 1

MEX0911001CE

Service Manual

CD Stereo System
Model No. SA-AK785LM-K

filfl_§@ Product Color: (K)...Black Type Rev. 01

_GITAL VIDEO

Remote
Control
Transmitter

SB»WAK780

SB-AK780 SA-AK785 SB-AK780 SH-FX785 SB-AK785 SB-AK785

Notes: This models CD Mechanism Unit (CR14C). Please refer to the Original Service Manual
(Order No. MD0805031 CE) for this CD Mechanism Unit.

A WARNING

This service information is designed for experienced repair technicians only and is not designed for use by the general public.

It does not contain warnings or cautions to advise non-technical individuals of potential dangers in attempting to service a product.
Products powered by electricity should be serviced or repaired only by experienced professional technicians. Any attempt to service
or repair the product or products dealt with in this sen/ice information by anyone else could result in serious injury or death.

IMPORTANT SAFETY NOTICE
There are special components used in this equipment which are important for safety. These parts are marked by A in the Schematic
Diagrams, Circuit Board Diagrams, Exploded Views and Replacement Parts List. it is essential that these critical parts should be replaced
with manufacturer's specified parts to prevent shock, fire or other hazards. Do not modify the original design without permission of

manufacturer.

Nota: El idioma original de este Manual de Servicio es en idioma inglés, sin embargo algunas notas aqui mencionadas seran escritas en espafiol
para mejor descripcién para Centros de Servicio de Mexico.

© Panasonic Corporation 2009. All rights reserved.
Unauthorized copying and distribution is a violation

Panasonic m.

Page 2

TABLE OF CONTENTS

1 Safety Precautions
1.1. General Guidelines
1.3. Caution For Fuse Replacement
1.4. Before Repair and Adjustment
1.5. Protection Circuitry
1.6. Safety Parts Information
2 Warning
2.1. Prevention of Electrostatic Discharge (ESD)
to Electrostatic Sensitive (ES) Devices
2.2. Precaution of Laser Diode
2.3. Service caution based on Legal restrictions
2.4. Handling Precautions for Traverse Unit
3 Service Navigation
3.1. Service Information
4 Specifications
5 Location of Controls and Components
5.1. Main Unit Key Button Operation
5.2. Remote Control Key Button Operation
5.3. Disc Information
6 Self-Diagnosis and Special Mode Setting
6.1. Doctor Mode Summary Table
6.2. Doctor Mode Table
6.3. Service Mode Summary Table
6.4. Service Mode Table
6.5. Reliability Test Mode (CD Mechanism Unit
CR14C)
6.6. Error Code Table
7 Troubleshooting Guide
7.1. Jupiter USB
7.2. Troubleshooting Guide
7.3. Troubleshooting Guide for F61 and/or F76
8 Service Fixture & Tools
8.1. Service Tools and Equipment
9 Disassembly and Assembly Instructions
9.1. Disassembly Flow Chart
9.2. Main Components and P.C.B. Locations
9.3. Disassembly of Top Cabinet
9.4. Disassembly of CD Mechanism Unit (CR14C)
9.5. Disassembly of Rear Panel
9.6. Disassembly of Fan Unit
9.7. Disassembly of Front Panel Assembly
9.8. Disassembly of Mic P.C.B.
9.9. Disassembly of Panel P.C.B.
9.10. Disassembly of Dynamic Bass Knob &
Dynamic Bass Button Unit
9.11. Disassembly of Memory P.C.B.
9.12. Disassembly of MPort/Headphone P.C.B.
9.13. Disassembly of CD Servo P.C.B.
9.14. Disassembly of D-Amp P.C.B. & Fan
9.15. Replacement of Audio Digital Amp IC
(ICS400)
9.16. Replacement of Audio Digital Amp IC
(ICSOOO)
9.17. Replacement of Audio Digital Amp IC
(I05200)
9.18. Disassembly of Main P.C.B.
9.19. Disassembly of SMPS P.C.B.

9.20. Replacement of Switching Regulator IC

9.21. Replacement of Rectifier Diode (D5702)
9.22. Replacement of Regulator Diode (D5801)
9.23. Replacement of Regulator Diode (D5802)
9.24. Replacement of Regulator Diode (D5803)
9.25. Disassembly of AC Inlet P.C.B.
9.26. Disassembly of Jupiter P.C.B.
9.27. Replacement of Traverse Unit Assembly
9.28. Disassembly of CD Lid
10 Service Position
10.1. Checking and Repairing of Main P.C.B.
10.2. Checking and Repairing of Panel P.C.B.. MIC
P.C.B.. Jupiter P.C.B. and MPort/Headphone
P.C.B.
10.3. Checking and Repairing of D-Amp P.C.B.
10.4. Checking and Repairing of SMPS P.C.B. and
AC Inlet P.C.B.
11 Voltage & Waveform Chart
11.1. CD Servo P.C.B.
11.2. Main P.C.B. (1/3)
11.3. Main P.C.B. (2/3)
11.4. Main P.C.B. (3/3)
11.5. Panel P.C.B.
11.6. D-Amp P.C.B.
11.7. Jupiter P.C.B. (1/2)
11.8. Jupiter P.C.B. (2/2)
11.9. Mic P.C.B.
11.10. SMPS P.C.B.
11.11. Waveform Table (1/3)
11.12. Waveform Table (2/3)
11.13. Waveform Table (3/3)
12 Illustration of ICS, Transistor and Diode
13 Block Diagram
13.1. CD Servo Block Diagram
13.2. Jupiter Block Diagram
13.3. Main(1/2) Block Diagram
13.4. Main(2/2) Block Diagram
13.5. Panel / MPort/Headphone / Mic / Memory
Block Diagram
13.6. D-Amp Block Diagram
13.7. SMPS / AC Inlet Diagram

14 Wiring Connection Diagram
15 Schematic Diagram Notes
16 Schematic Diagram

16.1. CD Servo Circuit

16.2. Main Circuit (1/6)

16.3. Main Circuit (2/6)

16.4. Main Circuit (3/6)

16.5. Main Circuit (4/6)

16.6. Main Circuit (5/6)

16.7. Main Circuit (6/6)

16.8. Panel Circuit (1/2)

16.9. Panel Circuit (2/2)

16.10. Memory/ MPort/Headphone / Mic Circuit