Onkyo TUD 1 Service Manual

This is the 20 pages manual for Onkyo TUD 1 Service Manual.
Read or download the pdf for free. If you want to contribute, please mail your pdfs to info@audioservicemanuals.com.

Page: 1 / 20
left right
Onkyo TUD 1 Service Manual

Extracted text from Onkyo TUD 1 Service Manual (Ocr-read)


Page 1

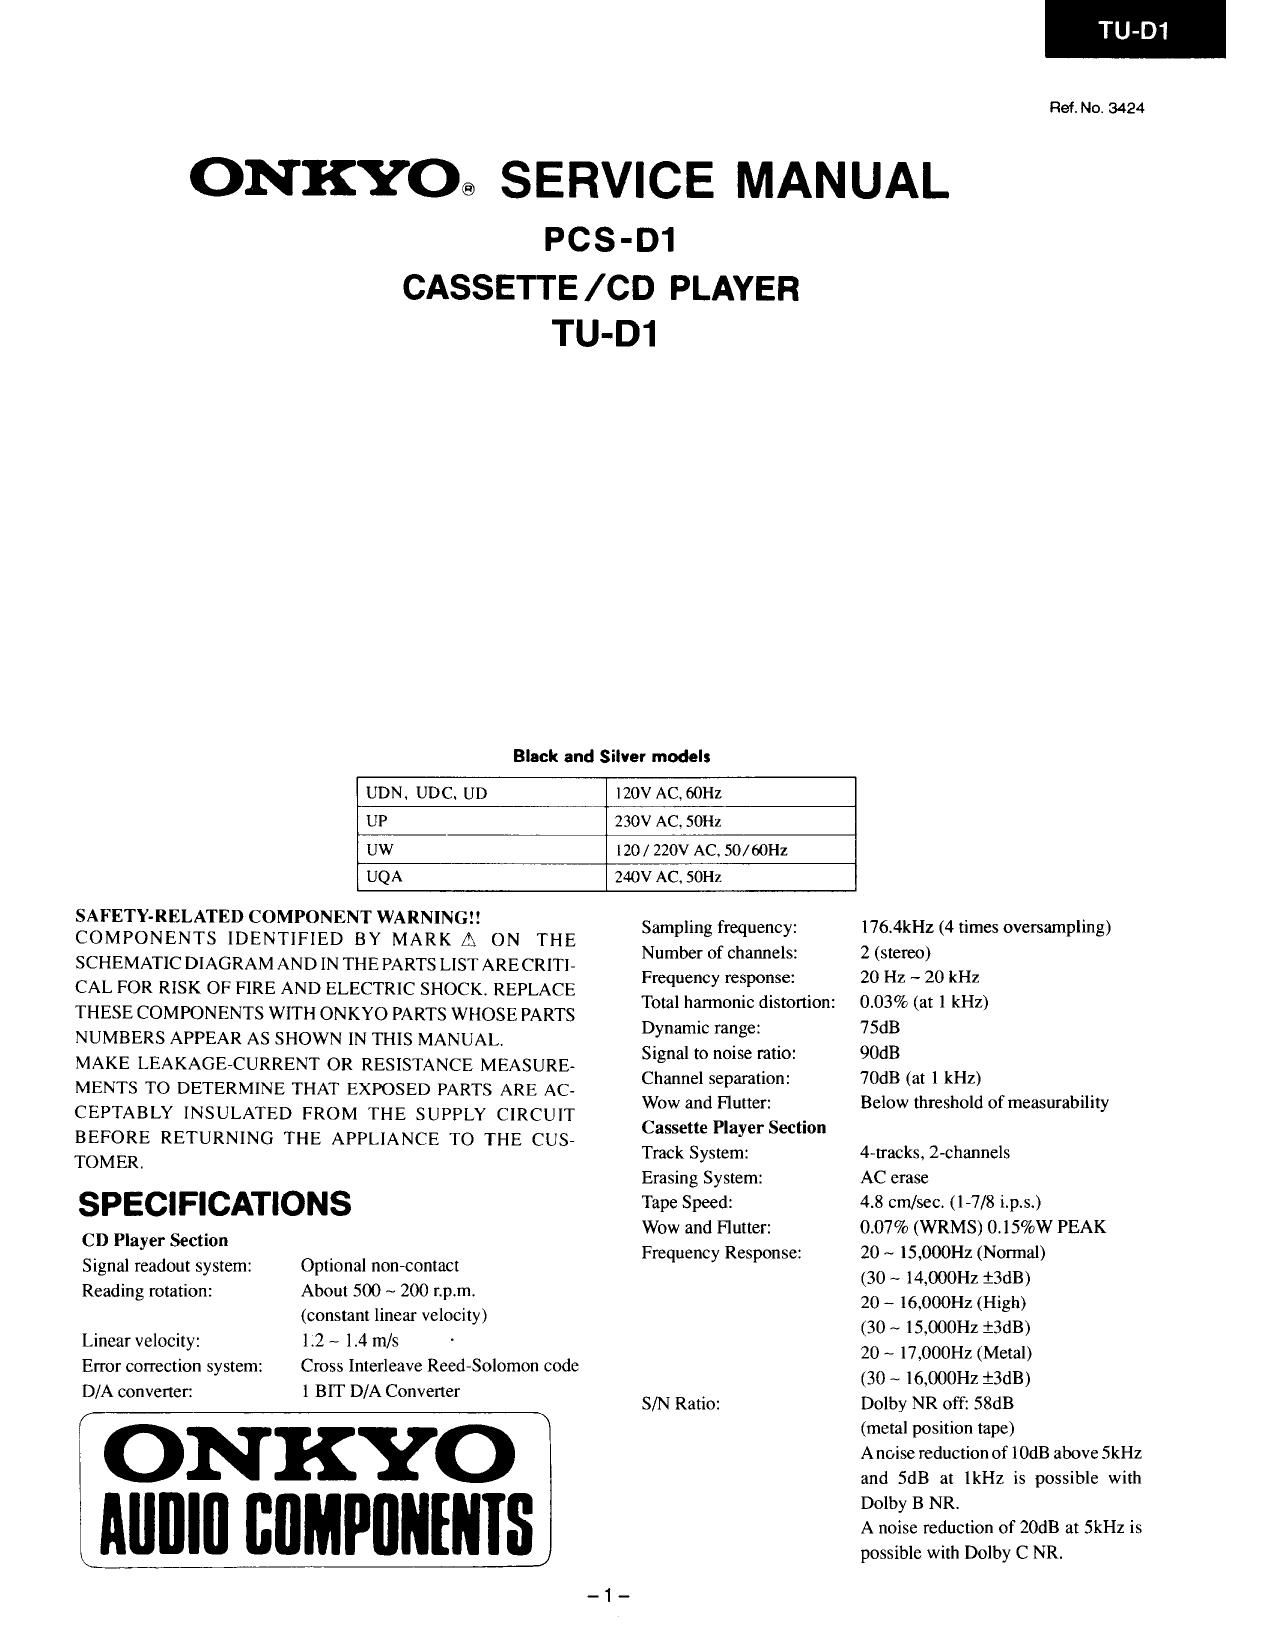
TU-D1

Ref. No. 3424

ONKYO@ SERVICE MANUAL

PCS-D1
CASSETTE / CD PLAYER
TU-D1

Black and Silver models

UDN. UDC. UD 120V AC, 60111
UP 230V AC, SOHZ
UW 120/ 220V AC, 50/6011:
UQA 240V AC. SOHZ

SAFETY-RELATED COMPONENT WARNINGE!
COMPONENTS IDENTIFIED BY MARK A ON THE
SCHEMATIC DIAGRAM AND IN THE PARTS LIST ARECRI'IIi
CAL FOR RISK OF FIRE AND ELECTRIC SHOCK. REPLACE
THESE COMPONENTS WITH ONKYO PARTS WHOSE PARTS
NUMBERS APPEAR AS SHOWN IN THIS MANUAL.

MAKE LEAKAGEACURRENT OR RESISTANCE MEASURE-
MENTS TO DETERMINE THAT EXPOSED PARTS ARE AC-
CEPTABLY INSULATED FROM THE SUPPLY CIRCUIT
BEFORE RETURNING THE APPLIANCE TO THE CUSP

Sampling frequency:
Number of Channels:
Frequency response:

Dynamic range:

Signal to noise ratio:
Channel separation:
Wow and Flutter:
Cassette Player Section

TOMER. Traclr System:
Erastng System:
SPECIFICATIONS Tape Spies;
W It :
CD Player Section ow an u er
. . Frequency Response:
Signal readout system: Optional non-contact
Reading rotation: About 500 ~ 200 r.p,m.
(constant linear velocity)
Linear velocity: 12 ~ 1.4 V8
Error correction system: Cross Interleave Reed-Solomon code
D A 1 BIT D A C rt
rl converter. / onve er S/N Ratio:

i ONKYO
l MIIIIII summits)

Total harmonic distortion:

176i4kHz (4 times oversampling)
2 (stereo)

20 Hz ~ 20 kHz

0.03% (a: 1 kHz)

75dB

90dB

70dB (at 1 kHz)

Below threshold of measurability

4-wacks, 2-channels

AC erase

4.8 cm/sec. (177/8 i.p.s.)

007% (WRMS) 0.15%W PEAK

20 ~ 15,(X)0Hz (Normal)

(30 ~ 14000Hz i3dB)

20 ~ 16,000Hz (High)

(30 ~ 15,000Hz :3dB)

20 ~ 17,000Hz (Metal)

(30 ~ 16,000Hz :SdB)

Dolby NR off: 58dB

(metal position tape)

Anoise reduction of 10118 above SkHz
and SdB at 1kHz is possible with
Dolby B NR.

A noise reduction of 20dB at SkHz is
possible with Dolby C NR.

Page 2

AUX IN: 2
Input sensitivity: 280/500mV
Input impedance: 50 kohms
Monitor Jack: 1
Optimum load impedance:
872000th
Motors: DC servo motor X 1; DC motorx 1
Heads: REC/PB: 1
ERASE: 1
Power Supply Rating: (AC Adaptor)
European models: AC 230V, 50Hz
3 pin Attachment plug
USA. and Canadian models:
AC 120V, 60Hz
3 pin Attachment plug

Input Jacks:

Outputs:

SERVICE GUIDE

RESET AND POWER CIRCUIT

By connecting AC Adapter, Q917OUT is to set at 5V resetting Main

Microcomputer Q804 and Key Microcomputer 0806 by Q918.

Q2304 44 is to set at H" and then reset Servo Microcomputer Q80]

by Q919 8 that is to set for Q919 "2 H".

Next, when input through KEY of the Operation Buttons,

Q804"44"58 is to be set at ",H turning 0N Q908, 0909, Q910,

Q91], and Q912 respectively; then, supply +B into the mechanism

and the circuit. The power supply of the Transmitter Section detects

wired connection or not for the system by means of Microcomputer

Q804 setting Q80456 at ".H in case of un-wired, while 070] 2E

turns in H and outputs 5V toward Q7013V0.

While charging battery, its voltage increases up to around 14.6V,

however when completed charging, it decreases down to 13.6 Y or

so.

BATTERY CHARGING CIRCUIT

The changing current is to be applied to the battery by way of R903

and Q903 from AC Adapter. While charging. the current is detected

by R909 and the base voltage of R905 is controlled (Charge Indicator

is turned ON by the live Q905 while charging), At the end of

charging, due to the R909 not charged, base voltage of Q905

increases to turn OFF Q905 and then Charge Indicator:

OVERDISCHARGE PREVENTION OF BATTERY

Microcomputer Q80463 detects the poor capacity of the battery

when its voltage falls down to approx. 10.6V turning Warning Light

ON on the other hand, In case of lowere voltage, Microcomputer

Q80444 and 58 tum in L to start Q912 and Q919 to prevent +B

from passing.

Although you take out AC Adapter with battery connection under

POWER OFF, the back-up current (abt. 8 mA) to Microcomputer is

still alive, and the battery is to be exhaussted (completely in a week

or so).

CABINET DISASSEMBLY

1. Turn over the set.

2. Loosen out setscrews of the battery cover and then take the cover
off.

3. Loosen out the 6 (siz) screws fixing Cabinet (TOP) and Cabinet
(BASE).

4. Turn down the set.

5. Set up ANT and take off the cabinet (TOP).

UK. and Australian models:
AC 240V, SOHZ
3 pin Attachment plug
Worldwide models: AC 120V ~ 220V variable,
50/60Hz 3 pin Attachment plug

Battery Pack (BT-Dl )MOption
Used Battery Small sealed lead battery
Normal voltage 6V DC Requires 2
Nominal capacity 1800 mA battery packs

Dimensions: 295 (W) x 80 (H) x 256 (D) mm
(11-5/8" >< 34/8 >< 1071/8)
Weight: 2.6kg. (5.7lbs.)

Design and specifications are subject to change without prior notice.

BT-Dl (BATTERY)

1. CHARGING

Put two batteries into the Control Center (TU-D1 ) to connect to AC

Adapter and then plug in for power supply to start charging (the

Charge Indicator of Control Center will be tumed 0N). When

completed charging, the said Light is to goes out. (Charging takes

about four hours. Play back for two hours. while recording is not
available)

NOTE: Charging for SU-Xl requires series arrangement of two
batteries and therefore, if not discharge equally, (to be
normal generally, when used for TU-Dl, and so, when
just one of the two batteries was used separately) the
used one may not be charged In such a case, charge one
by one at the rated voltage of supply DC 7 V 800 mA.

After stored for a long time (12 months or more) or overcharged. it

will be difficult to charge. This is because of the sulfate film caused

on the electrode In this case. charge for 12 to 24 hours and more to
remove the sulfate film in order to be as new as a virgin battery.

2. DISPLAY

At shop, for first-in-first-out method. the display consists of 10»digit

Serial NO., the four inferior of which are to show the Date of

Manufacture:

1 1
1-1 ;1

Month Day
therefore, there can be some NOs with the same inferior four digits.
Number of products and cartons (containing two products) is also
displayed on the color label to be stuck to a larger package every six
months.

November 91 to April 92 : Color label not stuck
May 92 to October 92 : Red label stuck
November 92 to April 93 2 Yellow label to be stuck
May 93 to October 93 : Blue lable to be stuck
November 93 to April 94 : Orange label to be stuck

May 94 to October 94 : Green label to be stuck
3. LIFE OF CYCLE
Varies based on the discharge onditiorl.
The more discharged, the less in cycle numbers.
100% discharge - 200 times of charge/discharge
50% discharge - 400 times of charge/discharge
30% discharge 7 1200 times of charge/discharge

Page 15

TU-D

TAPE MECHANISM-EXPLODED VIEW

I

A

-13-

-17-