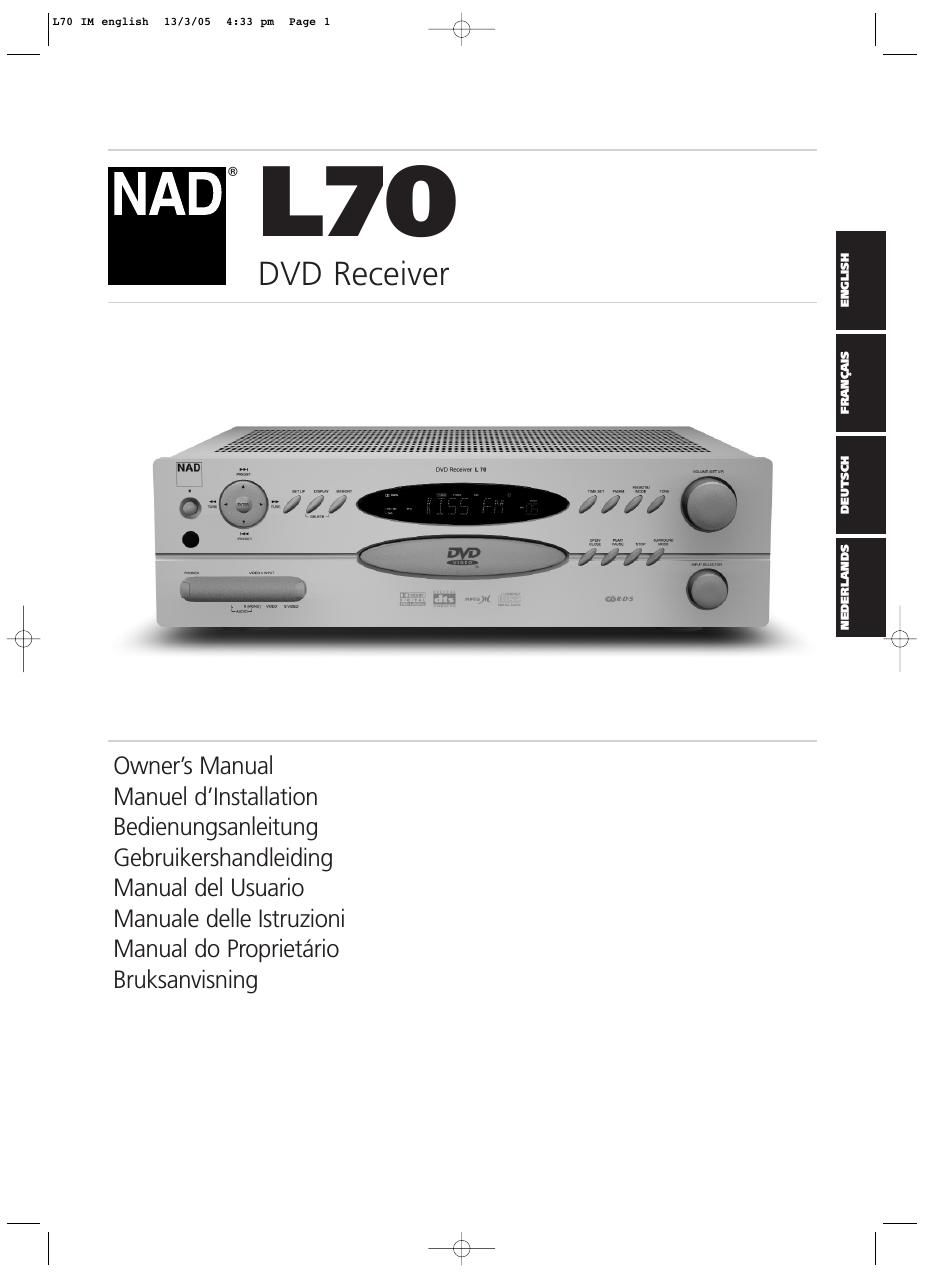
Nad L 70 Owners Manual

This is the 34 pages manual for Nad L 70 Owners Manual.
Read or download the pdf for free. If you want to contribute, please mail your pdfs to info@audioservicemanuals.com.

Page: 1 / 34
left right
Nad L 70 Owners Manual

Extracted text from Nad L 70 Owners Manual (Ocr-read)


Page 1

2 WARNING: TO REDUCE THE RISK OF FIRE OR ELECTRIC SHOCK, DO NOT EXPOSE THIS PRODUCT TO RAIN OR MOISTURE CAUTION THIS DVD PLAYER EMPLOYS A LASER SYSTEM. TO ENSURE PROPER USE OF THIS PRODUCT, PLEASE READ THIS OWNERS MANUAL CAREFULLY AND RETAIN FOR FUTURE REFERENCE. SHOULD THE UNIT REQUIRE MAINTENANCE, CONTACT AN AUTHORISED SERVICE LOCATION. USE OF CONTROLS, ADJUSTMENTS TO MODIFY PERFORMANCE OF PROCEDURES OTHER T\ HAN THOSE SPECIFIED MAY RESULT IN HAZARDOUS RADIATION EXPOSURE. TO PREVENT DIRECT EXPOSURE TO LASER BEAM, DO NOT TRY TO OPEN THE ENCLOSURE. VISIBLE LASER RADIATION EXISTS WHEN THE ENCLOSURE IS OPENED. DO NOT STARE INTO BEAM. THE APPARATUS SHOULD NOT BE EXPOSED TO DRIPPING OR SPLASHING LIQUIDS. OBJECTS FILL\ ED WITH LIQUIDS, SUCH AS VASES, SHOULD NOT BE PLACED ON THE APPARATUS. W ARNING: CHANGES OR MODIFICATIONS NOT EXPRESSLY APPROVED BY THE PA RTY RESPONSIBLE FOR COMPLIANCE COULD VOID THE USERS AUTHORITY TO OPERATE THE EQUIPMENT. NOTE The L70 is not an auto voltage DVD receiver. Connect only to the prescribed AC outlet, i.e., 120V 60Hz or 230V 50Hz. RECORD YOUR MODEL NUMBER (NOW, WHILE YOU CAN SEE IT) The model and serial number of your new DVD receiver are located on the back of the cabinet. For your future convenience, we suggest that you record these numbers here: MODEL NO.____________________________ SERIAL NO.____________________________ SAFETY PRECAUTIONS Introduction ENGLISH FRANÇAIS DEUTSCHNEDERLANDS ESPAÑOLITALIANO PORTUGUÊS SVENSKA NAD is a trademark of NAD Electronics International, a division of Lenbrook Industries Limited Copyright 2005, NAD Electronics International, a division of Lenbrook Industries Limited L70 IM english 13/3/05 4:33 pm Page 2

Page 2

3 INTRODUCTION Safety precautions . . . . . . . . . . . . . . . . . . . . . . . . . . . . . . . . . . . .\ 2 Table of contents . . . . . . . . . . . . . . . . . . . . . . . . . . . . . . . . . . . .\ .3 Getting the most from the NAD L70 . . . . . . . . . . . . . . . . . . . .4-5 Unpacking and setup . . . . . . . . . . . . . . . . . . . . . . . . . . . . . . . . . 4 About the L70 . . . . . . . . . . . . . . . . . . . . . . . . . . . . . . . . . . . . \ . . 4 E.A.R.S. and Digital Surround . . . . . . . . . . . . . . . . . . . . . . . . . . . 4 Ease of Use . . . . . . . . . . . . . . . . . . . . . . . . . . . . . . . . . . . . \ . . . . 5 Upgradability . . . . . . . . . . . . . . . . . . . . . . . . . . . . . . . . . . . . \ . . . 5 About the HTR L70 System Remote Control . . . . . . . . . . . . . . . . 5 Quickstart . . . . . . . . . . . . . . . . . . . . . . . . . . . . . . . . . . . . \ . . . . . 5 IDENTIFICATION OF CONTROLS Front Panel/Display Window . . . . . . . . . . . . . . . . . . . . . . . . . .6-7 Rear Panel . . . . . . . . . . . . . . . . . . . . . . . . . . . . . . . . . . . .\ . . . . .8-9 SETUP Setting up the L70 . . . . . . . . . . . . . . . . . . . . . . . . . . . . . . . . .10-12Getting Started . . . . . . . . . . . . . . . . . . . . . . . . . . . . . . . . . . . . \ 10 Dealing With Hum and Noise . . . . . . . . . . . . . . . . . . . . . . . . . . 10 About the on-screen displays (OSD) and front panel readout . . . 10 Displaying the OSD . . . . . . . . . . . . . . . . . . . . . . . . . . . . . . . . . 11 Navigating the OSD and Making Changes . . . . . . . . . . . . . . . . 11 Input Setup . . . . . . . . . . . . . . . . . . . . . . . . . . . . . . . . . . . . \ . . . 12 Speaker configuration . . . . . . . . . . . . . . . . . . . . . . . . . . . . .13-14 Surround mode . . . . . . . . . . . . . . . . . . . . . . . . . . . . . . . . . . . . \ 13 Level trim (Test) setup. . . . . . . . . . . . . . . . . . . . . . . . . . . . . . . . 13 Delay time . . . . . . . . . . . . . . . . . . . . . . . . . . . . . . . . . . . . \ . . . . 14 OPERATION Using the L70 . . . . . . . . . . . . . . . . . . . . . . . . . . . . . . . . . . . .\ . . .15Selecting Sources . . . . . . . . . . . . . . . . . . . . . . . . . . . . . . . . . . . 15\ Adjusting the Volume . . . . . . . . . . . . . . . . . . . . . . . . . . . . . . . 15 Muting the Sound . . . . . . . . . . . . . . . . . . . . . . . . . . . . . . . . . . 15 Using the L70s DVD/VCD/CD . . . . . . . . . . . . . . . . . . . . . . . .16-18 About DVD/VCD/CD . . . . . . . . . . . . . . . . . . . . . . . . . . . . . . . . 16 Region management information . . . . . . . . . . . . . . . . . . . . . . . 16 OSD Navigation . . . . . . . . . . . . . . . . . . . . . . . . . . . . . . . . . . . . \ 17 Transport Control Keys . . . . . . . . . . . . . . . . . . . . . . . . . . . . . . . 18 T itle and Menu Keys . . . . . . . . . . . . . . . . . . . . . . . . . . . . . . . . 18 Using the L70s AM/FM radio . . . . . . . . . . . . . . . . . . . . . . . .19-20 About Antennas . . . . . . . . . . . . . . . . . . . . . . . . . . . . . . . . . . . 19\ Selecting the Radio . . . . . . . . . . . . . . . . . . . . . . . . . . . . . . . . . 19 Tuning Stations . . . . . . . . . . . . . . . . . . . . . . . . . . . . . . . . . . . . \ 19 Setting Radio Presets . . . . . . . . . . . . . . . . . . . . . . . . . . . . . . . . 19 Selecting Radio Presets . . . . . . . . . . . . . . . . . . . . . . . . . . . . . . . 19 Choosing the FM Mute / Mode . . . . . . . . . . . . . . . . . . . . . . . . 20 About RDS . . . . . . . . . . . . . . . . . . . . . . . . . . . . . . . . . . . . \ . . . 20 V iewing RDS Text . . . . . . . . . . . . . . . . . . . . . . . . . . . . . . . . . . . 20\ Entering User Names . . . . . . . . . . . . . . . . . . . . . . . . . . . . . . . . 20 About the L70s Surround Modes . . . . . . . . . . . . . . . . . . . . .21-24 Selecting SURROUND MODEs . . . . . . . . . . . . . . . . . . . . . . . . . 22 Adjusting SURROUND MODEs . . . . . . . . . . . . . . . . . . . . . . . . . 23 Adjusting LEVEL TRIM On the Fly . . . . . . . . . . . . . . . . . . . . . 24 Adjusting the Tone Controls . . . . . . . . . . . . . . . . . . . . . . . . . . . 24 12V Trigger Out . . . . . . . . . . . . . . . . . . . . . . . . . . . . . . . . . . . . \ 24 Using the HTR L70 remote control . . . . . . . . . . . . . . . . . . . .25-30 Specifications . . . . . . . . . . . . . . . . . . . . . . . . . . . . . . . . . . . . \ . . 25 Controlling the L70 . . . . . . . . . . . . . . . . . . . . . . . . . . . . . . . . . 25 Learning Codes From Other Remotes . . . . . . . . . . . . . . . . . . . . 26 Punch-Through . . . . . . . . . . . . . . . . . . . . . . . . . . . . . . . . . . . . \ 26 Copy a Command From Another Key . . . . . . . . . . . . . . . . . . . . 27 Macro Commands . . . . . . . . . . . . . . . . . . . . . . . . . . . . . . . . . . 27 Recording Macros . . . . . . . . . . . . . . . . . . . . . . . . . . . . . . . . . . 27 Executing Macros. . . . . . . . . . . . . . . . . . . . . . . . . . . . . . . . . . . 28\ Key-Illumination Timeout . . . . . . . . . . . . . . . . . . . . . . . . . . . . . 28 Factory Reset . . . . . . . . . . . . . . . . . . . . . . . . . . . . . . . . . . . . \ . . 28 Delete Mode . . . . . . . . . . . . . . . . . . . . . . . . . . . . . . . . . . . . \ . . 28 Loading Code-Libraries. . . . . . . . . . . . . . . . . . . . . . . . . . . . . . . 29 Summary of HTR L70 Modes . . . . . . . . . . . . . . . . . . . . . . . . . . 30 REFERENCE Troubleshooting . . . . . . . . . . . . . . . . . . . . . . . . . . . . . . . . . . . .\ .31 Specifications . . . . . . . . . . . . . . . . . . . . . . . . . . . . . . . . . . . .\ . . .32 T ABLE OF CONTENTS Introduction ENGLISH FRANÇAIS DEUTSCH NEDERLANDS ESPAÑOL ITALIANO PORTUGUÊS SVENSKA THANK YOU FOR CHOOSING NAD The L70 A/V Surround Sound DVD Receiver is a technologically advanced and highly capable\ product-yet we have invested great eff ort in making it simple and easy to use. The L70 delivers a range of genuinely useful opt\ ions for surround sound and stereo listening alike, usi ng powerful digital signal processing and superbly accurate digital-audio circuitry. However, we have also been careful to ensure that the receiver is as musically transparent and spatially accurate as possible, incorporating much of what weve lear\ ned from a quarter-centurys experience designing audio an d home-theatre components. As with all our products, NADs Music First design philosophy guided the L70s design, such that it can confident ly promise you both state-of-the-art surround home-theatre and audiophile-quality music listening for years to come. We encourage you to take a few minutes now to read right through this manual. Investing a little time here at the outset might save you a good deal of time later, and is by far the best way to ensure that you make the most of your investment in the NAD L70, and get the \ most from this powerful and flexible home-theatre component. One more thing: We urge you to register your L70 ownership on the NAD Worldwide Web site: http://NADelectronics.com/w/Registration.html For warranty information contact your local distributor. L70 IM english 13/3/05 4:33 pm Page 3

Page 5

6 FRONT PANEL Identification of controls ENGLISHFRANÇAIS DEUTSCHNEDERLANDS ESPAÑOLITALIANO PORTUGUÊS SVENSKA 1 Power : When the L70 is first plugged into the AC power, the L70s clock will light in the main VFL display showing the time of day, and very little power is consumed. Press in to switch the receiver from standby, changing the standby indicator to bright blue and illuminating the VFL display. Pressing the power switch again turns the unit back to standby. It is usual (and perfectly acceptable) to leave the L70 in standby mode in between normal viewing and listening sessions. Pressing the OPEN CLOSE button on the front-panel, or the HTR L70 remotes ON button, will switch the receiver on, making it operational. Press the remotes OFF button to return to standby. Note that when you do choose to switch off from standby using the front panel Power button, the L70s memory back-up system will store channel level, tuner preset, and other settings for several weeks while the unit is switched off, or even unplugged from AC power altogether. 2 INDICATOR : When the L70 is in standby the LED will light bright blue, the VFL in the L70 will display the L70s internal clock. This indicator will extinguish itself when the power cable is unplugged from the AC supply. 3P RESET TUNE : Press to step up or down between radio presets or searching channels; 30 FM and 30 AM station presets are available. Note that this function wraps: Pressing or will step from Preset 30 to Preset 1, or vice versa. Unused presets are skipped over. (Note that Presets must previously have been stored; see Listening to Radio, below.) Pressing momentarily the or button will manually scan the AM or FM band. Press and hold the or for more than 2 seconds to search up or down; the L70s tuner will stop at the next sufficiently strong signal it encounters. Note that this function, too, wraps, and will continue searching up or down from one end of the AM or FM band to the other. 4 SET UP : Press momentarily for setup of the L70 via the OSD. Use this function in conjunction with your video monitor. This SET UP button is mode dependent, the DVD and receivers OSD are mutually exclusive. Press and hold SET UP to bring up the receiver OSD even when in DVD mode. 5 DISPLAY : Use this multifunction button to toggle between RDS PS, RDS RT and station frequency in FM Tuner mode(see Listening to Radio). This DISPLAY button will also toggle between optical, coaxial and analog inputs. 6MEM ORY: Use to store tuned stations to the L70s 60 preset- memory locations. (See Listening to Radio.) 7 VFL DISPLAY : The Vacuum Fluorescent Display (VFL Display) provides visual information on all of the L70s important modes, settings, and functions. 8 TIME SET : Press and hold to set the internal clock, ON/OFF timer, and display of the clocks time. A red clock face will appear in the florescent display when the timer is activated. Use the MEMORY keys to toggle between the hours and minutes. There are two timers, one for when the L70 powers on, the other for when the unit powers off; these too are programmed in the same way as above. 9 FM/AM : Press to toggle between the tuners FM and AM bands. 10 FM MUTE/MODE : In the normal Mute position, only the stations with a strong signal can be listened to, and the noise between stations is muted. Pressing the FM Mute/Mode button allows distant (and potentially noisy) stations to be received. (See Listening to Radio.) 11 TONE : Press to toggle between Bass, Treble, TONE OFF and TONE ON. The VOLUME knob is used to adjust the Bass and Treble levels. 12 VOLUME : Turn clockwise to increase the master-volume setting; counter clockwise to lower it. The VFL and on-screen displays show the setting, displayed as increments between MIN, 1 to 77. The VOLUME knob is also used to increment/decrement the Bass and Tr eble levels. 13 INPUT SELECTOR : Use to select an audio/video input along with its assigned analog or digital inputs (see Input Setup). Rotate clockwise or counter clockwise to select between: Internal DVD -žœExternal 5.1 -žœInternal AM/FM tuner -žœCABLE/SAT -žœ VCR -žœVIDEO 4 -žœthen back to Internal DVD L70 IM english 13/3/05 4:33 pm Page 6

Page 12

13 Every surround-sound system requires bass-management to direct low-frequency content from any or all channels to the speakers best able to reproduce it. For this function to operate correctly, it is important that you correctly identify your speakers capabilities. We use the terms SMALL, LARGE, NONE, (and OFF), but note that physical size may be irrelevant. -A SMALL speaker is any model, regardless of physical size, that lacks significant deep-bass response, that is, below about 80 Hz. -A LARGE speaker is any full-range model, that is, one with deep-bass response -A NONE speaker is one that is not present in your system. For example, you might not have any surround-back speakers installed; in that case, you would set the setup item to NONE. -A OFF speaker is one that may be present such as a subwoofer but set to off for in the SPEAKER CONFIGURATION setup menu such as . SETTING SPEAKER CONFIGURATION From the OSDs
screen, select the line using the HTR L70 remotes , and ENTER keys. Using the keys, set to LARGE or SMALL as your main-front speakers require according to the guidelines noted above. Similarly, set
, and to LARGE, SMALL, or NONE as your systems loudspeakers require. Set to ON or OFF. NOTE -The SPEAKER CONFIGURATION is global; that is, it remains in force with all inputs and in all SURROUND MODEs. -You can set Subwoofer to ON even with LARGE front speakers. In such cases, both subwoofer and front speaker will receive the LFE-channel signal. In the case where the front speakers are set to SMALL the LFE-channel signal will be routed to subwoofer but not to the front speakers; LFE- channel signal will pass only to the subwoofer. In most subwoofer-equipped systems, setting front speakers to SMALL is usually the better option. SURROUND MODE From the OSDs
screen, select the line using the HTR L70 remotes , and Enter keys. Using the and keys you can select mode variations, and adjust various parameters, depending on the current SURROUND MODE. For more information, see About the L70s SURROUND MODEs, below. LEVEL TRIM (TEST) SETUP Adjusting the relative balance of your systems loudspeakers ensures that surround-sound recordings, whether music or film, will present the balance of effects, music, and dialog that the artists intended. Additionally, if your system incorporates a subwoofer it establishes a correct relationship between the volume of the subwoofer and the other speakers, and thus of low-frequencies (bass) to other sonic elements. SPEAKER CONFIGURATIONSetup ENGLISH FRANÇAIS DEUTSCH NEDERLANDS ESPAÑOL ITALIANO PORTUGUÊS SVENSKA L70 IM english 13/3/05 4:34 pm Page 13

Page 14

15 You may operate the L70 DVD Surround Sound Receiver from its front panel or via the HTR L70 remote control. Since the remote will be the primary controller for most cases, we will focus on remote-controlled operations. Be sure also to read the section, Front Panel above. SELECTING SOURCES With the HTR L70s remotes Amp device selected, the remotes numeric-key section directly selects the receivers internal DVD and tuner TUNER, as well as the other inputs and multichannel input (Ext. 5.1) refer to the orange labels directly above each key. -When a source other than the internal DVD is selected, the video signal at the monitor output is always a black background, until the internal DVD is selected. -When you change sources, the VFL will display the new input in its primary display. ADJUSTING THE VOLUME Use the HTR L70 remotes keys to adjust the master volume of the L70, raising or lower all channels together. NOTE -A momentary keypress will change the master volume by 1 unit increments; if you hold down the master-volume change will run-on until the key is released. -The L70s OSD will show the volume setting as a line graphic with a numeric display above relative to the reference level. Since recordings vary considerably in overall average level, there is no imperative to listen at any particular master-volume setting. A setting of 20 may sound as loud from one CD or DVD as 10 does from another. -If muting has been activated (below), adjusting master-volume via the HTR L70 remote or the front- panel knob automatically releases the mute function. -The L70 will power-up from standby mode at whatever master volume setting was last used; however, if the prior setting was greater than 50 the L70 will power up to 50. This prevents inadvertently beginning a session at excessive volume. MUTING THE SOUND Use the HTR L70 remotes key to silence all channels completely. Muting is always available, regardless of source or SURROUND MODE selections. NOTE -Cycling through standby or powering off releases muting; the L70 will return from standby with muting off if standby was invoked with muting on. -A changing input or listening-mode selection releases muting. -Adjusting the master-volume via the HTR L70 or the front-panel knob automatically releases the mute function. USING THE L70Operation ENGLISH FRANÇAIS DEUTSCH NEDERLANDS ESPAÑOL ITALIANO PORTUGUÊS SVENSKA L70 IM english 13/3/05 4:34 pm Page 15

Page 18

19 The L70s internal AM/FM tuner offers very high quality sound from radio broadcasts. Note that reception and sound quality will always be dependent to a degree on the type of antenna(s) used, as well as proximity to the broadcast origin, geography, and weather conditions. ABOUT ANTENNAS The supplied ribbon-wire FM antenna can be connected to the rear-panel FM-antenna input using the balun included adaptor, and should be fully extended to form a T. This folded-dipole antenna will usually work best oriented vertically, with the arms of its T full outstretched and arranged perpendicular to the origin of the desired broadcast. There are no rules, however, and experimenting freely with antenna placement and orientation may yield the clearest sound and lowest background noise. In areas of poor FM reception, an exterior FM antenna can improve performance dramatically. If radio listening is important to you, consider consulting an antenna installation professional to optimise your system. The supplied AM loop antenna will usually provide adequate reception. However, an exterior AM antenna can be used to improve reception; consult an antenna professional for more information. SELECTING THE RADIO Press the AM/FM key on the L70 front panel, the HTR L70s orange TUNER (the numeric 9 key), or the yellow AM and FM keys to select the receivers radio mode. Each subsequent press of either key will toggle the unit between its FM and AM bands. TUNING STATIONS Press TUNE on the front panel momentarily to step up or down between FM or AM frequencies. Press and hold TUNE for more than 2 seconds to search up or down; the L70s tuner will stop at the next sufficiently strong signal it encounters. See Front Panel, above. Pressing the TUNE keys momentarily during the search process will stop the search. After first pressing the yellow TUNER mode-select key on the HTR L70 to set the remote to control radio functions, press TUNE DOWN or TUNE UP on the HTR L70 (yellow lettering); press momentarily to perform slow manual search, hold in to automatically search (see above). SETTING RADIO PRESETS The L70 can store as many as 60 of your favourite radio stations for immediate recall; 30 FM stations and 30 AM. To store a radio preset, first tune the desired frequency (see above), then press the front panel MEMORY key. Press the PRESET key to select the preset number to be assigned. Then press the MEMORY key once again. NOTE -The Radio Presets must be stored from the front panel; this setup function is not accessible from the HTR L70 remote. SELECTING RADIO PRESETS Press PRESET on the front panel to step up or down between presets; press and hold PRESET to scroll continuously up or down. The HTR L70 remotes PRESET keys work similarly. USING THE L70S AM/FM RADIOOperation ENGLISH FRANÇAIS DEUTSCH NEDERLANDS ESPAÑOL ITALIANO PORTUGUÊS SVENSKA L70 IM english 13/3/05 4:34 pm Page 19

Page 21

22 DOLBY DIGITAL / DTS Digital recordings in Dolby Digital or DTS formats are reproduced via the channels employed in the original recording (up to the maximum channels present in the current setup). NOTE -The DVD player must be sending a Dolby Digital or DTS bit-stream from its digital output. The DVD includes its own setup menu that (among other things) lets you select the default bit-stream format, and includes an Auto setting that directs the player to choose the Dolby Digital/DTS signal whenever these are available. In a few cases, you may have to set the players bit-stream manually to DOLBY DIGITAL: ON. In the case of DVDs that carry both Dolby Digital and DTS, you will select one or the other from the discs (not the players) main menu. -While most Dolby Digital recordings are 5.1-channel surround productions, older examples may be multichannel, 2-channel, or even monaural; the L70 will automatically reproduce the Dolby Digital signal with the maximum number of channels available. The table below indicates which SURROUND MODEs are available with the two types of audio signal sources: digital- or analog-input 2-channel (whether the actual signal is monaural, stereo or surround- encoded), and digital-multichannel (Dolby Digital or DTS). Where a SURROUND MODE is not available to a given signal source, it will not appear in the selection rotation. 2-ch analog or PCM Multi-ch. (DD/DTS) Stereo Downmix EARS - -Dolby Digital or DTS Dolby Pro Logic II Music - Dolby Pro logic II Movie Dolby Pro logic Emulation - Enhanced Stereo SELECTING SURROUND MODES Keying the HTR L70 remotes SURR MODE button steps through each of the L70s SURROUND MODEs available to the current input signal. It also momentarily displays the SURROUND MODE in the OSD. NOTE Changing the type of input signal may automatically change the SURROUND MODE: If the new signal is a Dolby Digital or DTS recording, it will automatically invoke its native mode. The reverse is also true if Dolby Digital or DTS was previously selected. ABOUT THE L70S SURROUND MODES Operation ENGLISHFRANÇAIS DEUTSCH NEDERLANDSESPAÑOLITALIANO PORTUGUÊSSVENSKA L70 IM english 13/3/05 4:34 pm Page 22

Page 29

30 CHECKING CODE-LIBRARY NUMBER You can check the current code-library on any Device Selector key as follows. Enter Library Mode by simultaneously pressing-and-holding for 3 seconds both the desired components Device Selector key and the PROGRAM key, until the Learn LED turns green. Press the DISP key; the HTR L70 indicates the current code-library by flashing its TAPE, VCR, and MACRO keys. For example, to indicate code- library #501 the HTR L70 will flash TAPE 5 times, pause, and then flash MACRO once. You might wish to make a note of your components code-library numbers. SUMMARY OF HTR L70 MODES Mode Keys To Press (for 3 seconds) Learn/Copy/Punch Through Device Key + OPEN/CLOSE Key Delete Mode Device Key + Return Key Macro Record Macro Key + Function Key Library Mode Device Key + Program Key Back Light Timeout Display Key + Digit Key Factory Reset (see Factory Reset, above) USING THE HTR L70 REMOTE CONTROL Operation ENGLISHFRANÇAIS DEUTSCH NEDERLANDSESPAÑOLITALIANO PORTUGUÊSSVENSKA L70 IM english 13/3/05 4:34 pm Page 30