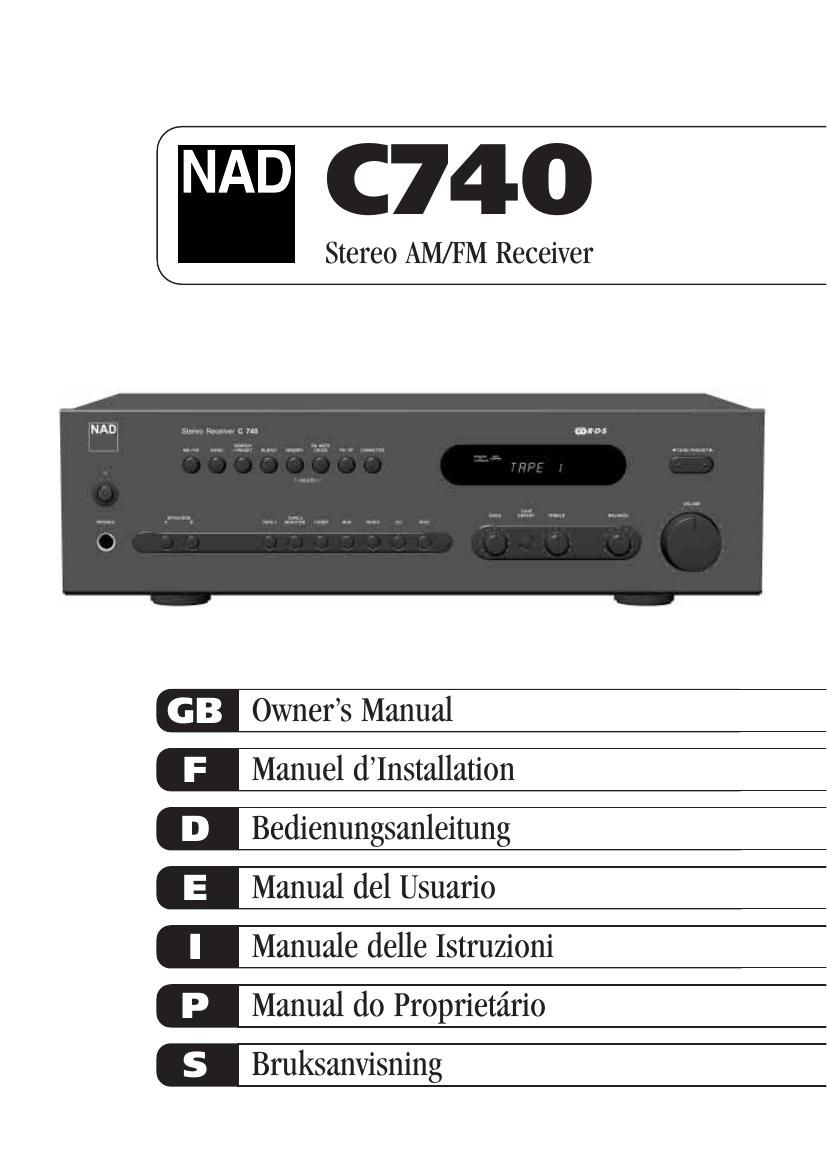
Nad C 740 Owners Manual

This is the 64 pages manual for Nad C 740 Owners Manual.
Read or download the pdf for free. If you want to contribute, please mail your pdfs to info@audioservicemanuals.com.

Page: 1 / 64
left right
Nad C 740 Owners Manual

Extracted text from Nad C 740 Owners Manual (Ocr-read)


Page 1

Warning: To reduce the risk of fire or electric shock, do not expose this unit to rain or moisture. The lightning flash with an arrowhead symbol within an equilateral triangle, is intended to alert the user to the presence of uninsulated Òdangerous voltageÓ within the productÕs enclosure that may be of sufficient magnitude to constitute a risk of electric shock to persons. The exclamation point within an equilateral triangle is intended to alert the user to the presence of important operating and maintenance (servicing) instructions in the literature accompanying the product. Do not place this unit on an unstable cart, stand or tripod, bracket or table. The unit may fall, causing serious injury to a child or adult and serious damage to the unit. Use only with a cart, stand, tripod, bracket or table recommended by the manufacturer or sold with the unit. Any mounting of the device on a wall or ceiling should follow the manufacturerÕs instructions and should use a mounting accessory recommended by the manufacturer. An appliance and cart combination should be moved with care. Quick stops, excessive force and uneven surfaces may cause the appliance and cart combination to overturn. Read and follow all the safety and operating instructions before connecting or using this unit. Retain this notice and the ownerÕs manual for future reference. All warnings on the unit and in its operating instructions should be adhered to. Do not use this unit near water; for example, near a bath tub, washbowl, kitchen sink, laundry tub, in a wet basement or near a swimming pool. The unit should be installed so that its location or position does not interfere with its proper ventilation. For example, it should not be situated on a bed, sofa, rug or similar surface that may block the ventilation openings; or placed in a built-in installation, such as a bookcase or cabinet, that may impede the flow of air through its ventilation openings. The unit should be situated from heat sources such as radiators, heat registers, stoves or other devices (including amplifiers) that produce heat. The unit should be connected to a power supply outlet only of the voltage and frequency marked on its rear panel. The power supply cord should be routed so that it is not likely to be walked on or pinched, especially near the plug, convenience receptacles, or where the cord exits from the unit. Unplug the unit from the wall outlet before cleaning. Never use benzine, thinner or other solvents for cleaning. Use only a soft damp cloth. The power supply cord of the unit should be unplugged from the wall outlet when it is to be unused for a long period of time. Care should be taken so that objects do not fall, and liquids are not spilled into the enclosure through any openings. This unit should be serviced by qualified service personnel when: A. The power cord or the plug has been damaged; or B. Objects have fallen, or liquid has been spilled into the unit; or C. The unit has been exposed to rain or liquids of any kind; or D. The unit does not appear to operate normally or exhibits a marked change in performance; or E. The device has been dropped or the enclosure damaged. DO NOT ATTEMPT SERVICING OF THIS UNIT YOURSELF. REFER SERVICING TO QUALIFIED SERVICE PERSONNEL Upon completion of any servicing or repairs, request the service shopÕs assurance that only Factory Authorized Replacement Parts with the same characteristics as the original parts have been used, and that the routine safety checks have been performed to guarantee that the equipment is in safe operating condition. REPLACEMENT WITH UNAUTHORIZED PARTS MAY RESULT IN FIRE, ELECTRIC SHOCK OR OTHER HAZARDS. ATTENTION POUR ƒVITER LES CHOC ELECTRIQUES, INTRODUIRE LA LAME LA PLUS LARGE DE LA FICHE DANS LA BORNE CORRESPONDANTE DE LA PRISE ET POUSSER JUSQUÕAU FOND. CAUTION TO PREVENT ELECTRIC SHOCK, MATCH WIDE BLADE OF PLUG TO WIDE SLOT FULLY INSERT. If an indoor antenna is used (either built into the set or installed separately), never allow any part of the antenna to touch the metal parts of other electrical appliances such as a lamp, TV set etc. CAUTION POWER LINES Any outdoor antenna must be located away from all power lines. OUTDOOR ANTENNA GROUNDING If an outside antenna is connected to your tuner or tuner- preamplifier, be sure the antenna system is grounded so as to provide some protection against voltage surges and built-up static charges. Article 810 of the National Electrical Code, ANSI/NFPA No. 70-1984, provides information with respect to proper grounding of the mast and supporting structure, grounding of the lead-in wire to an antenna discharge unit, size of grounding conductors, location of antenna discharge unit, connection to grounding electrodes and requirements for the grounding electrode. a. Use No. 10 AWG (5.3mm2) copper, No. 8 AWG (8.4mm2) aluminium, No. 17 AWG (1.0mm2) copper-clad steel or bronze wire, or larger, as a ground wire. b. Secure antenna lead-in and ground wires to house with stand-off insulators spaced from 4-6 feet (1.22 - 1.83 m) apart. c. Mount antenna discharge unit as close as possible to where lead- in enters house. d. Use jumper wire not smaller than No.6 AWG (13.3mm2) copper, or the equivalent, when a separate antenna-grounding electrode is used. see NEC Section 810-21 (j). EXAMPLE OF ANTENNA GROUNDING AS PER NATIONAL ELECTRICAL CODE INSTRUCTIONS CONTAINED IN ARTICLE 810 - RADIO AND TELEVISION EQUIPMENT. NOTE TO CATV SYSTEM INSTALLER:This reminder is provided to call the CATV system installerÕs attention to Article 820-40 of the National Electrical Code that provides guidelines for proper grounding and, in particular, specifies that the ground cable ground shall be connected to the grounding system of the building, as close to the point of cable entry as practical. CAUTION RISK OF ELECTRIC SHOCK DO NOT OPEN ATTENTION:RISQUE DE CHOC ELECTRIQUE NE PAS OUVRIR CAUTION:TO REDUCE THE RISK OF ELECTRIC SHOCK, DO NOT REMOVE COVER (OR BACK). NO USER SERVICEABLE PARTS INSIDE. REFER SERVICING TO QUALIFIED SERVICE PERSONNEL. IMPORTANT SAFETY INSTRUCTIONS 2

Page 2

3 REAR PANEL CONNECTIONS FRONT PANEL CONTROLS

Page 8

STORING A STATION NAME When a station is transmitting RDS information, your NAD C740 will automatically show the station initials when its Preset is used. Although the receiver automatically shows the frequency of any other AM or non-RDS Preset station, it also allows you to type in the station name to make it easier to identify which station is stored in the Memory Preset. To enter a name: Â¥ Select the Preset you want to attach a name to. Â¥ Then press Character (No. 18) and the first space in the Station Data area of the Display Panel will flash. Â¥ Press either the Tune/Preset or (No. 19) button to scroll and select the first character (see Character list for reference). Â¥ Pressing Memory (No. 15) will store the first character and move forward to the next space on the line. Â¥ Use the Tune/Preset buttons again to select the next character in the name and press Memory to store it. Continue until the station name is complete (up to 8 characters). Â¥ Press Character again to store the completed name. There are 54 characters available including a blank space. NOTE: This function is only available for non-RDS stations. RDS stations will always display their transmitted name and this cannot be over-written using CHARACTER. NOTE:The 120V versions (North America) do not have RDS (Radio Data System) REMOTE CONTROL HANDSET The Remote Control handset handles all the key functions of the NAD C740 and has additional controls to remotely operate NAD Tuners, Cassette and CD machines. It will operate up to a distance of 16ft (5m). Alkaline batteries are recommended for maximum operating life. Two AAA (R 03) batteries should be fitted in the battery compartment at the rear of the Remote Control handset. When replacing batteries, check that they have been put in the right way round, as indicated on the base of the battery compartment. Please refer to previous sections of the manual for a full description of individual functions. NOTE: The remote control handset supplied with the C740 is of a universal NAD type, designed to operate several NAD models. The Video 2 and Video 3 input selector buttons on the remote control handset are inoperative in the case of the C740. The Speaker A and B buttons, the Bank button, and input selector buttons perform the same functions as the buttons labelled the same on the front panel. There are a few differences and extra functions with the remote control handset however:TUNER AM, TUNER FM Pressing either the AM or FM button will select the tuner as the active input and revert to the last station tuned to on respectively the AM or FM band. MUTE Press the MUTE Button to temporarily switch off the sound to the speakers and headphones. Mute mode is indicated by Ã’AUDIO MUTEÓ flashing in red in the display area. Press MUTE again to restore sound. Mute does not affect recordings made using the Tape outputs but will affect the signal going to the Pre-amp output (Pre Out). VOLUME or respectively increases or decreases the Volume setting. The motorised Volume Control on the front panel will indicate the level set. TUNER CONTROL PRESET or allow direct selection of the desired preset. Use of these buttons will automatically switch the tuner section to Preset mode. Refer also to chapter Ã’Front Panel ControlsÓ; section 13 Ã’Search/PresetÓ for more information. Other than the commands relating to the NAD C740 receiver itself, there are other buttons which will operate most NAD CD players and Cassette decks equipped with NAD Link: CD PLAYER CONTROL (for use with NAD CD Player) engages Pause engages Stop engages Play or toggles between Play and Pause or engages Track skip; Press once to respectively go to the next track or to return to start of current or previous track. NEXT DISC Go to next disc (for NAD CD changers). CASSETTE DECK CONTROL (For use with single (DECK B) or double transport (A and B) NAD Cassette Decks) or engages Forward Play or Reverse Play. Record / Pause. Press to put cassette deck into record- pause. Press Play to start recording. Stops Play or Recording. engages Rewind. engages Fast Forward. NOTE:Direct sunlight or very bright ambient lighting may affect the operating range and angle for the remote control handset. NOTE:The infrared remote control command receiver, located on the far left of the display window, receives commands from the remote control. There must be a clear line-of-sight path from the remote control to this window; if that path is obstructed, the remote control may not work. GB 9 _ A B C D E F G H I J K L M N O P Q R S T U V W * X Y Z " & ' ( ) + , -“ . / = ? [ \ ] | 0 1 2 3 4 5 6 7 8 9

Page 10

GB 11

Page 38

9. ANTENNA AM Il NAD C740 fornito di unÕantenna AM a filo aereo che serve per garantire la ricezione delle stazioni a modulazione dÕampiezza (A.M.). Per collegare lÕantenna AM, premere in giœ i tasti sui terminali Antenna. Infilare i cavi spelati dellÕantenna nei due fori terminali e spingere i tasti dei connettori verso lÕalto per fissare le connessioni (vedere la Fig. 2). Sperimentare lÕorientamento dellÕantenna assicurandosi sempre che il cerchio sia in verticale per garantire una buona ricezione. La ricezione pu˜ essere pregiudicata se lÕantenna viene collocata accanto a componenti metallici, quali scaffali o termosifoni. 10. ANTENNA FM LÕunitˆ dotata anche di unÕantenna a piattina per le stazioni a modulazione di frequenza (FM); questa va collegata al connettore FM sul retro dellÕunitˆ. (I modelli 120 V per lÕAmerica del Nord devono utilizzare lÕadattatore ÒbalunÓ per accoppiamento simmetrico/asimmetrico fornito - vedere la figura 1). LÕantenna a piattina va montata su una superficie verticale, in modo che formi una ÒTÓ. Orientare lÕantenna in varie posizioni per individuare quella migliore, ottenendo cio il massimo segnale possibile con minimo rumore di fondo. Un segnale FM non perfetto dˆ di solito sibilo molto forte, specie in ascolto stereo, nonchŽ interferenze da fonti elettriche esterne. Se la ricezione FM molto scadente, possibile peraltro migliorare le prestazioni del sintonizzatore impiegando unÕantenna FM esterna. Interpellare a questo proposito un tecnico specializzato che provvederˆ ad installare lÕantenna nel modo migliore possibile a seconda della zona. 11. ÒSOFT CLIPPINGÓ Quando lÕamplificatore viene azionato oltre lÕoutput prescritto a volumi molto alti si noterˆ un suono ÒsporcoÓ e con forte distorsione. Ci˜ dovuto al fatto che lÕamplificatore elimina ovvero ÒmozzaÓ per distorsione i picchi del suono che non in grado di riprodurre. Lo speciale circuito di distorsione/limitazione NAD ÒSoft ClippingÓ lÕoutput del sistema per ridurre al minimo la distorsione sonora se lÕamplificatore viene Òtirato al massimoÓ. Se lÕascolto comporta livelli di potenza moderati, ÒSoft ClippingÓ pu˜ essere disabilitato. Se invece si ascolta ad alto volume, oltre le capacitˆ esecutive dellÕaltoparlante, abilitare ÒSoft ClipÓ. ÒSOFT CLIPPINGÓ si accende sul display quando il ricevitore si trova appunto nel modo Soft Clip. 12. ALTOPARLANTI A + ALTOPARLANTI B Il NAD C740 dotato di due serie di connettori per gli altoparlanti. Impiegare i connettori Altoparlanti ÒAÓ per gli altoparlanti principali; impiegare i connettori Altoparlanti ÒBÓ per una seconda coppia di casse, ad esempio altoparlanti supplementari, disposti in altro locale. Collegare lÕaltoparlante destro ai terminali marcati ÒR +Ó ed ÒR - Ó, assicurandosi che ÒR +Ó sia collegato al terminale Ò+Ó sullÕaltoparlante, con ÒR -Ó collegato al terminale Ò-Ó dellÕaltoparlante. Collegare i terminali marcati ÒL +Ó ed ÒL -Ó in pari modo allÕaltoparlante sinistro. Impiegare sempre il tipo di cavo a filo attorcigliato heavy duty (calibro 16; spessore 1,5 mm o piœ) per collegare gli altoparlanti al Vs. NAD C740. I terminali a morsetto per lÕalta corrente possono essere impiegati quali terminali a vite per quei cavi con prese o capocorda a forcella oppure a piedini, oppure infine per cavi con fili scoperti.FILI SCOPERTI E CONNETTORI A PIEDINI I fili scoperti e le prese a piedini vanno infilati nel foro nel gambo del terminale. Svitare la boccola in plastica dei terminali degli altoparlanti per scoprire il foro nel gambo della vite. Infilare il piedino o il cavo scoperto nel foro e fissare il cavo serrando la boccola del terminale (Vedere la fig. 3). Assicurarsi che il filo spelato dai cavi degli altoparlanti non possa fare contatto contro il pannello posteriore o altre prese. Assicurarsi che vi sia solo un centimetro di cavo o piedino scoperto, controllando inoltre che i cavi degli altoparlanti non abbiano trefoli allentati. NOTA:Assicurarsi che lÕimpedenza degli altoparlanti sia pari a 4 ohm o piœ quando si collega solo una coppia di altoparlanti; assicurarsi che lÕimpedenza per tutti gli altoparlanti sia superiore ad 8 ohm quando si collegano due serie di altoparlanti. 13. ÒNAD LINK IN/OUTÓ Il connettore NAD-Link viene impiegando per inviare comandi dalle altre unitˆ dotate di connettori NAD-Link. In questo modo si ottiene un perfetto controllo centralizzato dellÕintero sistema e si ha inoltre la possibilitˆ di controllare tramite il telecomando del ricevitore alcune delle funzioni basilari di altri componenti NAD (ad esempio: il riproduttore per CD o per cassette). Per assicurare un funzionamento perfetto con le altre unitˆ, collegare il ÒNAD-Link OutÓ del C740 al ÒNAD-Link InÓ sullÕaltra unitˆ. I connettore ÒNAD-LinkÓ possono essere concatenati ÒINÓ ad ÒOUTÓ pertanto possibile comandare un intero sistema tramite i telecomandi di unÕunitˆ. 14. CAVO DÕALIMENTAZIONE C.A. Collegare il cordone C.A. nella presa a muro in tensione. Assicurarsi che tutte le connessioni siano state perfezionate a regola dÕarte prima di collegare lÕunitˆ alla rete. COMANDI DEL QUADRO ANTERIORE 1. ÒPOWER ON/OFFÓ (ACCESO/SPENTO) Premere il pulsante POWER per portare il ricevitore nel modo di attesa ÒStand-byÓ. LÕindicatore Stand-by (No. 4) sul pulsante si accenderˆ. Agendo sul pannello anteriore, premere uno dei pulsanti selettori di input per accendere il ricevitore. Agendo sul telecomando, premere il pulsante verde Stand-by (sopra i pulsanti Altoparlanti A e B) per accendere lÕunitˆ. Il display si accenderˆ indicato quale input stato selezionato: la spia dello Stand-by si spegnerˆ. Premendo lÕinterruttore POWER una seconda volta si spegne completamente lÕunitˆ. Il ricevitore NAD C740 impiega un sistema back-up per la memoria che serve per memorizzare le informazioni relative alle stazioni preimpostate per il sintonizzatore. Queste informazioni vengono conservate per parecchie settimane, anche se lÕunitˆ viene spenta completamente oppure scollegata dalla rete. TELECOMANDO Pulsante STAND-BY (verde): Premere questo pulsante per portare lÕunitˆ nel modo di attesa ÒStand-byÓ o viceversa: premere questo pulsante una seconda volta per portare lÕunitˆ in modo ÒStand-byÓ: la sorgente selezionata per ultima verrˆ indicata sul display. NOTA:Il modo di attesa ÒStand-byÓ indicato dalla spia Standy- by (No. 4) sopra il pulsante verde di alimentazione ÒPOWERÓ sul pannello anteriore (No. 1) I 39

Page 42

Il display ha inoltre una sezione ad otto caratteri alfanumerici che visualizza lÕinput attivo, il nome della stazione, il Testo Radio oppure la frequenza. COME MEMORIZZARE, RICHIAMARE E Ã’BATTEZZAREÓ LE PREIMPOSTAZIONI Come memorizzare una preimpostazione: Â¥ Sintonizzarsi sulla stazione radio che si desidera memorizzare in una preimpostazione (fare riferimento al capitolo Ã’Comandi sul pannello anterioreÓ; sezione 13). Se la stazione sta trasmettendo informazioni RDS, lÕindicatore RDS si accende e la sigla della stazione viene visualizzata sul quadro del display. Se si capta una stazione non RDS, allora solo la frequenza viene visualizzata. Â¥ Per memorizzare tale stazione quale preimpostazione basta premere il pulsante Ã’MemoryÓ (No. 15). LÕindicatore Ã’MemoryÓ verrˆ visualizzato e la sezione di preselezione Ã’PresetÓ lampeggerˆ sul quadro del display. Â¥ Premere Ã’BankÓ (No. 12) per selezionare in quale delle tre linee di preimpostazione (A, B oppure C) si desidera memorizzare la stazione. Premere i pulsanti Ã’Tune/PresetÓ oppure per selezionare quale numero di preimpostazione si desidera attribuire alla stazione (dallÕ1 al 10), che viene evidenziato quale numero lampeggiante sul quadro del display, quindi premere unÕaltra volta Ã’MemoryÓ (No. 15). La spia Ã’MemoryÓ sul quadro del display si spegne: la stazione pertanto memorizzata nella memoria del Vs. NAD C740. Per uscire dal modo di Memoria senza memorizzare una stazione, non toccare alcun comando del sintonizzatore; il modo di Memoria si autocancella dopo otto secondi. Le Preselezioni della Memoria sono registrate in una memoria back-up, pertanto rimangono memorizzate per parecchie settimane, anche se il ricevitore viene spento o staccato dalla rete. NOTA:Si puËœ iscrivere una nuova stazione in una preselezione non utilizzata oppure scrivere su una preselezione della memoria giˆ esistente. Intervenendo in questo modo si sostituiscono tutti i dati registrati in precedenza per quel numero di preselezione. COME RICHIAMARE UNA STAZIONE PREIMPOSTATA Â¥ Per selezionare una stazione preimpostata, passare al modo di preimpostazione premendo il pulsante di ricerca/preimpostazione Ã’Search/PresetÓ (No. 13) finchŽ la scritta Ã’PRESETÓ non si accende sul display. Â¥ Premendo il pulsante Ã’BankÓ (No. 12) si sceglie quale linea di preimpostazioni si vuole impiegare (A, B oppure C, che sono indicati sul display). Â¥ Premere i pulsanti di sintonizzazione/preimpostazione Ã’Tune/PresetÓ oppure (No. 19) finchŽ non si individua la preimpostazione che viene poi riportata sul quadro del display. Tutte le preselezioni non utilizzate vengono saltate; non possibile selezionare una Linea se non ha come minimo una Preselezione giˆ memorizzata. COME CANCELLARE UNA PREIMPOSTAZIONE MEMORIZZATA Una preimpostazione puËœ essere liberata cancellando le informazioni memorizzate: Â¥ Selezionare la preimpostazione che si desidera annullare. Â¥ Premere il pulsante Ã’MemoryÓ (No. 15), tenerlo premuto e premere poi il pulsante Ã’FM MODE/MUTEÓ (No. 16). LaPreselezione sarˆ cos cancellata: il Numero di Preselezione sarˆ indicato dal simbolo Ã’--Ó. EÕ possibile inoltre memorizzare una nuova stazione in una Preselezione usata: basta ripetere il processo di memorizzazione della Preselezione ed impostare una nuova stazione su quella originale. COME MEMORIZZARE LA SIGLA DI UNA STAZIONE. Quando una stazione sta trasmettendo informazioni RDS, il NAD C740 visualizza automaticamente la sigla della stazione quando si impiega il relativo Ã’PresetÓ. Sebbene il ricevitore visualizzi automaticamente la frequenza di tutte le altre stazioni preimpostate AM oppure non RDS, possibile digitare la sigla della stazione per rendere piÅ“ facile identificare quale stazione iscritta nella Preselezione della memoria. Come iscrivere un nome: Â¥ Scegliere la preimpostazione per la quale si desidera iscrivere un nome. Â¥ Premere quindi Ã’CharacterÓ (No. 18): il primo spazio libero nel settore Ã’Station DataÓ sul quadro del display lampeggerˆ. Â¥ Premere i pulsanti Ã’Tune/PresetÓ oppure (No. 19) per visionare e scegliere il primo carattere (vedere lÕelenco dei caratteri). Â¥ Premendo Ã’MemoryÓ (No. 15) si memorizza il primo carattere e si passa allo spazio successivo sulla riga. Â¥ Impiegare nuovamente i pulsanti Ã’Tune/PresetÓ per selezionare la lettera successiva della sigla, quindi premere Ã’MemoryÓ per memorizzarla. Proseguire finchŽ il nome della stazione non completo (fino ad otto lettere). Â¥ Premere nuovamente Ã’CHARACTERÓ per memorizzare lÕintera sigla. Vi sono in tutto 54 lettere o caratteri, compreso uno spazio in bianco. NOTA:Questa funzione disponibile solo per le stazioni non RDS. Le stazioni RDS visualizzano sempre la sigla trasmessa che non puËœ essere cancellata impiegando Ã’CHARACTERÓ. NOTA:I modelli a 120 volt (America del nord) non hanno il sistema RDS (sistema informativo autoradio) I 43 _ A B C D E F G H I J K L M N O P Q R S T U V W * X Y Z " & ' ( ) + , -“ . / = ? [ \ ] | 0 1 2 3 4 5 6 7 8 9

Page 53

P 54 RESOLU-šÃŒO DE PROBLEMAS AUSæNCIA DE SOM Â¥ Cabo de alimenta-¹o CA desligado, ou a alimenta-¹o elŽctrica n-¹o est-¡ ligada Â¥ Modo Controle Tape 2 seleccionado Â¥ Fun-¹o Mute activada Â¥ Interliga-ºes do amplificador Pre- out/Main-in n-¹o instaladas Â¥ Altifalantes n-¹o est-¹o ligadosÂ¥ Verifique se o cabo de alimenta-¹o CA se encontra ligado e se a alimenta-¹o elŽctrica est-¡ ligada Â¥ Desactive o modo de Controle Tape 2 Â¥ Desactive a fun-¹o Mute Â¥ Instale as interliga-ºes Â¥ Accione os bot-ºes Speakers A ou B (Altifalantes A ou B) AUSæNCIA DE SOM NUM CANAL Â¥ Bot-¹o de controle do balano n-¹o est-¡ centrado Â¥ Altifalante mal ligado ou danificado. Â¥ Cabo de entrada desligado ou danificadoÂ¥ Coloque o bot-¹o de controle do Balano na posi-¹o central Â¥ Verifique as liga-ºes e os altifalantes Â¥ Verifique os cabos e as liga-ºes APARELHO DE CONTROLO REMOTO NÃŒO FUNCIONAÂ¥ Pilhas gastas, ou colocadas incorrectamente Â¥ Janelas do receptor ou transmissor IR obstrudas. Â¥ Receptor IR exposto a raios solares ou a luz ambiente muito brilhante.Â¥ Verifique ou substitua as pilhas Â¥ Elimine a obstru-¹o Â¥ Coloque a unidade num local afastado da exposi-¹o directa aos raios solares e reduza a intensidade de luz ambiente. AUSæNCIA DE SOM QUANDO SE SELECCIONA O SINTONIZADORÂ¥ Cabos da antena mal ligados Â¥ Esta-¹o n-¹o seleccionada ou sinal fraco com a fun-¹o FM Mute activada. Â¥ Fusvel interno fundidoÂ¥ Verifique as liga-ºes da antena para o receptor Â¥ Sintonize de novo ou desactive a fun-¹o FM Mute Â¥ Consulte o seu revendedor autorizado Problema Causa Solu-¹o BAIXOS FRACOS/ IMAGEM ESTÆ’REO DIFUSAÂ¥ Cabos ligados fora de fase Â¥ Verifique as liga-ºes para todos os altifalantes no sistema RUêDO E INTERFERæNCIAS EM AM E FM Â¥ Sinal fraco Â¥ Verifique a sintonia da esta-¹o. Ajuste ou substitua a antena. DISTOR-šÃŒO EM FM Â¥ Interferncias ou sinais de traject-ria mÅ“ltipla provocados por outra esta-¹oÂ¥ Verifique a sintonia da esta-¹o. Ajuste ou substitua a antena SILVOS OU ZUMBIDOS EM FM E AM. Â¥ Interferncias provocadas por outros fontes elŽctricas - computadores, consolas de jogosÂ¥ Verifique a sintonia da esta-¹o. Desligue ou afaste a fonte causadora do rudo elŽctrico. SILVOS OU ZUMBIDOS EM AM Â¥ Interferncias provocadas por luzes fluorescentes ou motores elŽctricosÂ¥ Verifique a sintonia da esta-¹o. Ajuste ou substitua a antena AM AUSæNCIA DE INFORMA-šÃŒO RDS Â¥ Sinal da esta-¹o demasiado fraco. Â¥ A esta-¹o n-¹o est-¡ a transmitir dados RDSÂ¥ Verifique a sintonia da esta-¹o. Ajuste ou substitua a antena Â¥ Sem solu-¹o.