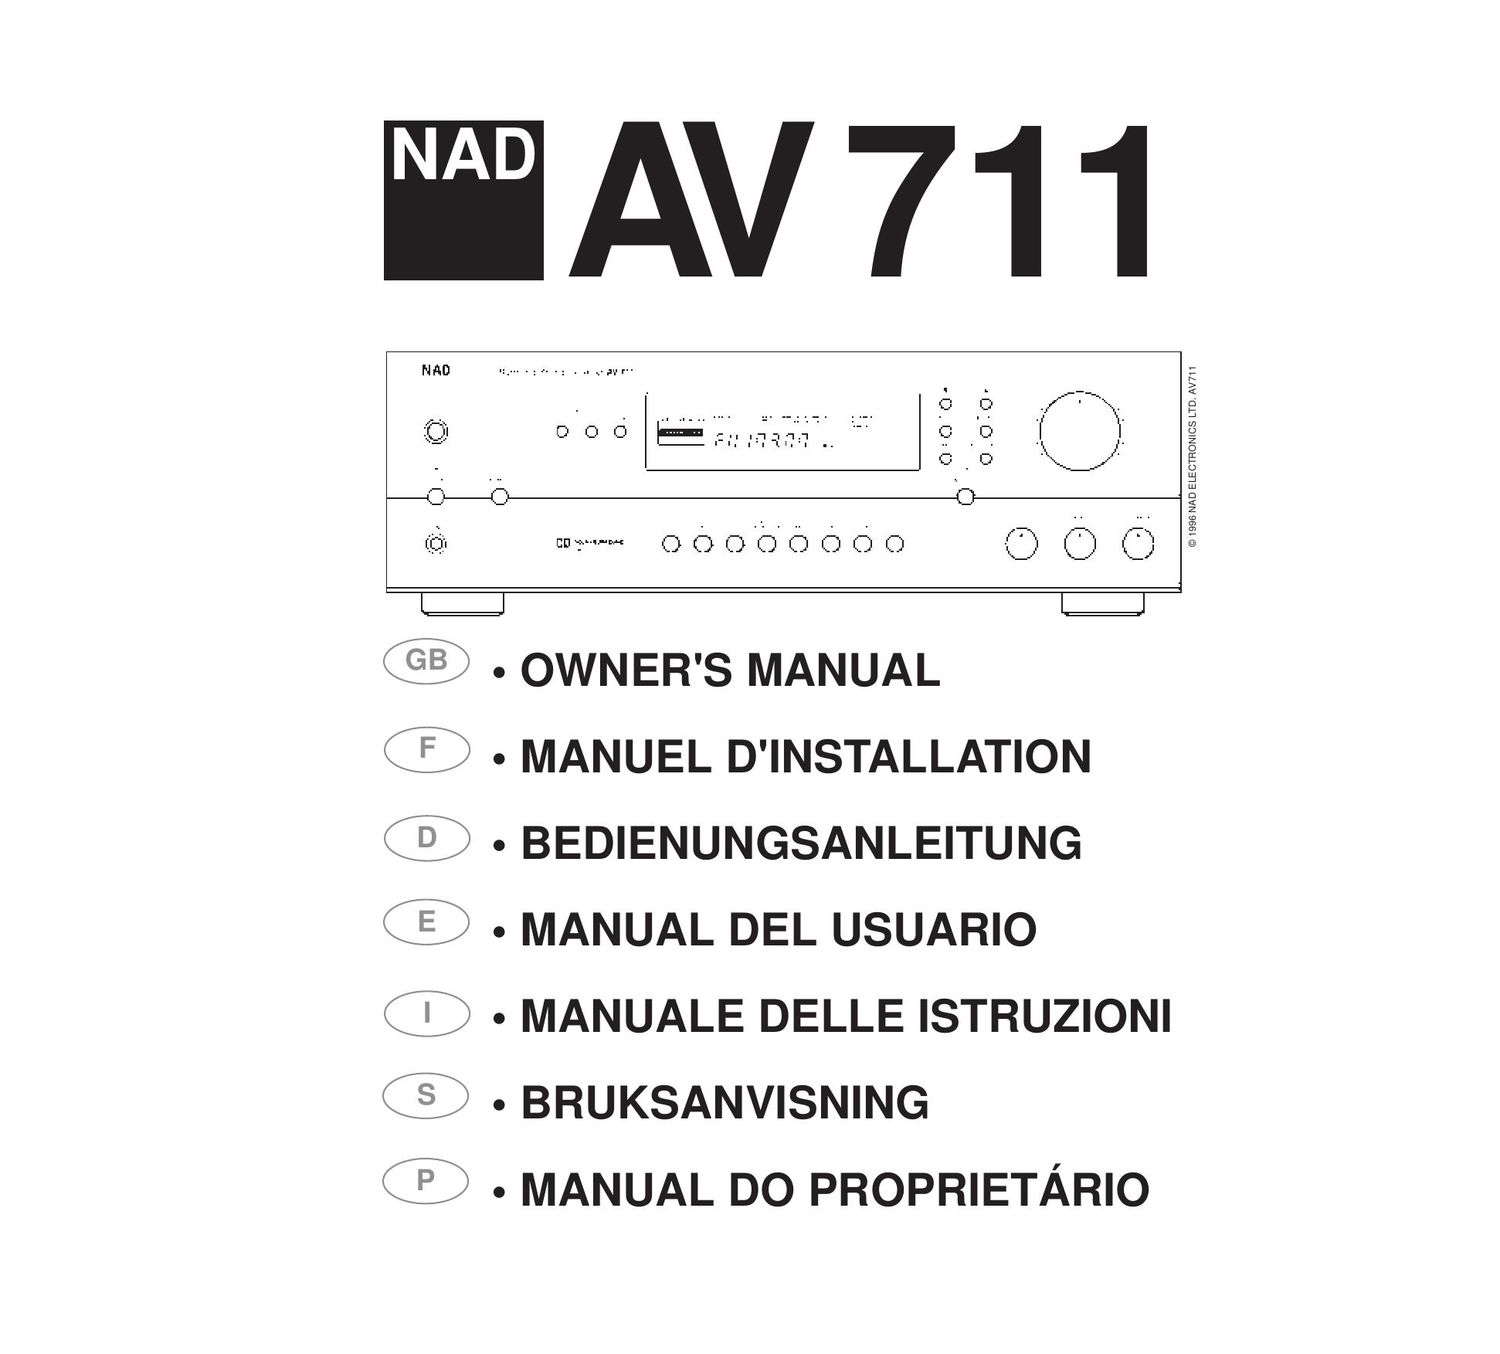
Nad AV 711 Owners Manual

This is the 77 pages manual for Nad AV 711 Owners Manual.
Read or download the pdf for free. If you want to contribute, please mail your pdfs to info@audioservicemanuals.com.

Page: 1 / 77
left right
Nad AV 711 Owners Manual

Extracted text from Nad AV 711 Owners Manual (Ocr-read)


Page 2

PRECAUTIONS AND SAFETY INSTRUCTIONS

CAUTION ATTEN'ITON:

RIsouE DE cHoc ELEchiouE
NE PAS OuleR

CAUTION: To REDUCE THE RISK OF ELECTRIC SHOCK, Do NOT REMOVE COVER lOR RACK)
ATTENTION: AFIN DEvITER UN CHOC ELECTRIOUE ET LEs CONSEQUENCES GRAVES our
POuRRAIENT EN RESULTER TENTEz PAS DOUVRIR LAPPAREIL ET DE TOuCHER AUx
COMPOSANTS INTERNES SANS LA PRESENCE DUNE SERVICE PERSONNEL

WARNING: TO REDUCE THE RISK OF FIRE OR ELECTRIC
SHOCK, DO NOT EXPOSE THIS UNIT TO RAIN OR MOISTURE.

RISK OF ELECTRIC

SHOCK Do NOT OPEN

The graphic symbol ol a lightning flash With an arrow poInt within a My
angle signilies that there is dangerous voltage within the unIt and it
poses a hazard to anyone removIng the cover to gain access to the
interior of the unIt. Only qualified service personnel should
make any such attempt.

The graphic symbol of an exclamation point wrthin an equilateral trIanr
gle warns a user of the device that it is necessary to refer to the
instruction manual and its warnings for proper operatIon of the unit.

Do not place this unit on an unstable cart, stand or tripod,
bracket or table. The unIt may fall. caUSIng serious injury to a
child or adult and serious damage to the unit. Use only with a
cart. stand, tripod, bracket ortable recommended by the many
utacturer or sold with the unit. Any mountIng of the device on a
wall or ceiling Should follow the mautacturer's instructions and
should use a mounting accessory recommended by the maan
Iacturer.

An appliance and can Combination should be moved With care. Quick stops,
excessive Iorce and uneven surfaces may cause the appliance and cart combir
nation to overturn.

Read and follow all the safety and operating instructions before connecting or
using this unit. Retain this notice and the owner's manual for future reference.

All warnIngs on the unit and in it's operatIng instructIons should be adhered to.

Do not use thIs unIt near water; Ior example, near a bath tub, washbowl.
kitchen Slltk, laundry tub, in a wet basement or near a swimming pool.

The unit should be Installed so that its location or positIon does not Intertere
with Its proper ventilation. For example. it should not be situated on a bed, Sofa,
rug or similar surface that may block the ventilation openings; or pif laced in a
bUlIHn Installation, such as a bookcase or cabinet, that may impede the flow of
air through the ventilation openings, there should be at least 20cm (8 in.) of Iree
space behind the unit.

The unit should be sItuated from heat Sources such as radiators, heat
registers, Stoves or other devices (including amplifiers) that produce heat.

The unIt should be connected to a power supply outlet only of the voltage and
frequency marked on its rear panel.

The power Supply cord should be routed so that It is not likely to be walked on
or pinched, especially near the plug, convenience receptacles. or where the cord
exits from the unit.

Unplug the unit from the wall outlet before cleaning. Never use benzine.
thinner or other solvents for cleaning. Use only a soft damp cloth.

The power Supply cord Of the unit Should be unplugged from the wall outlet
when it is to be unused for a long period ot time.

Care should be taken so that objects do not fall, and liquids are not spilled Into
the enclosure through any openings.

This unit should be serviced by qualified service personnel when:

(1) The power cord or the plug has been damaged; or

(2) Objects have fallen. or liquid has been spilled Into the unit; or

(3) The unit has been exposed to rain or liquids of any kind: or

(4) The unit does not appear to operate normally or exhibits a marked change
in performance; or

(5) The device has been dropped or the enclosure damaged.

DO NOT ATTEMPT SERVICING OF THIS UNIT YOURSELF. REFER
SERVICING TO QUALIFIED SERVICE PERSONNEL.

Upon completion of any servicing or repairs, request the service Shop's
assurance that only Factory Authorized Replacement Parts WllIl the same
characteristics as the original parts have been used, and that the routine safety
checks have been performed to guarantee that the equipment is in safe
operating condition.

REPLACEMENT WITH UNAUTHORIZED PARTS MAY RESULT IN
FIRE, ELECTRIC SHOCK OR OTHER HAZARDS.

CAUTION: TO PREVENT ELECTRIC SHOCK, MATCH WIDE
BLADE OF PLUG TO WIDE SLOT, FULLY INSERT.

ATTENTION: POUR EVITER LES CHOCS ELECTRIQUES

INTRODUIRE LA LAME LA PLUS LARGE DE LA FICHE DANS LA
BORNE CORRESPONDANTE DE LA PRISE ET POUSSER
JUSQU'AU FOND.

If an indoor antenna is used (elther buIlt into the set or installed separately),
never allow any part of the antenna to touch the metal pans of other electrical
appliances such as a lamp, TV Set etc.

CAUTION - POWER LINES: ANY OUTDOOR ANTENNA MUST BE
LOCATED AWAY FROM ALL POWER LINES.

OUTDOOR ANTENNA GROUNDING

If an outsIde antenna is connected to your tuner or tunerrpreamplifier, be Sure
the antenna system Is grounded so as to provide some protection against
voltage surges and bulltrup static charges. Section 810 of the National Electrical
Code, ANSI/NFPA No. 7071984, provides information with respect to proper
grounding of the mast and supporting Structure, grounding of the leadrin wire to
an antenna discharge unit. size ol grounding conductors, location of antenna
dIscharge unit, connection to grounding electrodes and requirements for the
grounding electrode.

(1) Use No. 10 AWG (5.3mm2) copper, No. B AWG (8.4mm2) aluminium, No.
17 AWG (1.0mm2) copperrclad steel or bronze wire, or larger, as a ground wire.

(2) Secure antenna leadrin and ground WIres to house WIth Standroft
insulators spaced from 476 feet (1.22 71.83 m) apart.

(3) Mount antenna discharge unit as close as possible to where leadrin
enters house.

(4) Use jumper wire not smaller than No.6 AWG (13.3mm2) copper, or the
equivalent, when a separate antennargroundlng electrode is used. See NEC
Section 81021 (j).

EXAMPLE OF ANTENNA GROUNDING AS PER NATIONAL ELECTRICAL
CODE INSTRUCTIONS CONTAINED IN ARTICLE 810 , RADIO AND
TELEVISION EQUIPMENT.


Hel- LE Afllhflfi
I in mLF _Elll:| N'INIII
:3..wur v _,_\_
awal-MI-
_'I:i.Hr.Fl:|E

Memo win .1 -

(:IKDUHIJ CMUFE

NOTE TO CATV SYSTEM INSTALLER: This reminder is provided
to call the CATV system installers attention to Article 820-22 of the
National Electrical Code that provides guidelines for proper grounding
and, in particular, specifies that the ground cable ground shall be
connected to the grounding system Of the building, as close to the
point of cable entry as practical.

Page 22

®

puisquelle porte plus dattention aux sons qui
latteignent en premier. Pour résoudre ce probleme,
le circuit Dolby Pro Logic comporte un retard de
Sonorisation Enveloppante. De cette maniere. les
sons provenant des haut-parleurs de Sonorisation
Enveloppante atteignent toujours les oreilles
de lauditeur aprés les sons provenant des haut-par-
leurs Avant.

La valeur exacte du retard nécessaire depend des
distances relatives entre les haut-parleurs Avant et de
Sonorisation Enveloppante et la position de lauditeur
dans la piece.

Commencer par noter la distance entre les haut-
parleurs de Sonorisation Enveloppante et la position
decoute. Noter ensuite la distance entre les haut-par-
leurs Avant et la zone d'ecoute. Utiliser la courbe
ci-dessous et noter le point ou les deux distances se
croisent. Ce point indique le Retard préconisé a
régler sur l'appareil.

Pour régler le Retard, mettre lAV-711 en mode
Dolby Pro Logic et appuyer sur RETARD [DELAY]
sur la face parlante ou sur la télécommande.
Continuer a appuyer sur RETARD [DELAY] jusqua
ce que la valeur requise apparaisse sur latticheur.

Les réglages du Niveau et du Retard sont stockés
dans la mémoire de lAV-71 1.

Les valeurs correspondantes sont rappelees
automatiquement a chaque mise sous tension de
lappareil.

Pour reference, utiliser les cases ci-dessous pour
noter vos réglages personnels. En cas de modifica-
tion accidentelle, il sera possible de reproduire ces
réglages sans avoir recours a la procédure de Test.

TELECOMMANDE

La Télécommande 45RCt reproduit toutes les
tonctions cles de lAV-711, et comporte aussi des
commandes supplémentaires permettant de telecom-
mander les lecteurs de cassettes et de disques
audionumériques (CD) NAD, depuis une distance
pouvant allerjusqua 5 metres.

Les fonctions subsidiaires, de mode et de configu-
ration sont assurées a l'aide de boutons noirs.
Les commandes de Marche/Arrét [Power] et
dEnregistrement [Record] (destinées a une platine
cassettes NAD) sont de couleur rouge.

Se reporter aux sections precédentes du manuel
pour des descriptions détaillées des dittérentes tonc-
tions.

POWER [MARCHE/ARRET]
Commute lAV-711 entre les modes
Marche et Veille.
SURROUND MODE [MODE SONORITE
ENVELOPPANTE]
Sélectionne les modes Dolby Pro
Logic, Dolby 3 Stereo Hall ou By-Pass.
SLEEP [SOMMEIL]
Met I'AV 711 en mode SOMMEIL
[SLEEP].

TAPE 1 [MAGNETOPHONE 1]
Sélectionne le Magnétophone 1
comme entree active.

TAPE 2 [MAGNETOPHONE 2]
Sélectionne le moniteur
Magnétophone 2.

TUNER Sélectionne le Tuner comme entree
active.

PHONO Sélectionne Phono comme entrée
active.

CD Sélectionne le lecteur de Disques
Audionumériques (CD) comme entrée
active.

VIDEO 1 Sélectionne VIDEO 1 comme entrée
active.

VIDEO 2 Sélectionne VIDEO 2 comme entrée
active.

TUNER BANK [BANQUE TUNER]
Sélectionne une Banque de
Stations Préréglées du Tuner.
PRESET + - [STATION PREREGLEE + -]
Sélectionne une Station Prereglée
du Tuner.
CASSETTE DECK CONTROL [COMMANDE DE
LA PLATINE A CASSETTES] (pour utilisation avec
une Platine a Cassettes NAD).
DECK A, DECK B [PLATINE A, PLATINE B]
Si une seule platine est connectée,
utiliser les commandes de la Platine B.

Lecture en Arriere.

> Lecture en Avant.

'/ II Enregistrement et Pause.
l Arrét.

Rembobinage.

b > Avance Rapide.

CD PLAYER CONTROL
[COMMANDE DU LECTEUR DE CD]
(pour utilisation avec un Lecteur de CD NAD).
DISC [DISQUE]
Disque suivant (Pour les Lecteurs CD
multi-disques NAD).

> Lecture.

I I Pause.

I Arrét.

I Piste précédente.
P Fl Piste suivante.

DELAY [MINUTERIE]

Réglage de la minuterie.

Lance la procedure de Test de

Configuration de la Sonorisation

Enveloppante.

MUTE [COUPURE SON]

Coupe le son sur toutes les sorties.

CENTRE VOLUME [VOLUME CENTRE A V]
Regle le niveau sonore relatif du haut-
parleur Central.

REAR VOLUME [VOLUME ARRIERE A v]
Regle le niveau sonore relatif des haut-
parleurs de Sonorisation Enveloppante.

VOLUME A V
Augmente ou diminue le reglage du
Volume sonore, en activant la com
mande de Volume sonore motorisée
sur la face parlante.

TEST

Page 38

NAD
38

®

Experimente colocando Ia antena para hallar la
posicién que da la mejor iuerza de sefial y el ruido de
tondo mas bajo. Normalmente una sefial inadecuada
de FM produce altos niveles de ruido sibilante.
especialmente en estéreo, e interterencia desde las
tuentes eléctricas externas. En areas de defectuosa
recepcion de FM. se puede mejorar el rendimiento de
la seccion de sintonizador utilizando una antena de
FM montada externamente. Un instalador caliticado
de antenas podra asesorarle y montar una antena
recomendada para las condiciones de recepcién
de usted.

10. SOFT CLIPPING
(RECORTAMIENTO BLANDO)

Si un ampliticador es excitado mas alla de su salida
de potencia especiticada. se puede escuchar un
sonido tuerte distorsionado con sonidos muy bajos.
Esto se debe a que el ampliticador esta cortando o
recortando en duro los maximos del sonido que no
esta disefiado para reproducir. El circuito de Soft
Clipping (Recorte Blando) NAD limita suavemente
la salida del sistema para minimizar la distorsion
audible si el amplificador se sobreexcita.

Si usted escucha con niveles de potencia modera-
dos, puede dejar desconectado el Soft Clipping. Si es
probable que escuche con niveles altos que superen
la capacidad de potencia del ampliticador, conecte el
Soft Clipping.

11. VIDEO 1 (VIDEO)

Conexicm para la entrada de sefial de video de
Linea (Combinada) para VIDEO 1. Usando un
tonoconductor, conecte la Video Out' (salida de
video) del equipo VCR, TV, Disco de Laser 0
satélite/cable. Se puede usar VIDEO 1 para escucha
de video solamente. Si quiere conectar un equipo
VCR para grabar y escuchar a través del AV 711,
use VIDEO 2.

12. VIDEO 2 (VIDEO)

Conexién para la entrada de sefial de video de
Linea (Combinada) para VIDEO 2. Usando un
tonoconductor, conecte la Video Out' (salida de
video) del equipo VCR a VIDEO 2 IN (entrada video
2) para escucha. Conecte la VIDEO 2 OUT a la
Video In' del equipo VCR para copiar sefiales de
video procedentes de VIDEO 1.

13. MONITOR VIDEO OUTPUT
(SALIDA DE VIDEO DE MONITOR)

Salida de video combinada (de linea) para conec-
tar un equipo de TV 0 Monitor de Video para visionar
tuentes de video conectadas a VIDEO 1 0 VIDEO 2.
Usando un tonoconductor. conecte la Video Line In'
(entrada de linea de video) en el equipo de TV 0
monitor a la MONITOR VIDEO OUTPUT (salida de
video de monitor). Esta salida también puede usarse
como salida adicional de grabacion si es necesario.
Entonces el monitoreo del video debe hacerse a
través de la salida de la grabadora de video.

14. FRONT SPEAKERS
(ALTAVOCES DELANTEROS)

Estas salidas de altavoz se conectan y
desconectan usando el pulsador SPEAKERS situado
en el panel delantero.

Conecte el altavoz derecho a los terminales marca-
dos con R + y R - asegurando que R +' este
conectado al terminal + de su altavoz y que R -'
esté conectado al terminal - del altavoz. Conecte los
terminales marcados con L +' y L -' al altavoz
lzquierdo de la misma manera.

Use siempre hilo de cordén para trabajos pesados
(calibre 16 o mas grueso) para conectar los altavoces
a su AV 711.

Desenrosque el casquillo de plastico del terminal
de altavoz hasta que quede expuesto el orificio que
hay en el fuste del tornillo. Inserte el pasador o
extremo de cable desnudo en el orificio y sujete el
cable apretando el casquillo del terminal (Fig. 3).

Para evitar cualquier dafio debido a que el metal
desnudo de los cables de altavoz toque el panel
trasero u otro conector. asegure que haya solamente
127 om de cable desnudo o pasador y que no
existan cordones sueltos del hilo de altavoz.

PRECAUCION: Este equipo se ha disenado para
producir calidad de sonido Optima cuando se
conectan altavoces con impedancias dentro de las
gamas establecidas. Le rogamos compruebe la infor-
macion siguiente y elija los altavoces con la
impedancia necesaria para las conexiones.

ALTAVOCES DELANTEROS: 4 ohmios minimo
por altavoz.

ALTAVOZ CENTRAL: 8 ohmios minimo.

ALTAVOCES TRASEROS: 4 ohmios minimo por
altavoz.

15. CENTER SPEAKER
(ALTAVOZ CENTRAL)

Conecta el altavoz central que se usa cuando el AV
711 tunciona en modo Dolby Pro Logic. Conecte el
Center + al terminal +' de su altavoz central y el
Center -' al terminal -' del altavoz. Pele 8 mm de
aislamiento del extremo del cable de altavoz y doble
los hilos desnudos de manera que no queden
cordones sueltos. Abra la palanca de terminal de
grapa e inserte el hilo. AI cerrar la palanca se queda
fijo en posicién el hilo. Este altavoz tunciona con los
Altavoces Delanteros y se conecta y desconecta
usando el pulsador SPEAKERS (altavoces) del panel
delantero.

16. REAR SPEAKERS
(ALTAVOCES TRASEROS)

Conecta los altavoces traseros que se usan
cuando el AV 711 tunciona en modos Dolby Pro
Logic 0 Hall (sala). Conecte el altavoz trasero
derecho a los terminales marcados R +' y R -'
asegurando que el R +' se conecte al terminal + de
su altavoz y el R - se conecte al terminal - del
altavoz. Conecte los terminales marcados con L + y
L - al altavoz izquierdo de la misma manera.Pele 8
mm de aislamiento del extremo del cable de altavoz y

Page 52

Q)

Per scegliere un'altra stazione preimpostata,
selezionare prima di tutto la linea che ha tale stazione
premendo i| pulsante BANK". Cio fatto, premere ll
pulsante PRESET. Premere TUNE A 0 V per
invocare le impostazioni disponibili finché non si evi-
denzia il numero di preimpostazione richiesto sul
display. L'AV-711 invoca solo le preimpostazione che
sono sintonizzate su stazioni, ignorando pertanto
tutte Ie preimpostazioni vacanti.

COME RICHIAMARE STAZIONI PREIM-
POSTATE

lmpiegando il telecomando, premere il pulsante
BANK e scegliere il gruppo della memoria, quindi
premere RESET (pulsante + oppure -)

COME ANNULLARE LE
PREIMPOSTAZIONI.

Selezionare prima di tutto la stazione preimpostata.
Tenere premuto i| pulsante MEMORY e poi premere
i| pulsante FM MUTE/MODE. || numero di preim-
postazione scomparira quindi dal display: la
preimpostazione particolare e cosl libera.

FUNZIONI SLEEP E MUTE"

l pulsanti per le funzioni SLEEP e MUTE com»
paiono solo sul telecomando.

SLEEP

Premere SLEEP per fare si che lAV-711 si spen-
ga automaticamente dopo un numero prestabilito di
minuti. Premendo il pulsante SLEEP una volta si
imposta Io spegnimento a novanta minuti: l'AV-711 si
spegnera automaticamente passando al modo di
attesa Stand-by". ll display riporta il modo e il ritardo
per Sleep. Per regolare i| ritardo di Sleep basta
tenere premuto il pulsante SLEEP. In questo modo
si riduce il tempo in scarti di dieci minuti, come evi-
denziato sul display. Per cancellare il modo Sleep.
continuare a premere ll pulsante SLEEP finché il
display non riporta il nome della sorgente. Premendo
i| pulsante POWER si annulla i| modo Sleep.

MUTE

Premere il pulsante MUTE" per interrompere
provvisoriamente il suono agli altoparlanti e alla
cuffia. ll display riporta la dicitura Audio Mute quan-
do l'unita si trova nel modo tacitato Mute. Ripremere
MUTE per riprlstinare i| suono

IMPOSTAZIONE DEL SISTEMA
SURROUND".

Per garantire il funzionamento ottimale dell'AV-711
occorre regolare le funzioni surround in modo da
ottenere un equilibrio corretto del suono proveniente
da tutti gli altoparlanti del sistema. Occorre inoltre
impostare correttamente i| ritardo per gli altoparlanti
surround rispetto alla posizione dascolto prescelta.

La regolazione del livello degli altoparlanti si effet-
tua impiegando Ie funzioni di controllo e regolazione
Test e Speaker Level Adjust sul telecomando.

La cosa principale che occorre tare e quella di
impostare correttamente la tase di tutti gli altoparlanti

del sistema. Controllare che i terminali positivi (+)
degli output altoparlanti amplificatori siano collegati al
connettore positivo (+) dei singoli altoparlanti.

Prima di iniziare la procedura di impostazione, assi-
curarsi sempre che il modo CENTER sia impostato
correttamente a seconda della contigurazione degli
altoparlanti. TONE DEFEAT (esclusione toni) deve
essere INSERITO; il comando BALANCE va portato
alla posizione impiegata normalmente per le sorgenti
stereo (di solito e la posizione detta ore 12).

COME IMPIEGARE TEST PER IMPOSTARE
I LIVELLI DEL SISTEMA SURROUND.

Assicurarsi che gli altoparlanti siano collegati e che
il VOLUME sia a zero, quindi selezionare il modo
DOLBY PRO-LOGIC o DOLBY 3 STEREO, e pre-
mere TEST sul telecomando. In questo modo si
ottiene un segnale di controllo che viene alimentato a
turno a ciascuno dei canali degli altoparlanti (sinistro,
centrale, destro e DOLBY 3 STREREO), in modo che
ciascuno di questi possa essere regolato per ottenere
intensita eguale dalla posizione prescelta per
lascolto. ll display indica quale altoparlante riceve il
segnali di prova.

Aumentare il VOLUME finché il segnale non e
abbastanza forte agli altoparlanti sinistro e destro.
Quando il segnale di controllo raggiunge laltOpar-
lante centrale, premere il pulsante CENTER A '
sul telecomando per pareggiare i livelli ottenuti dagli
altoparlanti sinistro e destro. || livello del canale
centrale e indicato sul display e pub essere variato in
scarti dB. AI di sotto di -20 dB gli aumenti diventano
progressivamente piu approssimativi.

Una volta regolato il livello del canale centrale. il
segnale di controllo continua a commutare automati-
camente tra gli altoparlanti. Se l'imposta ottenuta non
e proprio quella che desiderate. ripetere allora la pro-
cedura finché non si ottiene l'appaiamento dei livelli.

Ripetere l'operazione per impostare il livello degli
altoparlanti surround impiegando i pulsanti per il vol-
ume posteriore REAR VOLUME A V sul
telecomando. Quando si selezionano i modl Dolby
Pro Logic. la regolazione interessa contemporanea-
meme entrambi gli altoparlanti Surround.

lmpiegando un fonometro e possibile ottenere una
regolazione piu precisa. lmpostare lo strumento nei
modi Slow e C-weighted, quindi ricontrollare le
impostazioni con lo strumento in varie posizione
nellarea d'ascolto.

Se si lmpiega un Sub-woofer. regolare ll comando
di livello del Sub-woofer in modo che sia udibile,
senza pero che predomini sul suono. l livelli Sub-
Wooter" possono essere perfezionati in un secondo
tempo impiegando un programma.

IMPOSTAZIONE DEL RITARDO PER
SURROUND.

Dal momento che gli altoparlanti surround" scno di
solito piu vicini all'ascoltatore rispetto agli altoparlanti
anteriori. lorecchio tende a localizzare i suoni a tergo.
poiché ll nostro udito e influenzato principalmente dai
suoni che giungono per primi al capo. Per risolvere
questo problema, il circuito Dolby Pro Logic incorpora

Page 61

17. FM MUTE / MODE

Kopplar om FMdeIen mellan Mute On/ Stereo och
Off/ Mono. | normallage (FM MUTE ON) ar radion tyst
under sokning tills man tinner en tillratckligt stark
station upptacks. Om man trycker pa FM MUTE/
MODE slar man ifran mute-tunktionen. AV 711 slar
automatiskt om ti|| stereo nar man hittar en station
vilket visas av stereoindikatorn i displayen.

Svaga stereosignaler kan ha ett hogt bakgrunds-
brus. Om man slar over till mono med FM MUTE
OFF, torsvinner bakgrundsbruset.

SOKNING OCH LAGRING AV AM & FM
RADIOSTATIONER.

Du kan anvanda den manuella eller sjalvsokningen
for att leta upp vilka stationer som sander i ditt
omrade och anvanda MEMORY knappen for att Iagra
dem i apparatens minne. valj torst om du vi|| lyssna
pa FM eller AM. Tryck sedan pa sokknappen (13)
uppat eller nerat en halv sekund for att starta
sjalvsokningen. Nar radion finner en station med ti||-
racklig styrka stannar sokningen vid den stationen.
For att Iagra den stationen som ett snabbval, tryck pa
MEMORY knappen. Nu blinkar MEMORY och PRE-
SET i atta sekunder eller tills du Iagrat stationen i
minnet. Tryck pa BANK knappen och valj vilken bank
du vi|| Iagga stationen pa. Tryck sedan pa TUNE upp
och ner knapparna for att valja vilket snabbvalsnum-
mer stationen skall fa. Aktuellt snabbvalsnummer
visas i displayen. Tryck ater pa MEMORY for att Iagra
stationen pa avsedd plats i minnet. AV 711 atergar
automatiskt till normal drift. Informationen tinns nu
Iagrad i minnet tills du sjalv raderar den.

VAL AV RADIOSTATION VIA SNABBVAL.

Om du vi|| lyssna pa nagon av de stationer du har i
snabbvalsminnet skall du trycka pa PRESET, snabb-
valsindikatorn tands nu och visar det snabbval som
anvandes senast. For att nu byta snabbval maste du
torst valja den bank som din station tinns i. Tryck
sedan pa PRESET knappen. Tryck sedan pa TUNE
upp eller her for att stega tram genom de olika
snabbvalen tills ratt snabbval visas i displayen.
AV 711 hoppar over de snabbvalsplatser som ej har
programmerats.

Anvand fjarrkontrollen, tryck pa BANK knappen och
valj bank grupp, tryck darefter pa PRESET (+ eller -
knappen)

HAMPTNING AV SNABBVAL.

Plocka forst fram det gamla snabbvalet. Tryck
sedan in MEMORY knappen samtidigt som du trycker
pa FM MUTE/ MODE knappen. Snabbvalsnumret
forsvinner nu fran displayen och platsen ar nu tom.

SLEEP OCH MUTE FUNKTIONERNA

Knapparna for SLEEP och MUTE finns bara pa tjar-
rkontrollen.
SLEEP

Funktionen SLEEP kan fa AV 711 an slas av
automatiskt etter en forutbestamd tid. Ett tryck pa

(é)

SLEEP knappen ger 90 minuter tills apparaten slas
av. SLEEP Iage och tid visas i displayen.

For att andring av tiden skall SLEEP knappen hal-
Ias intryckt, da minskar tiden i tio minuters steg vilket
visas i displayen. Om du angrar SLEEP installningen
skall du halla kanppen intryckt tills Ijudkallans namn
(CD, FM, Tape etc.) visas i displayen. Om du stanger
av apparaten nollstalls SLEEP ocksa.

MUTE

Tryck pa MUTE for att stanga av Ijudet i hogtalarna
och i horlurama temporart. Audio Mute visas da i dis-
playen. For att ta tillbaka Ijudet trycker du pa mute en
gang tiII.

INSTALLNING AV ETT
SURROUNDSYSTEM.

For att fungera som avsett bor ett surroundsystem
justeras in noggrant med avseende pa nivaer och
tidsfordrojning till surroundhogtalarna. De install-
ningar som beror nivaerna i de olika kanalerna
utfores med TEST och SPEAKER LEVEL knapparna
pa tjarrkontrollen. Det air viktigt att alla hogtalare ar
inkopplade i korrekt fas ti|| AV 711. Kontrollera att alla
hogtalarnas pluspoler ar kopplade ti|| de roda pluspol-
erna pa torstarkaren. Innan du fortsatter skall du
kontrollera att installningen pa forstarkaren for
Centerkanalen overensstammer med den den center-
hogtalare du tanker anvanda. TONE DEFEAT bor var
tillkopplat och Balansreglaget skall sta rakt upp.

HUR DU ANVANDER I'II'EST FOR ATI'
JUSTERA IN DIN ANLAGGNING.

Nar alla hogtalare ar anslutna och volymen ner-
skruvad till noll, tryck in DOLBY PRO-LOGIC och
SPEAKER och daretter TEST pa tjarrkontrollen. Nu
matas en testsignal ti|| varje kanal i tur och ordning
(vanster, center, hoger och surround), sa att de kan
justeras till samma Ijudniva vid din lyssningsposition.
Displayen visar vilken hogtalare som matas med
testsignalen.

Vrid upp volymen tills signalen ar Iagom hog genom
hoger och vanster hogtalare. nar testsignalen kom-
mer till Centerhogtalaren, justera in den ti|| samma
niva som hoger-vanster hogtalarna med CENTER
volymen A ' knapparna. Den relativa nivan pa
centerhogtalaren visas i displayen och kan regleras i
stteg. Under -20dB blir stegen storre.

Nar du ar klar med injusteringen av centerkanalen
kommer testsignalen att fortsatta skifta mellan de
olika hogtalarna. Om du inte skulle vara nojd med din
installning 5r det bara att gora om proceduren igen
tills du ar nojd.

Gor nu om proceduren med surroundhogtalarna
genom att anvanda REAR volym upp och ner knap-
parna pa tjarrkontrollen nar du valt Dolby Pro Logic
Iage. Justeringen sker i bada surroundhogtalarna
samtidigt.

Om en subbas anvands i systemet, reglera nivan
pa subbasen sa att den precis hors. men inte
dominerar Ijudbilden. Nivan kan finjusteras senare $51
an den passar det programmaterial som anvands.

Page 71

monotonia e eliminara o ruido de fundo.

O estatuto da fungao FM MUTE é indicado no
Mostrador.

COMO DESCOBRIR E MEMORIZAR
ESTAQOES EM AM & FM

Utilize a sintonia Manual (Manual) para seleccionar
a frequéncia ja conhecida de uma estagao ou o modo
Search (Busca) para procurar automaticamente as
estagoes que sao transmitidas na sua area. De
seguida, utilize a tecla MEMORY para armazena-las
na memoria do AV 711. Comece por seleccionar a
banda AM ou FM, carregando nas teclas de Entrada
AM ou FM (AM ou FM Input). Mantenha as teclas
TUNE A ou v premidas durante 1/2 segundo para
iniciar a busca do sintonizador através da banda de
trequéncia. Sempre que o sintonizador encontrar um
sinal emissor de intensidade adequada, a busca
automatica parara naquela estaoao. Para guardar
essa estagao como um Pré-programa, prima a tecla
MEMORY. As luzes do indicador das teclas MEMO-
RY e PRESET e do nUmero do pré-programa
piscarao durante 8 segundos ou enquanto estiver a
introduzir informagoes Pré-programadas.

Prima a tecla BANK para seleccionar 0 Banco de
Pré-programas em que deseja guardar a estaoao.
Prima as teclas TUNE A ou V para seleccionar o
numero de Pré-programa que deseja atribuir a
estaoao. O Mostrador indicara o numero actual do
Pré-Programa. Prima de novo a tecla MEMORY para
guardar a frequéncia da estaoao como o Pré-progra-
ma escolhido. De seguida, o seu AV 711 passara
para o modo de funcionamento normal.

Enquanto nao limpar o Pré-programa, as
intormagoes Pré-programadas ficarao armazenadas
na memoria do AV 711.

COMO CHAMAR ESTAQOES PRE-PRO-
GRAMADAS.

Para chamar qualquer uma das estagoes pré-pro-
gramadas, prima a tecla PRESET. O Indicador desta
tecla acender-se-a e o Ultimo pré-programa sintoniza-
do a ser utilizado sera chamado. Para seleccionar
uma outra estagao Pré-programada, comece por
seleccionar 0 Banco onde a estaoao se encontra
guardada premindo a tecla BANK. De seguida, prima
atecla PRESET. Prima a tecla TUNE A ou ' para
passar em revista os nlJmeros disponiveis, ate surgir
no Mostrador o numero do Pré-programa pretendido.
O AV 711 so colocara a sua disposigao os Pré-pro-
gramas que estao sintonizados em estagoes,
passando por cima dos Pré-programas vazios.

Usando o controlo remoto, carregue no botao
BANK (CONJUNTO) e escolha o grupo do conjunto e
carregue RESET (REAJUSTE) (botao + ou -)

COMO APAGAR PRE-PROGRAMAS

Comece por seleccionar a estagao Pré-programa-
da. Mantenha a tecla MEMORY pressionada e
carregue na tecla FM MUTE/MODE. Nessa altura, o
numero do Pré-programa desaparecera do Mostrador
e o Pré-programa ficara vazio.

(ED

FUNQOES DE SLEEP (TEMPORIZADOR DE
DESACTIVAQAO ) E MUTE (SILENCIAMENTO)

As teclas para as fungoes SLEEP e MUTE so
aparecem no telecomando.

SLEEP _
(TEMPORIZADOR DE DESACTIVAQAO)

Prima SLEEP para desligar automaticamente o seu
AV 711 apds urn nomero pré-programado de minu-
tos. Se carregar uma vez na tecla SLEEP,
programara o tempo de desactivaoao para dai a 90
minutos, apos os quais 0 AV 711 desligar-se-a auto-
maticamente e passara para o modo Standby'. As
indicaooes Sleep mode (modo temporizador de
desactivagao) e Sleep delay (retardamento do tem-
porizador) surgem no Mostrador. Para ajustar o
Retardamento do Temporizador, prima continua-
mente a tecla SLEEP. Deste modo, ira reduzir o
tempo de desactivaoao em intervalos de 10 minutos,
tal como surge indicado no Mostrador. Para cancelar
o modo Temporizador de desactivagao (Sleep), con-
tinue a carregar na tecla SLEEP até surgir no
Mostrador o nome da fonte. Ao premir a tecla
POWER, cancelara igualmente este modo.

MUTE (SILENCIAMENTO)

Prima a tecla MUTE para desligar temporariamente
o som enviado para os altifalantes e auscultadores.
Quando a unidade estiver no modo Silenciamento
(MUTE), surgira no Mostrador a indicaoao Audio
Mute. Prima de novo MUTE para ligar o som.

COMO !NSTALAR O SISTEMA
PEHIMETHICO

Para darem o seu melhor, os niveis de saida das
instalaooes perimétricas do seu AV 711 tém de estar
ajustados de forma a existir um equilibrio uniforme do
som em todos os altifalantes do sistema. Tendo em
conta a sua posigao habitual de audioao do sistema,
é também necessario acertar o tempo de
Retardamento para os altifalantes Perimétricos.

O ajustamento dos niveis dos altifalantes é levado
a cabo utilizando as fungoes de ajustamento Test
(Teste) e Speaker Level (Nivel dos Altifalantes) no
Telecomando.

E importante comeoar por estabelecer o correoto
funcionamento em fase de todos os altifalantes no
sistema. Certifique-se de que os terminais positivos
(+) das saidas do amplificador estao ligados ao
oonector positivo (+) de cada um dos altitalantes.

Antes de iniciar o processo de instalagao, certi-
fique-se de que 0 Mode CENTER esta correctamente
regulado relativamente a configuraoao dos seus alti-
falantes. O comando TONE DEFEAT devera estar
em ON e o comando BALANCE regulado para a
posigao habitualmente utilizada para fontes estere-
ofénicas (geralmente, a posioao das 12 horas).

COMO UTILIZAR O COMANDO TESTE
PARA INSTALARIOS NIVEIS DO
SISTEMA PERIMETRICO.

Com os altifalantes ligados e 0 VOLUME em zero,
seleccione DOLBY PRO LOGIC MODE, DOLBY 3

NAD
71