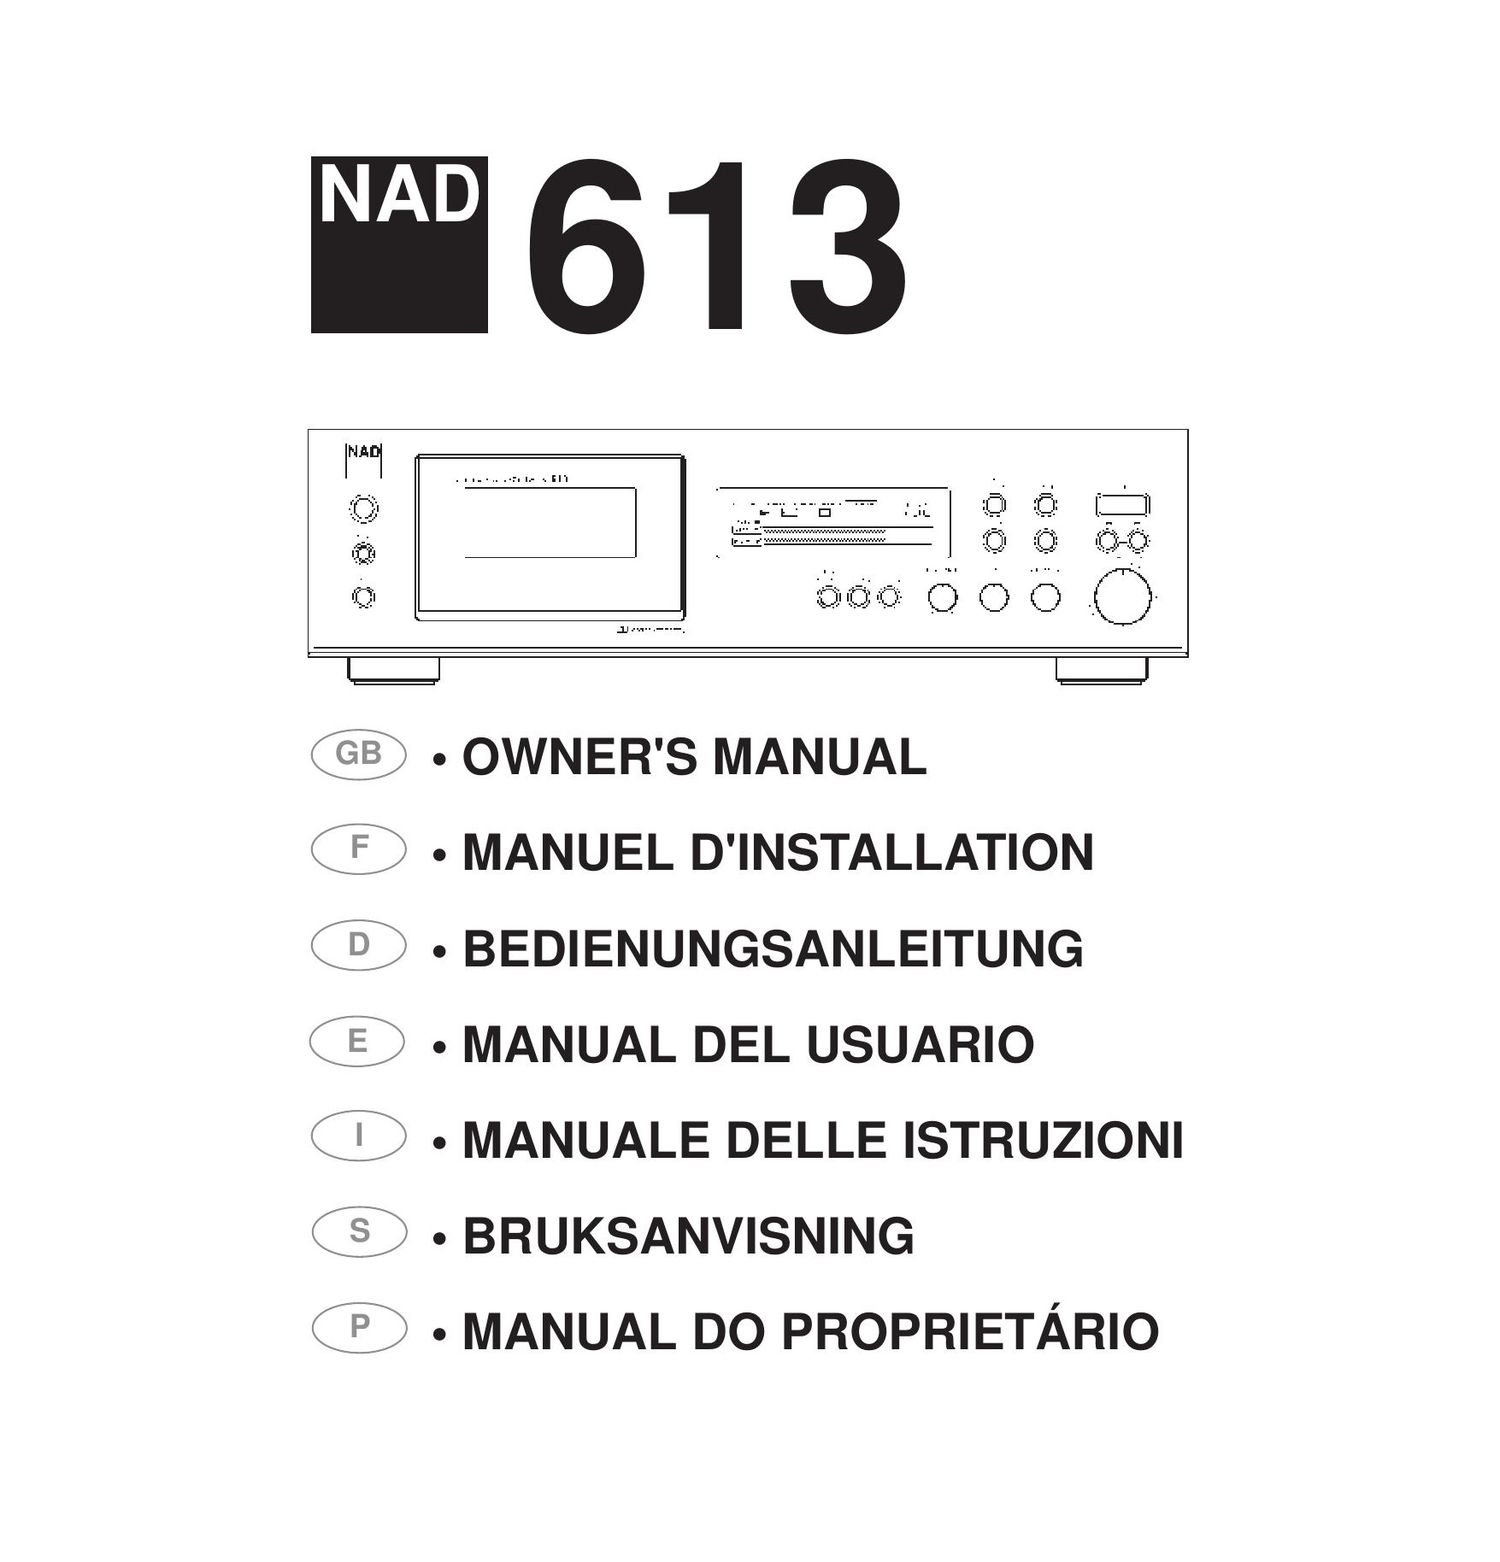
Nad 613 Owners Manual

This is the 44 pages manual for Nad 613 Owners Manual.
Read or download the pdf for free. If you want to contribute, please mail your pdfs to info@audioservicemanuals.com.

Page: 1 / 44
left right
Nad 613 Owners Manual

Extracted text from Nad 613 Owners Manual (Ocr-read)


Page 2

WARNING:TO PREVENT FIRE OR ELECTRIC
SHOCK, DO NOT EXPOSE THIS APPLIANCE
TO RAIN OR MOISTURE

Note to CATV system installer: This reminder is provided
to call the CATV installer's attention to Section 820-40 of
the NEC , which provides guidelines for proper grounding
and, in particular, specifies that the cable should be con-
nected to the grounding system of the building, as close to
the point of cable entry as practical.

THIS DIGITAL APPARATUS DOES NOT EXCEED THE CLASS B
LIMITS FOR RADIO NOISE EMISSIONS FROM DIGITAL
APPARATUS AS SET OUT IN THE RADIO INTERFERENCE
REGULATIONS OF THE CANADIAN DEPARTMENT OF
COMMUNICATIONS.

LE PRESENT APPAREIL NUMVERIQUE NEMET PAS DE
BRUITS RADIOELECTRIQUES DEPASSANT LES LIMITES
APPLICABLES AUX APPAREILS NUMERIQUES DE LA CLASSE
B PRESCRITES DANS LE REGLEMENT SUR LE BROUILLAGE
RADIO ELECTRIQUE EDICTE PAR LE MINISTERE DES
COMMUNICATIONS DU CANADA.

CAUTION: TO PREVENT ELECTRIC SHOCK DO
NOT USE THIS POLARISED PLUG WITH AN
EXTENSION CORD RECEPTACLE OR OTHER
OUTLET UNLESS THE BLADES CAN BE FULLY
INSERTED TO PREVENT BLADE EXPOSURE.

ATTENTION: POUR PREVENIR LES CHOCS ELEC-
TRIQUES NE PAS UTILISER CETTE FICHE
POLARISEE AVEC UN PROLONGATEUR, UNE
PRISE DE COURANT OU UNE AUTRE SORTIE DE
COURANT, SAUF SI LES LAMES PEUVENT ETRE
INSEREES A FOND SANS EN LAISSER AUCUNE
PARTIE A DECOUVERT,

A'I'I'ENTION FOR EUROPEAN MODEL:
THIS APPARATUS COMPLIES WITH THE REQUIREMENTS OF
EC DIRECTIVE 87/308/EEC.
WARNING : BEFORE PLUGGING IN THE UNIT FOR THE FIRST
TIME, READ THE FOLLOWING SECTION CAREFULLY.
Some models are designed for use only with the power supply volt-
age of the region where they are sold.
European models:
U.S.A. anmd Canadian models:

AC 230V, 50HZ
AC 120V, 60HZ

A'I'I'EN'HON:

RlSOUE DE CHOC ELECTRIQUE
NE us OUVRIR

CAUTION fl

CAUTION TO REDUCE THE RiSK OF ELECTRic
SHOCK. Do NOT REMOVE COVER [OR BACK}
No USER SEVICEABLE PARTS iNSiDE
REFER SERViciNG TO QUALIFIED
SERViCE PERSONNEL

AFlN DEVITEFl UN CHOC
ELECTRIQUE ET LES
CONSEQUENCES GRAVES
OUi POURRAIENT EN
HESULTER TENTEZ PAS
oOUVRiR LAPPAREIL ET
DE TOUCHER AUX
COMPOSANTS iNTERNES
SANS LA PRESENCE D'UNE
SERVICE PERSONNEL

CAUTION : TO REDUCE THE RISK OF ELECTRIC SHOCK, DO
NOT REMOVE COVER (OR BACK). NO USER-SERVICEABLE
PARTS INSIDE, REFER SERVICING TO QUALIFIED SERVICE
PERSONNEL.

The exclamation point within an equilateral triangle is intend-

ed to alert the user of the presence ot important operating

and maintenance (servicing) instructions in the literature
accompanying the appliance

The lightning flash with arrowhead, within an equilateral tri-
angle is intended to alert the user of the presence of unin-
sulated "dangerous voltage" within the product's enclo-
sure; that may be of sufficient magnitude to constitute a

risk of electric shock to persons.

REAR PANEL CONNECTIONS

fawn;

43??? I I

© 1995. NAD ELECTRONICS LTD. 613.

Page 4

INSTALLATION

The recorder may be installed on any stable sur-
face that is not subjected to vibration or intense mag-
netic fields. It should not be placed directly on a loud-
speaker, a television set, or a large power amplifier
where it might pick up hum from the amplifier's power
transformer. if you wish to install the recorder next to
an amplifier on the same shelf, place the recorder on
the left so that its cassette compartment will be locat-
ed away from the amplifier.

WARNING TO UK USERS. If this appartus is not fit-
ted with a UK three-pin plug, do not attempt to insert
the attached plug into a UK mains socket. Instead, cut
the plug from the mains lead and attach a fused UK
three-pin plug using the following safety advice on
wiring.

IMPORTANT. The wires in this mains lead are
coloured BLUE and BROWN;

BLUE: NEUTRAL BROWN: LIVE

The colours of these mains lead wires may not corre-
spond with the coloured markings identifying the ter»
minals in your plug. In this case the BROWN wire
must be connected to the terminal which is marked
L(ive) or coloured RED. The BLUE wire must be con-
nected to the terminal marked N(eutral) or coloured
BLACK. No connection should be made to the termi-
nal marked E or coloured green or green and yellow

PRECAUTIONS

To ensure that maximum performance of the NAD
613 cassette deck is maintained over time, please
bear the following precautions in mind:

THE DECK

A. Make sure the heads and transport are cleaned
regularly. Please referto page 8.

B. Demagnetise both heads and tape guidance from
time to time. Please refer to page 8.

C. The bearings and other moving parts have been
treated with special lubricants and are therefore main-
tenance-free. Additional lubrication can actually cause
malfunctioning.

D. Do not position the deck near equipment with
strong magnetic fields, such as loudspeakers or tele-
visions, etc.

E. Place the deck on a solid, flat surface.

F. Avoid dirt, dust, sand, etc. from entering the deck.
G. Avoid placing near transmitters: they can generate
high frequencies which may cause malfunctioning of
the deck.

H. Ensure the cassette deck compartment lid is
closed when the deck is not in use. Open it only for
taking a cassette in or out, or for cleaning the heads
and tape guides.

|. Do not place the deck directly on top of a (power)
amplifier or receiver. The deck may pick up hum from
the amplifier's power transformer. Some amplifiers
can also generate a fair amount of heat, even when
on stand-by.

WARNING : BEFORE PLUGGING IN THE UNIT FOR
THE FIRST TIME, READ THE FOLLOWING SECTION
CAREFULLY.

Some models are designed for use only with the
power supply voltage of the region where they are
sold.

NAD 613 CASSETTE DECK

European models:
U.S.A. and Canadian models:

AC 230V, 50HZ
AC 120V, GOHZ

THE CASSETTE TAPES

A. Store the cassette tapes in their jewel case, away
from dust. Never store tapes in direct sunlight or very
hot places.

B. Always use cassette tapes of a good quality.
Besides mediocre results, poor quality tapes can
cause excessive head wear.

C. Never touch the exposed tape itself or take it out of
its cassette casing.

D. In most cases the cassette tape has a five to eight
second leader tape at both the beginning and end of
a cassette tape. As you cannot record on this leader
tape, be sure to commence recording beyond this
tape.

REAR PANEL CONNECTIONS &
CONTROLS.

The numbers in the text refer to the connections in
figure REAR PANEL CONNECTIONS

This cassette deck can be connected to almost all
pre-amplifiers, integrated amplifiers or receivers.
Ensure the plugs are fully inserted and the recording
and playback cables are connected properly.

1. INPUT.

Connect a cable from the decks LINE IN" jacks at
the rear panel to the TAPE OUT or REC jacks of your
amplifier. Connect the left channel of the deck to the
left channel of the amplifier and connect the right
channel of the deck to the right channel of the amplifi-
er. Normally, the red plug is used for the right chan-
nel, the black or white plug for the left channel.
Please refer to figure 1.

2. OUTPUT.

Connect a cable from the deck's LINE OUT jacks
at the rear panel to the TAPE lN, PLAY, or MONITOR
jacks of your amplifier. Connect the left channel of the
deck to the left channel of the amplifier and connect
the right channel of the deck to the right channel of
the amplifier. Normally, the red plug is used for the
right channel, the black or white plug for the left chan-
nel. Please refer to figure 1.

3. NAD LINK.

The NAD Link IN" connector allows the NAD 613
to be operated by external remote control signals
passed from another NAD remote control component
featuring NAD Link, e.g. AV 716 receiver. NAD Link
works in a daisy chain fashion, connections going
from one unit to the next one. Many NAD receivers
and AV components come supplied as standard with
an NAD system remote control which sports buttons
for most used tape transport functions (Play, Record,
Fast Forward, Rewind, Stop, etc.). It is recommened
that the NAD 613 is the second unit in the daisy chain
after the master unit, usually a receiver. Connect a
cable from the master unit Link Out (e.g. the AV 716)
to the NAD Link IN jack on the 613.

Page 8

NAD
8

level will result in excessive tape hiss. whereas too
high a recording level will result in distortion. The
standard procedure is to set the recording level to
accommodate the loudest part of the music, and then
leave the controls alone. Set the control so that sus-
tained sounds, e.g. a singing voice or full orchestral
chord reaches the red segments (up to 4 dB). With
music that spans a wide range of volume levels, this
may mean that the quiet portions of the music will be
recorded at a level of -20 dB or less (with no seg-
ments illuminated). This is normal.

The BALANCE (13) control will allow you to alter
the left/right balance of a recording. When turned fully
counter clock-wise, only the left channel will be
recorded. whereas turned fully clock-wise only the
right channel will be recorded. For normal use the
control is set in the detent in the centre of its range.
recording each channel with equal levels.

If you wish to erase a tape, without making a new
recording. follow the procedure as described above,
but turn the RECORD LEVEL (12) control fully
counter clock-wise. No recording level segments will
illuminate.

ACCIDENTAL ERASURE PREVENTION.

Whilst making a new recording any previous
recordings already on the tape will automatically be
erased. If you wish to protect a tape from being
erased or re-recorded accidentally, you can remove
the tapes protection tabs. This way the record func-
tion will not engage. Please note that most pre-
recorded tapes commercially available already have
the tabs removed. Using adhesive tape over the
holes will enable the circuits to record again.

CrO2 (type II) and Metal (type IV) tapes have addi-
tional holes in the cassette housing, enabling the
deck to recognize" the various tape types. Make sure
you do not cover these holes as well! Refer to figure
3.

THE PLAY TRIM CONTROL.
Position the PLAY TRIM control in the 0" (centre
detent) position for normal play-back.

Errors in high frequency response often occur in
cassette recordings. especially in tapes that were
recorded on one machine and are being played on
another. These errors arise from tape saturation -
particularly those tapes recorded on decks without
HX Pro headroom extension -, from biasing that didn't
match the tape when the recording was made, and
from differences in equalisation and head azimuth
among recorders.

These errors cause mis-tracking of the Dolby NR
circuits. which in turn cause the faults to be magni-
fied by the circuits, often resulting in dull sound.

Play Trim is a special high-frequency play-back
equalisation circuit. used to restore accurate play-
back response before Dolby NR decoding takes
place. Standard play-back equalisation. for correctly
recorded tapes, is provided when the Play Trim con-
trol is set at the detent in the centre of its range.

When playing tapes, set the DOLBY NR selector to

match the recorded tape. If the recording sounds dull,
turn the Play-Trim up (clock-wise) to restore accurate
highs. if the recording sounds edgy or sibilant. turn
the Play-Trim down to obtain smoother treble.

NOTE: The Play Trim control only affects play-back
and doesn't function whilst making a recording.

MAINTENANCE

The bearings and other moving parts have been
factory treated with special lubricants and do not
need any special attention.

Dirt, dust and tape-oxide can potentially damage
the heads and tape guidance. besides degrading the
sound quality both on play-back and recording. Parts
in direct contact with the tape therefore need to be
cleaned regularly.

NOTE: Make sure the receiver or amplifier is
switched off before cleaning or demagnetising the
heads.

CLEANING

Open the cassette compartment door. At the bot»
tom of the compartment you can see the heads and
tape guidance (capstan and pinch-roller). Refer to
figure 4.

Clean the heads (A & B) and the capstan (C) using
cotton wool buds with pure alcohol or with a dedicat-
ed Tape Recorder Cleaner.

Clean the pinch-roller (D) using only distilled water.
Never use alcohol on the roller, as the rubber will dry
out. Alternatively. you can use a special cleaning cas-
sette. Be sure to use a cassette that cleans all parts
illustrated in figure 3.

DEMAGNETIZING

Parts in direct contact with the tape will become
slightly magnetic over time, This magnetism will
increase hiss. both during play-back and recording.

It is therefore advisable to demagnetise the heads.
pinch roller and other metal tape guidance parts from
time to time. using a demagnetiser or a demagnetis-
ing cassette. Follow the instructions of the demagne-
tiser or demagnetising cassette.

WARNING
Keep demagnetisers away from your tapes, they
can accidentally erase the recordings.

Your dealer will be able to advise you and supply
the proper accessories for both cleaning and demag-
netising.

PLAY TRIM was developed by NAD and Dolby Laboratories Inc.

HX Pro originated by Bang and Olufsen.

Dolby Noise reduction and HX Pro headroom extension manufacV
lured under license from Dolby Laboratories Licensing Corporation.
Dolby" Dolby NH", the doublerD symbol and HX Pro are regis~
tered trademarks of the Dolby Licensing Corporation.

Dolby NR is a registered trademark of Dolby Laboratories Ltd.

Page 17

l I" in der Anzeige. Durch erneutes DriJcken der
Taste PLAY die Wiedergabe bzw. die Aufnahme tort-
setzen.

8. RUCKSPULEN «

Mit der Funktion « laBt sich das Band von rechts
nach links zuriickspulen. Bei Erreichen des
Bandanfangs bzw. wenn das Band bei eingeschal-
teter Wiederholblockfunktion (REPEAT) den
Blockanfang erreicht hat (siehe auch Abschnitt
Wiederholung (16) in diesem Kapitel), wird die
Rflckspultunktion automatisch gestoppt. Mit der Taste
STOP konnen Sie den Riickspulvorgang unter-
brechen.

9. FAST FORWARD » (Schnellvorlauf)

Mit der Funktion » IaBt sich das Band von links
nach rechts vorspulen. Bei Erreichen des Bandendes
wird die Funktion Schnellvorlauf automatisoh
gestoppt. Mit der Taste STOP wird der Schnellvorlauf
von Hand gestoppt.

10. RECORD (Aufnahme)

Wird diese Taste zusammen mit der Taste PLAY
oder PAUSE gedrflckt, werden die
Autnahmeschaltungen aktiviert; das Symbol
RECORD und entweder das Symbol PLAY oder
PAUSE leuchten in der Anzeige. Durch gleichzeitiges
DrUcken der Tasten PLAY und RECORD beginnt die
Aufnahme sofort; durch gleichzeitiges DriJcken der
Tasten PAUSE und RECORD werden lediglich die
Autnahmesohaltungen aktiviert. Durch
anschlieBendes DriJcken der Taste PLAY beginnt die
Aufnahme. Zur Anzeige des Aufnahmestatus leucht-
en nun die Aufnahme-Meldelampe und das
Wiedergabe-Symbol in der Anzeige.

» Eine Cassette gemaB der Beschreibung in
Abschnitt Wiedergabe oben einlegen.

- Den DOLBY NR-Wahler (17) auf das gewiJnschte
Rauschunterdriickungssystem einstellen (keine
Rauschunterdriickung, OFF (Aus), B oder C).
wahrend der Autnahme bitte keine Anderungen an
der DOLBY NR-Einstellung vornehmen. FUr weitere
Informationen siehe Kapitel Leistungsoptimierung
des Cassettenrecorders NAD 613, Abschnitt
DOLBY NR-Rauschunterdriickungssysteme B & C.

- Gleichzeitig die Tasten RECORD (10) und
PAUSE (7) driicken; in der Anzeige leuchten die rote
Meldelampe und das Pause-Symbol.

- Die Autnahmelautstarke mit dem Drehknopf
RECORD LEVEL (12) und dem Balanoeregler BAL-
ANCE (13) einstellen.

Fiir weitere Informationen siehe Kapitel
Leistungsoptimierung des Cassettenrecorders NAD
613, Abschnitt Aufnahmepegel.

- Die Autnahme durch Drflcken der Taste PLAY (6)
starten.

- Durch Drflcken der Taste PAUSE (7) konnen Sie
die Autnahme unterbrechen; Autnahmeschaltungen
und Anzeige blelben jedoch aktiv. Wenn Sie mit der
Aufnahme fortfahren mochten, die Taste PLAY (6)
driicken. Diese Einrichtung ist bei Autnahmen von

®

Radio- bzw. Fernsehsendungen niitzlich, um
Ansagen oder Werbespots von der Aufnahme
auszuschlieBen.

- Mit der Taste STOP (5) die Aufnahme stoppen.

(Hinweis: Die Funktion PLAY TRIM bleibt wéhrend
der Autnahme ohne Wirkung).

11. RESET (Rflcksetzen)

Mit dieser Taste wird der Bandzahler auf 0000
zuriickgesetzt. Der zahler laBt sich an jeder beliebi-
gen Stelle wahrend der Wiedergabe eines Bandes
racksetzen, um eine bestimmte Stelle auf dem Band
zu kennzeichnen. Auch nach dem Ausschalten des
Recorders wird der Zéhler auf 0000 riickgesetzt.

12. RECORD LEVEL (AUFNAHMEPEGEL)
Uber diesen Regler laBt sich die Lautstarke tiJr
beide Kanale regeln. Die beiden horizontalen Saulen
in der Anzeige zeigen die genaue Lautstarke
wéhrend der Aufnahme an. Die Séulen werden auch
bei der Wiedergabe angezeigt. Diese
Aufnahmepegelmesser sind mit einer Peak Hold"-
Anzeige ausgestattet, die zur akkuraten Einstellung
den hochsten Pegel eine Sekunde lang anzeigt, auch
wenn der Spitzenpegel nur den Bruchteil einer
Sekunde dauerte. FL'Jr weitere Informationen siehe

Kapitel Leistungsoptimierung des
Cassettenrecorders NAD 613, Abschnitt
Autnahmepegel.
13.BALANCE

Mit diesem Regler laBt sich die Autnahme-Balance
zwischen linkem und rechtem Kanal einstellen.
Normalerweise steht dieser Regler in der
Mittelstellung (12-Uhr-Position). Fiir weitere
lnformationen siehe Kapitel Leistungsoptimierung
des Cassettenrecorders NAD 613, Abschnitt
Autnahmepegel.

14. BIAS

Mit dem Bias-Regler wird die Recorderelektronik an
die Eigenarten spezieller Cassettenbander angepaBt.
Die Hohenwiedergabe wird durch Drehen des
Reglers nach rechts (im Uhrzeigersinn) erhoht und
durch Drehen des Reglers naoh links (entgegen den
Uhrzeigersinn) abgesenkt. Normalerweise steht
dieser Regler in der Nullstellung (in der Mitte
eingerastet). FUr weitere lnformationen siehe Kapitel
Leistungsoptimierung des Cassettenrecorders NAD
6133, Abschnitt Bias-Regelung.

15. PLAY TRIM

Play Trim ist eine besondere Wiedergabe-
Entzerrungsschaltung, die die genaue Wiedergabe
von bespielten, alten und abgenutzten Bandern, auf
anderen Cassettenrecordern aufgenommenen
Bandern, mangelhaft autgenommenen Bandern (mit
zu viel bzw. zu wenig Bias) wiederherstellt. Mit
diesem Regler lassen sich die Schaltungen des
Cassettenrecorders aut richtige Dolby NR-
Autschaltung zum Ausgleich der Hohenverluste ein-
stellen.

NAD
17

Page 23

(repeticién) y la cinta ha llegado al comienzo del
bloque (vea también la seccién Repeat" (16) de este
capitulo), puede parar manualmente el rebobinado
usando el pulsador STOP.

9. FAST FORWARD (AVANCE RAPIDO) »

Con la funcién » puede usted rebobinar la cinta
hacia adelante de izquierda a derecha. El rapido ade-
lante se para automaticamente al llegar al final de
una cinta. Usted puede parar manualmente el avance
rapido usando el pulsador STOP.

10. RECORD (GRABACION)

Este pulsador. si se aprieta con el pulsador PLAY 0
el pulsador PAUSE, activa Ios circuitos de grabacion.
En el visualizador se ilumina el anunciador Record"
con el icono de Play 0 Pause. Apretando PLAY en
combinacion con RECORD. comienza inmediata-
mente la grabacién; apretando PAUSE con RECORD
solamente se activan Ios circuitos de grabacion.
Apretando luego PLAY comienza la grabacion. Ahora
se ilumina en el visualizador el anunciador Record"
con el icono de Play para indicar el estado de
grabacion.

- lnserte una cinta como se describe en la anterior
seccion Escucha de una cinta.

» Ponga el selector DOLBY NR (17) contorme al
tipo deseado de reduccion de ruido (sin reduccion de
ruido; OFF. B o C). No cambie el ajuste Dolby NR
mientras la pletina de cinta esta grabando. Vea el
capitulo Gomo conseguir el mejor rendimiento de su
pletina de cassettes NAD 613", seccion Sistemas de
Reduccién de ruido Dolby B NR y C para informa-
cion mas detallada.

» Apriete el pulsador RECORD (10) junto con el
pulsador PAUSE (7); en cl visualizador se ilumina el
anunciador rojo y el icono de Pause.

- Ajuste el nivel de grabacién usando el control
rotativo RECORD LEVEL (12) (nivel de grabacién) y
el control BALANCE (13) (equilibrio).

Vea el capitulo Como conseguir el mejor
rendimiento de su pletina de cassettes NAD 613,
seccion Nivel de grabacién para mas intormacién.

- Comience la grabacién apretando el pulsador
PLAY (6).

Si desea interrumpir una grabacion manteniendo
activos Ios circuitos de grabacién y el visualizador,
apriete el pulsador PAUSE (7). Cuando este prepara-
do para reanudar la grabacién apriete PLAY (6). Esta
tecnica es Ulll para omitir Ios anuncios o publicidad
cuando se graba de la radio 0 television.

- Para parar la grabacion. apriete el pulsador STOP
(5).

(Nota: Play Trim no tiene etecto durante la
grabacion).

11. RESET (REAJUSTE)

Apriete este pulsador para reajustar el contador de
cinta a 0000". El contador puede reajustarse en
cualquier momento mientras esta escuchandose una
cinta para marcar un lugar particular de la cinta. El
contador se reajusta también a 0000 despues de que
se desconecta la alimentacion eléctrica.

12. RECORD LEVEL (NlVEL DE
GRABACION)

El nivel de grabacicm para los dos canales puede
controlarse con este control. Las 2 barras horizon-
tales del visualizador le dan a usted una indicacién
exacta del nivel de grabacién durante la grabacion.
Las barras tuncionan también durante la escucha.
Estos medidores de nivel de grabacién estan equipa-
dos con un dispositivo automatico de Mantenimiento
de Maximos que visualizan Ios maximos mas altos
durante un segundo, incluso aunque el maximo dure
solo una traccién de segundo, para facilitar una lec-
tura exacta. Vea le capitulo Gomo conseguir el
mejor rendimiento de su pletina de cassettes NAD
613, seccion Nivel de grabacion" para intormacién
mas detallada.

13. BALANCE (EQUILIBRIO)

El equilibrio de la grabacion entre el canal izquier-
do y el derecho puede ajustarse usando este control.
Normalmente este control esta ajustado en la posi-
cion de las 12 horas.

Vea el capitulo Cémo conseguir el mejor
rendimiento de su pletina de cassettes NAD 613",
seccién Nivel de grabacién para mas intormacién.

14. BIAS (POLARIZACION)

El control de sintonizacion Bias le permite compen-
sar Casi todas las diferencias de marca a marca en
sensibilidad de cinta y respuesta de trecuencia.
Girando el control a la derecha se disminuyen Ios
agudos (mas Bias). girandolo a la izquierda se
aumenta la respuesta de agudos (menos Bias).
Normalmente este control debe estar colocado en la
posicién 0" (detente central). Vea el capitulo Para
conseguir el mejor rendimiento de su pletina de cas-
settes NAD 613, seccion Control Bias para mas
intormacién.

15. PLAY TRIM (AJUSTE FINO DE SONIDO)

El Ajuste Fino de Reproduccicm de Sonido es un
circuito de igualacién de reproduccién de sonido que
restablece una respuesta exacta de reproduccién de
sonido a partir de cintas pregrabadas. viejas 0 gas-
tadas, cintas grabadas en otra pletina o cintas que no
se grabaron apropiadamente (desvio excesivo o
escaso). Este control le permite ajustar Ios circuitos
de la pletina de cintas para asegurar un seguimiento
de pista Dolby NR apropiado para una respuesta cor-
recta de alta trecuencia.

Vea el capitulo Para conseguir el mejor rendimien-
to de su NAD 613, seccion Control Play Trim" para
intormacion mas detallada.

16. REPEAT (REPETICION)

La pletina NAD 613 esta equipada con dos modos
de repeticicm; repeticion del lado entero de una cas-
sette o repeticion de un bloque preseleccionado 5
veces. El pulsador REPEAT pasa por tres ajustes
diferentes: OFF ti FULL (COMPLETO) fl BLOCK
(BLOQUE) ti OFF ti FULL, etc. (Que se indican en el
visualizador). Seleccione FULL (bien desde parada o
durante una escucha) para repetir toda la cassette.

NAD
23

Page 40

NAD
40

®

tiver chegado ao pringlpio do bloco (consulte também
a secgao REPETIQAO (16) neste capitulo). Pode
parar manualmente a rebobinagem usando o botao
STOP (PARAGEM).

9. EAST FORWARD » (MOVIMENTO
RAPIDO DE AVANQO .1

Corn a fungao » pode bobinar a fita para a frente
da esquerda para a direita. O movimento rapido de
avango para automaticamente assim que a fita
chegue ao fim. Pode parar o movimento rapido de
avanoo manualmente usando o botao STOP (PAR-
AGEM).

1o. RECORD [GRAVAQAO].

Este botao, quando é pramido em conjunto com o
botao PLAY (REPRODUQAO) ou PAUSE (PAUSA),
ira activar os circuitos de gravagao. O anunciador
Gravagéo, quer acompanhado pelo simbolo de
Reprodugéo quer pelo simbolo de pausa ira acen-
der-se no eora. Premindo PLAY (REPRODUQAO)
em conjunto corn RECORD (GRAVAQAO), a
gravaoao comegara imediatamente; premindo
PAUSE (PAUSA) com RECORD (GRAVAQAO), so
serao activados os oircuitos de gravagao.
Subsequentemente, premindo PLAY
(REPRODUQAO), a gravagao comegara. Agora o
anunciador Gravagao em conjunto com o slmbolo
de reprodugao ira acender-se para indicar o estado
de gravagao.

- Coloque uma tita contorme descrito na secgao
reproduoao da fita acima.

- Regule o selector do DOLBY NR (17) para o tipo
desejado de redugao de ruido (sem redugao de
ruldo; DESLIGADO, B ou C). Nao altere a regulagao
do Dolby NR enquanto o porta-cassetes esta a
gravar. Consulte o capltulo intitulado Como obter o
melhor desempenho do seu porta-cassetes NAD
613", na secgao Sistemas de redugao de ruldo
Dolby B NR 6 C" para obter informagoes mais por-
menorizadas.

- Prima o botao RECORD (GRAVAQAO) (10) em
conjunto com o botao PAUSE (PAUSA) (7); o anunci-
ador vermelho e o simbolo de pausa acender-se-ao
no ecra.

- Ajuste o nlvel de gravagao usando o comando
rotativo _de RECORD LEVEL (NIVEL DE
GRAVAQAO) (12) e BALANCE (EQUILIBRIO) (13).

Consulte o capitulo intitulado Como obter melhor
desempenho do seu porta-cassetes NAD 613, na
secgao Nivel de gravagao" para obter mais infor-
magoes.

- Comece a gravagao premindo o botao PLAY
(REPRODUQAO) (6).

Se desejar interromper uma gravagao ao mesmo
tempo que mantém os circuitos de gravagao e de
apresentagao activos, prima o botao PAUSE
(PAUSA) (7). Quando estiver pronto ~para voltar a
gravagao prima PLAY (REPRODUQAO) (6). Esta
técnica é Util para omitir antmcios ou publicidade
durante a gravagao do radio ou da televisao.

- Para parar a gravaoao, prima o botao STOP
(PARAGEM) (5).

(Nota: A redugao da reprodugao nao tem efeito
durante a gravagao).

11. RESET [REAJUSTE].

Prima este botao para reajustar o contador da fita
para 0000". O contador pode ser reajustado em
qualquer momento enquanto a fita esta a tocar para
marcar o lugar especifico na tita. O contador é rea-
justado para 0000 depois da energia também ser
desligada.

12. REC LEVEL [NlVEL DA GRAVAQAO].

O nivel da gravaoao em ambos os canais pode ser
controlado por este comando. As 2 barras horizontais
no ecra dao-lhe uma indicagao exacta do nlvel
durante a gravagao. As barras também funcionam
durante a reprodugao. Estes medidores de nlvel de
gravagao estao equipados com um sistema automati-
co de Manutengao de picos" que irao visualizar o
pico maximo durante um segundo, mesmo se este
pioo tiver durado apenas uma tracgao de um segun-
do para facilitar leitura rigorosa. Consulte o capltulo
intitulado Como obter o melhor desempenho do seu
porta-cassetes NAD 613, na secgao Nivel de
gravagao, para obter intormaooes mais por-
menorizadas.

13. BALANCE [EQUILlBRIO].

O equilibrio de gravagao entre o canal esquerdo e
o canal direito pode ser ajustado usando este coman-
do. Normalmente este comando esta regulado para a
posigao das 12 horas no mostrador do relégio.

Consulte o capitulo intitulado Como obter o melhor
desempenho do seu porta-cassetes NAD 6313,
secgao Nivel de gravagao, para obter mais infor»
maooes.

14. BIAS [DESVlO].

O comando da sintonizaqao do desvio permite-lhe
compensar quase todas as diterengas entre uma
marca e outra na sensibilidade da fita e na resposta
de frequéncia. Girando o comando da esquerda para
a direita ira diminuir os sons altos (mais Desvio),
girando o contador da esquerda para a direita
aumenta a resposta dos sons altos (menos desvio).
Normalmente este comando deve estar na posioao
0 (reentrancia central). Consulte o capltulo intitula-
do Como obter o melhor desempenho do seu porta-
cassetes NAD 613, na secgao Comando de
desvio, para obter mais informagées.

15. PLAY TRIM. LREDUQAO DA
REPRODUGAO]

A reduoao da reprodugao é um circuito especial de
igualizagao da reprodugao para repor a resposta rig-
orosa da reprodugao em relagao a titas pre-
gravadas, antigas e gastas, fitas gravadas noutro
porta-cassetes ou titas que nao foram devidamente
gravadas (com desvio excessivo ou insuficiente).
Este controlo ira permitir-lhe ajustar o conjunto de cir»
cuitos do porta-oassetes para assegurar acompan-
hamento correcto pelo Dolby NR para uma resposta
correcta de alta trequéncia.