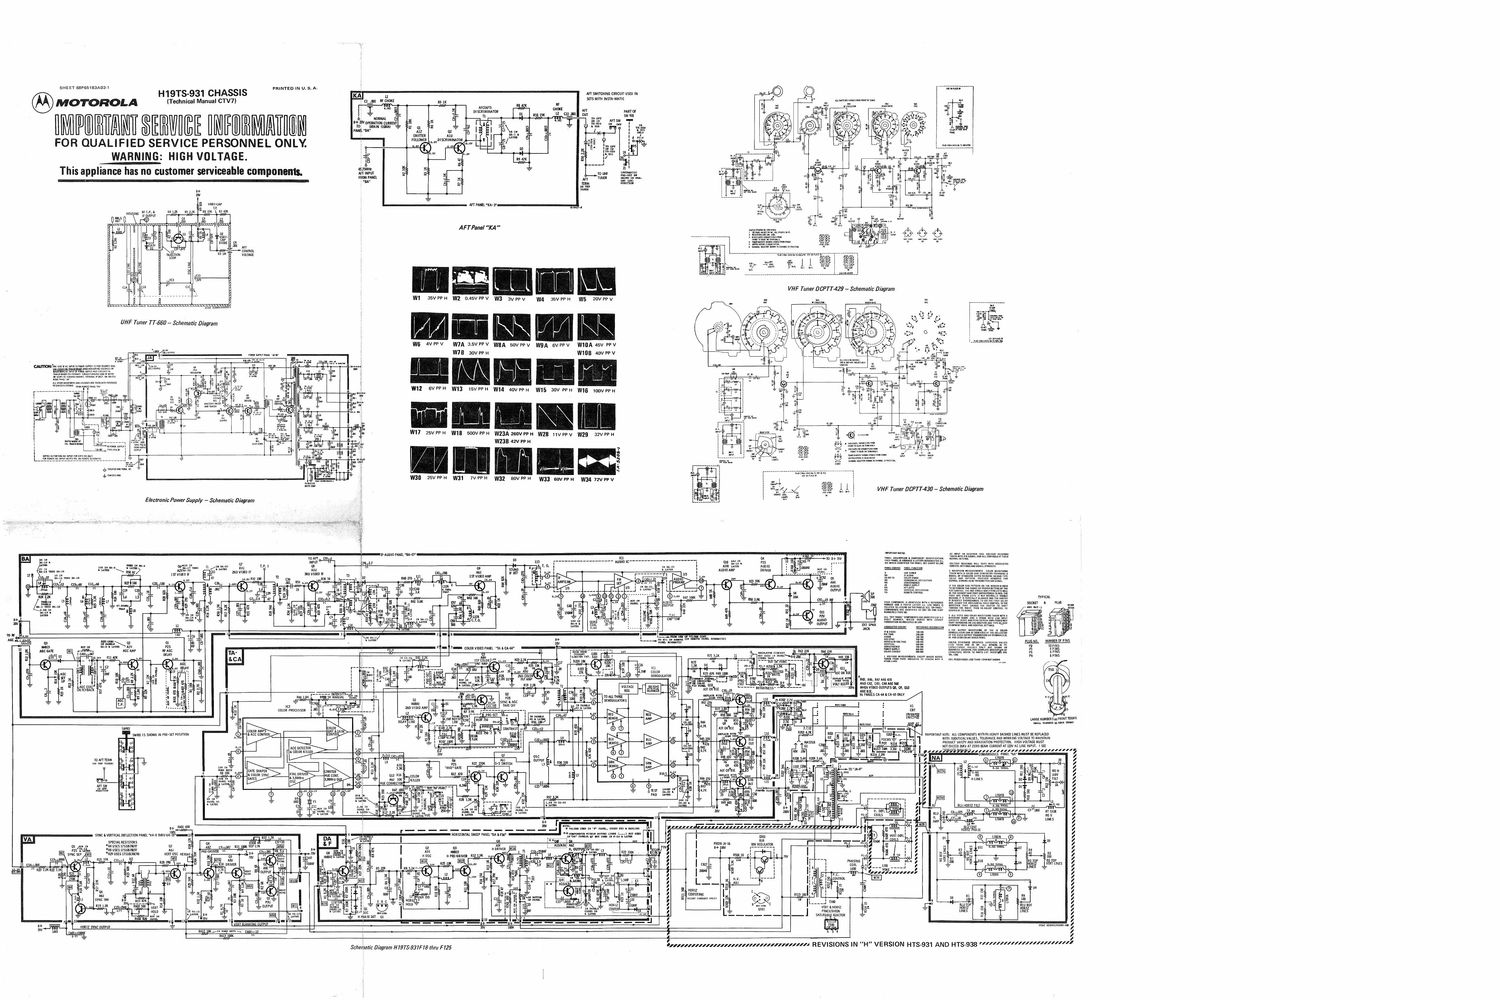
Motorola h 19 ts 931 chassis service manual

This is the 2 pages manual for motorola h 19 ts 931 chassis service manual.
Read or download the pdf for free. If you want to contribute, please mail your pdfs to info@audioservicemanuals.com.

Page: 1 / 2
left right
motorola h 19 ts 931 chassis service manual

Extracted text from motorola h 19 ts 931 chassis service manual (Ocr-read)


Page 2

IF AGC ADJUSTMENT

Adjustment: Tune in a moderately strong
signal. Set brightness to normal; contrast to
maximum. Adjust AGC control for slightly
above normal contrast. Make operational
check. Readjust AGC as necessary.

RF AGC DELAY

NOTE: Factory pre-set. Adjust only if
overloading or busy background Is present.

1. Tune in medium or weak station.

2. Turn RF AGC clockwiselas viewed from
panel side) until picture 'IS snowy, then
counter-clockwise until picture clears. If
interference appears, optimize adjustment.

AFT (AFC DISCRIMINATOR
ADJUSTMENT)

VISUAL ADJUSTMENT: Defeat AFT and
fine tune roperly. _ActIvate AFT.
(InstavMatic off) If detuning occurs, retune
with secondary core only.

COMPLETE ALIGNMENT:

l. Finé tune in best pictureljust off burble)
with AFT switch in off moon.

2. Connect VTVM to AFT output terminal
and ground. Set meter to zero center scale.
3. Set AFT switch to ON.

4. Adjust both cores to extreme outer ends
of coil.

5. Adjust primary core for first peak
reading.

6. Adjust secondary core for zero center
scale.

7. Disconnect VTVM and check AFT action
by noting any detuning as AFT Is sWItched
in and out. Repeat Steps 4 thru 6 as
required.

INSTAMATIC COLOR SWITCH

When ON" (in position) Insta-Matic
indicator will be reen and pre-setcontrols
will be activated. ustomer hue, Int, contrast
and brite controls are inoperatIve. See
lnsta-Matic color pre-set adjustment.
SOUNOIF

1. Adjust fine tuning for best picture.

signal - (disconnect antenna if necessary).

3. Adjust quad coil (L3) for best sound with
normal signal.

COLOR KILLER ADJ.

(FACTORY PRE-SET)

Adjust to kill color snow
on blank channel. Check

SERVICE ADJUSTMENTS ARE FACTORY HRESET (Adjustonlyifnecessary)
. l

lNS'EA-MATIC COLOR PRESET ADJ

NOTE:This chassis is equipped with an Electronic Power

. RED/GREEN VERTICAL DYNAMIC

CONVERGENCE, STEPS 1 THRU 6

3.58 050 TANK
, ADJ FOR STABLE \
2. Adjust A.T.O. for best sound wrth weak COLOR SYNC

BLUE HDRIZ PHASE COIL L4 NOT
REQUIRED IN ALL SETS. IF NOT USED,
JUMPER CONNECTED AS SHOWN (STEP
11).

/\ ..

'\
In


POWER
SUPPLY!

35V\1_l a\
4m ..' .2
\- .caur

I,
i

ZOUV
I

, oov

zov/ .
POWER «uzo
RECT - -

,D.
zoov souecE5~ T1 /
CONNECT To (Do NOT AOJI
095 0F 3 ALTERNATE

DR LOOP TERM. COLOR PANEL
IN SOME SETS

4hr

firm/1H2


.a
To
4

an

i
Es?

/: . 1.
TRAP 3 .
00 NOT ADJUST . -

a:
r 3
l AFT PANEL

I . llKAII//

CONVERGENCE PANEL "NA"

47.25MH TRAP T '
TADJUST@

"
5191!

j.
(2

\_.. L

/ TA" 0 R
"CA"-5(]

on black & white picture

INSTA-MATIC
PRESET CONTROLS
ADJ. THRU HOLES
IN SHAFTS WITH
INSTA-MATIC ON.

L, J
«Mg/1':
COLOR KILLER

FACTORY ._
7"PRESET %

<\ i/ \
\HUEiADJIr VERTICAL \

l. Depress Insta-Matic Color Switch to IN"
position (indicator green).

2. Adjust controls for normal brite, hue, int,
and cgont. as with customer controls.

3. Check all available channels. Readjust
contfiols as necessary to obtain optimum
hue, int, brite and contrast on all channels.


HDRIZ.
PANEL "DA" \
REPL F" 1

\
; CAUTION HEAT

SINK AT +BUVDC

18! 480V PULSE

HDRIZ
, SIZE I

i HV H.V.
? RECT ADJ.

I).

FT

VERT.T|LT
COIL

PAN EL "VA

"
R a 40V 20V

MASTER BRIGHTNESS
Set brightness control to maximum.

Supply, designed to shut down with excessive current drain. . R E D / G R N

HORIZONTAL

REGULATOR
TRANSISTOR


(vERT PIN :4
AMP CONTROL

An overload, High Voltage are or instantaneous short may
cause power supply to shut down. It will remain shut down
until re-set by removing power from set. To reset, shut set
OFF for approximately 6 seconds, then turn set on.


p

HORIZ CENTERING

NOT USED ON TS-931. Control included
on replacement panels only for use with
chassis originally equipped with centering
ckt.

HORIZONTAL HOLD

Adjust for most stable horizontal sync.
Check by changing channels.

VERTICAL PINCUSRION

1. Turn vert pin amp control
counter-clockwise (max gain).

2. Adjust vert tilt coil for symmetrical
barreling at top & bottom.

3. Adjust vert pin amp control for optimum
correction at top & bottom.

HIGH VOLTAGE ADJUSTMENT

High voltage control is factory preset.
Measure 2nd anode voltage with an accurate
high-im edance, high-voltage meter, with
zero C T beam current (raster extinguished)
at 122V AC line input. Adjust'for 25KV.

fully

WARNING: The high voltage control is a
critical component and misadjustrnent of
this control may cause excessive X-radiation.

//7
I ' xvii L

VERT SIZE

MASTER GI TAPS -~
USE 20V TAP ONLY
IF BRIGHTNESS

RANGE IS TOO HIGH


A

NO CD

VIDEO DRIVE

PICTURE TO RIGHT

IN
>VEHTICAL LINEARITV a VERTICAL

for color kill and on color
picture for adequate color.
If color is low, adjust to
increase color slightly
above normal at max.
intensity. Optimize for all
channels.

3 81 W TRACKING (background adjust-
mant)

TUNEIN STATION SIGNAL

FOR TOUCH UP ONLY - Set drive
controls at or near maximum (at high
brightness) for white highlights.

Set 62 controls (at low brightness) for gray
raster. (Approximately 30% from minimum
is normal.)

For complete 8 81 W tracking procedure see
service manual for appropriate chassis.

IRS/Fl

the point of highlight bl
Also sige B & W Tracking".

xi" P

Adjust master brightness control
for adequate brightness, but below

ooming.

NOISE LIMITER (Not on all panels)
1. Turn clockwise until picture polls on strong signal.
2. Back off until picture is stable. Check all channels.

PURITY,DC CONVERGENCE & CRIT ASSEMBLY

STATIC CONVERGENCE
USE CROSSHATCH DR DOT PATTERN

1. Adjust red and green mtic magnets to
converge pattern at center of screen.

2. Adjust blue static and blue lateral
magnet: to superimpoaa blue on red/groan
pattern at center otscrean.

Some interaction may occur. Repeat steps 1

DOUBLE SIDED

Adjust for whi

ALTERNATE METHOD:

Voltage at term. 3 of Horizontal Panel DA
(Fl should not exceed 80V, which is
equivalent to 26KV. lf adjustment is
necessary, adjust for 78V (25KV) at zero
beam current.

RRECTIDN PICTURE

CENTERING
TAPS

SIZE

Large excursions may affect dynami

HUE RANGE
1. Set HUE control to mid~range.
2. Adjust L3 or L7 for correct flesh tones.

te picture highlights

at high brightness level. Also see

Background Adjustment".

FRONT YOKE MTG CLAMP
MTG EARS

BLUE STATIC MAGNET
REAR YO KE MTG CLAMP

PURITY RING

C

convergence. Adjust before converging set.

CONVERGENCE, STEPS 7 THRU 8

.BLUE HORIZONTAL DYNAMIC STEPS

BTHRU 12

. BLUE VERTICAL STEPS 13 THRU15

DYNAMIC CONVERGENCE PROCEDURE

For complete convergence, perform the
following steps first.

1. Demagnetize shadow mask.
2. DC converge

3. Adjust purity. Do not adjust purity ring
after dynamic convergence.

4. 'Check & adjust vertical size & linearity.
@TOP BLUE HORIZONTAL LINES

Adjust to converge blue
red/green lines at top of screen.

@BOTTDM BLUE HORIZONTAL LINES

Adjust to converge blue lines with
red/green lines at bottom of screen.
Readjust top blue horizontal lines 13 as
necessary.

@RECHECK DC CONVERGENCE

Make background adjustments. DO NOT
ADJUST PURITY RING OTHERWISE
THE ENTIRE CONVERGENCE
PROCEDURE MUST BE REPEATED.

@ BLUE HORIZONTAL AMPLITUDE

Adjust to converge blue line on center
horizontal R-G line or for equal
displacement, then converge with blue DC
magnet. Repeat Steps IO, 11 and 12 as
required for as straight line as possible.

Adjust BLUE HORIZONTAL AMP
(No. 12) to maximum.

BLUE HORIZONTAL TILT

Adjust for blue line droop in center of
screen. Note: May appear as shown in Step
11.

lines with

'BLUE CENTER HORIZONTAL
PHASE. SEE NOTE 3

Adjust to force droop in blue line upward
and in center of screen.

0 BLUE HORIZONTAL DYNAMICS

SEE NOTE3

Turn up blue 62 control. Touch up
controls 10 thru 12. Detail shows area
affected by controls

If above procedure is not adequate,
perform following steps, 9 thru 12.

and 2 as necessary.

BLUE LATERA M
/ L AGNET
RED STATIC MAGNET

V; P P . _
(JI/i-EDZ- CONVERGENCE

PLUG

PURITY ADJUSTMENT

NOTE: CHECK STATIC CONVERGENCE
AND CONVERGE IF NECESSARY.

1. Reduce blue and green (12 controls to
minimum.

2. Loosen front and rear yoke mounting
clamp.

3. Slide yoke forward or backward to
obtain a red ball on CRT.

4. Spread ears of purity rim only as much
as necessary, and rotate coraplate assembly
to center red ball on CRT screen.

5. Position yoke for most uniform rad field.
Adjust purity ring as necessary to obtain rad
field.

6. Turn down red 62 control and
alternately turn up green 62 and blue 62
controls. Observe individual fields, adjust
purity ring as necosaary to olltain pure
individual fields. In some arses it may be
necessary to re-adjust vote to optimize


cREEN \
STATIC L
MAGNET , /

x I POSITION
CORTESMEIIEW '.- PURITY nmc
POLEFIEcEs l j BETWEEN

: , \ ciacz
coNVENcENcEl A "1m" .' REAR 0F

I I
I

G2 Gl
COLOR TUBE ASSEMBLY AND ADJUSTMENTS

purity of individual red, blue and green
fields.

CHECK STATIC CONVERGENCE: react if
necessary. Rachack individual fields. Secure
deflection yoke clamps. Proceed with
background adjustment.

ASSEMBLING CRT

DEFLECTION YOKE MOUNTING

The following procedure is essential to
assure accurate lateral yoke movement
nacasaary to obtain optimum purity.

1. Position yoke firmly against CRT bell
and secure rear yoke clamp.

2. Position front yoke mounting clamp onto
front of yoke. Snug tighten clamp onto
yoke. Slide clamp onto CRT bell and form
clamp ears to ball of CRT.

3. Loosen rear yoke clamp to allow yoke
movement for purity adjustment.

4. Tighten front and rear yoke clamps after
tilt and purity adjustment.

CONVERGENCE YOKE AND BLUE
LATERAL ASSEMBLY MOUNTING

1. Install yoke with cores centered over
convergence pole pieces as shown in detail,
and secure.

2. Install blue lateral assembly with respect
to GI & G2 as shown in detail and secure.

VOL. INDICATOR
LAMP

|
INSTA~MATIC

" @ swoon
OEGAUSSING
can
I
:82 MIcRoPIIoNE

CABLE PLUG
I

./

CRT
SOCKET

CRTSIIIELI]\/h

.t. \ ... N.
WW


GNO
LEAD

oar

DYNAMIC CONVERGENCE PROCEDURE

R-G TOP HORIZONTAL LINES

Adjust to converge horizontal lines near
top of screen. Repeat Steps 3 and 4 as
necessary (See Note 1).

' I
TOP BLUE R-G TOP
HDRIZ LINES HDR

R-G TOP
VERT LIN ES

BOTTOM llLU E

/ Homz LINES


R-G BOTTOM
VERT LINES

R-G aoTToM
£32,213; j, HDRIZ LINES
I I - \I_LI I
. I P 7:
IQ HDRIZ DIFF a II. - ISO
_ TILT c . "F"
L l I I I
j i U

aLuE HDRIZ AMP 133229:
I l
\ _-_..-
l I 1
\LI
0 // aLue HDRIZ TILT
IILUE cENTER P
/ RORIZ PHASE RI; HOHI
":7 "fix I I
. l l I I
Not In I l l l
crkt in I : ---. 07-
some sets. 7. . . . , I
SeenotaB IIII II m

HORIZONTAL IIYIIIIIIICS

Label 54P65189A 75

REG LEFT SIDE VERT LINES

no RIGHT SIDE
(: :j" VERT LINES

0 E
can... .3;


For 2 pole
Convergence ..
Yokes \4fi \|
33 ILAV BLUE CENTER
3 HORIZ PHASE
L4 /
For Staple O ( )/ NOTE 3: The blue
I Convergence L2 VEL Iii/center horiz. phase
TILT Yokes L1 fl control (Step 11) is
comnm CONVERGENCE not required in all
AMPLITUDE PANEL "NA" (fi sets. If used connect
CONTROL as shown.
Convergence Panel Alternate connection:
shown in Service Position coil out of circuit.
CHASSIS REMOVAL

1. Remove volume and toner knobs

2. Uorlug oke,_convergence panel, degaussing coil leads, CRT socket,
secon ano e, microphone plug and ground clips.

3. Place receiver face down on a soft cloth and remove 4 screws A at
bottom of chassis. Perform following steps with receiver face down.

4. Remove 4 screws 8 at ends of handle support bracket.
5. Remove 2 screws C on pincushion bracket.

6. Remove ground lead and 5 screWs O at sides of chassis.
7. Remove 2 screws E on volume control bracket.

B._ Loosen 2 screws F and release lnsta-matic switch. NOTE: When
reinstalling switch, first secure chassis to cabinet then insert switch in
cabinet front, realign switch bracket and tighten screws F. Check
switch for binding and readjust bracket if necessary.

9. Remove 1 screw G on volume indicator lamp bracket, and lift
chassis off cabinet front.

CRT REMOVAL

1. Unhook 4 shield springs H and remove shield and degaussing coil as
an assembly.

2. Loosen CRT retaining screw J to relieve tension on corner mounting
straps

3. Remove 4 bolts K and remove CRT.

R-G TOP VERTICAL LINES

Adjust to converge center line at top of
screen.

R-G BOTTOM HORIZONTAL LINES

Adjust to converge horizontal lines near
bottom of screen.

R-G BOTTOM VERTICAL LINES

Reduce 62 to extinguish blue raster.

Adjust to converge center vertical line at
bottom of screen

+ WWW/oHORIZDNTAL DIFFERENTIAL TILT
I Adjust to make center horizontal R-G

lines converge in center of screen. Repeat
Steps 7 and 8 as necessary (see Note 1).
Repeat Steps 5, 6, 7 and B as necessary for

best overall convergence.
NFL-G LEFT SIDE VERTICAL LINES

Adjust to converge vertical lines from
center to left side.

R-G RIGHT SIDE VERTICAL LINES

Adjust to converge vertical lines from
center to right side.

oR-c HORIZONTAL LINES

Set HORIZONTAL DIFF TILT (no. 8) to
mid-range. Adjust R-G HORIZONTAL
LINES (No. 7) to converge R-G center
lines.

NOTE 1:

If lines will not converge, adjust for equal
displacement to permit convergence with
disc magnets.

NOTE 2:

If the displacement of the blue line is not
equal on both ends with respect to R-G '
line, readjust blue horizontal tilt control V)
(Step 10).

NOTE 3: See convergence panel detail.

585: z a