Marantz SR 9300 Service Bulletin

This is the 4 pages manual for Marantz SR 9300 Service Bulletin.
Read or download the pdf for free. If you want to contribute, please mail your pdfs to info@audioservicemanuals.com.

Page: 1 / 4
left right
Marantz SR 9300 Service Bulletin

Extracted text from Marantz SR 9300 Service Bulletin (Ocr-read)


Page 1

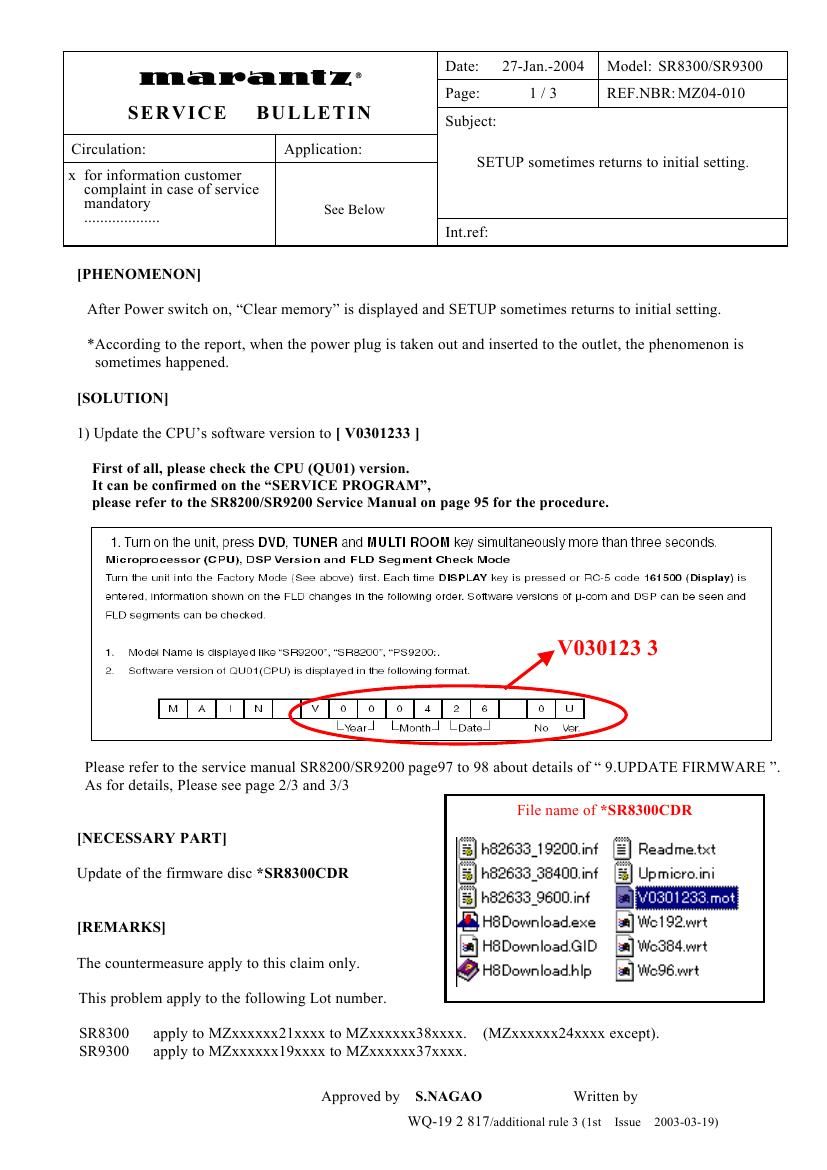
97 9. UPDATE FIRMWARE Software for CPU and DSP can be updated. Have *SR9200CDR update disc. There are two mode of download, regarding to the target of software as bellow. Mode 1: Download DSPs software to 4M Flash-ROM. This mode is to update the software for DSP. The target devise is 4M -“Flash ROM (Q671) on P604. SR9200&8200 need to be set download condition, by three front keys. Mode 2: Download CPUs software to internal Flash-ROM. This mode is to update the software for DSP. The target devise is internal flash ROM of CPU (QU01) on P604. The unit needs to be set to writing condition, by pushing internal switch from back-panel. The following items are required for updating. RS232C Dsub-9 pin cable (female to female/Straight type) PC (Windows 98, NT, ME, 2000) with RS-232C port. Upgrade software to CPU. Upgrade software to DSP. Use RS232C Dsub-9 pin cable (female to female/Straight type) to connect PC and the unit. COM port on PC needs to be set by dialog box for each program. COM port can be set from COM1 to COM5. Download Firmware for DSP (Mode 1) 1. Put the DSP upgrade folder into anywhere on your PC's hard disc. 2. Connect PC and the unit with the RS-232C cable. 3. Turn on the unit. 4. Press ENTER, MUTE and MULTI-SPK buttons simultaneously more than 5 seconds to turn the unit into Loading Mode. 5. LOADING MODE will be shown on FLD. 6. Launch UpgradeDSP.exe on PC. 7. Set the Baud Rate to 38400 then click Start communication button. If the connection is made successfully, a dialog box saying Success to connect appears and CONNECTED is displayed on FLD. 8. Click Send the DSP codes button on the dialog box. Progress status of downloading will be shown on PC and LOADING is displayed on FLD. 9. If downloading is completed successfully, COMPLETED is displayed on FLD. And a dialog box saying "Finished the DSP code transmitting" appears. Click OK and then click CLOSE to close the application. 10. Turn off the unit.

Page 2

98 Download Firmware for CPU (Mode 2) 1. Put the CPU upgrade folder into anywhere on your PC's hard disc. 2. Connect PC and the unit with the RS-232C cable. 3. Remove the screw on the backside of the unit. 4. Insert a thin rot to the screw hole and push the switch (SU02) inside to turn on the switch. 5. Turn on the power of the unit. (Confirm that the stand-by LED lights in green so the unit is in the boot mode.) 6. Launch H8Download.exe on PC. 7. Click other files-¦ button in the dialog box to specify the file (XXXX.mot) to be upload. 8. Click Connect button. If the connection with the H8 µ-com is successfully made, a dialogue box saying Success to the H8 micro processor connection appears. If the connection fails, error message will appear. 9. Click Send button to start update. 10. If the firmware is updated successfully, a dialog box saying Finished the firmware program sending appears. 11. Click CLOSE button to close the application. 12. Disconnect Mains power cord. 13. Turn off the internal switch that has been turned on at step 3. Put on the screw. 14. Turn on the unit. Firmware Version Check To check the versions of the firmware, see Microprocessor (CPU), DSP Version and FLD Segment Check Mode in SERVICE PROGRAM section.