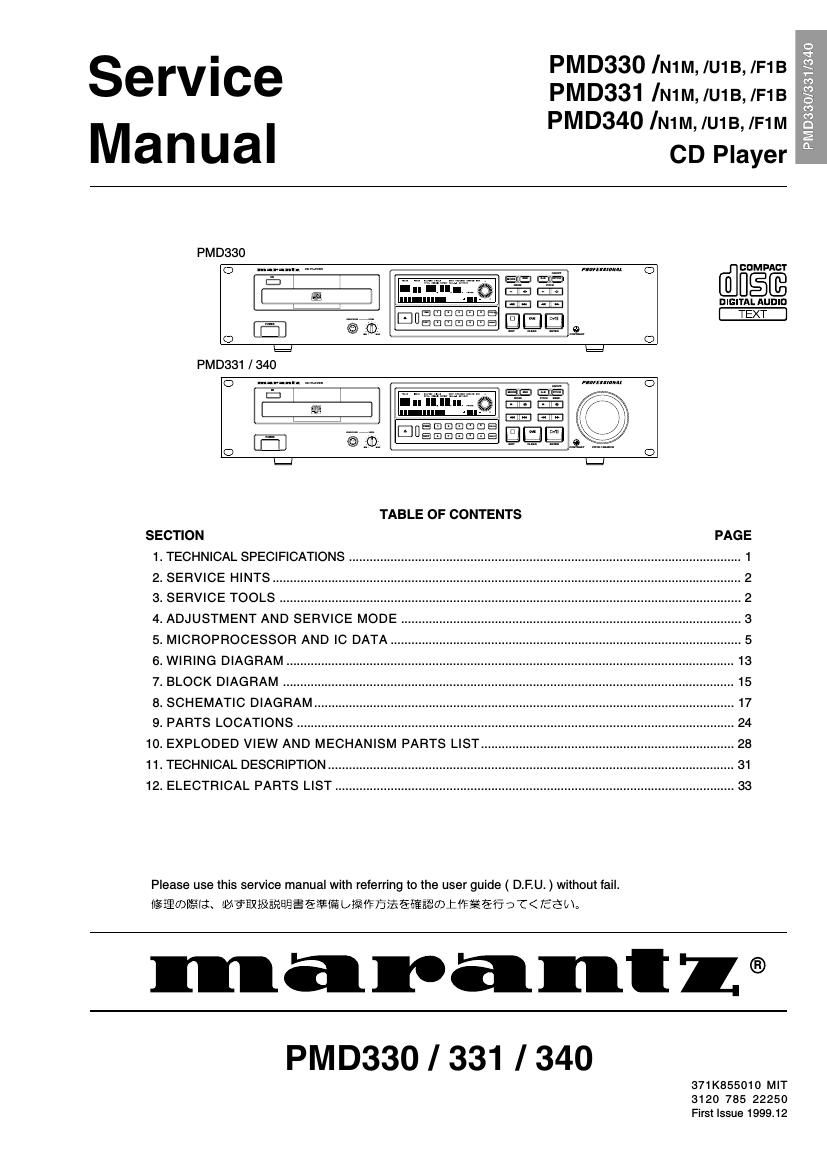
Marantz PMD 330 Service Manual

This is the 24 pages manual for Marantz PMD 330 Service Manual.
Read or download the pdf for free. If you want to contribute, please mail your pdfs to info@audioservicemanuals.com.

Page: 1 / 24
left right
Marantz PMD 330 Service Manual

Extracted text from Marantz PMD 330 Service Manual (Ocr-read)


Page 1

' PM D330 /N1M, /U1B,/F1B
serVIce PMD331 /N1M,/U1B,/F1B
PMD340 /N1M,/U1B, /F1M

Manual CD Player


PMDBaO
O ,mmm. 0 [fl BEE
, ' DIGITAL AUDIO
m - ~ III E 2 E E E E =.
i _ ii © .0.
o - o
I=I
PMD:331 /340
o ------ - mm O
"a
,
I E EI EI E) E) :I E
m. -:7- Eli] . '.
E @3 (D E? II El E1 E) :l E
C) C)
1::

TABLE OF CONTENTS

SECTION
1. TECHNICAL SPECIFICATIONS

2. SERVICE HINTS....

3. SERVICE TOOLS ..
4. ADJUSTMENT AND SERVICE MODE .................................................................................................. 3
5. MICROPROCESSOR AND IC DATA .. 5
6. WIRING DIAGRAM ................................ .13
7. BLOCK DIAGRAM .................................................................................................................................. 15
8. SCHEMATIC DIAGRAM ......................................................................................................................... 17
9. PARTS LOCATIONS ..................................................... 24
10. EXPLODED VIEW AND MECHANISM PARTS LIST 28
11. TECHNICAL DESCRIPTION ..................................................................................................................... 31
12. ELECTRICAL PARTS LIST ................................................................................................................... 33

Please use this service manual with referring to the user guide ( D.F.U. ) without fail.
iigflmlfii; %?ER}&§§EBE%EEEIF£b5¥1$fii£éfi§§fl®ti¥¥§fi 9C< TEE.

maranll®

PMD330 / 331 I340

371K855010 MIT
3120 785 22250
First Issue 1999.12

Page 2

MARANTZ DESIGN AND SERVICE

Using superior design and selected high grade components, MARANTZ company has created the ultimate in stereo sound.
Only original MARANTZ parts can insure that your MARANTZ product will continue to perform to the specifications for which
it is famous.

Parts for your MARANTZ equipment are generally available to our National Marantz Subsidiary or Agent.

ORDERING PARTS :

Parts can be ordered either by mail or by FaX.. In both cases, the correct part number has to be specified.

The following information must be supplied to eliminate delays in processing your order :

1. Complete address

2. Complete part numbers and quantities required

3. Description of parts

4. Model number for which part is required

5. Way of shipment

6. Signature : any order form or Fax. must be signed, otherwise such part order will be considered as null and void.

- USA - - EUROPE/TRADING - BRAZIL
MARANTz AMERICA, INC. MARANTz EUROPE B.V. PHILIP DA AMAZONIA IND. ELET. ITDA
440 MEDINAH ROAD P.O.BOX 30002, BUILDING SFF2 CENTRO DE INFORMACOES AO
ROSELLE, ILLINOIS 60172 5600 JB EINDHOVEN CEP 04698-970
USA THE NETHERLANDS SAO PAULO, SP, BRAZIL
PHONE : 630 - 307 - 3100 PHONE : +31 - 40 - 2732241 PHONE : 0300 - 123123(Discagem Direla Gratuila)
FAX : 63o . 307 - 2637 FAX : +31 - 40 - 2735573 FAX : +55 11 534. 3933
, PINIFESSIDNAl AMERICAS 7 - PHDFESSlnfl/Al AUSTRALIA - , CANADA
SUPERSCOPE TECHNOLOGIES, INC. TECHNICAL AUDIO GROUP FTY. LTD LENBROOK INDUSTRIES LIMITED
MARANTz PROFESSIONAL PRODUCTS 553 DARLING STREET, 633 GRANITE COURT,
2640 WHITE OAK CIRCLE, SUITE A BALMAIN, NSW 2041, PICKERING, ONTARIO L1w 3K1
AURORA, ILLINOIS 60504 USA AUSTRALIA CANADA
PHONE : 630 - 320 - 4300 PHONE : 61 - 2 - 9310 - 5300 PHONE : 905 - 331 - 6333
FAX : 630 - 320 . 3103 FAX :61 . 2 - 9310 - 5355 FAX : 305 - 331 - 6936
- AUSTRALIA - T THAILAND - 7 SINGAPORE
JAMO AUSTRALIA PTY LTD MR2 STANDARD co.,LTD wo KEE HONG (S) PTE LTD
1 EXPO COURT, PO. BOX 350 746 - 754 MAHACHAI ROAD, wo KEE HONG CENTRE
MT. WAVERLEY VIC 3149 WANGBURAPAPIROM, PHRANAKORN, No.23, LORONG 3, TOA PAYOH
AUSTRALIA BANGKOK, 10200 THAILAND SINGAPORE 313257
PHONE : +61 - 3 - 3543 - 1522 PHONE : +66 - 2 - 222 9131 PHONE : +65 2544555
FAX : +61 - 3 - 3543 - 3677 FAX ; +66 - 2 - 224 6795 FAX : +65 2502213
7 NEW ZEALAND - TAIWAN - - MALAYSIA -
WILDASH AUDIO SYSTEMS NZ PAI- Yuma CO.. LTD. wo KEE HONG ELECTRONICS SDN. BHD.
14 MALVERN ROAD MT ALBERT 6 TH FL NO, 143 SUNG KIANG ROAD, SUITE 3.1, LEVEL 3, MENARA GENESIS,
AUCKLAND NEw ZEALAND TAIPEI, 10423, TAIWAN R.O.c. No.33, JALAN SULTAN ISMAIL,
PHONE :+64 - 3 - 3451953 PHONE : +336 » 2 - 25221304 50250 KUALA LUMPUR, MALAYSIA
FAX : +64 - 9 » 3463554 FAX : +336 - 2 - 25630415 PHONE :+60 3 - 2457677
FAX : +60 3 - 2453130
, JAPAN Technical _ KOREA
MARANTz JAPAN, INC. E] 2K V 5 y v If ifi 45 $1 MK ENTERPRISES LTD.
35. 1, 7- CHOME, SAGAMIONO ROOM 604/605, ELECTROOFFICETEL, 16-58,
SAGAMIHARA - SHI, KANAGAWA 2:: #1 T22878505 36A, HANGANGRQ YONGSANKU' SEOUL
JAPAN 223-3505 Iain-3.1IiEfBIEiEmafEflW-sw KOREA
PHONE : +31 42 7431013 §¥4§EE T150-0022 PHONE . +322 _ 3232 .155
FAX : +31 42 741 9190 fissmfieaatbfifim 1 .9 FAX . +322 _ 3232 _ 154

SHOCK, FIRE HAZARD SERVICE TEST:

CAUTION : After servicing this appliance and prior to returning to customer, measure the resistance between either primary AC
cord connector pins ( with unit NOT connected to AC mains and its Power switch ON ), and the face or Front Panel of product and
controls and chassis bottom.

Any resistance measurement less than 1 Megohms should cause unit to be repaired or corrected before AC power is applied, and
verified before it is return to the user/customer.

Ref. UL Standard No. 813.

In case of difficulties, do not hesitate to contact the Technical
Department at above mentioned address.

991207MIT

Page 4

4. ADJUSTMENT AND SERVICE MODE

1.1. Digital Output (Coaxial) Check

On the preset menu, set "D.OUT" to "ON".(PMD331/PMD340)
Do waveform observation with the oscilloscope, and confirm
the digital output level of JTO1 to be 0.5Vp-p, square wave
within 120% .

1.2. Balanced Output Adjustment (PMD331/PMD340)
1kHz, 0 dB are played back by using TEST disc.

Turn RBO1 on the rear panel, and adjust the output of JB53
(Balanced Out L-CH).

Turn RB02 on the rear panel, and adjust the output of JB54
(Balanced Out R-CH).

Adjust each output level to 16 dBu, within :0.5dB.

1.3. Service Mode

1) With power off, simultaneously press the PLAY/PAUSE,
MODE and TIME buttons, and at the same time, press the
power button. At this time the LCD shows the model name
and firmware version.

2) Next, press CUE button.

3) At this time the LCD shows " Test :Version (TEST MODE
select menu)

4) The NEXT and PREVIOUS buttons change the TEST
MODE(reter to the chart below).The PLAY button selects it.

5) Pressing the CUE button returns to the TEST MODE select
menu.

6) Press the STOP button to exit the service mode.

TEST
INDEX MODE CONTENTS
1-3-1 Version MPU firmware version check
1.3.2 Dlsplay LCD&LED test
1 .3.3 Key&GP| Conlirmation of Buttons, GPI Control l/O and R05
1.3.4 EE-PROM Check of EEPROM Read/Write
1.3.5 * PlckuP Manual moving of the pickup

* It is not usually necessary to confirm.

1.3.1. Model name and firmware version check

When the LCD shows "Test :Version", press the PLAY button,
to see the model name and the MPU firmware version.
Pressing the CUE button returns to the TEST MODE select
menu.

1.3.2. LCD and LED test

1) Set the LCD panel contrast adjustment screw to mechani-
cal center. (you will feel a click.)

2) When the LCD shows "Test : Display", press the PLAY button.

3) The LCD and LED lights as the chart below.

4) Each time the PLAY/PAUSE button is pressed the LCD and
LED change as shown in the chart below.

5) Pressing the CUE button returns to the TEST MODE select
menu.

4. EEtU-BZE- F

1.1.Digital Output (Coax) REE

Preset Menu c " D,OUT" 5 "ON" 1:29:35. 1PMD331/PM0340)
JTOtODESJSwaDI/NJbEZs/D23-7Cififiééfiifiléaoi
73m 0.5Vp-p, +/-20%LXWDIEFIZEECEEJEEEEEEEE.

1.2, Balanced Output 55% (PMD331/PMD340)

TEST Disc Efififlb 1kI-lz. OdB EEifi'é.

TEE/174W) RBO1EIEI Lz'C dB53 (Balanced Out LiChl 033173
Eififiégéo

TEE/120W) RBOZEIEI L/C dB54 (Balanced Out RCh) COED
Eifiggée

ENUJHflJ I/Nlbé 16dBu. +/*O.5dB LXWICEIS§3éa

1.3. SERVICE 33- FTUNIESE

E7}? OFFUDIX, C Play/Pause 7115?. Mode/T157 J. Time/11
9)EEE§IC}$UEDBET§EA1I§.

EEIEEEE ONUDlfiIE-Cfifirlfi 'J 63 )DBU-EZD- FE
EéCClCoCIO. U-EXE- FICAéo CODE? LCDICISIJE
Ell/Ed: MPU? 7 -A'fi I 70311-9 a )ifiéhé.

RIC. CUETITSVEIEFB.

CODE. LCDUDiE/fiff " Test 2 Verslon CLIVE. (Test mode
EREE)

Nextc: Previous 7115)? Test modeWfiEflé-il EUJ Ogi.
Play 71157 DEERE/Z).

CUEWIQ )1 Test mode LEREEUDIKEEICIEé.

Stop/115I J'Ctt- EXE- P 5.1th36.

ESE Test mode W75

LEE

1.3.1 Version MPU (D 77~L0117 ODII Jilin?

1.3.2 Drsplay LCD&LED $7315.11?

1.3.3 Key&GPl #59), GPI Control I/O, R05 (73703551
1.3.4 EE-PROM EEPROM Head/Write fifty?

1.3.5 PICKUP t WMT EEETEIEEGE

* EUODIEEIJEEEEEEUDMElXfil/to

1.3.1. ETJDS/jfldabll-Da JGJBEEE

"Test I Version" CEEEHTLIECEIC. Play #6771553
6:. EEJLECMPLD P -Lx'7 I FUJI l- 9' a JDEUTTEEYLZJ.
CUE/119 Jéfifigc Test mode EREE UMXEICEDEE.

1.3.2. LCD $7381 LEDERKWJWESE

EBDUUJEUEI TZII/UDEJ hi} IEEEFEHTU J-Lx RYO1
EXDZDJI/EJQ-TQ 'J y 93§IEIEIC§I§¥3§>D

"Test : Dlsolay " CirfiénCIAECEIC. Play TfiSJWéC
TEEEIUE 3 C LCDE: LEDDUEIGEIIEJ. Play 7W9 )élfiigg
(C LCDC LEDIETEUDIIIEICEU? ' EKTDWDETJ6.

CUE/"1'55 Jélfirg'c: Test mode EREE UJIXIEEICEDEED

LCD BUTTON GPI Control I/O
PLAY PAUSE CUE FADER END
END PITCH PLAY CUE TALLY TALLY TALLY TALLY NDEX TALLY
1 PATTERN1 O X O X O X 0 X o X
PATTERN2 >< O X o X O X o X o
:3: All lightup O O O o O O O O o o
(4) None Iightup X X X X X X X X X X

O:Light X:Not Light Oalfifl" Xajjfix]

PATTERN 1

-N9-y1§fi

TRDGK muzx smut: cuE

DRE-6mm
u a


mu
mp

PlTEH%

PATTERN 2

eligiJZEfi

ztnnszu a:
N

NEXT
n

autumn

1.3.3. Confirmation of Buttons, GPI Control IIO and RC5

1) When the LCD shows "Test : Key&GPl", press the PLAY
button.

2) The LCD shows "No Signal".

3) Press a button, GPI Control |/O and R05 are input, and the
LCD changes as shown in the chart below.

1.3.3. 71157). GPI Control l/O. R05 (DEE?

"Test 2 Key&GPI" CEEEHCHECEIC. PIaYITVSI JWB'C
"No Signal " CEEDEDVJ KbéflEIEEEECEfiEFEEUD
fillfflém LCD (Ci/33%».

SW GPI " R05 SW GPI " RC5
FUNCTION Input Input Input FUNCTION Input Input Input

Open/Close 28 -» 29 Preset 33 -- 34
Time 29 -- 30 Index + 17 8 18
CD-Text 30 -- 31 Index - 18 9 19
Mode 31 -- 32 O 1 - 2
Stop "' -- -- -- 1 2 3
Cue "'" -- -- -- 2 3 - 4
Play/Pause 1 1 -- -- 3 4 5
Play -- 1 12 4 5 6
Cue + Play 13 4 -- 5 6 7
Pause -- 2 13 6 7 8
Next 15 10 16 7 8 9
Previous 16 11 17 8 9 10
FF 19 6 20 9 10 - 11
HEW 20 7 21 Pitch Bend + 26 -- 27
END 22 -- 23 Pitch Bend -' 27 -- 28
A-B Repeat 21 -- 22 Service -- -- 35
Pitch + 24 " 13 25 Fader Fader --
Pitch - 25 " 14 26 (Normal) Input

Program 32 -- 33 Fader Fader --
Pitch On/Off 23 15 24 (Invert) Input

* : PMD331, PMD340 only.
*** : The service mode is exited.
**** :The TEST MODE select menu is returned.

** : PMD330 only.

1.3.4. Check of EEPROM Read/Write

1) When the LCD shows "Test : EE-PROM", press the PLAY
button.

2) Check of EEPROM Read/Write begins.The check takes
about 1 minute. During the check pressing any button has
no effect.

3) At this time the LCD shows as the following order.

"ADDR (LOW)"--->"WR|TE (LOW)"--->"WR|TE (HIGH)"
--->"PAGE WRITE"--->"EEPROM OK!"

4) If there is an error in the EEPROM, the LCD shows
"EEPROM NGI".

5) Pressing the CUE button returns to the TEST MODE se-
lect menu.

1.3.5. Manual moving of Pick up

1) When the LCD shows "Test : Pickup", press the PLAY button.

2) The LCD shows "Laser power". The laser diode turns on.

3) Press the NEXT button. The sled will move to the outside.

4) Press the PREVIOUS button.The sled will move to the inside.

5) Pressing the CUE button returns to the TEST MODE select
menu.

*2 PMD331, PMDS4O (733).,

**1 PMD330 (7)9}.

*>l<*: U-EX'E- IDflTgéo

>l<>I<>I<*. Test mode EREE ODIXFEICE0330

1.3.4. EEPROM mRead/Writeil y 9

"Test 3 EEPROM" CEEEHTHECEIC. PlayfiiQ JWQ'C
EEPROMUDRead/erte 51 y 9EDSNJ§§D 7 I *y Qnggé
H3Eijl311fl1 fiETCg'.

E: w 9113l3t7JUD/TI5 VIEIEDfiEQECEO 353.

C®H§r LCDICI; "ADDR (LOW) " "> "WRITE (LOWI" ~> WRITE
(HIGH) W> "PAGE WRITE" "> "EEPROM OK I" (Datiliifiéll.
39.

EEPROM ICTEIDEEEEEIQ. "EEPROM NGI"D§EE1L§§Z
CUE/1197531336: Test mode EIREE UDIfiEICEDig.

1.3.5. Pickup ®§E§DT§§J

"Test IPlckuo" CEEEHTHECEIC. Play HiS'VJE'TIC
"Laser power " tin-17.12130 Laser Dlode DONL/af'g.
Next/1154' )CSIIIEA. Prevlous 7115 JTWIEAXI/ J F1135
swat-9*.

CUE/119 yétwc Test mode EIREE QIKEICEDEE.