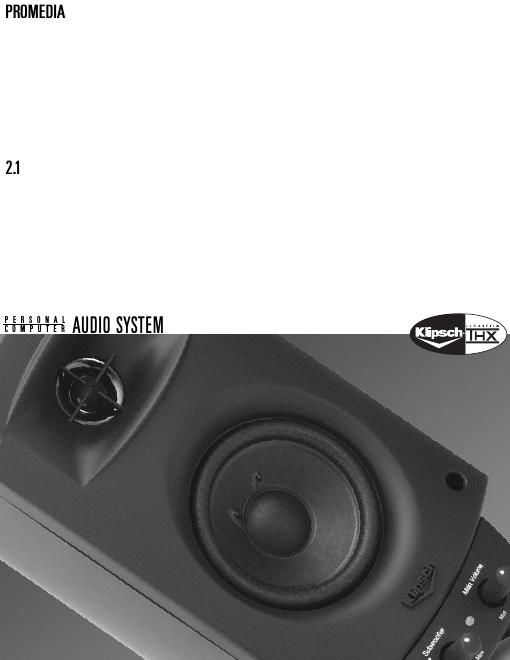
Klipsch promedia 2 1 owners manual

This is the 16 pages manual for klipsch promedia 2 1 owners manual.
Read or download the pdf for free. If you want to contribute, please mail your pdfs to info@audioservicemanuals.com.

Page: 1 / 16
left right
klipsch promedia 2 1 owners manual

Extracted text from klipsch promedia 2 1 owners manual (Ocr-read)


Page 1

CAUTION: RISK OF ELECTRIC SHOCK! DO NOT OPEN! CAUTION! To reduce the risk of electric shock and fire, do not remove the cover or back plate of this device. There are no user-serviceable parts inside. Refer repairs to a Klipsch authorized service center. CAUTION! The international symbol of a lightning bolt inside a triangle is intended to caution you to uninsulat- ed dangerous voltage within the device's enclosure. CAUTION! To prevent electrical shock, match the wide blade of the plug on the power cord to the wide slot on the power outlet and insert fully. CAUTION! To reduce the risk of electrical shock, do not expose this equipment to rain or moisture. CAUTION! Do not plug in the AC cord before setting up your system. 1. Read Instructions. All safety and operating instructions should be read before operating the device and should be retained for future reference. 2. Heed Warnings. All warnings on the device and in the operating instructions should be adhered to. 3. Water and Moisture. The device should never be used in, on or near water due to the risk of fatal shock. 4. Wall and Ceiling Mounting. The device should be mounted on a wall or ceiling only as recommended by the manufacturer. 5. Ventilation. The device should always be located in such a way that it maintains proper ventilation. It should never be placed in a built-in installation or anywhere that may impede the flow of air through its heat sink or ventilation openings. 6. Heat. Never locate the device near heat sources such as a radiator, floor register, stove or other heat-generating device. 7. Power Supply. The device should only be connected to a power supply of the type described in the operating instructions or as marked on the device. 8. Power Cord Protection. Power cables should be routed so they are unlikely to be stepped on or crushed by items placed on or against them. Pay special attention to where the plug enters a socket or fused strip and to where the cord enters the device. 9. Periods of Non-Use. The device should be unplugged from the wall outlet when it is not in use for extended periods. 10. Dangerous Entry. Care should be taken that no foreign objects or liquids fall or are spilled inside the device. 11. Damage Requiring Service. The device should be serviced by an authorized service center when: - The plug or power supply cord has been damaged. - Objects have fallen or liquid spilled inside of the device. - The device has been exposed to moisture. - The device does not appear to be operating properly or exhibits a marked change in performance. - The device has been dropped or the cabinet has been damaged. 12. Service. The user should not attempt to service the device beyond what is described in the operating instructions. All other servicing should be referred to qualified personnel. For U.S. customers, if dealer service is not available, contact Klipsch customer service for a return authorization (RA) number before shipping. Klipsch Customer Service: 1-888-554-5665. If purchased outside of the U.S., please contact your local dealer or distributor. PACKING LIST 2 Satellite speakers with pedestals attached 1 Control pod, attached to one satellite speaker 1 Subwoofer 1 Packet of two individual speaker connections 1 Owner's manual packed with rubber isolation feet SPEAKER PLACEMENT 1. Attach the supplied rubber feet to the bottom of all loudspeakers. 2. The two satellite speakers should be positioned on each side of your computer monitor. To wall mount, the pedestal stands may be removed by unscrewing the 1/4" 20-thread bolt, which accommodates a wide variety of wall brackets available through stereo and appliance stores. Klipsch WB-1 wall brackets are available at www.klipsch.com. 3. Locate the subwoofer either directly under your computer desk, or close to the satellite speakers. Do not cover up the side sub driver or front port of the enclosure and be sure to provide enough ventilation to the rear of the subwoofer. It is normal for this panel to be warm to the touch. The subwoofer should be no clos- er than 10" to the computer monitor to avoid interference. 4. Speaker or power cables running across an area of heavy foot traffic should be positioned against a wall or corner and secured with tape. SOUNDCARD CONNECTION 1. Plug the ProMedia 2.1 control pod input cable into the soundcard output jack on the rear of the PC. Since the Klipsch ProMedia 2.1 has its own internal amplifier, it was designed to hook into the line out connector. Connection to the speaker level output jack might result in poor sound quality. 2. Connect the control pod output, which is the round multi-pin plug, into the subwoofer "Preamp Input." 3. From the subwoofer, connect the two remaining individual speaker wires to each of the two satellites. Be sure to observe proper polarity (+/-) for the tinned wire ends that connect to the subwoofer. SPEAKER CONNECTION DIAGRAM 1. Connect mini plug to PC soundcard from the control satellite preamp. 2. Connect the DIN plug to the subwoofer from the control satellite preamp. 3. Connect the speakers by inserting the tinned wire leads into the subwoofer. 4. Do not plug in the AC power until your computer system is set up. 5. Plug headphone mini stereo plug in headphone jack, if desired. 6. Plug stereo mini plug into MP3/Aux jack. Plug stereo mini plug into MP3 player (as an example). SOFTWARE AND HARDWARE GAIN CONTROLS Software Volume Controls in Microsoft Windows 1. Click the Start button on your taskbar 2. Choose Accessories 3. Windows 95: Choose Multimedia Windows 98: Choose Entertainment 4. Click on the Volume Control 5. Adjust the Wave Volume Elevator Button to halfway Volume Control Programs Some soundcard and/or PC manufacturers may have software that must be adjusted separately from the Windows volume control. Consult applicable manual for specific hardware documentation. Subwoofer Level For CD or DVD output, the optimum position will be indicated by the mark at 10 o'clock on the sub level con- trol. Optimum sub levels and user preference may vary from game to game. Usually a high bass level is pre- ferred, especially at low listening levels. Remember to reset the control settings before playing CDs or films on DVD. 6 5 4 3 2 1 ENGLISH 230 V

Page 2

CONTROL POD FEATURES Headphones: The 1/8" stereo headphone output jack, located on the right-hand side of the control pod, turns off the two satellite speakers and the subwoofer output. The main volume control will adjust the head- phone output. MP3/Aux: The MP3/Auxiliary input jack is used with portable audio players. This signal will be mixed with the main source. The input has a +6dB input sensitivity to help compensate for the lower output voltage of some portable players. To obtain the proper balance with the main signal, the level adjustments in the com- puter software and in the portable player will need to be adjusted. An example would be listening to an MP3 player while surfing the net and hearing associated sounds from various websites. The mixed sound may not be desirable, and you will ultimately determine how you use this feature. NOTE: During playback of MP3 files, overall sound quality may be perceptibly degraded compared to other audio sources such as CD. This is caused by the encoding method and quality of the MP3 file. It is recom- mended that MP3 files be encoded at a minimum 128 bit rate. SPECIFICATIONS Total System Frequency Range: 32Hz-20kHZ Maximum Acoustic Output: 106dB Peak Amplifier Headroom: 2 X 35 watts-satellites 1 X 130 watts-subwoofer Satellite Impedance: 4 ohms minimum Preamplifier Control Pod: Subwoofer and Main volume level controls LED power indicator MP3/Aux player line input with soundcard mixing function Headphone jack Direct path interface Satellite: Sealed elliptical two-way enclosure with 0.75" polymer dome tweeter mated to MicroTractrix(r) Horn and 3" long-throw mid-bass driver Subwoofer: Bass-reflex enclosure with front port and side-firing 6.5" long-throw driver; flared tuned port; sixth-order enclosure design Amplifier: Digital linear hybrid amplifier; discrete MOSFET output power section Subwoofer Limiter: Protective limiter function protects the driver and amplifier from extremely high volume playback ACCESSORIES All accessories are available at www.klipsch.com. RB-1 Speaker Stands Telescopic floor stand for ProMedia satellites. Cast metal base, hollow tubing (allowing wire to be hidden inside). Minimum height: 28 inches. Maximum height: 48 inches. WB-1 Wall Mount Brackets Versatile Wall Bracket 1 is made from the same quality steel as the ProMedia satellite pedestals. The clean, simple design affords the most extreme angle adjustment, with up to 160 degrees of movement for precise speaker positioning in the horizontal plane. Wall stud wood screws included. TROUBLESHOOTING If no sound, ensure that: - Power, input, speaker cables and connectors are securely attached - Software is properly installed and functioning - Computer sound (control panel) volume is turned up and not muted - LED glowing If one or more speakers have little or no sound, ensure that: - All cables are connected properly - Connectors are fully "seated" in soundcard and speakers - Main and subwoofer level controls are properly adjusted on control pod- Computer software audio settings are adjusted for proper use - Computer system's sound (control panel) volume is turned up If the satellites or subwoofer exhibit distortion or buzzing: - Turn down computer's overall volume (via control panel), and reduce control pod volume - Turn down subwoofer volume, as program signal may be too strong - Plug the subwoofer power cord into a surge protector If there is noise or hissing and the volume is low even with main volume turned up: - Turn up computer's sound volume (via control panel) - Turn down main volume on control pod to compensate - Ensure that software/ hardware is properly installed and operating If there is computer monitor interference: - Make sure the subwoofer is positioned at least 10" from the computer monitor - Increase the distance between the satellite speakers and the computer monitor For more detailed information and FAQs, please visit www.klipsch.com. WARRANTY-U.S. and Canada Only KLIPSCH, LLC ("KLIPSCH") warrants this product to be free from defects in materials and workmanship (sub- ject to the terms set forth below) for a period of one (1) year from the date of purchase. During the warranty period, KLIPSCH will repair or replace (at KLIPSCH's option) this product or any defective parts. Proof of pur- chase in the form of a bill of sale or receipted invoice, which is evidence that this product is within the war- ranty period, must be presented or included to obtain warranty service. This warranty does not cover damage due to misuse, abuse, negligence, acts of God, accident, commercial use or modification of, or to any part of this product. This warranty does not cover damage due to improper operation, maintenance or installation, or attempted repair by anyone other than KLIPSCH or someone authorized by KLIPSCH to do warranty work. Any unauthorized repairs will void this warranty. This warranty does not cover product sold AS IS or WITH ALL FAULTS. This warranty is invalid if the factory applied serial number or date stamp has been altered or removed from this product. REPAIRS OR REPLACEMENTS AS PROVIDED UNDER THIS WARRANTY ARE THE EXCLUSIVE REMEDY OF THE CONSUMER. KLIPSCH SHALL NOT BE LIABLE FOR ANY INCIDENTAL OR CONSEQUENTIAL DAMAGES FOR BREACH OF ANY EXPRESS OR IMPLIED WARRANTY ON THIS PRODUCT. EXCEPT TO THE EXTENT PROHIBITED BY LAW, THIS WARRANTY IS EXCLUSIVE AND IN LIEU OF ALL OTHER EXPRESS AND IMPLIED WARRANTIES WHATSOEVER, INCLUDING BUT NOT LIMITED TO, THE WARRANTY OF MERCHANTABILITY AND FITNESS FOR A PRACTICAL PURPOSE. Some states do not allow the exclusion or limitation of incidental or consequential damages or implied war- ranties so the above exclusions may not apply to every customer. This warranty gives you specific legal rights, and you may have other rights which vary from State to State. To obtain warranty service, please follow these directions: 1. If you purchased this product from a retail store, please return this product to such store in its original packaging along with proof of purchase. 2. If you purchased this product from a computer manufacturer, please contact that manufacturer. 3. For purchases made through www.klipsch.com, please call KLIPSCH Customer Service at 1-888-554-5665. Product may only be returned to KLIPSCH after a Return Authorization number has been obtained from KLIPSCH. Returned product must be shipped, freight prepaid to KLIPSCH in either its original packaging or packaging affording an equal degree of protection along with proof of purchase. WARRANTY-Outside the U.S. and Canada The warranty on this product if it is sold to a consumer outside of the United States or Canada shall comply with applicable law and shall be the sole responsibility of the distributor that supplied this product. To obtain any applicable warranty service, please contact the dealer from which you purchased this product, or the dis- tributor that supplied this product.