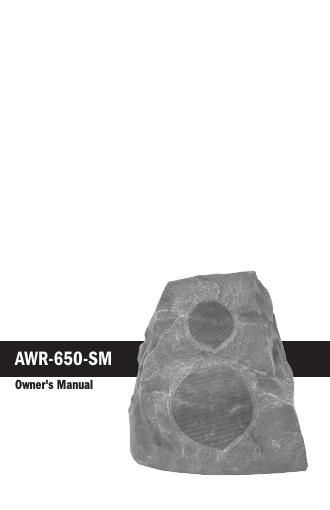
Klipsch awr 650 sm owners manual

This is the 4 pages manual for klipsch awr 650 sm owners manual.
Read or download the pdf for free. If you want to contribute, please mail your pdfs to info@audioservicemanuals.com.

Page: 1 / 4
left right
klipsch awr 650 sm owners manual

Extracted text from klipsch awr 650 sm owners manual (Ocr-read)


Page 1

AWR-650-SM

Owner's Manual

Page 2

Klipsch All-Weather Rock Speakers

Thank you for your purchase of this Klipsch Rock Speaker. The

Klipsch AllrWeather Rock speaker (AWRVBSOVSM) is a tworway, dual
channel design using a single high performance bass driver for the low
frequenCies and a pair of Polymer dome high frequency tweeters for
wide, even coverage

The AWRVGEOVSM can be configured as a single two channel speaker
or used in pairs as a single channel speaker. The AWRrGfiOrSM is
constructed of durable weather proof materials such as a fiberglass
enclosure and powder coated aluminum grilles a polymer woofer
cone and polymer dome tweeters. This ensures that the speaker will
look and sound good for years to come regardless of environmental
extremes.

Please he sure to fill out the warranty card included with this manual or
online at www klipschcom so we are better able to serve you.

Placement

The Klipsch AllrWeather Rock speaker is perfect for lawns, gardens,
patios, decks or any other place where exposure to the elements
makes conventional loudspeaker usage unsuitable. Due to its aesthetic
design and uprlllletl orientation, this model is designed for low or
ground level placement.

To achieve the best performance from a pair of AWRVGEOVSMs place
them on the same side of your intended listening area and space them
8 to 20 feet apart. For a higher quality stereo image some degree of
toerin, toward the primary listening area, maybe required to achieve
the desired effect.

if a single AWRrBfiOrSM is connected in a two channel configuration it
is best to center the speaker on the preferred side for even coverage.
Some additional Bass will result if you place the speakers in a corner
or near a wall,

Connections

Important: Properconnection of your speakers to your
amplifier is Vital to obtaining good sound quality. Please
follow these directions carefully.

The AWRVGSOVSM is provided with a Arconductor cable to be able to
connecteithert or 2 channels. One input uses RED for positive and
GREEN for negative. the other uses WHITE for positive and BLACK
for negative. When connecting only 1 channel to the AWRVGSOVSM
the RED and WHITE must be connected together for positive and
BLACK and GREEN together for negative Positive(s) and negative(s)
on the speaker must be connected to the positive(s) and negative(s)
respectively for your receiver/amplifier for correct phasing

Important: Each channel on the AWRV65075M has 8
ohm impedance When Joining the inputs forat channel
connection as previously described and shown below. the
AWRVSSOVSM becomes a 4 ohm speaker. Make sure your
receiver/amplifier can accept a 4 ohm (which most can).

2 channel Wiring

Red

k
Green WI
White
Black W
1 channel Wiring

Red

White

Green

Black

Wire Splicing

Unless the AWRVSSOVSM will be connected to an amplifier/receiver
directly using the 5 lead, Wire splicing to a separate set of high quality,
moisture resistant speaker cable will be required. Follow the followmg
steps to connect the AWRVGSOVSM to an amplifier/receiver as a single
channel speaker

. Strip away two to three inches of the AWRVGSOVSM 5' speaker lead
outer iacket away from the indiVidual insulated conducts.

Strip one half inch from each of the 4 indiVidual conductors.

. Twist together the stripped ends of the AWRVBSOVSM BLACK
(negative) wire AND the AWRVGSOVSM GREEN (negative) wire AND
the stripped end of the speaker wire connected to the negative
output of the desired channel of the amplifier/receiver.

Cap the three wire combination With a silicon filled wire nut. The
material inside the wrre nut will protect the stripped ends of the wire
from moisture. If additional protection is desired, additional silicon
(sold separately) can be added to the bottom of the wire nut to
further seal the connection

Repeat steps 3 & 4 for the positive connection of the same channel
using the AWRVGBOVSM RED (positive) wire AND the AWRVGEOVSM
WHITE (positive) wire and speaker wire connected to the positive
output of the amplifier/receiver.

wrv

P

51

To connect the AWRVGEOVSM as a dual channel stereo speaker

two additional wire nuts will be required (sold separately) Make 4
indiViduai splices, referring to the diagram above. and always double
check that the positive leads of the AWRVGBOVSM are connected to
the positive outputs of the amplifier/receiver and the negative leads
of the AWRVGSOVSM are connected to the negative outputs of the
amplifier/receiver.

WARNING: If channel 1 and 2 are wired out of phase.
the woofer will make little to no sound. This can damage the
woofer if left wired in this manner.