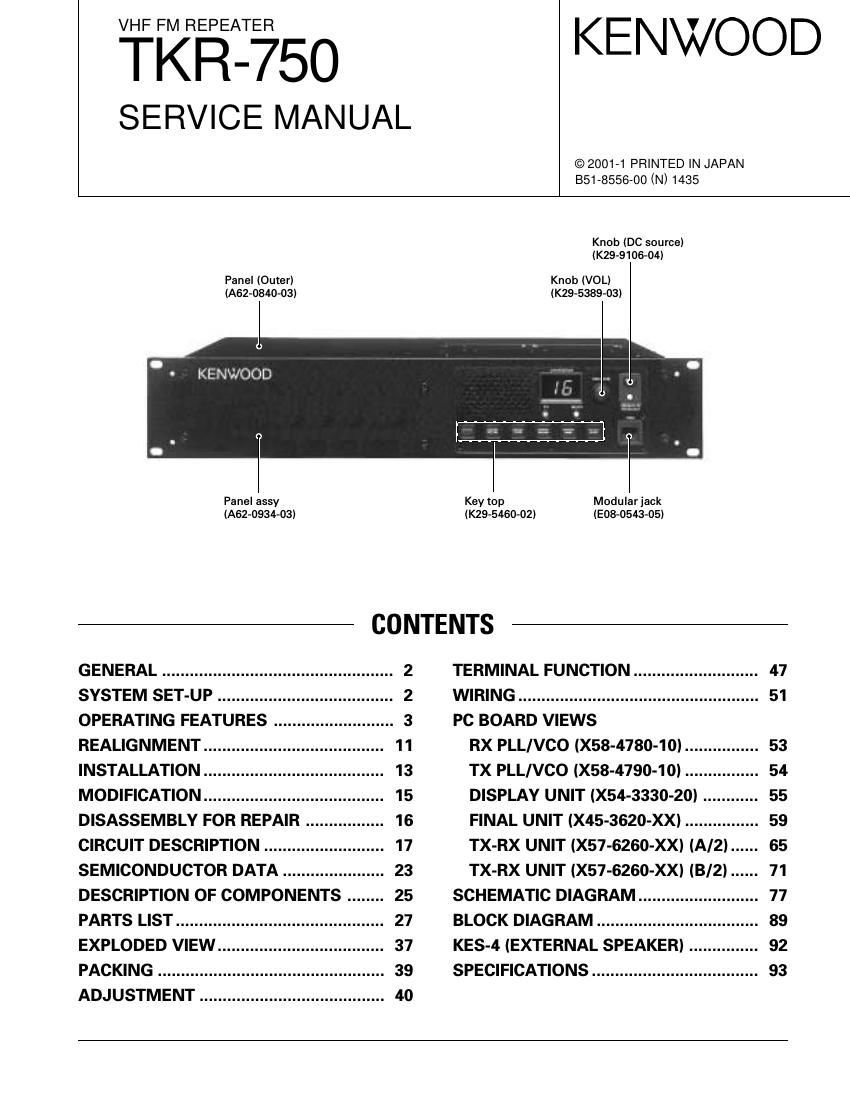
Kenwood TKR 750 Service Manual

This is the 54 pages manual for Kenwood TKR 750 Service Manual.
Read or download the pdf for free. If you want to contribute, please mail your pdfs to info@audioservicemanuals.com.

Page: 1 / 54
left right
Kenwood TKR 750 Service Manual

Extracted text from Kenwood TKR 750 Service Manual (Ocr-read)


Page 1

VHF FM REPEATER

TKR-750

SERVICE MANUAL

KENWOOD

© 2001-1 PRINTED IN JAPAN
851-8556-00 (N) 1435

Panel (Outer)
IA62-0840-03)

KENWOOD

Panel assy

Knob (DC source)
(K29-9106-04I

Knob (VOL)
(K29-5389-03I

Key top Modular jack

IA62-0934-03) (K29-5460-02) (an-os43-05)
CONTENTS

GENERAL .................................................. 2 TERMINAL FUNCTION ........................... 47
SYSTEM SET-UP ...................................... 2 WIRING .................................................... 51
OPERATING FEATURES .......................... 3 PC BOARD VIEWS

REALIGNMENT ....................................... 11 RX PLLIVCO (X58-4780-10I ................ 53
INSTALLATION ...... 13 TX PLLIVCO (X58-4790-10I ...... 54
MODIFICATION ....................................... 15 DISPLAY UNIT (X54-3330-20I ............ 55
DISASSEMBLY FOR REPAIR ................. 16 FINAL UNIT (X45-3620-XXI ................ 59
CIRCUIT DESCRIPTION .......................... 17 TX-RX UNIT (X57-6260-XXI IAIZI ...... 65
SEMICONDUCTOR DATA ...................... 23 TX-RX UNIT (X57-6260-XXI IB/ZI ...... 71
DESCRIPTION OF COMPONENTS ........ 25 SCHEMATIC DIAGRAM 77
PARTS LIST ............................................. 27 BLOCK DIAGRAM ................................... 89
EXPLODED VIEW .................................... 37 KES-4 (EXTERNAL SPEAKER) ............... 92
PACKING ................................................. 39 SPECIFICATIONS .................................... 93

ADJUSTMENT ........................................ 4O

Page 2

TKR-75O

GENERAL/ SYSTEM SET-UP

INTRODUCTION

SCOPE OF THIS MANUAL

This manual is intended for use by experienced techni»
cians familiar with similar types of commercial grade comA
munications equipment. It contains all required service in-
formation for the equipment and is current as of the publica
tion date. Changes which may occur after publication are
covered by either Service Bulletins or Manual Revisions.
These are issued as required.

ORDERING REPLACEMENT PARTS

When ordering replacement parts or equipment informa-
tion, the full part identification number should be included.
This applies to all parts : components, kits, or chassis. If the
part number is not known, include the chassis or kit number
of which it is a part, and a sufficient description of the re,
quired component for proper identification.

PERSONNEL SAFETY

The following precautions are recommended for persona

nel safety :

- DO NOT transmit until all RF connectors are verified seA
cure and any open connectors are properly terminated.

0 SHUT OFF and DO NOT operate this equipment near
electrical blasting caps or in an explosive atmosphere.

- This equipment should be serviced by a qualified technia
cian only.

SERVICE

This radio is designed for easy servicing. Refer to the
schematic diagrams, printed circuit board views, and alignA
ment procedures contained in this manual.

SYSTEM SET-UP
Merchandise
received
I Frequency range (MHZ) RF power Type
Choose the type TX/RX 146~174 50W K,E
of transceiver TX/RX 136~150 50W K2
Repeater See page 11.
pro rammin & setup A personal computer (IBM PC or compatible), programming interface (KPG»46I,
g g and programming software (KPG»GGDI are required for programming.

DC power
supply or
duplexer?

YES Installation in the

optional space

NO

YES

External speaker? KES-4 installation

NO

Delivery

Page 16

TKR-750

MODIFICATION / DISASSEMBLY FOR REPAIR

3. Trickle Charge for Backup Battery

If the external DC power supply is connected to the Main

DC connector and a backup battery (12V rechargeable type)
is connected to the Backup connector at the same time, the
battery can be trickle-charged from the external DC power
supply with a maxlmum current of 0.5A.

Short the CHARGE land near R61.

Notes :

1.

2.

16

Make this modification after removing the DC power sup-
ply and battery for safety.

When the DC power supply is connected after the modl-
ficatlon, DC voltage is output to the Backup connector.
Be careful during setup.

. When the backup battery is used for a long time, remove

the battery from the repeater and recharge it because the
trickle charge ls not sufficlent for recharging a completely
discharged battery.

Final unit (N2)

O Component side

CN7 BACKUP (3
(ORANGE)

l

l

l

l

l

= l

CI l

CHARGE l

E

l

5 l

l:| n: |_|r

l-ll

,,,,,,,,,,,,,,,,,,, 1:1,,4
Fig. 4

DISASSEMBL Y FOR REPAIR

How to Remove the Panel Assy (ABS)

Note : You can remove the panel assembly (ABS) without
removing the top panel (A62A084O-03).

1.
2.

3.

To remove panel (TX~R><, ®), loose 6 screws (6)).

To remove panel assembly (Front, @L loose 6 screws
l©).

The panel assembly (ABS) is security fastened by 4 tabs
(CED) on top and bottom. You can remove the panel as-
sembly by pulllng to front while you are pulling up the
tabs.

Page 22

TKR-75O

22

CIRCUIT DESCRIPTION

5-6. DSP

The DSP circuit filters transmit/receive audio signal and
encode/decodes signaling (OT, DOT). This circuit consists
of |C618, |C612, |C613, |C614, |C603, |C606, lC608, lC610,
1C616, and |C619.

The receive signal DET is converted from analog to digital
by lC614 with a sampling frequency of 16.128kHz. The digi-
tized audio signal is sent to DSP |C618 to process the signal-
ing signal and audio signal. The processed digital audio sig-
nal is fed to CODEC |C614, converted from digital to analog,
and the analog signal is output from pin 16 (AOUTR). Then,
the audio signal is amplified by IC619 (B/Z), passes through
the |C619 (A/2) low-pass filter, and goes to an electronic vol-
ume |C615.

The transmit audio signal coming from |C605 is amplified
by |C610, fed to pin 3 (AINL) of CODEC lC614, and con-
verted from analog to digital at a sampling frequency of
16.128kHz. The digitized transmit audio signal is AGCApro-
cessed, preAemphasized and filtered at 300Hz to 3kHz by
DSP |C618, and the resulting signal is fed back to CODEC
1C614, and converted from digital to analog, and the analog
signal is output from pin 15 (AOUTL). The transmit signal
from AOUTL is amplified by lC616 (B/Z), passes through the
lC616 (A/2) low-pass filter, and goes to the |C611 (A/2) sum-
ming amplifier.

|C613 is a counter IC and the clock required for the
CODEC and DSP is generated by dividing the 16.515MHZ
clock signal produced by DSP |C618.

|C603 and |C606 are interface lC between the CPU oper-
ated at 5.0V and the DSP operated at 3.3V.

5-7. Base-Band Circuit

The base-band circuit switches between the modulation
signal to the transmitter circuit, and remote audio and ad-
justs their levels. This circuit consists of |C605, lC607,
lC611, |C615, and |C617.

Modulation inputs include local microphone input, low-
speed data (LSD), high-speed data (HSD), external audio in-
put (TA), and external data input (TD), and demodulation out-
puts include receive audio output (RA), and receive data out-
put (RD).

The multiplexer (|C605) changes signals, the electronic
volume (|C615) adjusts the level, and the operational ampli-
fier (lC607, |C611, |C617) amplifiers and sums signals.

5-8. RS-23ZC Circuit

The RS-232C circuit connects the RSA232C serial port of a
personal computer directly to this model to perform FPU
operation. The FPU operation can also be performed by con-
necting a programming cable (KPG-46) to the local micro-
phone on the front panel. But, if the D»sub connector on the
rear panel is used, the programming cable is not required.
The 232C driver IC (lC620) changes the TTL-232C level. The
firmware can only be rewritten with the local microphone on
the front panel.

5-9. Power Supply Circuit

The power supply circuit generates power to operate the
CPU, DSP, flash ROM, biAdirectional buffer, and baseAband
circuit. This circuit consists of |C624, |C625, lC626, lC627,
1C628, and |C630.

6. DC Power Supply Circuit

6-1. DC Source Switching Relay Circuit

1. The final unit contains a relay (K1) for switching between
the Main DC and Backup Battery.
If an external power source is connected to the Main DC
terminal, the Backup terminal is isolated by the relay. If
the Main DC turns OFF due to power failure, it is
switched to the Backup terminal by the relay.
The CPU monitors which is used, Main DC or Backup
Battery.

2. Trickle charge circuit
If both Main DC and Backup Battery are connected,
trickle charging of 0.5 A max. can be performed from the
Main DC power supply to the Battery.
(The default is OFF. See the Modification section for in
formation on the modification method.)
The battery is charged from the Main DC with D8, D9 and
R61. if it exceeds 0.5 A, the charging circuit is turned
OFF by D9.

Main
0 m
Dc D8 R54
D9 [J (Lee-MB
R61 0
120mA J K1
Land

Backup (Relay)
battery Final unit (A/Z)

TXVRX unit (BIZ)

BUP

|C604
CPU

Fig. 9 DC source switching relay circuit

6-2. SB Switching Relay Circuit

1. SB (Switched +B) is supplied through the relay (K1) in the
TX-RX unit A/Z.
When 8507 (DC source switch) in the display unit is
turned ON, the relay (K1) is turned ON to output SB.

2. If +B exceeds 18V, the relay is forcibly turned OFF by
D12 and 025 to interrupt the power and protect the main
unit.

K1
+3 . 045 SB
T .-.
|_l
R165 R166
D12 025 Land
PSW
024 )
D3»
/ Display unit
5507 (Front panel)

/

Fig. 10 SB switching relay circuit