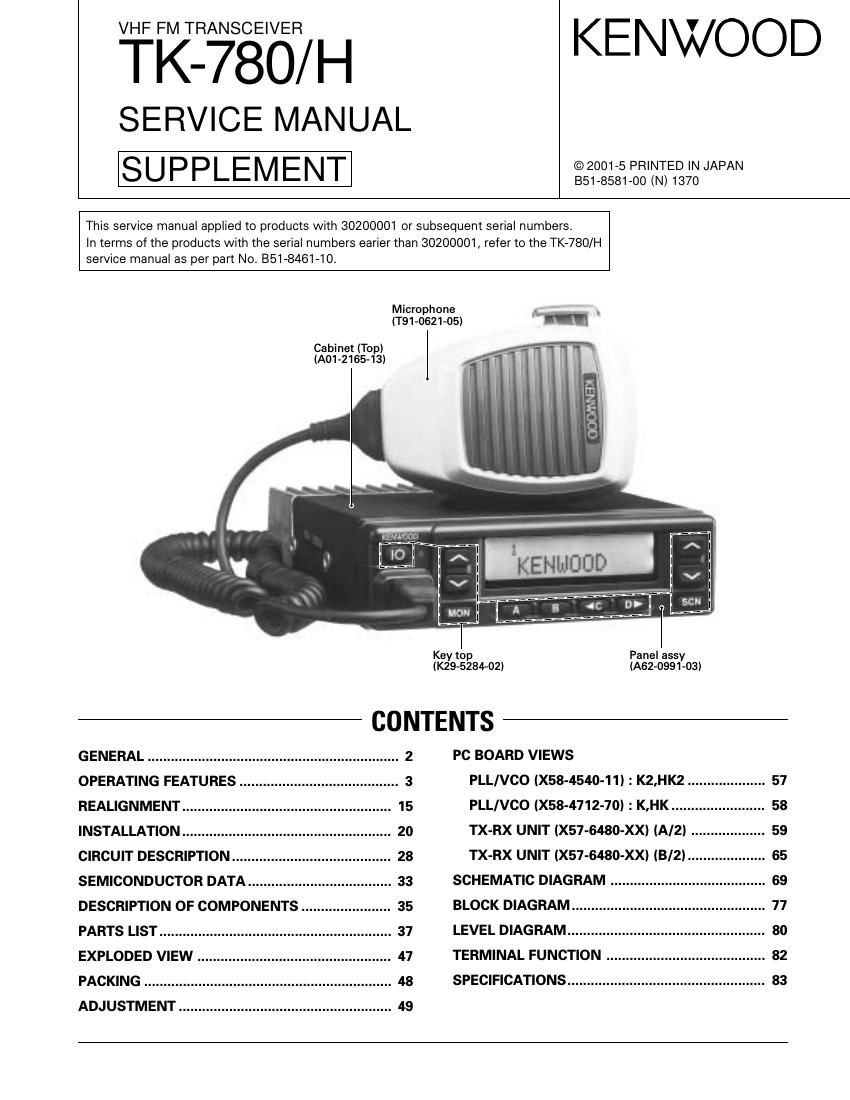
Kenwood TK 780 H Service Manual

This is the 69 pages manual for Kenwood TK 780 H Service Manual.
Read or download the pdf for free. If you want to contribute, please mail your pdfs to info@audioservicemanuals.com.

Page: 1 / 69
left right
Kenwood TK 780 H Service Manual

Extracted text from Kenwood TK 780 H Service Manual (Ocr-read)


Page 1

2 TK-780/ H GENERAL INTRODUCTION SCOPE OF THIS MANUAL This manual is intended for use by experienced techni- cians familiar with similar types of commercial grade com- munications equipment. It contains all required service infor- mation for the equipment and is current as of this publica- tion date. Changes which may occur after publication are covered by either Service Bulletins or Manual Revisions, which are issued as required. ORDERING REPLACEMENT PARTS When ordering replacement parts or equipment informa- tion, the full part identification number should be included. This applies to all parts : components, kits, and chassis. If the part number is not known, include the chassis or kit number of which it is a part and a sufficient description of the required component, for proper identification. PERSONNEL SAFETY The following precautions are recommended for person- nel safety : - DO NOT transmit if someone is within two feet (0.6 meter) of the antenna. - DO NOT transmit until all RF connectors are secure and any open connectors are properly terminated. - SHUT OFF this equipment when near electrical blasting caps or while in an explosive atmosphere. - All equipment should be properly grounded before power-up for safe operation. - This equipment should be serviced by only qualified tech- nicians. PRE-INSTALLATION CONSIDERNATIONS 1. UNPACKING Unpack the radio from its shipping container and check for accessory items. If any item is missing, please contact KENWOOD immediately. 2. LICENSING REQUIREMENTS Federal regulations require a station license for each ra- dio installation (mobile or base) be obtained by the equip- ment owner. The licensee is responsible for ensuring trans- mitter power, frequency, and deviation are within the limits permitted by the station license. Transmitter adjustments may be performed only by a li- censed technician holding an FCC first, second or general class commercial radiotelephone operators license. There is no license required to install or operate the radio. 3. PRE-INSTALLATION CHECKOUT 3-1. Introduction Each radio is adjusted and tested before shipment. How- ever, it is recommended that receiver and transmitter opera- tion be checked for proper operation before installation. 3-2. Testing The radio should be tested complete with all cabling and accessories as they will be connected in the final installa- tion. Transmitter frequency, deviation, and power output should be checked, as should receiver sensitivity, squelch operation, and audio output. QT equipment operation should be verified. 4. PLANNING THE INSTALLATION 4-1. General Inspect the vehicle and determine how and where the radio antenna and accessories will be mounted. Plan cable runs for protection against pinching or crush- ing wiring, and radio installation to prevent overheating. 4-2. Antenna The favored location for an antenna is in the center of a large, flat conductive area, usually at the roof center. The trunk lid is preferred, bond the trunk lid and vehicle chassis using ground straps to ensure the lid is at chassis ground. 4-3. Radio The universal mount bracket allows the radio to be mounted in a variety of ways. Be sure the mounting surface is adequate to support the radios weight. Allow sufficient space around the radio for air cooling. Position the radio close enough to the vehicle operator to permit easy access to the controls when driving. 4-4. DC Power and wiring 1. This radio may be installed in negative ground electrical systems only. Reverse polarity will cause the cable fuse to blow. Check the vehicle ground polarity before installa- tion to prevent wasted time and effort. 2.You must connect the positive power lead directly to the positive terminal of the vehicle battery. Never connect the lead to any other positive power source, such as a cigarette lighter jack or fuse terminals. CAUTION If DC power is to be controlled by the vehicle ignition switch, a switching relay should be used to switch the posi- tive power lead. The vehicle ignition switch then controls DC to the relay coil. 3.You must also connect the ground lead directly to the negative terminal of the vehicle battery. 4. The cable provided with the radio is sufficient to handle the maximum radio current demand. If the cable must be extended, be sure the additional wire is sufficient for the current to be carried and length of the added lead.

Page 2

3 TK-780 / H 5. INSTALLATION PLANNING -“ CONTROL STATIONS 5-1. Antenna system Control station. The antenna system selection depends on many factors and is beyond the scope of this manual. Your KENWOOD dealer can help you select an antenna sys- tem that will best serve your particular needs. 5-2. Radio location Select a convenient location for your control station radio which is as close as practical to the antenna cable entry point. Secondly, use your systems power supply (which supplies the voltage and current required for your system). Make sure sufficient air can flow around the radio and power supply to allow adequate cooling. SERVICE This radio is designed for easy servicing. Refer to the schematic diagrams, printed circuit board views, and align- ment procedures contained in this manual. Note When you modify your radio as described in system set- up, take the following precaution. The rating of pin 7 (SB) of the accessory connector cable (KCT-19) on the rear of the radio is 13.6V (1A). Insert a 1A fuse if you use the SB pin for external equipment. Accessory connector cable (KCT-19) If you do not intend to use the 3.5-mm jack for the exter- nal speaker, fit the supplied speaker-jack cap (B09-0235-05) to stop dust and sand getting in. GENERAL / OPERATING FEATURES Speaker-jack cap (B09-0235-05) 1. Operation Features The TK-780/780H is a VHF FM radio designed to operate in both trunking format (LTR model) and conventional for- mat (Conventional model). The programmable features are summarized. Model Trunking format Trunking mode Conventional format Conventional mode 1-1. Trunking Format This format can handle up to 32 systems with up to 250 groups in each system. The transceiver can be used in both trunked mode and conventional mode. Systems, groups, and their functions are programmed. 1-2. Conventional Format This format can handle up to 250 groups with 250 chan- nels in each group. The transceiver can be used only in con- ventional mode. Groups, channels, and their functions are programmed. 2. Transceiver Controls and Indicators (Fig. 1) 2-1. Front Panel Controls All the keys on the front panel are momentary-type push buttons. The functions of these keys are explained below. -POWER key Transceiver POWER key. When the power is switched off, all the parameters, such as the system and group in trunking format, and the group and channel in conventional format, are stored in memory. When the power is switched on again, the transceiver returns to the previous conditions. -SYSTEM UP/DOWN key (Trunking format, programmable) -GROUP UP/DOWN key (Conventional format, programmable) -SCAN key (Programmable) -MONITOR key (Programmable) -A, B, C and D key (Programmable) -VOLUME UP/DOWN key (Programmable) -BUSY/TX LED The BUSY indicator (Green LED) shows that the channel is in use. The TX indicator (Red LED) shows that you are transmitting. 1 3 + -“ 7 6 13 15

Page 8

9 TK-780 / H Sub LCD display You can use 3-digit the display to display the system number, channel number or group number. It is useful when the main (12-digit) display indicates system, group or channel name or other functions. Selective call alert LED You can select whether or not the LED on the transceiver flashes in an orange color when selective call was occurred. PTT ID PTT ID provides a DTMF or MSK (FleetSync-„¢ : Fleet-ID) ANI to be sent with every time PTT (beginning of transmis- sion, end of transmission, or both). You can program PTT ID for each group. You can pro- gram a PTT ID as on or off when DTMF is selected for the PTT ID type. You can program a PTT ID as own, sel or off when MSK is selected for the PTT ID type. The contents of ID are programmed for each transceiver. The timing that the transceiver sends ID is program- mable. BOT : DTMF ID (BOT)/MSK ID is sent on beginning of transmission. EOT : DTMF ID (EOT)/MSK ID is sent on end of transmis- sion. Both : DTMF ID (BOT)/MSK ID is sent on beginning of transmission and DTMF ID (EOT)/MSK ID is sent on end of transmission. Radio password When the password is set in the transceiver, user can not use the transceiver unless enter the correct password. This code can be up to 6 digits from 0 to 9 and input with the key, and "S" key. Off hook decode If the Off hook decode function has been enabled, re- moving and replacing the microphone on the hook has no effect for decoding QT/DQT and option signalling. Timed power off This function works as Automatic Power Switch Off. Timed power off timer starts from the ignition-off. After the timer expires, the radio will automatically turn off. The timer will be reset if the ignition is turned on and off. This function requires ignition-sense. Connect the igni- tion-line to the 9-pin connector which is located at the rear of the radio. After the timer expires, press the power switch to turn on the radio. OPERATING FEATURES Horn alert In trunking format, horn alert can be set to on or off for each group. If horn alert has been set to YES for a group and DEC ID/QT/DQT matches, the horn alert, HOR. is turned on and off. The group for which the optional signalling is set works by ANDing the decode ID/QT/DQT with the optional signalling. In conventional format, if you are called from the base station using 2-tone/DTMF while you are away from your transceiver, you will be alerted by the vehicle horn or some other type of external alert. To turn horn alert function on, press the [Horn Alert] key. Either continuous or non-continuous operation can be set by the FPU. The horn alert port is enabled or disabled as follows; Off hook horn alert Hook off Hook on Enable Yes Yes Disable No Yes Pulse The horn alert port, HOR, is turned on and off as follows; The timing when the fixed LTR ID matches is as follows (trunking format); Continuous Horn alert can be reset by setting an expiration time from the FPU, pressing the AUX-A key, or setting off hook. Data TX with QT/DQT Whether programmed QT/DQT is modulated or not with a data transmission except for Selcall. A radio unit can re- ceive a data message regardless of QT/DQT if the receiving unit is not scanning. 0.5s 0.5s 0.5s 0.5s 0.5s HOR 1s 0.5s 1s

Page 11

12 TK-780/ H Selective Call (SELCALL) This is a voice call to a particular individual or group of stations. -Example of call types; [100][ALL ] : All the units whose fleet number is 100 are called. [100][1000] : The unit, whose the fleet number is 100 and ID num- ber is 1000, is called. [ALL][ALL ] : All the units are called. [ALL][1000] : All ID 1000 are called regardless of their fleet number. -Unit ID encode block Encode ID Block can be set to limit manual dial ID. The radio unit will not accept an ID other than these IDs which are entered from the keypad. If Inter-fleet Call is enabled, block ID setting affects each fleet group. Status Message Using a 2-digit number, you can send and receive a Sta- tus message which may be decided in your talk group. Each Status may be displayed with 16 alphanumeric characters if programmed in the radio. A maximum of 9 received mes- sages can be stored in the stack memory, and it can be re- viewed after reception. If the message memory becomes full, the oldest one will be erased. The stack memory will be cleared by turning radio power off. -Status 80~99 (Special) Status numbers from 80 to 99 are reserved for special purposes. Entering these statuses from the DTMF keypad can be inhibited. Please notice that the following status numbers are used for special purposes; 80~87 : Reserved for future use. 88 : Terminates to emergency mode. 89 : Request for horn alert. 90 : Remote stun on. Disable the received radio units TX. 91 : Remote stun on. Disable the received radio units TX/RX. 92 : Cancel remote stun. Enable the received radio units TX/RX. 93 : Acknowledgement status sent when the radio unit is in stun mode (TX disabled). 94 : Acknowledgement status sent when the radio unit is in stun mode (TX/RX disabled). 95~97 : Reserved for future use. 98 : Man down emergency status (For portable). 99 : Emergency status. Note : Remote stun works with DTMF D.B.D. function also. -Automatic status response If you pre-select a status number and leave the radio in the Status Mode, it can automatically respond with the se- lected status number upon request from the base station. (The request function is initiated by serial control on the base station (Optional).) Short Messase (Optional) A maximum of 48 characters can be sent (External equip- ment is required). Received Short Messages will be dis- played in the same manner as a Status Message. A maxi- mum of 4 received messages can be stored in the stack memory. In the Stack Mode, 3-digit LCD indicates the re- ceived Short Message as M01~M04". Long Message (Optional) A maximum of 1024 characters can be sent (External equipment is required). Received Long Message will not be displayed or stacked in the radio memory but is output through the COM (Data) port. Emergency Function Emergency status 99 will be sent at the beginning of each emergency transmission. -Emergency status response Either Horn or Alert can be selected for the called radio units response to reception of status 99 which is used as an emergency status. Other Functions -Manual dial Fleet, ID and Status numbers can be entered from DTMF keypad. (DTMF microphopne is required.) -FleetSync-„¢ baud rate MSK data baud rate setting. The same rate must be set as a communication partner. 1200bps : Data communication is made in 1200bps. The communi- cation area is much wider than 2400bps. Recommended for repeater operation. 2400bps : Data communication is made in 2400bps. The communi- cation area is narrower than 1200bps, but it will decrease the data traffic. Data rate 2400bps may not work prop- erly depending on the repeaters characteristic. -Message mode timer Message Mode Timer is a delay timer returning from message/stack mode to Normal mode. -Status/short/long message on data group/channel Status/Short/Long Message transmission is made whether on the Data System/Group in trunking format and on the Data Group/Channel in conventional format. OPERATING FEATURES

Page 13

14 TK-780/ H -ACK delay time ACK Delay Time is the amount of time from the end of receiving a data to the beginning of sending an acknowledgement. It should be adjusted as the repeaters hang-up delay time. Also, it must be set less than the Maxi- mum ACK Wait Time of the calling radio unit. -TX delay time (RX capture) TX Delay Time is the amount of unmodulated transmis- sion to let the called unit stop scanning or exit its battery save mode. It is used only when starting a data communica- tion sequence. -Data TX modulation delay time Data TX Modulation Delay Time is the amount of time from the beginning of transmission to the beginning of a data modulation. It is used every time data is transmitted. It must be set to more than 300ms if data communication is made in Trunking Mode. 7. Audible User Feedback Tones The transceiver outputs various combinations of tones to notify the user of the transceiver operating state. The main tones are listed below. The high tone is 1477Hz, the mid tone is 941Hz, and the low tone is 770Hz. Power On Tone This tone is output when the transceiver is turned on. (The high tone is output for 500ms.) Alert Tone This tone is output when the transceiver is TX inhibition for TOT, battery warning and PLL unlocked. It is output until the PTT button is released. DBD On Tone When a D.B.D. code is received, transpond tone sounds. DBD Off Tone When a D.B.D. release code is received, transpond tone sounds. Password Agreement Tone When the correct password is entered, the tone sounds. The optional features control tone can be set to yes or no. PTT Release Tone When you release the PTT switch, the PTT release tone sounds. Busy Tone Sounds in LTR mode, when you cannot use a repeater (system busy or TX inhibit). Sounds in conventional mode, when busy channel lockout is functioning. You can select yes or no for the optional features warning tone. Group Call Tone Sounds when a group call with the correct DTMF/2-tone option signalling is received, repeats 7 times. You can se- lect yes or no for the optional features warning tone. Individual Call Tone Sounds when an individual call with the correct DTMF/2- tone option signalling is received. You can select yes or no for the optional features warning tone. Key Press Tone [A] Sounds when a key is pressed. For toggle keys, sounds when toggle function is turned on (key press tone [B] sounds when it is turned off). You can select yes or no for the optional features control tone. Key Press Tone [B] Sounds when a key is pressed. For toggle keys, sounds when the toggle function is turned off (key press tone [A] sounds when it is turned on). You can select yes or no for the optional features control tone. Key Press Tone [C] Sounds when a key is pressed. Also sounds when stor- ing data, adding a DTMF code to memory, and when chang- ing test mode settings. You can select yes or no for the optional features control tone. Key Input Error Tone Sounds when a key is pressed but that key cannot be used. You can select yes or no for the optional features warning tone. Roll Over Tone Sounds in Trunking format at the smallest system/group. Sounds in Conventional format at the smallest group/chan- nel. You can select yes or no for the optional features con- trol tone. Transpond Tone Sounds when an individual call with the correct LTR/ DTMF/2-tone option signalling is received. For group calls, only the group tone will sound, not the transpond tone. Intercept Tone (Trunking Format) This tone indicates that the transceiver is out of range. It indicates that the PTT button is pressed, and transmission has started, but the repeater cannot be connected and talk- ing is not possible. It is output until the PTT button is re- leased. (The mid tone and low tone are output alternately in 200ms intervals.) OPERATING FEATURES

Page 17

18 TK-780/ H REALIGNMENT Fig. 3 8. Self Programming Mode Write mode for frequency data and signalling etc. Mainly used by the person maintaining the user equipment. 8-1. Enter to the Self Programming Mode Delete R614 (SELF, Figure 3) in the TX-RX unit (B/2) and turn the power switch on while pressing the [D] key. When enter the self programming mode, SELF PROG is dis- played. Note : This mode (self programming mode) cannot be set when it has been disabled with the FPU. 9. Channel Setting Mode Each channel can be setup in its action mode by using the panel keys. - Pressing [MON] while SELF PROG is displayed will change to channel setting mode. - Press [C] to select a setup item, then press [GRP up/ down] to change the selection. - By pressing [B], the displayed information is stored in memory, and the next item appears. By pressing [C], the displayed information is not stored in memory, and the next item appears. - Press [MON] to return to the original display (SELF PROG). 9-1. Flow Chart Self programming mode [MON] [MON] Channel setting mode Channel selection Group selection [B] [D] [D] OFF QT OFF [D] [S][D] DQT N DQT I [C] [MON] [MON] [MON] [MON] [MON] [MON] [MON] [MON] [MON] RX frequency [B]/[C] [B]/[C] [B]/[C] [B]/[C] [B]/[C] [B]/[C] [B]/[C] [B]/[C] [B]/[C] RX signalling TX freuency TX signalling Scan delete/add Busy channel lockout yes/no RF power high/low Beat shift yes/no Wide/Narrow [D] [D] OFF QT OFF [D] [S][D] DQT N DQT I The setup items fro channel setting mode are listed be- low. Setup function Display Remarks (3 character) Channel selection CH or GRP RX frequency RXF [D] : Switches frequency on/off [A] : Changes the step value between 2.5kHz, 5kHz, 6.25kHz, 7.5kHz, and 1MHz RX signalling RXS [D] : Switches between off, QT, and DQT. [A] : Switches between 1 step and standard [SCN] : Switches between DQT normal and invert TX frequency TXF Same as RX frequency TX signalling TXS Same as RX signalling Scan del/add SCN Delete/Add Busy channel lockout BSY Yes/No RF power PWR High/Low Beat shift SFT Yes/No Wide/Narrow W/N Wide/Narrow IC512IC511 R614 TX-RX unit (B/2) Foil side

Page 36

37 TK-780/H PARTS LIST 2nd Word G H J K L ppm/°C±30±60±120±250±500 Example : CC45TH = -“470 ± 60ppm/°C Multiplier 2nd number 1st number 2 2 0 = 22pF CAPACITORS CC 45 TH 1H 220 J 12 3 4 56 1 = Type -¦ ceramic, electrolytic, etc. 4 = Voltage rating 2 = Shape -¦ round, square, ect. 5 = Value 3 = Temp. coefficient 6 = Tolerance - Temperature coefficient 1st Word C L P R S T U Color* Black Red Orange Yellow Green Blue Violet ppm/°C 0 -“80 -“150 -“220 -“330 -“470 -“750 - Tolerance (More than 10pF) Code C D G J K M X Z P No code (%)±0.25±0.5±2±5±10±20 +40 +80 +100 More than 10µF -“ 10 ~ +50 -“20 -“20 -“0 Less than 4.7µF -“10 ~ +75 - Voltage rating ABCDE FGH J K V 0 1.0 1.25 1.6 2.0 2.5 3.15 4.0 5.0 6.3 8.0 -“ 1 10 12.5 16 20 25 31.5 40 50 63 80 35 2 100 125 160 200 250 315 400 500 630 800 -“ 3 1000 1250 1600 2000 2500 3150 4000 5000 6300 8000 -“ - Chip capacitors (EX) C C 7 3 F S L 1 H 0 0 0 J 1234 5 6 7 (Chip) (CH, RH, UJ, SL) (EX) C K 7 3 F F 1 H 0 0 0 Z 1234 5 6 7 (Chip) (B, F) RESISTORS - Chip resistor (Carbon) (EX) R D 7 3 E B 2 B 0 0 0 J 1234 5 6 7 (Chip) (B,F) - Carbon resistor (Normal type) (EX) R D 1 4 B B 2 C 0 0 0 J 1234 5 6 7 1 = Type -¦ ceramic, electrolytic, etc. 5 = Voltage rating 2 = Shape -¦ round, square, ect. 6 = Value 3 = Dimension 7 = Tolerance 4 = Temp. coefficient- Capacitor value 010 = 1pF 100 = 10pF 101 = 100pF 102 = 1000pF = 0.001µF 103 = 0.01µF (Less than 10pF) Code B C D F G (pF)±0.1±0.25±0.5±1±2 1st word2nd word Refer to the table above.Dimension (Chip capacitors) Dimension code L W T Empty 5.6 ± 0.5 5.0 ± 0.5 Less than 2.0 A 4.5 ± 0.5 3.2 ± 0.4 Less than 2.0 B 4.5 ± 0.5 2.0 ± 0.3 Less than 2.0 C 4.5 ± 0.5 1.25 ± 0.2 Less than 1.25 D 3.2 ± 0.4 2.5 ± 0.3 Less than 1.5 E 3.2 ± 0.2 1.6 ± 0.2 Less than 1.25 F 2.0 ± 0.3 1.25 ± 0.2 Less than 1.25 G 1.6 ± 0.2 0.8 ± 0.2 Less than 1.0 H 1.0 ± 0.05 0.5 ± 0.05 0.5 ± 0.05 Dimension Dimension (Chip resistor) Dimension code L W T E 3.2 ± 0.2 1.6 ± 0.2 1.0 F 2.0 ± 0.3 1.25 ± 0.2 1.0 G 1.6 ± 0.2 0.8 ± 0.2 0.5 ± 0.1 H 1.0 ± 0.05 0.5 ± 0.05 0.35 ± 0.05 Rating wattage Code Wattage Code Wattage Code Wattage 1J 1/16W 2C 1/6W 3A 1W 2A 1/10W 2E 1/4W 3D 2W 2B 1/8W 2H 1/2W 1 = Type 2 = Shape 3 = Dimension 4 = Temp. coefficient 5 = Voltage rating 6 = Value 7 = Tolerance CC45Color* T WL

Page 43

TK-780/ H PARTS LIST 44 Ref. No. Address Parts No. Description Ref. No. Address Parts No. Description New Desti- parts nation New Desti- parts nation R531 RK73GB1J473J CHIP R 47K J 1/16W R532 RK73GB1J334J CHIP R 330K J 1/16W R533 R92-1252-05 CHIP R 0 OHM R535 RK73GB1J155J CHIP R 1.5M J 1/16W R536 RN73GH1J682D CHIP R 6.8K D 1/16W R537,538 RK73GB1J473J CHIP R 47K J 1/16W R540 RK73GB1J474J CHIP R 470K J 1/16W R541 RK73GB1J274J CHIP R 270K J 1/16W R542 RN73GH1J683D CHIP R 68K D 1/16W R544 RK73GB1J101J CHIP R 100 J 1/16W R545 RK73GB1J182J CHIP R 1.8K J 1/16W R546 RK73GB1J224J CHIP R 220K J 1/16W R547 RK73GB1J103J CHIP R 10K J 1/16W R548 RK73GB1J183J CHIP R 18K J 1/16W R550 RN73GH1J682D CHIP R 6.8K D 1/16W R551 RK73GB1J223J CHIP R 22K J 1/16W R552 RK73GB1J334J CHIP R 330K J 1/16W R553 RK73GB1J102J CHIP R 1.0K J 1/16W R554 RK73GB1J332J CHIP R 3.3K J 1/16W R555 RK73GB1J394J CHIP R 390K J 1/16W R556 RK73GB1J223J CHIP R 22K J 1/16W R558 R92-1252-05 CHIP R 0 OHM R562 RK73GB1J273J CHIP R 27K J 1/16W R564 R92-1252-05 CHIP R 0 OHM R566 RK73GB1J470J CHIP R 47 J 1/16W R567 RK73GB1J220J CHIP R 22 J 1/16W R568 RK73GB1J473J CHIP R 47K J 1/16W R569 RK73GB1J333J CHIP R 33K J 1/16W R571,572 R92-1252-05 CHIP R 0 OHM R573 RK73GB1J104J CHIP R 100K J 1/16W R574 RK73GB1J473J CHIP R 47K J 1/16W R575 RK73GB1J103J CHIP R 10K J 1/16W R576 RK73GB1J473J CHIP R 47K J 1/16W R577 RK73GB1J153J CHIP R 15K J 1/16W R579 R92-1252-05 CHIP R 0 OHM R580 RK73GB1J103J CHIP R 10K J 1/16W R581 RK73GB1J472J CHIP R 4.7K J 1/16W R582 R92-1252-05 CHIP R 0 OHM R584 R92-1252-05 CHIP R 0 OHM R585,586 RK73GB1J473J CHIP R 47K J 1/16W R587 R92-1252-05 CHIP R 0 OHM R588 RK73GB1J473J CHIP R 47K J 1/16W R589 R92-1368-05 CHIP R 0 OHM R590-600 RK73HB1J102J CHIP R 1.0K J 1/16W R601-603 R92-1368-05 CHIP R 0 OHM R608-610 RK73HB1J102J CHIP R 1.0K J 1/16W R611 R92-1252-05 CHIP R 0 OHM R612 RK73GB1J224J CHIP R 220K J 1/16W R613 RK73HB1J102J CHIP R 1.0K J 1/16W R614 R92-1252-05 CHIP R 0 OHM R615 RK73HB1J102J CHIP R 1.0K J 1/16W R616 RK73GB1J473J CHIP R 47K J 1/16W R617,618 RK73HB1J102J CHIP R 1.0K J 1/16W R619 R92-1252-05 CHIP R 0 OHM R620 RK73HB1J102J CHIP R 1.0K J 1/16W R621 R92-1252-05 CHIP R 0 OHM R622,623 RK73HB1J102J CHIP R 1.0K J 1/16W R624 R92-1252-05 CHIP R 0 OHM R625-627 RK73HB1J102J CHIP R 1.0K J 1/16W R628,629 R92-1368-05 CHIP R 0 OHMR630 RK73HB1J102J CHIP R 1.0K J 1/16W R631 R92-1368-05 CHIP R 0 OHM R632 RK73HB1J102J CHIP R 1.0K J 1/16W R633 R92-1368-05 CHIP R 0 OHM R634 RK73HB1J102J CHIP R 1.0K J 1/16W R635 R92-1368-05 CHIP R 0 OHM R636,637 RK73HB1J102J CHIP R 1.0K J 1/16W R638 R92-1368-05 CHIP R 0 OHM R639 RK73HB1J102J CHIP R 1.0K J 1/16W R640 R92-1368-05 CHIP R 0 OHM R641 RK73HB1J102J CHIP R 1.0K J 1/16W R642 R92-1368-05 CHIP R 0 OHM R643 RK73HB1J102J CHIP R 1.0K J 1/16W R644 R92-1368-05 CHIP R 0 OHM R645 RK73GB1J472J CHIP R 4.7K J 1/16W R646,647 RK73HB1J102J CHIP R 1.0K J 1/16W R649 RK73HB1J102J CHIP R 1.0K J 1/16W R650-652 R92-1368-05 CHIP R 0 OHM R653,654 RK73HB1J102J CHIP R 1.0K J 1/16W R655-657 R92-1368-05 CHIP R 0 OHM R658 RK73HB1J472J CHIP R 4.7K J 1/16W R659-666 R92-1368-05 CHIP R 0 OHM R667,668 RK73GB1J181J CHIP R 180 J 1/16W R670 RK73GB1J473J CHIP R 47K J 1/16W R672,673 RK73GB1J473J CHIP R 47K J 1/16W R674 RK73FB2A222J CHIP R 2.2K J 1/10W R675 RK73GB1J472J CHIP R 4.7K J 1/16W R676 RK73GB1J103J CHIP R 10K J 1/16W R677 RK73GB1J223J CHIP R 22K J 1/16W R678 RK73GB1J103J CHIP R 10K J 1/16W R679 RK73FB2A390J CHIP R 39 J 1/10W R680 RK73FB2A222J CHIP R 2.2K J 1/10W R682 RK73GB1J473J CHIP R 47K J 1/16W R683 RK73GB1J103J CHIP R 10K J 1/16W R701 RK73GB1J102J CHIP R 1.0K J 1/16W R702 RK73GB1J101J CHIP R 100 J 1/16W R705,706 RK73GB1J473J CHIP R 47K J 1/16W R710,711 RK73GB1J104J CHIP R 100K J 1/16W R712,713 RK73GB1J473J CHIP R 47K J 1/16W R714 RK73GB1J103J CHIP R 10K J 1/16W R716 RK73GB1J472J CHIP R 4.7K J 1/16W R718 RK73GB1J154J CHIP R 150K J 1/16W R719 RK73GB1J103J CHIP R 10K J 1/16W R720 RK73GB1J683J CHIP R 68K J 1/16W R721 RK73GB1J334J CHIP R 330K J 1/16W R722 RK73FB2A680J CHIP R 68 J 1/10W R723 R92-1252-05 CHIP R 0 OHM R724 RK73GB1J472J CHIP R 4.7K J 1/16W R725 RK73GB1J562J CHIP R 5.6K J 1/16W R726 R92-1252-05 CHIP R 0 OHM R727 RK73GB1J472J CHIP R 4.7K J 1/16W VR1 R32-0658-05 SEMI FIXED VARIABLE RESISTOR K,K2,HK VR1 R32-0668-05 SEMI FIXED VARIABLE RESISTOR HK2 D1-6 DA204U DIODE D7 02DZ20(Y,Z) ZENER DIODE D8,9 DA204U DIODE D11 DAN202U DIODE D12-14 DA204U DIODE D15 DAN235E DIODE TX-RX UNIT (X57-6480-XX)