Kenwood MDXG 2 H Service Manual

This is the 20 pages manual for Kenwood MDXG 2 H Service Manual.
Read or download the pdf for free. If you want to contribute, please mail your pdfs to info@audioservicemanuals.com.

Page: 1 / 20
left right
Kenwood MDXG 2 H Service Manual

Extracted text from Kenwood MDXG 2 H Service Manual (Ocr-read)


Page 1

NIDX{12(K)1nLlp 01,7.19153 PM "Es/41 /\

MD PERSONAL STEREO SYSTEM KEN V OOD
M DX-GZ- H/- L W

SERVICE MANUAL

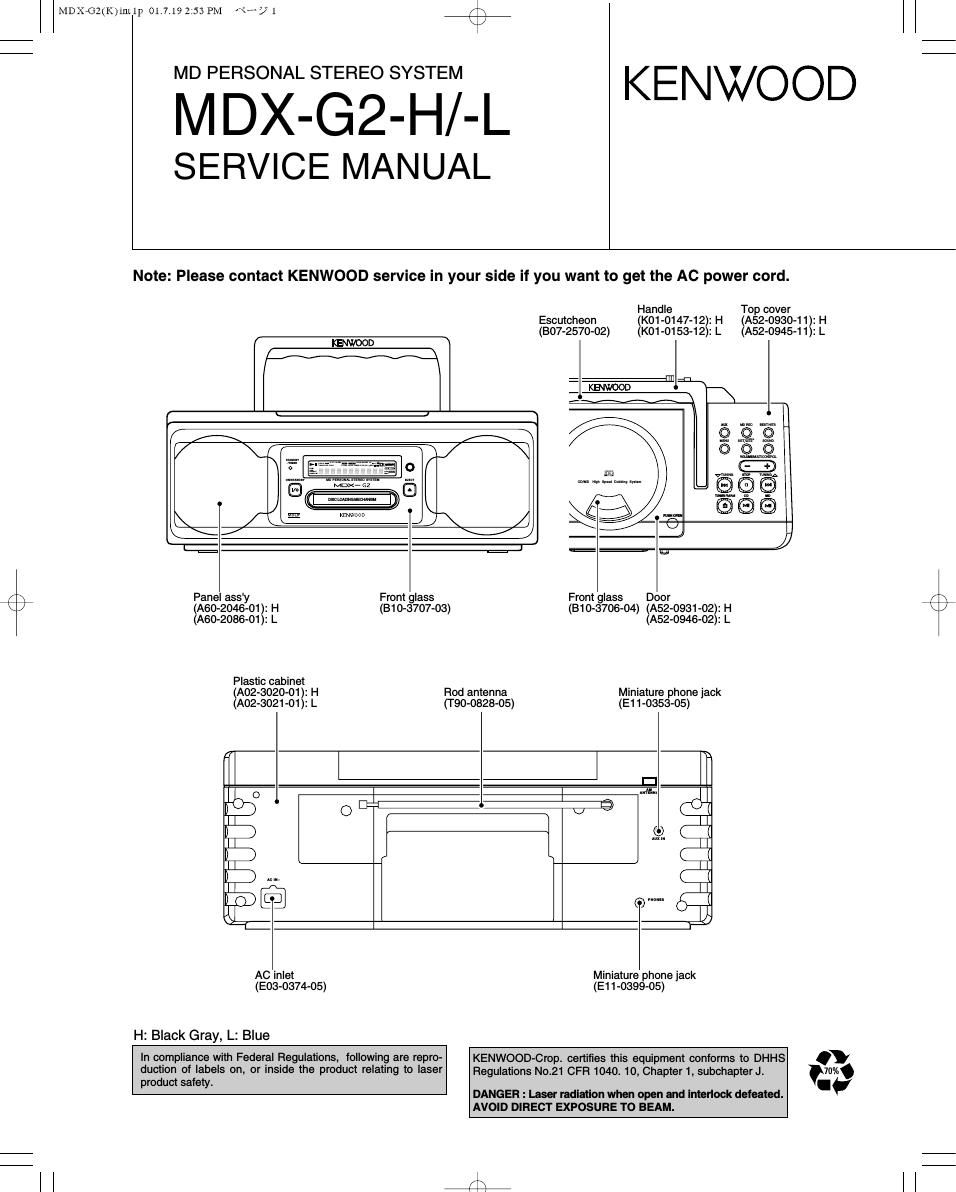
Note: Please contact KENWOOD service in your side if you want to get the AC power cord.

Handle Top cover
Escutcheon (K01-0147-12): H (A52-0930-11): H
(B07-2570-02) (K01-01 53-12): L (A52-0945-11): L
KENWOOD

/\ Panel ass'y Front glass Front glass Door
\ / (A60-2046-01): H (B10-3707-03) (B10-3706-04) (A52-0931-02): H
(A60-2086-01): L (A52-0946-02): L

Plastic cabinet
(A02-3020-01): H Rod antenna Miniature phone jack
(A02-3021-01): L (T90-0828-05) (E11-0353-05)

AC inlet Miniature phone jack
(E03-0374-05) (E11-0399-05)

H: Black Gray, L: Blue

In compliance With Federal Regulations, following are repro- KENWOOD-Crop certifies this equipment conforms to DHHS .

duction of labels on, or inside the product relating to laser Regulations N021 CFR 1040. 10, Chapter 1, subchapterJt W/a

product safety I.
DANGER : Laser radiation when open and interlock defeated.

AVOID DIRECT EXPOSURE TO BEAM.

l l A?

Page 2

NIDX£IZ(K)1n[lp 01.7.1915} PM "71

MDX-G2-H/-L

CONTENTS / ACCESSORIES / CAUTIONS

/\
\J

r\
\/

Contents

CONTENTS/ACCESSOWES/CAUWONS ............. 2 EXPLODEDIHEW .................................................... 17
ADJUSTMENT . .us PARTSIJST ............

PCBOARD ........ 4 SPEOFmAflONS

SCHEMAWCIMAGRAM ............................................ 7

Accessories

AM loop antenna (1)
(T90-0865-05)

Remote batteries (RB/AA) (2)

0

Remote control unit (1)
(A70-1509-05)

Battery cover (A09-1229-OB)

Cautions

Note related to transportation and movement

Before transporting or moving this unit, carry out the following operations.

(1) Remove the CD or MD irom the unit.

(2) Press the V/II key of the MD.

(3) Wait for some time and verify that the display becomes as shown in the
iigure.

(4) Press the >/II key of the CD.
(5) Wait for some time and verify that the display becomes as shown in the
Iigure.

(6) Wait a few seconds and turn the unit OFF.

Operation to reset

The microcomputer may tall into malfunction when a cord is unplugged and
plugged again while the unit is ON or due to an external cause. In such a
case, the microcomputer should be reset as described below:

Unplug the power cord trom the wall outlet and, while holding the
ON/STANDBY l/t') key depressed, plug the power cord again. This initializes
the microcomputer. Note that this clears the previously stored memory.

CLASS 1
LASER PRODUCT

The marking is located on the rear panel and says
this product has been classified as Class 1. It
means that there is no danger of hazardous radia-
tion outside the product

The marking of products using lasers (Except for some areas)

CAUTION

INVISIBLE LASER RADIATION

WHEN OPEN. AVOID EXPOSURE
TO BEAM.

Inside this laser product, laser diodes classified as
Class 3A and SB laser radiation are contained as
alerted by the internal caution label shown above.
To avoid exposure to laser beams, do not open the
cover.