Kenwood KR 1070 VR Service Manual

This is the 48 pages manual for Kenwood KR 1070 VR Service Manual.
Read or download the pdf for free. If you want to contribute, please mail your pdfs to info@audioservicemanuals.com.

Page: 1 / 48
left right
Kenwood KR 1070 VR Service Manual

Extracted text from Kenwood KR 1070 VR Service Manual (Ocr-read)


Page 1

filfiliélififlétw KENWOOD

1060VR/107OVR

S E RV I C E MAN UAL ©1997-6/851-5322-00 (K/K) 3145

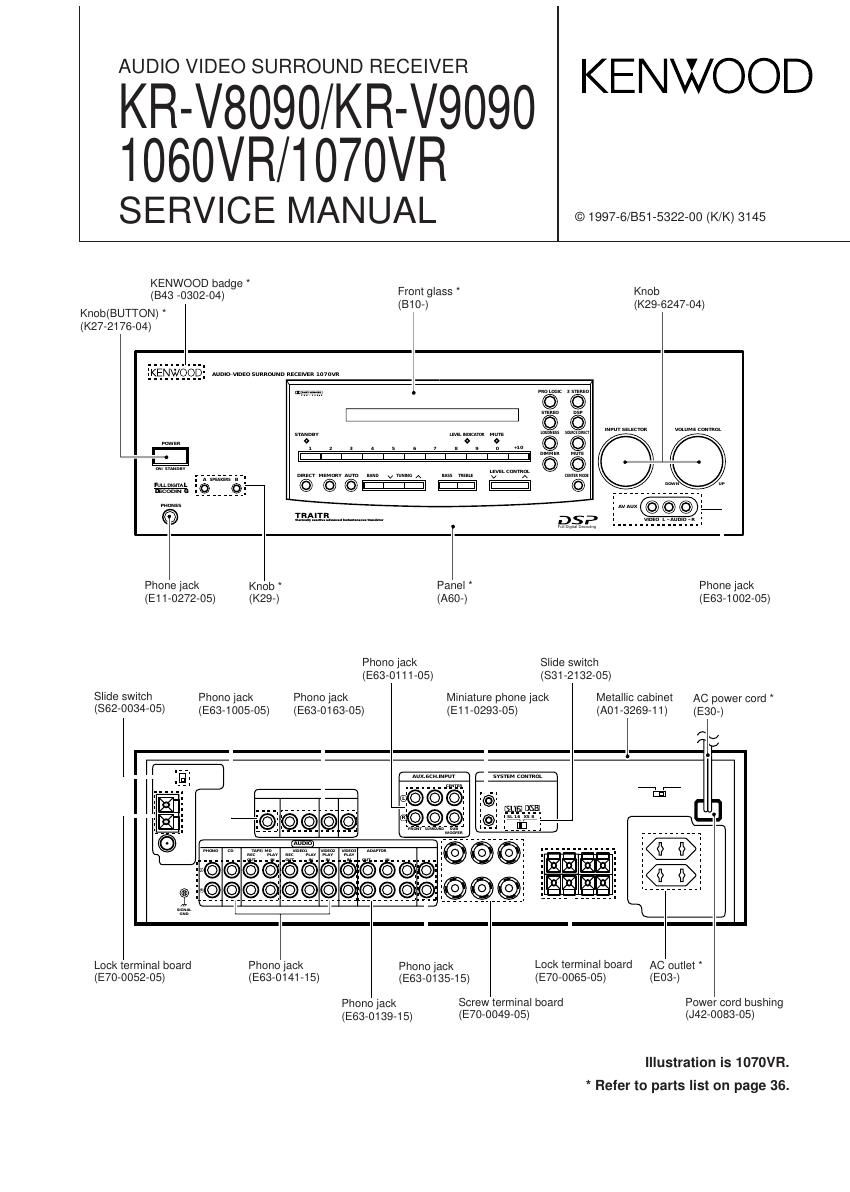
KENWOOD badge ,
(B43 _0302_04) Front glass Knob
(810-) (K29-6247-O4)
Knob(BUTTON) *

(K27-2176-O4)

{Kjgnygchég mummw J

159mm-

Phone jack Knob Panel Phone jack

(E11-0272-05) (K29-) (A60-) (1263-1 002-05)
Phono jack Slide switch
(E63-0111-05) (831-2132-05)
Slide SWilCh Phono jack Phono (ask Miniature phone jack Metallic cabinet AC power cord
(862-0034-05) (E63-1005-05) (E63-0163-05) (E11-0293-05) (A01 6269-1 1) (1230-)

Aux.sn<.mrur 5mm (mum

Lock terminal board Phono jack Phono jack Lock terminal board AC outlet

(E7o-0052-05) (E63-O141-15) (E63-0135-15) (E70-0065-05) (E03-)
Phono jack Screw terminal board Power cord bushing
(E63-0139-15) (E70-OO49-05) (J42-0083-05)

Illustration is 1070VR.
* Refer to parts list on page 36.

Page 2

J COVER(1P" 97.6.22 4:02 PM [I a I] 2
1060VR/1070VR/KR-V8090/KR-V9090

%

CONTENTS / ACCESSORIES

Contents

CONTENTS / ACCESSORIES .................................... 2 WIRING DIAGRAM .................................................... 17

CONTROLS ............................. 3 PC BOARD .......................

DISASSEMBLY FOR REPAIR. 5 SCHEMATIC DIAGRAM

BLOCK DIAGRAM ................... ...6 EXPLODED VIEW ............

CIRCUIT DESCRIPTION ...7 PARTS LIST ............

ADJUSTMENT ................... ,16 SPECIFICATIONS ..

Accessories

f \
FM indoor antenna ........ (1) "AM loop antenna __________ (1) 77777777777777777777 r Remote control unit ...... (1)

(T90-O810-05) (T90-0820-05)

(DEM-999D)

RF DEMODULATOR.....(1)

Q

M,C,T type only

(A70-1118-05): RC-R0805

Loop antenna stand (1)
(J19-3645-05)

Battery cover(A09-O366-08)

AC adapter .................... (1)
(E03-0115-05)

4
i"
M type only

An use model discrepancy table in of remote controller

Remote controller Model name Destination Battery cover
Parts number Type name
A70-1115-05 RC-R0805 1070VR All destinations
KR-V9090
A70-1117-05 RC-R0605 1060VR All destinations 90366438
KR-V8090 C
A70-1118-05 RC-R0606 KR-V8090 T,E,Q

Page 5

1060VR/1070VR/KR-V8090/KR-V9090

DISASSEMBLY FOR REPAIR

The method that exchanges a power transistor.

1.
2.

Remove 10 screws (0 and 9) of rear panels.

Remove flat cable from connector (CN851 and CN852) of
printed circuit board X08 (A/3) . And, remove one screw
(6). After this, move printed circuit board X08 (A/3)
toward the right.

Remove one screws (0) of printed circuit board X08
(8/3). After this, move printed circuit board X08 (8/3)
toward the right.

1) Cut certain 4 convenes with nippers etc. on the left side
of the power supply transformer.

2) Remove one screws (6) of printed circuit board X14
(0/5). And, remove a headphone unit.

3) Remove 4 screws (0) of printed circuit board X09.

- Make printed circuit board X08 (N3 and B/3) in
original condition, after screw (0) is removed. And,
remove screw (0 and 9) and FFC.

Remove 2 screws (0) of both sides of a panel.

Set up a receiver, so that the left side of a receiver
becomes downward. And, remove 4 screws (9). Turn
over a receiver like a figure after this.

Remove 5 screws (0) on the side of under of a panel.
Next, remove 2 screws of radiators on the side of a base.
And, remove a base plate to the back side (arrow
direction).

Remove the solder of a power transistor from FOIL side of
printed circuit board X09. And, exchange a power
transistor.