Kenwood KIVBT 700 Service Manual

This is the 44 pages manual for Kenwood KIVBT 700 Service Manual.
Read or download the pdf for free. If you want to contribute, please mail your pdfs to info@audioservicemanuals.com.

Page: 1 / 44
left right
Kenwood KIVBT 700 Service Manual

Extracted text from Kenwood KIVBT 700 Service Manual (Ocr-read)


Page 1

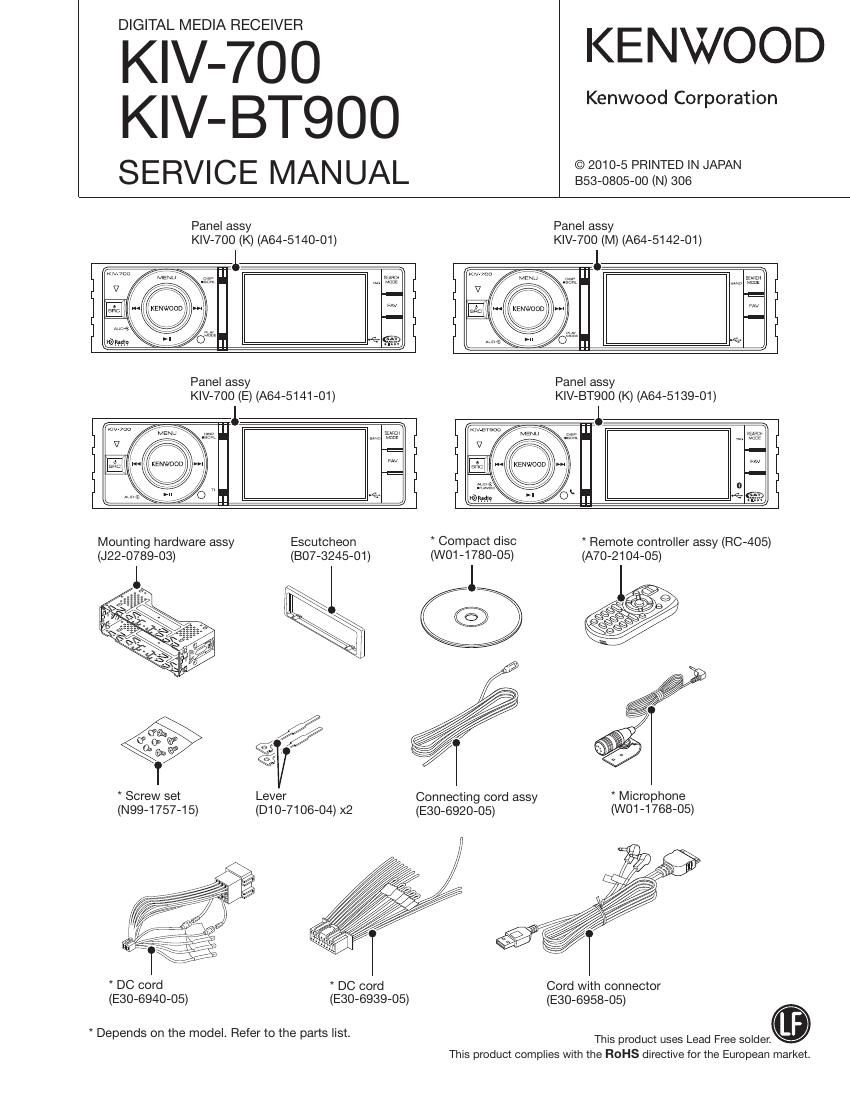
DIGITAL MEDIA RECEIVER

KlV-7OO KENWOOD
KIV BTQ O O KenWOOd Corporation

SERVICE MANUAL gigggzzNstggNN/NNN

Panel assy Panel assy
KlV-700 (K) (A64»5140-01) KIV-700 (M) (A64-5142»01)

Panel assy Panel assy
KiV-700 (E) (A64-5141-01) KIV-BTQOO (K) (A64-5139-01)

ll

Mounting hardware assy Escutcheon * Compact disc * Remote controller assy (RC-405)
(J22-0789-03) (BO7-3245-01) (W01-1780»05) (A70-2104-05)

i§\
«t

* Screw set Connecting cord assy * Microphone
(N99-1757-15) (D10»7106-04) x2 (E30-6920-05) (W01-1768-05)

u
u

* DC cord * DC cord Cord with connector
(E30-6940-05) (E30-6939-05) (E30-6958-05)
* Depends on the model. Refer to the parts list. This product uses Lead Free solder.

This product complies with the ROHS directive for the European market.

Page 16

KIV-700/BT900

TEST MODE

I Menu list adjust mode

~ Press [MENU] key briefly to display the Menu list.

Press [DNPP/SBF] and [DIRECT] key on the remote controller to transfer into the Menu list mode.

0 You shall not use the remote controller to successively send the items.

- Only in the Test mode, add Phone Selection in Menu list display when the source is STANDBY, and it is located as the de-
fault item (head of the list). (Only in the model with the built»in BT)

In Tuner (FM) source, the Local Seek shall be the first item. (Only for E destination)

I Backup current measurement
When the unit is reset when it is in ACC OFF (BackUp ON) condition, MUTE terminal is not turned off in 15 seconds but in 2
seconds.

I DO offset error detection information clear (E2PROM data clear)

While keeping pressing [SRO] and [ >II] keys, reset and turn on the unit to enter the DC offset error display mode.
(While -" is being displayed, power can be ON for 30 minutes.)

In the display during STANDBY source, the present DC offset error detection condition is displayed.

DC offset error detection display 1 (Information to indicate if there is a misconnection or other detection or not)
1st row (Display) 00170 K" (Not detected yet)
E Fl R (A misconnection or other detection)

DC offset error detection display 2 (Number of capacitor leak detected)
(Display) D C 2 ,0g (Not detected yet)

(Leak detected once)

(Leak detected 2 times)

(Leak detected 3 times)

(Leak detected 4 times or more)

2nd row

I Channel space switching (Only for models of destination K and M)
While keeping pressing [AUD] and [DISP] keys during POWER OFF, press [SRO] key to turn the unit on.
FM200kHz/AM10kHz <-> FM50kHz/AM9kHz

I Security (Only for European model)
<> Forced POWER ON mode
Even if 7, 7" is being displayed, it is possible to turn on the power (POWER ON) only for 30 minutes by resetting the product

while pressing [SRC] and (TI] keys. After 30 minutes have elapsed, the set can be recovered only by resetting it.

<> How to clear the security code
1.While 7 7" is being displayed, press [»I] key for 3 seconds or longer while pressing the [TI] key. (This makes the WW
display disappear.)
2. Input KCAR, using the remote controller.
Press [5] key of the remote controller 2 times (Input for K") and press [M] key.
Press [2] key of the remote controller 3 times (Input for 0") and press [M] key.
Press [2] key of the remote controller once (Input for A") and press [»I] key.
Press [7] key of the remote controller 2 times (Input for Fl") and press [»I] key.
3.The security is cleared and the unit enters STANDBY mode.
4. If wrong codes are input 7 will be displayed again.

u

16