Kenwood DVF 3030 Service Manual

This is the 53 pages manual for Kenwood DVF 3030 Service Manual.
Read or download the pdf for free. If you want to contribute, please mail your pdfs to info@audioservicemanuals.com.

Page: 1 / 53
left right
Kenwood DVF 3030 Service Manual

Extracted text from Kenwood DVF 3030 Service Manual (Ocr-read)


Page 1

r\
\/

DVF73030(K) COVER1,1P( 7/28/00 3:22PM «3? 1

DVD VCD CD PLAYER

/\
\/

DVF-303O

SERVICE MANUAL

KENWOOD

© 2000-6/B51-5645-00 (K/K) 1405

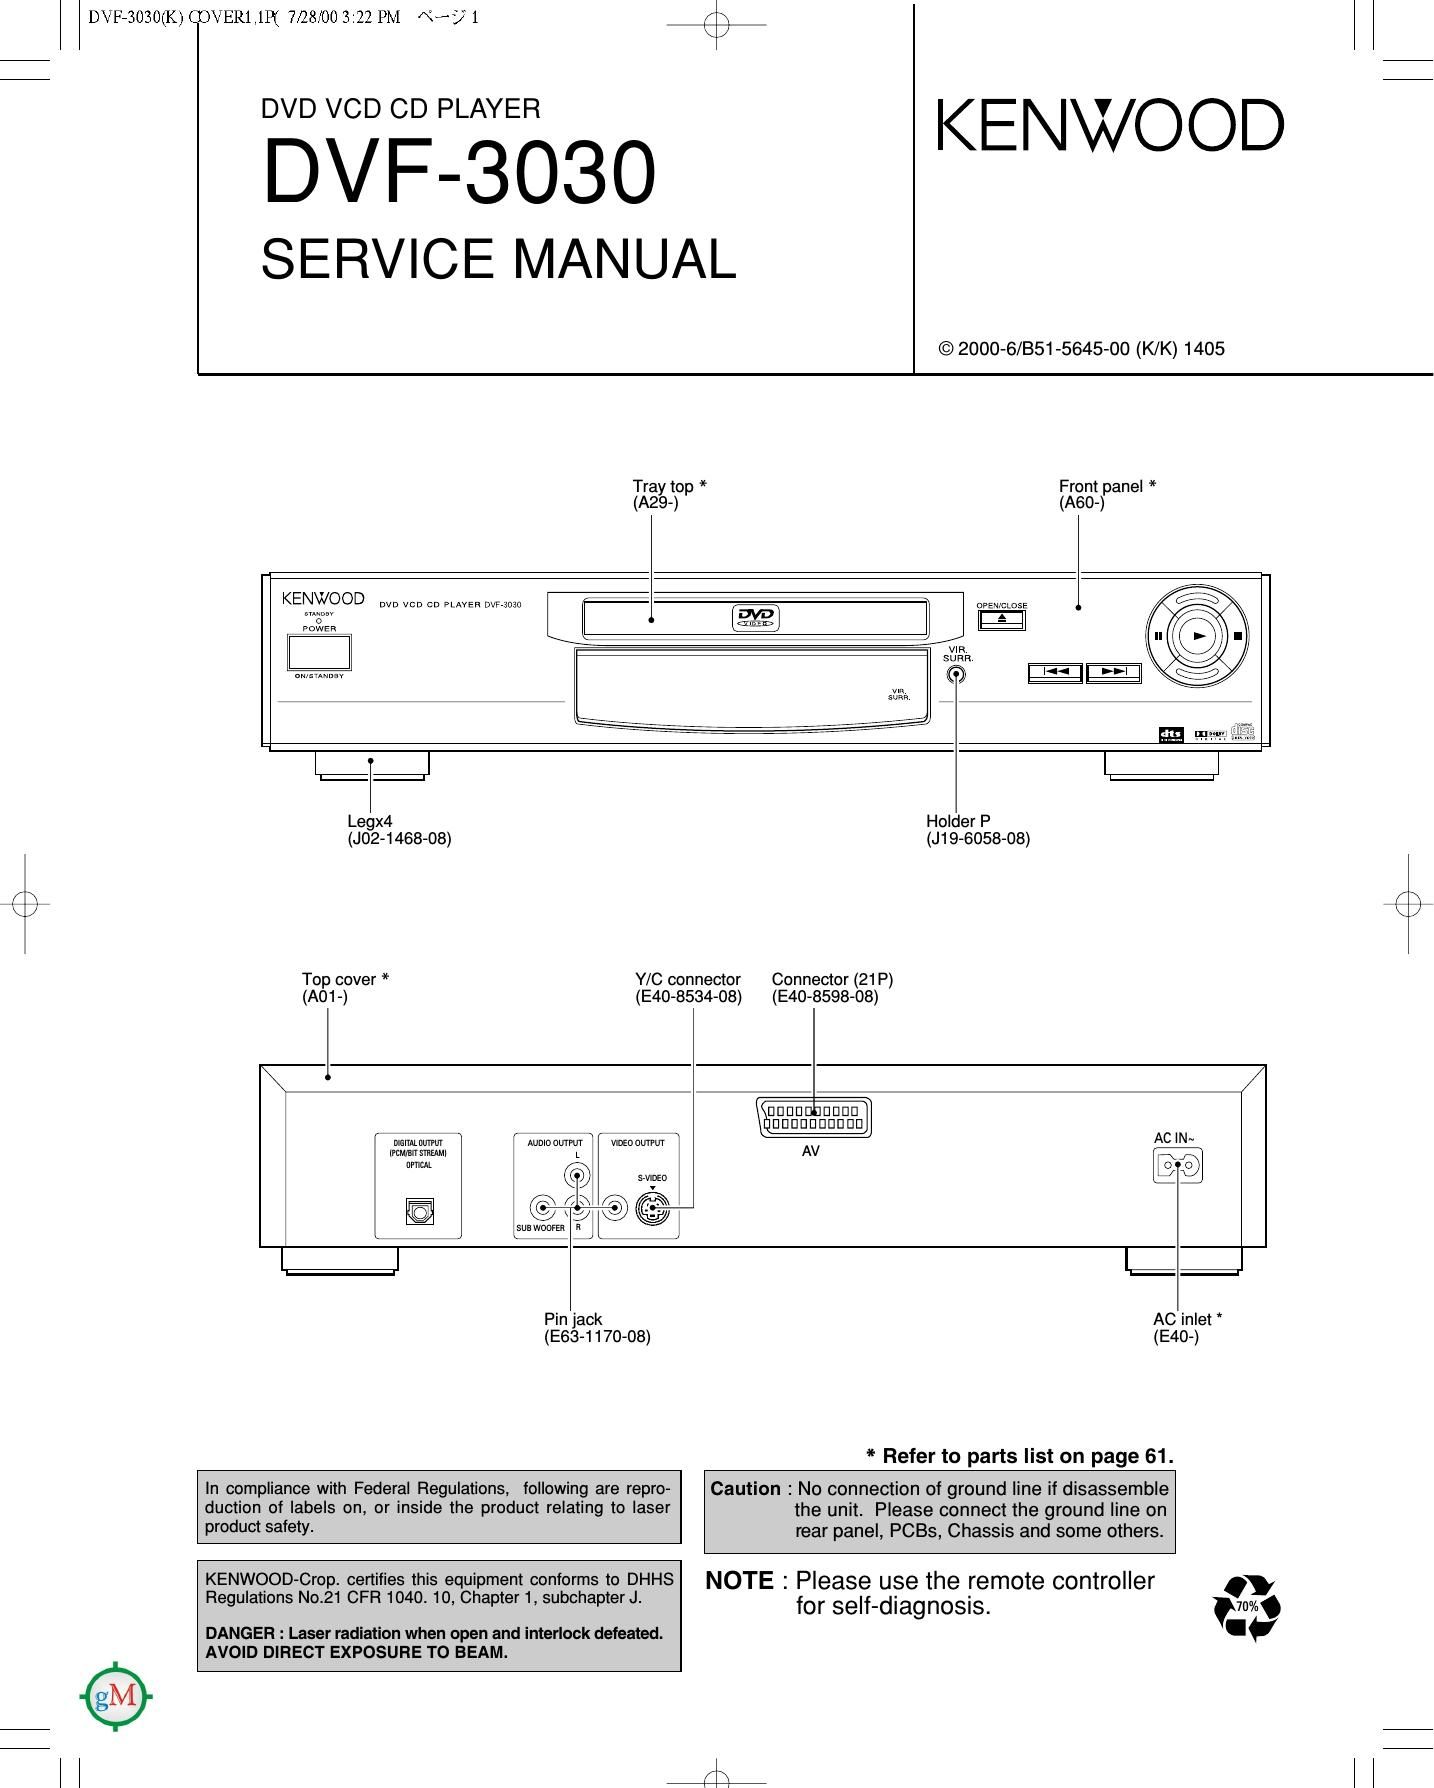
Tray top *
(A29-)

Front panel *

(A60-)

KENWOOD DVD VCD cu mm mm

o
vow/ER

OPEN/CLOSE

l=i=J


Legx4 Holder P
(J02-1468-08) (J19-6058-08)
Top cover * Y/C connector Connector (21 P)
(A01-) (E40-8534-08) (E40-8598-08)
l
nonnannonn
DDEIEID Dan on
mmmawm mm uuwur vim: mrmn AC IN~
chM/mrmim) AV J1
mm BF]

Pin jack
(E63-1170-08)

L__

AC inlet *

(E40-)

* Refer to parts list on page 61.

In compliance with Federal Regulations, following are repro-
duction of labels on, or inside the product relating to laser

product safety.

Caution : No connection of ground line if disassemble
the unit. Please connect the ground line on

rear panel, PCBs, Chassis and some

others.

KENWOOD-Crop. certifies this equipment conforms to DHHS
Regulations No.21 CFR 1040. 10, Chapter 1, subchapter J.

DANGER : Laser radiation when open and interlock defeated.

AVOID DIRECT EXPOSURE TO BEAM.

for self-diagnosis.

NOTE : Please use the remote controller

0

v

m
a

Page 2

r\
\/

DVF73030(K) COVER1,1P( 7/28/00 3:22 PM «3? 2

DVF-303O

CONTENTS / ACCESSORIES

Contents

CONTENTS / ACCESSORIES .....
DISASSEMBLY FOR REPAIR
BLOCK DIAGRAM .............
CIRCUIT DESCRIPTION
ADJUSTMENT .........
VOLTAGE CHART
WIRING DIAGRAM .....

Note: There is different part in this manual as compared with a usual one because we use OEM

tactory's data.

On "Circuit description, "Lubrication and Abbreviation of Logo", please refer to DV-303

PARTS DESCRIPTIONS ..........................................
PC BOARD ..................... .

SCHEMATIC DIAGRAM.
EXPLODED VIEW
PARTS LIST .........
SPECIFICATIONS

service manual (851-5561-00 or B51 -5583-00)


....Back cover

Accessories

,
Remote control unit ......... 1 Batteries .................... 2 AC cord ..................... 1
(A70-1444-08) for remote control unit [size "AA"] (E30-2946-08): E

How to read the schematic diagram

Q;
Battery cover (A09-1193-08)
Video/audio cable ............ 1 Digital cord ................... 1
(E30-2938-08) (319-1615-08)

(E30-2977-08): X

Connection of from" or "to".

OFTR @

Port name

- There are some destinations in this schematic.

Page 3

DVF73030(K) COVER1,1P( 7/28/00 3:22PM \°-A7 3 K \

DVF-303O

DISASSEMBLY FOR REPAIR

1. Assembling and Disassembling the Casing
and Checking C.B.A.s

1-1 Casing Parts and C.B.A. Positions

Pwarsupply cM/\ Top cover
Power sw on A
/ \ Module or: A.

\_ \ / E type nas
sonar pcb.

Front panel Mather (2.5 A

anlSWCBA.
1-2 Service Positions
Note
To inspect the loading base unit. position the left side
upward (as viewed from the front).

Mechanism
Loading c a A

Extension
mleic)


F\
\/

mr an
Mo 9 C MoomeCE.A

1-3 Disassembling the Tray

1. Turn the lever clockwise.

2. Move the tray in the direction of the arrow until it looks.

3. Release the tab locks on the left and right. then pull out
the tray.

Extension mew

Tab
Lever
Y \ 9-3
\ \ /
PCC T]
\. _ gfl/
"="fi

1-4 Disassembling the Front Panel
1. Release the 3 tabs on the bottom.
2. Release the 2 tabs on the left and right.

3. Release the 2 tabs.
4. Disconnect the 2 flexible cables.


Tab
r lfi__:_U- =71 g
T -.
Fleaible Kt?)
ca 6
, E
)
I, \
gag-gee-og

1-5 Disassembling the Loading Base Unit
1. Remove the 4 screws.
2. Pull out the loading base unit vertically.
Note
There is a danger of damaging the connectors.
Loading Base Unit

Screw

Connector

Page 6

DVF73030(K) COVER1,1P( 7/28/00 3:22PM «3? 6

DVF-303O

DISASSEMBLY FOR REPAIR

2-3 Static Electricity Countermeasures
The laser diode inside the traverse unit (optical pickup) can
be damaged by static electricity from your body. Be sure to
take static electricity countermeasures when working around
the optical pickup.
2-3-1 Static Electricity Countermeasure Methods
1. Ground yourself
Use an anti-static wrist strap to discharge static electrici-
ty from your body.
2. Ground the workbench
Lay a conductive material (sheet) or steel sheet on the
surface where the traverse unit (optical pickup) is to be
placed, then ground the sheet.

Anti-static wrist strip /

1M9

onductive material
(sheet) or steel sheet

F\
\/

2-3-2 Short-circuit the laser diode
Solder the land in the flexible cable of the optical pickup.
Notes

- Be sure to do this before disconnecting the flexible cable
of the optical pickup from the module C.B.A.

~ Use an anti-static soldering iron to short-circuit and
unshort-circuit laser diode.

(Recommended soldering iron: Hakko with ESD counter-
measure)

. After you have finished repairing the laser diode, follow
the correct procedure to remove the solder from the
short-circuit location. (Refer to page5/2. Assembling and
Disassembling the Optical Pickup (Mechanical Parts).)

Pickup unit


Flexlble cable

Solder

Use a clip or other item
to ground the unit.

(Magnilied View)

2-4 Disassembling the Clamp Base Unit

Remove the 2 screws. .
Loading base

Clamp base unit

2-5 Disassembling the Clamper Weight, Clamper
Yoke, Magnet and Clamper
1. Release the tab, and pull out the clamper.

Tab Clamper unit

Clamper base

2. Release the 3 tabs on the clamper. \

Yoke 3-Clam er tabs

Screw

00 Clam er wei ht

Q\" Magnet


Clamoer

Clam er base

Page 53

DVF73030(K) COVER1,1P( 7/28/00 3:22PM «3? 68 K \

r\
\/

DVF-303O

PARTS LIST

>l< New Parts
Parts without Parts No. are not supplied.
Les articles non mentionnes dans Ie Parts No. ne sont pas fournis. @
Teile ohne Parts No. werden nicht geliefert.
Add- New - - Desti- Re-
Ref. No ress Parts Parts No. Description nation marks
B44 >l< N09-5237-08 SCREW VH D1330
B45 N09-5158-08 SCREW XTV3+1OG
861 NOS-516208 SCREW VHD1224
862 >l< N09-5238-08 SCREW VHD1358
863 N09-3462-08 SCREW VH D1057
864 N09-3456-08 SCREW XQNQC17+3
865 N09-5164-08 SCREW XXE26C6FN
L: Scandinavia K: USA P : Canada R: Mexico C : China | : Malaysia
V : PX(Far East,Hawaii) T: England E : Europe G : Germany V: ChinalShanghai)
Y:AAFES(Europe) X:Austra|ia 0:Hussia H : Korea M : Other Areas A indicates safety critical components.

SPECIFICATIONS

Power requirements: AC 120 V-240 V, 50 Hz

Power consumption: 14W

Dimensions: 430 (W)X269 (D)X82 (H) mm
(excluding protrusions)

Mass: 2.9 kg

Signal system: PAL 625/50, PAL 525/60, NTSC

Operating temperature range:
+5 to +35°C

Operating humidity range:

Audio output:
Output level:
Output terminal:

Mixed output (L/R): Pin jack (1 system), AV
Subwoofer output: Pinjack (1 system)
Audio signal output characteristics:
(1) Frequency response:
- DVD (linear audio): 4 Hz~22 kHz (48 kHz sampling)
4 Hz~44 kHz (96 kHz sampling)

2 Vrms (1 kHz, 0 dB)

5 - 90% RH(no condensation) - CD audio: 4 Hz~20 kHz (EIAJ)
Discs played: (2) S/N ratio:
(1) DVD-Video disc - CD audio: 115 dB (EIAJ)

12 cm single-sided, single-layer
12 cm single-sided, dual-layer

(3) Dynamic range:
- DVD (linear audio): 102 dB

12 cm double-sided, single-layer - CD audio: 98dB (EIAJ)
8 cm single-sided, single-layer (4) Total harmonic distortion:
8 cm single-sided, dual-layer - CD audio: 0.0025% (EIAJ)

8 cm double-sided, single-layer
(2) Compact disc (CD-DA, Video CD)

Digital audio output:
Optical digital output: Optical terminal

12 cm disc Pickup: Wave length: 665 nm
8 cm disc Laser power: CLASS 2
Video output:
Output level: 1Vp-p (759)

Output terminal:
S video output:
Y output level:
0 output level:
NTSC: 0.286 Vp-p (75 9)
PAL: 0.300 Vp-p (75 0)
Output terminal: S terminal (1 system), AV

Pin jack (1 system), AV

1 Vp-p (75 o)

Power consumption in standby mode: approx. 4.0 W

Note: Specifications are subject to change without notice.
Mass and dimensions are approximate.

Note:

Component and circuit are subject to modification to insure best operation
under differing local conditions. This manual is based on Europe (E) standard,
and provides intormation on regional circuit modification through use of alterr
nate schematic diagrams, and information on regional component variations
through use of pans list.

KENWOOD CORPORATION

1476,Dogenzaka17chome, Shibuyarku, Tokyo, 1508501 Japan

KENWOOD SERVICE CORPORATION
PO BOX 22745, 2201 East Dominguez St, Long Beach, CA 9080175745, U.S.A.

8);