Kenwood DNX 512 EX Service Manual

This is the 86 pages manual for Kenwood DNX 512 EX Service Manual.
Read or download the pdf for free. If you want to contribute, please mail your pdfs to info@audioservicemanuals.com.

Page: 1 / 86
left right
Kenwood DNX 512 EX Service Manual

Extracted text from Kenwood DNX 512 EX Service Manual (Ocr-read)


Page 1

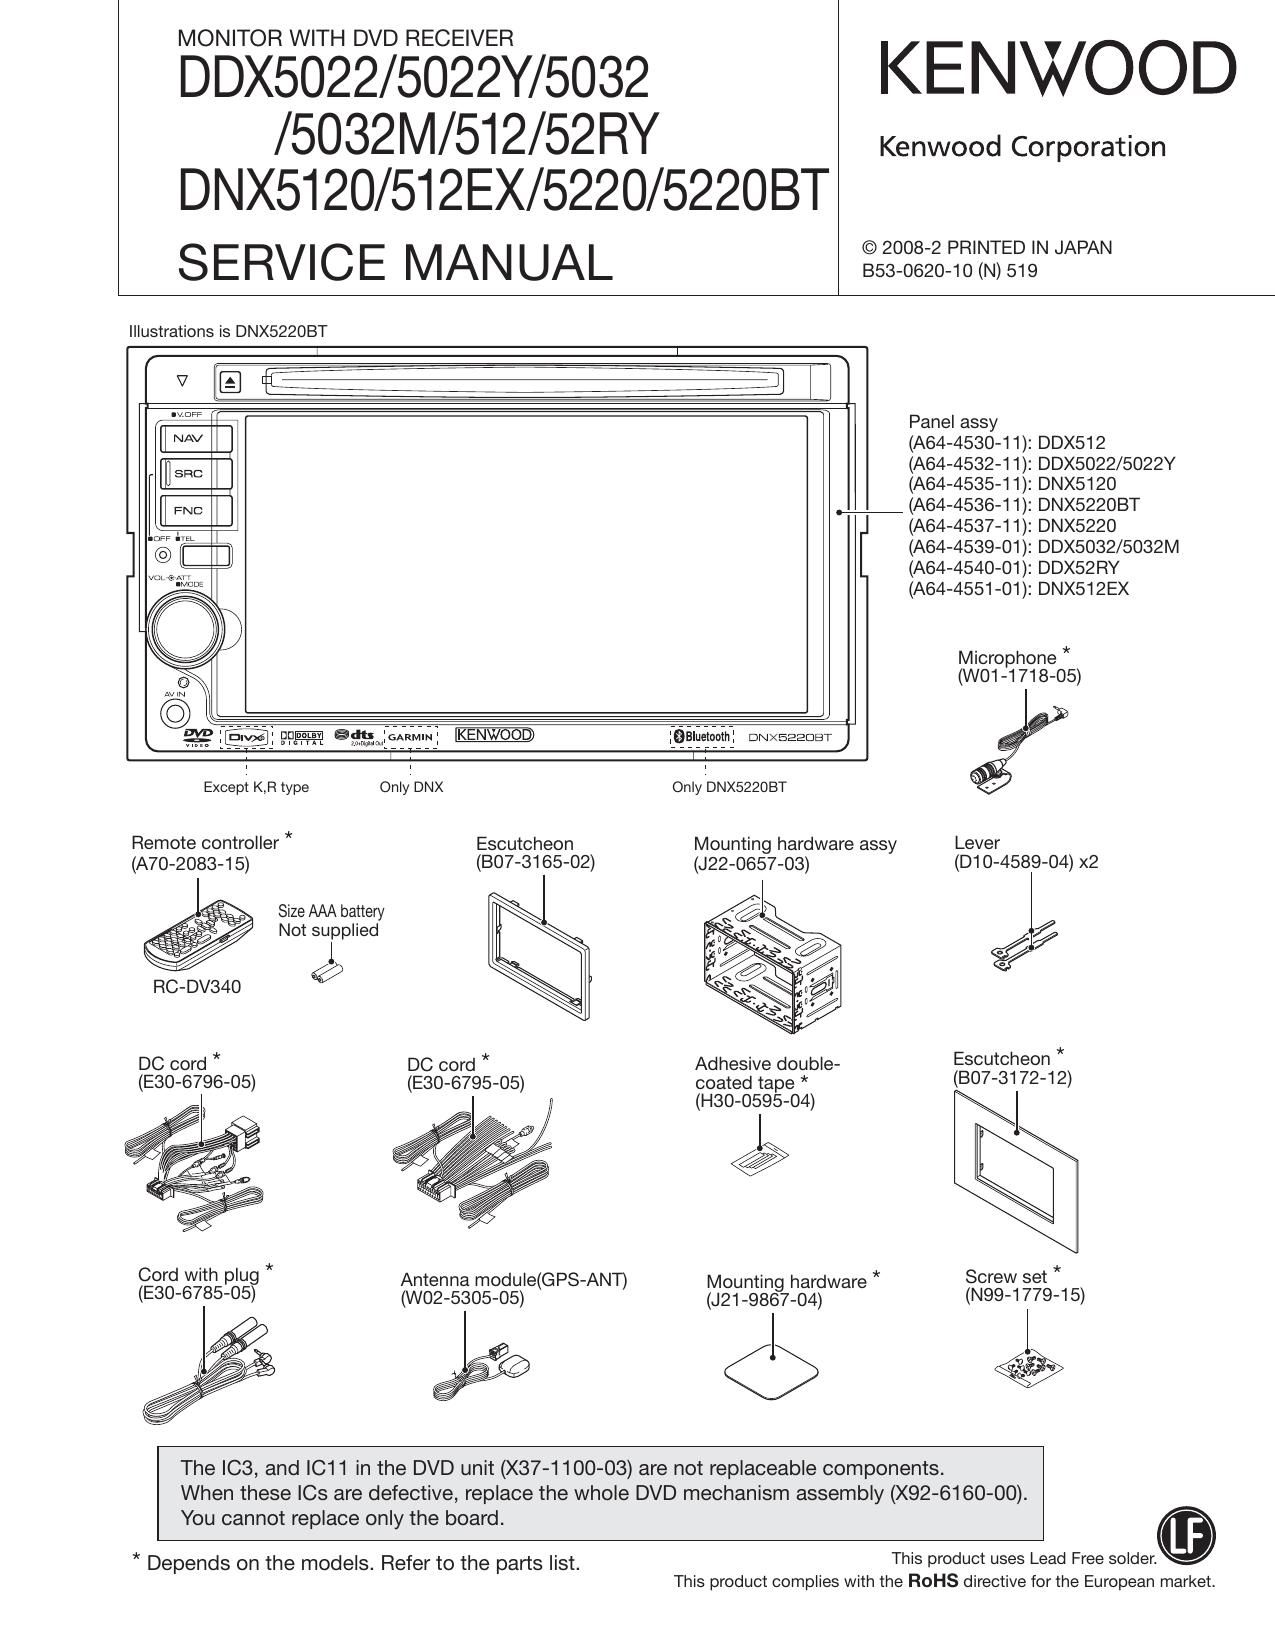
MONITOR WITH DVD RECEIVER

DDX5022/5022Y/5032 KENWOOD

/5032M/512/52RY Kenwood Corporation
DNX5I20/512EX/5220/52208T

SERVICE MANUAL sszNgzgifiz'tiiegNNNN

Illustrations is DNX522OBT

N [E fleeiiii i 7 iiiifij 7
"W Panel assy
[i AV l (AM-453041): DDX512
EH SEC (AM-453241): DDX5022/5022Y
(A64-4535-11): DNX5120
we (AM-453641): DNX5220BT
(A64-4537-11): DNX5220

n@ i[ ii (A64-4539»01): DDX5032/5032M
(A64-4540»01): DDX52RY
(A64-4551»01): DNX512EX

Microphone *
(W01-1718-05)

Jgp ammiftwil 9915211101111 owxeaaom)
1 1
Except K,Fl type Only'DNX Only'DNX5220BT

Remote controller * Escutcheon Mounting hardware assy Lever
(A70-2083-15) (BO7-3165-02) (J22-0657-03) (D10-4589-04) x2

Size AAA battery

Not sulpplied %/

RC-DV340 W

DC cord * DC cord * Adhesive double- Escutcheon *

(E30-6796-05) (E30-6795-05) coated tape * (307-3172-12)
, (H30-0595-04) J

Cord with plug * Antenna module(GPS-ANT) Mountin hardware * Screw set *
(E30-6785-05) (W02-5305-05) (J21_98§7_04) (N99-1779-15)

ee <5 ,.

The IC3, and IC11 in the DVD unit (X37-1100-03) are not replaceable components.
When these le are defective, replace the whole DVD mechanism assembly (X92-6160-00).

You cannot replace only the board.
This product uses Lead Free solder.

* Depends on the models. Refer to the parts list.
This product complies with the ROHS directive for the European market.

Page 17

DDX5022/5022Y/5032/5032M/512/52RY

DNX5120/512EX/5220/52208T

TEST MODE

Key Specification
Information : Transfer to Information screen.
Service : Transfer to Sen/ice screen.

Direct Select: Transfer to Direct Select screen.

Touch : Transfer to Touch Adjust screen.

HPOSI : Transfer to HPOSI Adjustment screen.

iPod : Transfer to iPod Authentication Chip Confir-
mation screen.

Auto Adjust : Transfer to Auto Adjust Menu screen.

Inverter : Transfer to Inverter Confirmation screen.

NAVI :Transfer to Navigation MAP Update Confir-
mation screen.

Bluetooth :Transfer to Bluetooth Confirmation screen

(only in the system running on the produc-
tion line).

3.2 Information screen

This screen is to display such information as version num-
ber and other conditions.

The contents displayed on the Information screen are
shown in Figure 3.2.

Information
DNX (DDX or KVT) Type : a Region ; 5;
Serial : +9»wa DC Offset 2 None Security : Off

Media Processor (Application) : Sep 15 2006 12:00:00

Decoder Firmware : V1.00
macrovision : V1.00
Mstar : V1.00
System uCom : Vthw RPM : Refer SPAN :

BT Module : Vxkid' PIN CODE: 1234

Figure 3.2 Information screen

Key Specification
Return : Transfer to Test Mode Main screen

3.3 Service screen

This screen is to show a variety of service information.
Pressing each [Clear] key is to clear the data saved in
E2PROM.

The contents displayed on the Service screen are shown in
Figure 3.3.

Service

| Serial
DVD/USE DIVX
Registration Code Clear

Monitor Open times

I DVSVSOOD Service

[ Tuner Mute Level

oxkt None

wot minutes

Figure 3.3 Service screen

Key Specification

Serial :Transfer to the screen to manually in-
put the Serial No.

DVS-SOOO Service: Transfer to DVS-8000 Sen/ice Informa»
tion Display screen.

Tuner Mute Level :Transfer to Tuner Mute Level Adjust-
ment screen

DVD/USB DivX Registration Clear : Clear DVD DivX Regis»

tration Code.

DC Offset Clear : Clear DC Offset information in E2PROM.

llnit : Initialize Power On time and number
of Monitor Open.
Return : Transfer to Test Mode Main screen

DVD/USB DivX Registration Code

Display DivX Registration Code, and clear the Code with
[Clear] key.

After the clearing of the Code, display None".

* Clear the Code after ejecting the DISC.

DC Offset

When the DC Offset detection information is shown as

None", it means that the offset is not detected. When it is

shown as Detect (x)", it means that the offset is detected.
X=0~3 : The number of capacitor leak detected.

Clear the detection information using the [Clear] key.

Service Information

Display Power On time and the number of Monitor Open.
Pressing the Unit] key for 1 or more second initializes the
service information being displayed.

17

Page 25

DDX5022/5022Y/5032/5032M/5l 2/52RY
DNX5I20/512EX/5220/52208T

ADJUSTMENT

1. Flicker adjustment

0 Condition
Video source: Video
Video: Luster white 30%~50%
BRIGHT: MAX
MODE: FULL

O Adjustment procedure

CD Display luster white 30%~50%.

CZ) Place a flicker adjustment jig to the monitor and observe
the waveform with an oscilloscope.

@Turn X35-489: VR200 and adjust to make the amplitude
of the waveform to minimum.

QU:>%

Oscilloscope range: 20mV, 0.5mS

0 Note

(Din checking the screen after the adjustment, move the
monitor up and down in order to confirm that the screen
does not flicker. (This check is also carried out on the 07
model.)

@Noise due to ACZUOV can be observed in the flicker ad-
justment jig and oscilloscope and thus carefully set up
the power supply and GND of the jig and oscilloscope.

.4. In 07 model, GND of the measurement equipment has
been floated.

2. VCOM Amplitude and AGC and WB Au-
tomatic adjustments

0 Adjustment conditions
Input signal: Input white 100% (NTSC) in R-CAM.

O Adjustment Method
Li) Press Auto Adjust on the Test Mode Main screen.

Test Mode Main

E [Mm Auto Adjust

ALI I BIImluIIILlI I

@After the automatic adjustment, Auto Set OK will be
shown to indicate the completion of the adjustment.

3. Adjustment of Horizontal display start
position and pixel

0 Video displayed on Adjustment screen

GRAPHIC : Special screen used only for adjustment (See
below)

DNX7NAVI :Special screen used only for adjustment of
GARMIN (See below)

DDX7NAVI : Input KNA-GSZO.

O GRAPHIC

Pixel Adjustment key (DOTiPHASE): Adjustment of horizon-
tal display position of pixel (Default: 32)

Screen Position Adjustment key (HPOSI): Adjustment of
horizontal display starting position of the entire screen (De»
fault: 0)

Display Range Adjustment key (DOTiFREQ): Adjustment of
horizontal display range of the video (Default: 64)

25