Kenwood CD 2280 M Service Manual

This is the 28 pages manual for Kenwood CD 2280 M Service Manual.
Read or download the pdf for free. If you want to contribute, please mail your pdfs to info@audioservicemanuals.com.

Page: 1 / 28
left right
Kenwood CD 2280 M Service Manual

Extracted text from Kenwood CD 2280 M Service Manual (Ocr-read)


Page 1

CDi226OM/DPEWK) COVER( 98.4124 10:51 PM y (W 2 /\
K

MULTIPLE COMPACT DISC PLAYER V
CD-226OM/DPF-J701O KENWOOD

CD-228OM/DPF-J901O
SERVICE MANUAL

© 1998-3/851-5416-00 (K/K) 3094

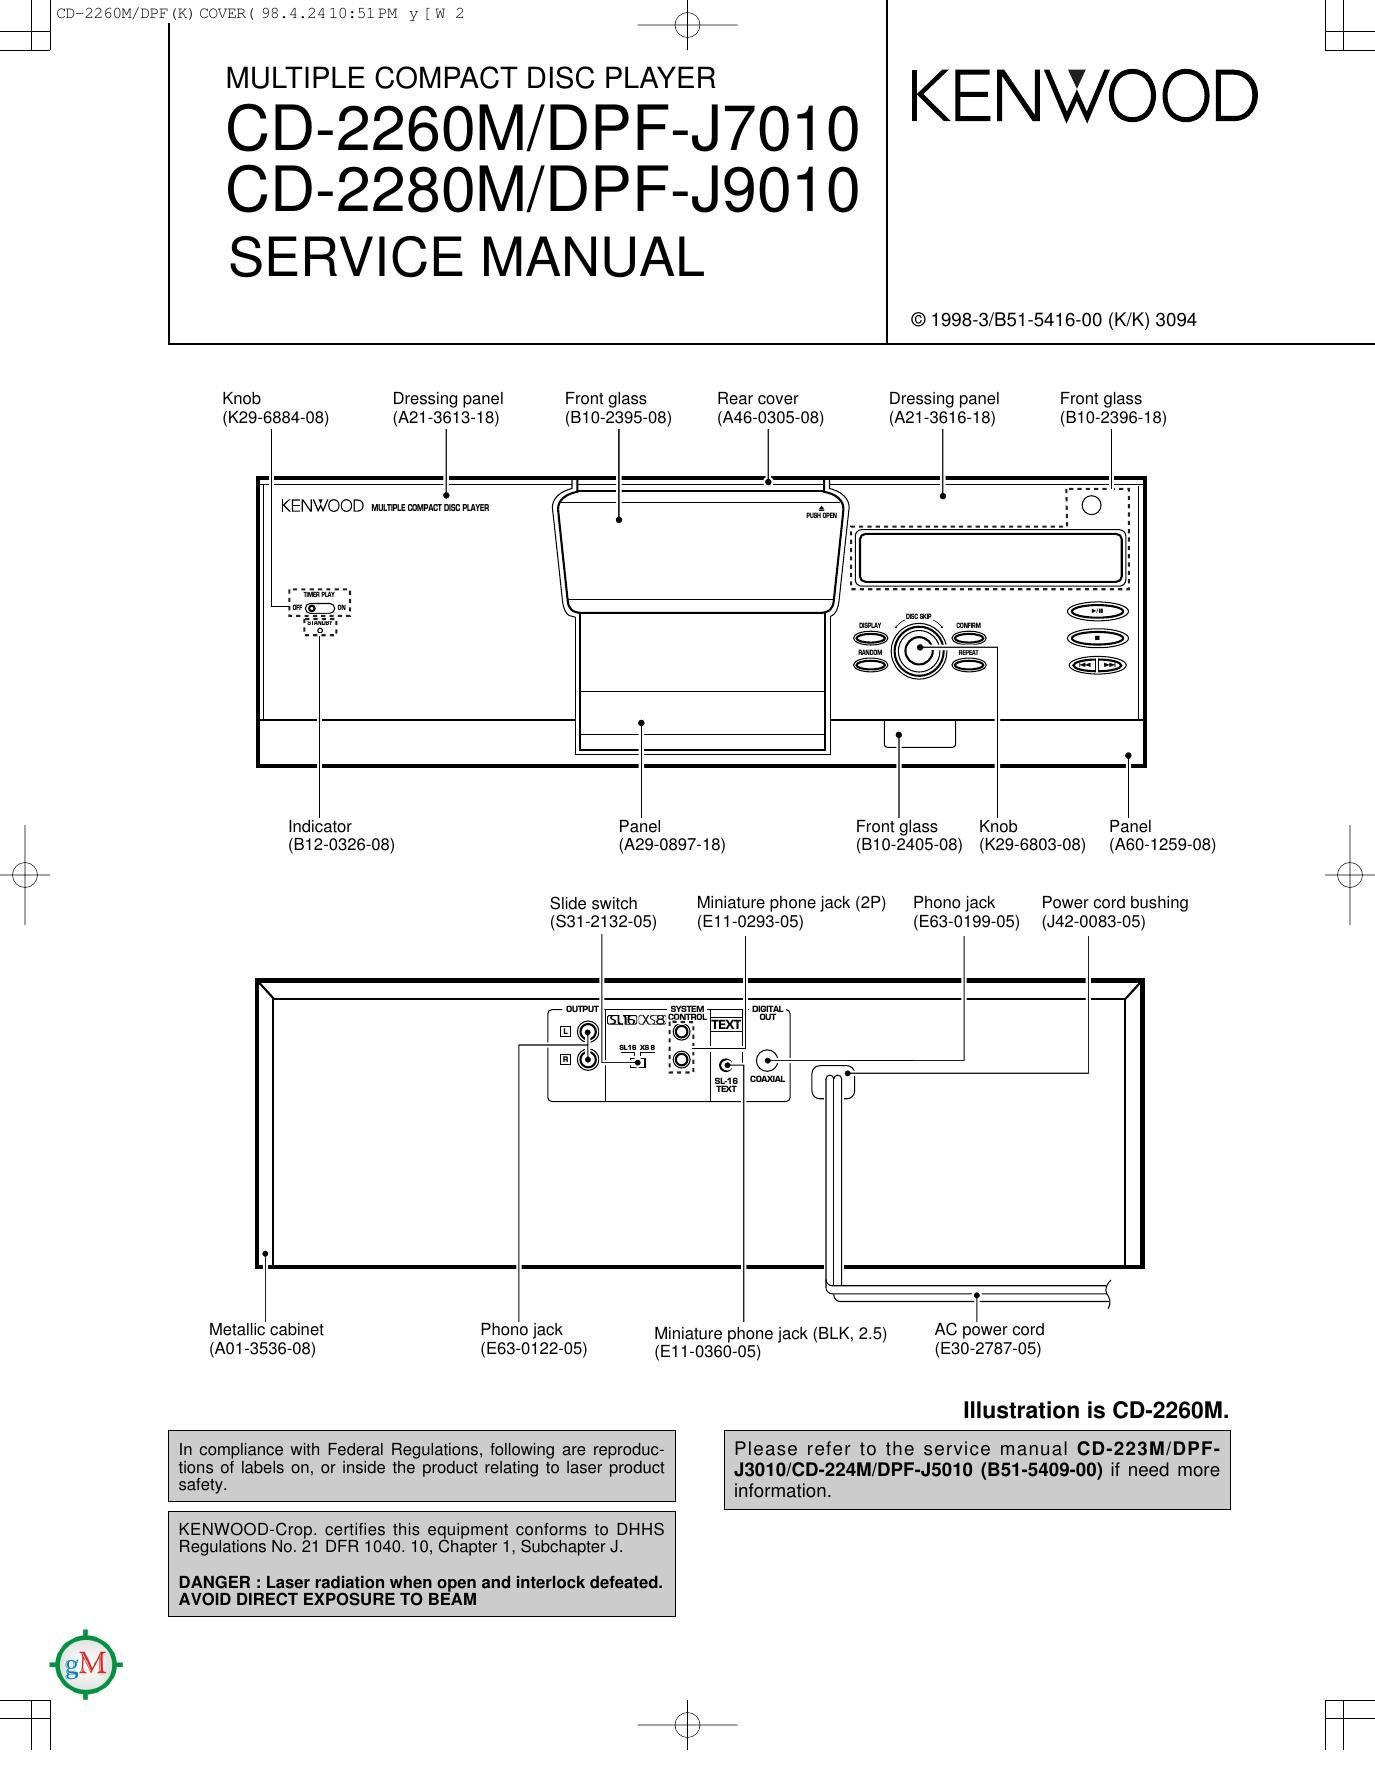
Knob Dressing panel From glass Rear cover Dressing panel Front glass
(K29-6884-08) (A21 -361 3-1 8) (810-2395-08) (A46-O305-08) (A21 -3616-18) (B10-2396-18)

KENWOOD annzcumzmscmvzn

mm

Indicator Panel Front glass Knob Panel
(812-0326-08) (A29-0897-18) (B10-2405-08) (K29-6803-08) (A60-1259-08)
\ A
x J @
Slide switch Miniature phone jack (2P) Phono jack Power cord bushing
(831-2132-05) (E11-0293-05) (E63-0199-05) (J42-0083-05)

1
Metallic cabinet Phono lack Miniature phone jack (BLK, 25) AC power cord
(A01-3536-08) (E63-0122-05) (E1 14,360.05) (E30-2787-05)
Illustration is CD-2260M.
In compliance with Federal Regulations, following are reproduc- Please refer to the service manual CD-223M/DPF-
tions of labels on, or inside the product relating to laser product .1301 0/CD-224M/DPF-J5010 (351-5409-00) if need more
safety- information.

KENWOOD-Crop. certifies this equipment conforms to DHHS
Regulations No. 21 DFR 1040. 10, Chapter 1, Subchapter J.

DANGER : Laser radiation when open and interlock defeated.
AVOID DIRECT EXPOSURE TO BEAM

Page 2

F

CD72260M/DPF(K) covsm 98.4.24 10:51PM y [w 3

+

CD-2260M/2280M/DPF-J7010/J9010

CONTENTS / ACCESSORIES

Contents
CONTENTS / ACCESSORIES ................................... 2 PC BOARD ............................................................... I1
EXTERNAL VIEW ................... ...3 SCHEMATIC DIAGRAM ..15
DISASSEMBLY FOR REPAIR ...4 EXPLODED VIEW ......... ..26
CONTROLS ................................................................ 5 PARTS LIST .............................................................. 28
CIRCUIT DESCRIPTION ...7 SPECIFICATIONS ...................................... Back cover
ADJUSTMENT ................
Accessories
r W

Audio cord ....................... (1) System control cord ........ (1) Communication cord ....... (1)

(Eso-osos-osi (E30-2816-05)

(A70-1 174-08) : RC-P0506
(A70-1175-08) : RC-P0306

Battery cover (A09-0374-08)

Remote control unit ........ (1) Batteries (Re/AA)

........ (2)

(E30-2861-05)

* Refer to parts list on page 28.

Beware of condensation

When water vapor comes into contact with the surface of cold
material, water drops are produced.

If condensation occurs, correct operation may not be possible,
or the unit may not function correctly.

This is not a malfunction, however, and the unit should be dried.
(To do this, turn the POWER switch ON and leave the unit as it
is for several hours.)

Be especially careful in the following conditions:

- When the unit is brought from a cold place to warm place, and
there is a large temperature difference.

- When a heater starts operating.

- When the unit is brought from an air-conditioned place to a
place of high temperature with high humidity.

- When there is a large difference between the internal tempera-
ture of the unit and the ambient temperature, or in conditions
where condensation occurs easily.

Note related to transportation and movement

Before transporting or mowng this unit, carry out the following op
eration:

1, Remove all discs from the carousel and close the door panel.
2. Confirm that the flashing "NO DISC display has changed to steady
lighting, and then switch off the power.

3. Wait a few seconds, then disconnect the power plug.

Operation to reset

The microcomputer may malfunction (impossib ity to operate,
erroneous display, etc.) when the connection cords are un-
plugged while power is ON or due to an external factor. In this
case, execute the following method to reset the microcomputer
and return it to normal condition.

Unplug the power cord from the power socket and plug the
power cord into the socket again.

To reset the registered contents

The registered contents for title name. music type, and best
selection can be reset by the following procedure.

Unplug the power cord from the power socket and. while
holding the l key depressed, plug the power cord into the
socket again.

Page 5

CD7226OM/DPFtK) covam 98t4t24 10:51 PM y [w 10

sh
CD-2260M/2280M/DPF-J7010/J9010

CONTROLS

CD-2260M/DPF-J7010

Play lndloator Text mformatron drsplay

[The drsplays grven rn (hrs manual are approxrmatrons only They may drfier
from what actually appears on the drsplay l

Pause rndlcator

Mumnz mm. m5: vuvin

OPOWER key/STANDBY indicator (For the U.S.A. and
Canada)
I/(b key/STANDBY indicator (For other countries)

9TIMER PLAY switch
Used for timer play ON/OFF

9Door panel
ORANDOM key
Press to start random playback

GDISPLAV key
Swrtchrng between title drsplay and trme display

GDISC SKIP knob

Used for drsc selectron Characters are selected at the trrne of trtle
regrstratron

About the STANDBYmode

DISPLAY

OCONFIRM key
The present playback mode rs displayed

0 REPEAT key

Press to start repeated playback

ePlay/Pause key lb/II)
@ Remote sensor
0 Stop key (I)

@LCD remote control signal transmitter
The drsc and track trtle data are output to the LCD remote control unrt
(provnded wrth a KENWOOD Recerver) through thrs wrndow.
@Skip keys (H4 ml

Press to skrp to the beglnnrng of another track.
Characters are selected at the trme of trtle reglstratron

While the STANDBY rndrcator ls Irt, a small amount of power is supplred to the system to back up the memory. Thrs rs called the standby mode. Under that

condltron, the system can be turned ON by the remote control unrt.