Kenwood A 83 Service Manual

This is the 18 pages manual for Kenwood A 83 Service Manual.
Read or download the pdf for free. If you want to contribute, please mail your pdfs to info@audioservicemanuals.com.

Page: 1 / 18
left right
Kenwood A 83 Service Manual

Extracted text from Kenwood A 83 Service Manual (Ocr-read)


Page 1

STEREO INTEGRATED AMPLIFIER KE NWOOD \2
A-83 '
, SERVICE MANUAL

©1989-8 PRINTED IN JAPAN

Q (7 3):) B51-3927-00(B)1312

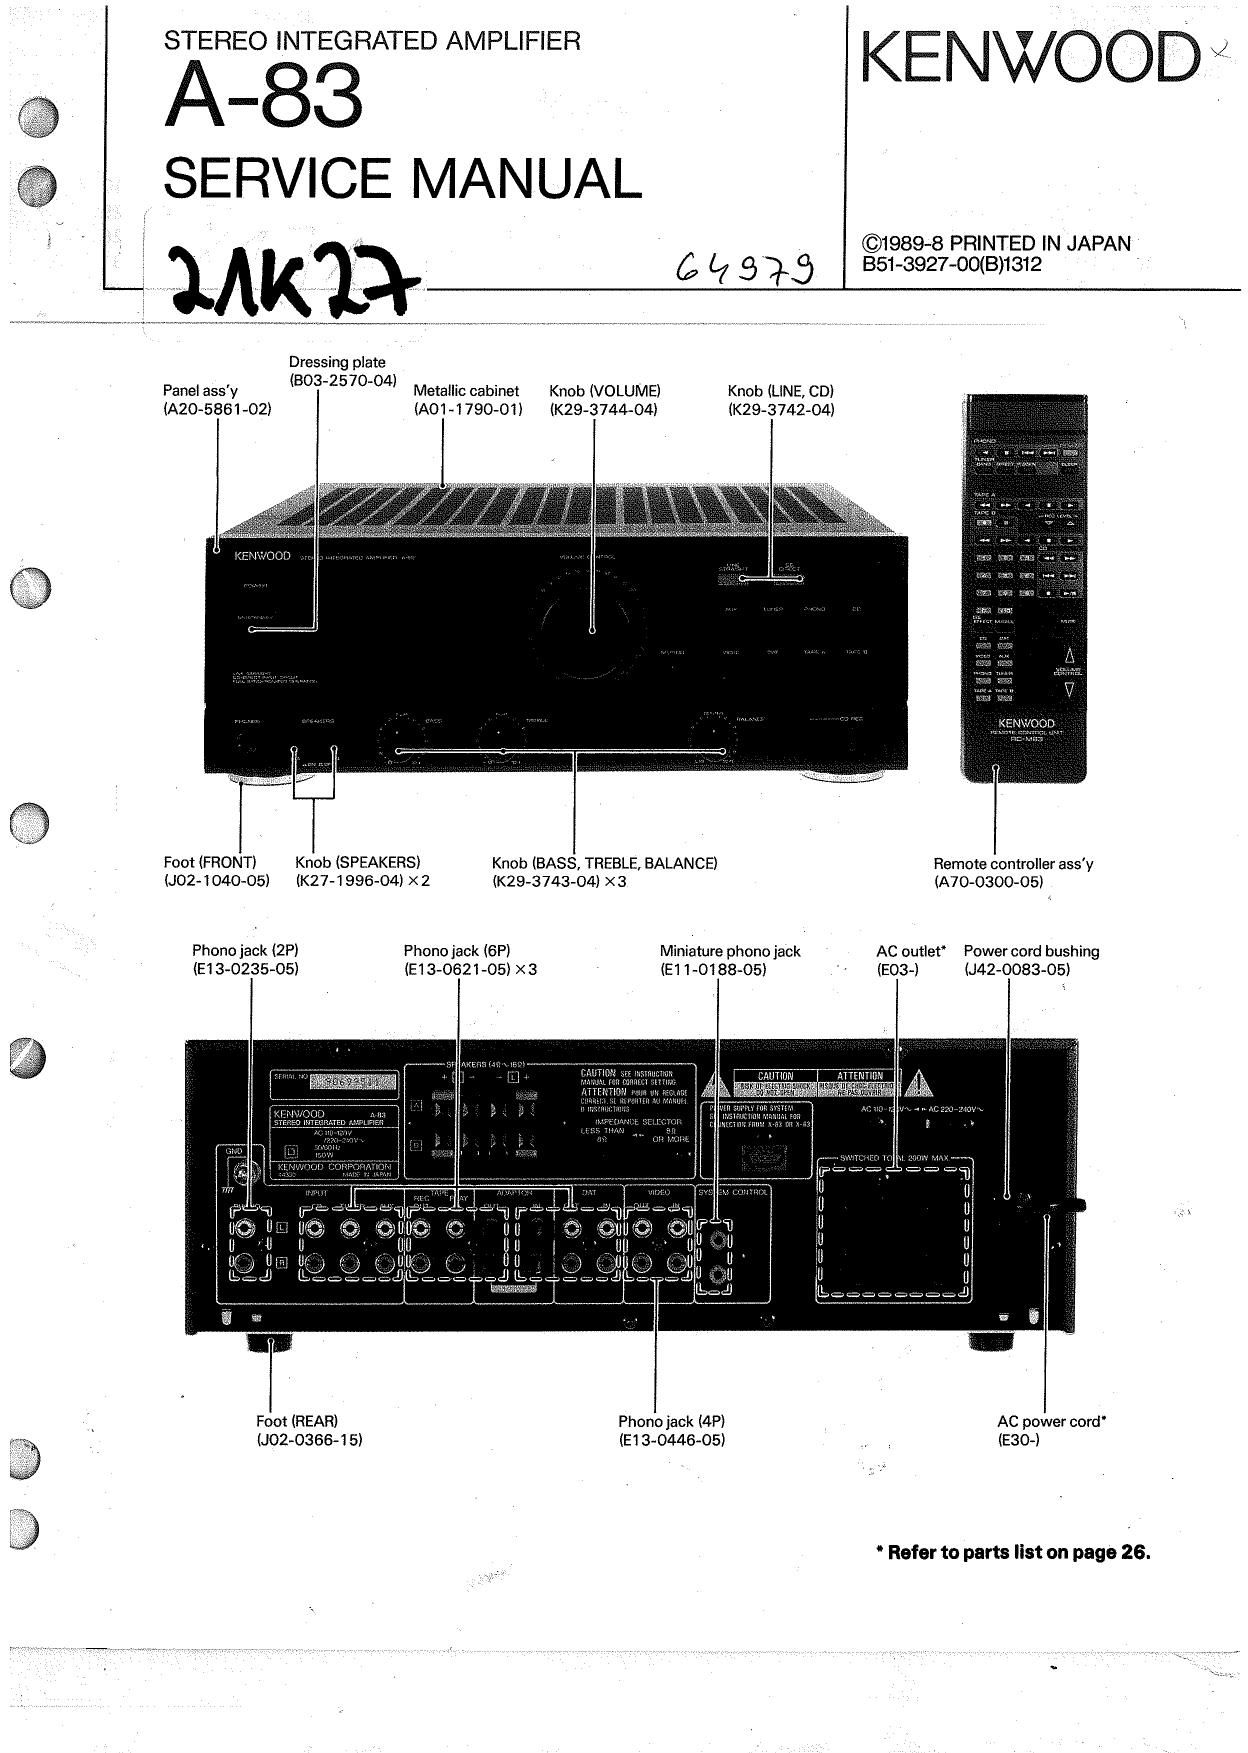
Dressing plate

Panelass'y (BO3-2570~04) MetaIIiccabinet KnobIVOLUME) Knob (LINE,CDI

IA20»5861-02I (A01 -I 790~01) IK29-3744-04) (K29-3742-04)


Foot (FRONT) Knob (SPEAKERS) Knob (BASS, TREBLE. BALANCE) Remote controller assy
(J02-1040-05) (K27-1996-04) X 2 (K294374304) X 3 (A70-0300-05I

Phonojack (2P) Phonojack (6P) Miniature phonojack AC outIet Power cord bushing
(E13-O235-05) (E13-0621-05) X 3 (E1 10188-05) 0303-) 420083-053

w
'?

Foot (REAR) Phono jack (4?) AC power cord
(J02-0368-15) (E130446-05) . (E30-I

Refer to parts list on page 26.

Page 2

A-83

CONTENTS

DISASSEMBLY FOR REPAIR ......................... 2

BLOCK LEVEL DIAGRAM..
CIRCUIT DESCRIPTION ..., ...........
ADJUSTMENT/REGLAGE/ABGLEICH.
PC BOARD ..........................................


4
..5
8

9

SCHEMATIC DIAGRAM ............................ 17
EXPLODED VIEW .................................. 25
PARTS LIST .............. .. . . 26
SYSTEM CONNECTIONS. ........... 31
SPECIFICATIONS ......................... Back cover

DISASSEMBLY FOR REPAIR

Remove the case prior to the following operations.
Cut the five catches 0 .

To put the bottom board back into place after repair-
ing, turn the bottom board 180° and hook the claws
into place as shown hereunder e .

Fix down the bottom board with the two screws 9 .

1.
2.

4. Draw out the four knobs o from their respective K.)

shafts.

5. Remove the five screws 6 of the front paneI, then

take out the front panel in the direction of the arrow,

6.

A-83

DISASSEMBLY FOR REPAIR

Remove the four screws 0 fixing the PC board.

Remove the three screws 0 fixing the subpanel.
Remove the two screws 0 fixing the PC board.
Remove the three nuts 9 fixing the PC board.

Draw out the two knobs ® from their respective
shafts.

. As shown hereunder, remove the screw and undo the

catches, then detach the PC board @ .

12. Remove the two screws @ from the rear panel, then
detach the PC board. (M TYPE only)
, 13. Remove the four screws Q from the rear panel, then
detach the PC board.

14. Remove the two screws w from the rear panel.
15. Remove the seven screws 9 fixing the PC board.