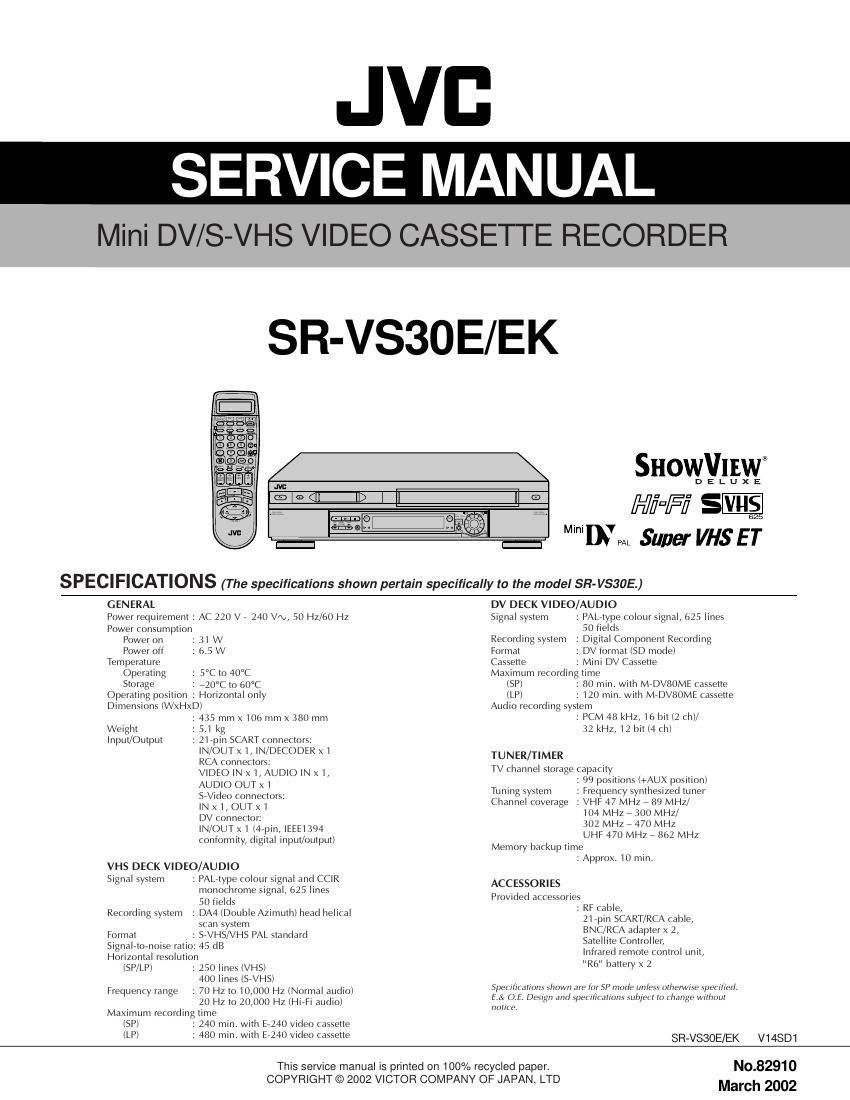
Jvc SRVS 30 E Service Manual

This is the 136 pages manual for Jvc SRVS 30 E Service Manual.
Read or download the pdf for free. If you want to contribute, please mail your pdfs to info@audioservicemanuals.com.

Page: 1 / 136
left right
Jvc SRVS 30 E Service Manual

Extracted text from Jvc SRVS 30 E Service Manual (Ocr-read)


Page 3

TABLE OF CONTENTS

Section Title Page
Important Safety Precautions
INSTRUCHONS

1. DISASSEMBLY
1.1 HOW TO REMOVE THE MAJOR PARTS
1.1. 1 Introduction

HOW TO READ T
DISCONNECTION OF CONNECTORS WIRES
HOW TO REMOVE THE MAJOR PART <00
1 DIsassembly flow chart ......
.2 Disassemny/assemoly me
OW TO REMOVE THE MAJOR PARTS .1 Disassembly flow chart
DisassembNI (assem

VE THE AJOR PARTS
DIsassemny flow chart ......
ODIsassemIqu/assemoly method .
ERVICE POSITIONS
.1 Requirement PATCH CORDS
.2 SeIVIce position
.3 Service posItIon .4 ServIce position .


dIIIwIIIIWQIImIImIIb-w-N

Adamo
mo

memm mm mm e?
m:b§N I

i RCU mode.

Selling the Jig RCU mode.
I2 Settin the User RCU mode
MECHA ISM SERVICE MODE
.1 How to set the MECHANISM SERVICE MODE .
MERGENCY DISPLAY FUNCTION.

.1 Displayinaqthe emergenc intormation.
.2 ClearIng e emergency istpry.

.3 Emergency content descrrption

III; Emergency detail informatIon <1
0

g L;;;;
m IIIII

Emergency deIaII information <2>

HANISM ADJUSTMENT VHS
BEFORE STARTING REPAI
Precautfons

NN

NNNN NNNN NNNNNNNNNNN N-NNNNNNI'

NNNN NNNN NNNNNNNNNNN N

ADJUSTMENT

.1
.2 Checking for Proper Mechanical O erations
.3 Manuall HemoVIng the Cassefle ape .
.4J Mgs an Tools Required torAdjustment.
.5 aintenance and Inspection.
REPLACEMENT OF MAJOR PARTS
Betore Starting Disassembling
Phase maichin gflbeiween me%hanical parts)..
ow to Set theT/I echanism Assembling Mode"
Cassette Holder Assembly
Prnch FIoIIer Arm Assemb
Gurde Arm Assembly and
Audio ConIrol Head
Loading Motor
Ca stan Motor
Po oe Base Assem y (supp y or ta e up sI e
Rotary Encoder
Clutch UnIt..
Change LevIeIr
and Coupling Gear
LInk Lever.
Cassette G
IEonérol FAIIIIeG I k 'd )
0a In rrn ear su or Ia e u SI e
and Logding Arm Gearpghsafl I:
Take up Lever Take up Head and Control Plate Guide.
Ca stan Brake Assembl
Su Brake Assembly( (ta eII Iup
MaIn Brake Assemny take up side)
Reel Drsk take up sId e
and Main rake Assem IYRS upply side) ......
2.1 Tension Brake Assembl eel DIsk( (supply side)
and Tension Arm Assem Iy
.2 Idler Lever Idler Arm Assembly.
.3SIatorAssembl y
.4 RoiorAssemny
.5 Oldgner Drum Assembl
ATIBILITY ADJUS MENT.
ICheckinE/Adjustment of FM Wav any!
Checklng/ dIustIrIenI 01 lbs Hei III and TlItloiilIIem Audio Control ea
.CheckiIIg/Ad ustment dithe udio Control Head Phase (X Value)
.Checking/ d' ustment of the Standard Tracking Prese
.Checking/AI ustment of the Tension Pole PosItIon"

ANISM ADJUSTMENT (DV)
EPARATION
Precautions.
Tools RequIrIed tor Adjustments
Disassembly and AssembI Procedures
Screws and Washers Use in Disasslembly/
Assembl of the Mechanism Ass sbem
IISASSEMBL /ASSEMBLY OF THE MECHAI SINI ASSEMBLY
Introduction.
Mechanism MIo des
IECHANISM TIMING CHART
ECHANISM ASSEMBLY/IADIBSIAYSSEMBLY PROCEDURE TABLE
ISASSEMBLY/ASSEM ......
IS T OF PROCEDURES IFOR DISASSEMBLY
MECHANISM PHASE CHECK/ADJUSTMENT
MECHANISM DISASSEMBLY/ASSEMBLY SHEE

_._._.o ooemoooooomee onaN-K-K-K-K

2.

Press Lever Assembly

---4

NNNN NNNN w

owmu mmow NOo
mmwN

'm__t_. IIII

mmuummmpppe La

NNN
NNNNNN


NNNNNNNNNN N
mmwwmwNNNN N
8N

NNN

ME

1:0

wmmNNNNNNN NNNN

S'wN-II: mph-1N-

puop

N

mugggflu

I.
mmbmAm-A-o oooo

mmmm m
jgbbo'xi'mNNLn .N.N.N.N';>
www'vww NNNN

Secfion Tme Page

POSITIONING THE TENSION POLE
OMPATIBILITY AND ERROR RATE
Preparation.
IAdjustmen
LInearIty adjustment.
PB switchin point adjustmen
Error rate a justrnent

Error rate measuring mIeIhcd
PE EJECTION..

CTRICAL ADJUSTMENT (VHS)
ECAUTION

Required tesIII equipments
Required adjustment tools
olor (colour) bar signal Color (colour) bar patiern
witch settings and standard precauilons
VR Ad' ustment
VO CI CUIT
Iwitchingkpoin .
EIowirac CLIJIIIII' pr

IR
EC color colour) level
i deo EQC(meR uency re IPI
TUO PIC InItial se Ing.
IO CIRCUIT

SCON CIRCUITI
TImer clock..

ELECTRICALT ADJUSTMENT (DV)
3. PRE ION

NN


..NNNNNN'I.
LIIIIIINN
Nwwwpzpzo

mouszA

i

.EL

wwN
m

CID

mammgamgg
VJUJIITIUJ

E

oI

Uo> ITI
"'1
<_

50
<
9%

WIBWWIWPIWWWW

.51


..6 1 Precautions
..6 2 Equlpmeni required for adIustment
..6 3 Tools required for adjustments
..6 4 Set up..

HARTS AND DIAGRAMS

ES OF SCHEMATIC DIAGRAM.
UIT BOARD NOT E.S
OARD INTER ONNEICI

AIN VIDEO/AUDOIOEI SCHEMATIC DIAGRAM
UNER SCH MATIC DIAGRAM ,

N ( IDEO l/ & SUB EMPHA SCH
IAINéAUDIO I/O SCHEMATI DIAGRAM.

WQWWW
mmmmw

O

9g.-
Ea

mm
é
a
o
E
z
m
rJD
mom
c
5;"
H
O
I
w
o
I

§§§§§§

222
22
<
I
(I)
V)
<
VJ
Z
w
o
I
ITI

1
o
E
>
a
I
>

AIN CONNEC ION SCHEMATIC DIAGRAM
DI ITAL/2M SCH MATIC DIAGRA .....

ERMINAL S SUB) SCHEMATIC DIAGRAM
RMINAL IT/O)R S HEMATIC DIAGRAM

OD RSCHEMATIC DIAGRAM.

m
wuaac
0mm
5;
mg
330
mg
5,9
m
NE
Egg
in
>17
;
<
)>
z
0
IL
£0
£0
EU:
a
I
rn
E
:I
o.
E
)>
o
:n
)>
g

S
MAIN SCHEEMATIC DIAGRAAMI
l/O SCHEMATIC DIAGRAM
VOUT SCHEMATIC DIAGRAM .
PRE/REC ESCHEMAJIC DIAGRAM

<<<<<<

ggUUZUUU
>1;
cm
90
00:
)1
9m
DE
)2;
VJ-I
05
IS
rrI_
§$
III
0;
9;
>5
{5'
II
)>
E

AlNéONO SCREEN) SCHEMATIC DIAGRA
REM TE CONTROL SCHEMATIC DIAGRAM
SWITCHING REGULATOR CIRCUIT BOARD
MAIN CIRCUIT BOA

3D DIGITAL/2M CIRCUITI
DEMODULATOFI POWER SW SW/DISF
TERMINAL CIRCUIT BOARD

DV MAIN CIRCUIT BOARD

TS
FDP GRID ASSIGNMENT AND ANODE CONNECTION
CPU PIN FU NCTIO
SYSTEM CONTROL BLOCK DIAGRAM (VHS)
VIDEO BLOCK DIAGRAM(VHS
AUDIOE BLOCK DIAGRAM (VI-l

mum:mmmmLaNNNNNNNNNNA-AAALLLAAmmubhkmNA

\lmUibwm-OmmflmmemN-meflmmwa-O


mpigiyiyigiuu beeeebbeeeeebbeee$>>>bt~>eebbt~t~>ebbbeee

SS OCNTROL BLOCK DI GRAM (DV) 4769
VIDEO BLOCK DIAGRAM (DV).. 4771
.PARTS LIST

.1 PACKING AND ACCESSORY ASSEMBLY 571
.2 FINAL ASS .3 MECHANISM ASSEMBLYI IVHS) 574
.4 MECHANISM ASSEMBLY DV) 576
.5 ELECTRICAL PARTS LIST.. 5 8
W REGULATOR BOARD ASSE 8
MAIN BOARD ASSEMBLY <03>. 9
3D DIGITAL/2M BOARD ASSEMBLI 7
TERMINAL BOARD ASSEMBLY <06> 9
AUDIO CONTROL HEAD BOARD AS , 0
DEMOD BOARD ASSEMBLY <14> ,20
OW SW BOARD S ,21
SW/DISPLAY BOARD ASSBEMELY :28 ,21
DV MAIN BOARD ASSEM 5722
LOADING MOTOR BOARD ASSEMBLY <55> 5727

JOG BOARD ASSEMBLY <85>..

The following table lists the differing points between models SR-VSSOEK and SR-VS30E.

EM MODEL SR-VS3DEK sn-vssoI-z

POWERPLUG SHNKXASSH) GEEKIAsmn

VIDEO SYSTEM PAL/NTSC ON PAL TV PAL/MESECAMIMANUAL)/NTSC ON PAL TV
BROADCAanGsTANDARD we DM
STEREODECODER NmAM NwAmmz

VCR PLUS+ VIDEO PLUS+ DELUXE SHOWVIEW DELUXE
LANGUAGEUMTMLHONSCREENDSPLAW ENGUSH IoLANGUAcEIa

Page 8

1.4 HOW TO REMOVE THE MAJOR PARTS

1.4.1 Disassembly flow chart

This flowchart shows the disassembly procedure for the ex-
terior parts and electrical parts.
Basically, reverse this procedure when assembling them.

[1] I Top cover, Bracket I

[2] I Front panel assembly I

SW/Display board assembly, Power SW board assembly,
[3] Jog board assembly
t

[4] | sw REG board assembly I

[5] IFoot assembly, Foot(center), Foot(rear), Bottom cover I

1.4.2 Disassembly/assembly method

Step/ . .
Lac No. Part name Fig. No. Point Note
TPPEEJY?! ,,,,,,,,, 4i?! @2:?£$1b). ..
[1] Bracket CON 2(S1c)
[2] Front panel COM2 8(L2a), assembly CN7510(WR2a), 2b, 2c,2d>

CN3011(WR2b)
[31 $Wlil§vlarb9§iia§semfili COW 863a)

Power SW board ass ,bJY, gt$§ -
Jog board assembly 2(83c),Knob(Jog)

[4] SW REG board COM4 4(S4a),
assembly CN5322(WR4a),

CN5321(WR4b),
CN5325(WR4c),

CN5324(WR4d),
CN5323(WR4e)
[5] 999%? ,,,,,,,,,,, COM5 (.35?) ,,,,,,,,,,,
Foot assembly 5(L5a)
Foot(center)
F99Itr§§ri ,,,,,,,,,,,,,,,,,,,,,,,,,
Bottom cover 4(L5b), 9(L5c),
2(L5d)

- When attaching the FPC, be sure to connect it in the cor»
rect orientation.
- When attaching the PFC take care that it is not caught.
- When removing or attaching the WIRE/FPO. refer to "1.7
CONNECTION"(page 1-8) at same time.

When attaching the Front panel assembly, make sure that
the door openers of both decks (DV, VHS) are in the down
position.

When attaching the Front panel assembly. be careful not
to damage the DV terminals.

When attaching (WR2a) and (WR2b), insert supporting
long side to connector in the Main board assembly.

When attaching Jog board assembly. attach it before SW/
Display board assembly.

When removing Bottom cover, remove it after VHS sec-
tion parts and DV section parts.

1-2

[1] Top cover

Fig. com

DV SIDE

(L2a)

DV terminalsI

,,,(WR2a)
I
. (L23)
(L2a)


[2] Front panel assembly

Fig. COM2

Page 17

1.8.4 Service position

(1) Remove the top cover and bracket.

(2) Remove the front panel assembly.

(3) Remove the Base(DV) together with DV Mechanism as-
sembly and DV Main board assembly.

(4) Remove the DV Mechanism assembly and DV Main
board assembly from Base(DV).

Note:

Take care not to damage the parts during operating.

< Installation >

(1) Place a DV Main board assembly on the Bottom chas-
sis.

(2) Place an insulation sheet on the rear side of DV Main
board assembly.

(3) Place a DV Mechanism assembly on the insulation sheet.

Note:

- Confirm that DV Mechanism assembly be getting on on

the insulation sheet completely.

(4) Connect PATCH CORD to the connector(CN1502) and
connect FPC from DV Mechanism assembly.(reter to Fig.
1-8-3)

(5) Connect other FPCs and wires to the connector that cor-
responds each.(reter to "1-7 CONNECTION")

For the PATCH CORD is required, see Table 1-8-1.

Note:

- Confirm that FPCs and wires are not unconnected from

the connectors(especially CN4001).

DV Mechanism

Hill

A
ill-guilt

err/£21:


Insulation Sheet


CN4001

l
l

DV Main boaiu
assembly

)

CN7001 CN7191

Front panel assembly

Fig. 1-8-3

1.9 Jig RCU mode

This unit uses the following two modes for receiving remote
control codes.
1) User RCU mode : Ordinary mode for use by the user.
2) Jig RCU mode : Mode for use in production and serv-
icing.
When using the Jig RCU, it is required to set the VCR to the Jig
RCU mode (the mode in which codes from the Jig RCU can be
received). As both of the above two modes are stored in the
EEPROM, it is required to set the VCR back to the User RCU
mode each time that an adjustment is made or to check that the
necessary operations have been completed. These modes can be
set by the operations described below.

1.9.1 Setting the Jig RCU mode

(1) Unplug the power cord plug from the power outlet.

(2) Press and hold the REC and PAUSE" buttons on the
VCR simultaneously, while plugging the power cord plug
into the power outlet.

When the VCR is set to the Jig RCU mode, the symbols
( : ) in the time display of the FDP are turned off.

1.9.2 Setting the User RCU mode

(1) Turn off the power.

(2) Press the REC and PAUSE buttons of the VCR simul-
taneously. Alternatively, transmit the code 80" from the
Jig RCU.

Page 30

Nolches Guide hole Notch

Relay gear


Drive gear

Limit gear

Fig. 2-2-3i

2.2.4 Pinch roller arm assembly

1. How to remove

(1) Remove the spring from the hook of the press lever as-
sembly.

(2) Remove the slit washer and remove the pinch roller seat
2. (See Fig.2-2-4a.)

(3) Remove the pinch roller arm assembly by pulling it up.

Slit washer

Pinch roller seat2 %

Pinch roller arm
\ assembly
Press lever assembly

Pinch roller arm assembly

Fig. 2-2-4a

2.2.5 Guide arm assembly and press lever assembly

1. How to remove

(1) Remove the spring and expand the lug of the lid guide in
the arrow-indicated direction. Then remove the guide arm
assembly by pulling it up.

(2) Remove the press lever assembly by pulling it up. (See
Fig.2-2-5a.)

Press lever
assembly
© 0 W

, e, , Guide arm
assembly

Lid guide Lug

Fig. 2-2-5a

2.2.6 A/C head

1. How to remove

(1) Remove the two screws (A) and remove the A/C head
together with the head base.

(2) When replacing only the A/C head, remove the three
screws (B) while controlling the compression spring.

Head base

if, Screws(A)

A/C head new ,

3' "we, Compression
springs

A/C head board , l

assembly

cgkg

Headbase We, :a&
Q
Fig. 2-2-6b

2. How to install

(1) To make the post-installation adjustment easier, set the
temporary level as indicated in Fig.2-2-6c. Also make sure
that the screw center (centre) is brought into alignment
with the center (centre) position of the slot.


Head base
A/C head
/3crew
12.4 mm
+ Head base A/C head
Fig. 2-2-6c

2.2.7 Loading motor

1. How to remove

(1) Remove the belt wound around the worm gear.

(2) Open the two lugs of the motor guide and remove the
loading motor, loading motor board assembly and motor
guide altogether by pulling them up.

(3) When replacing the loading motor board assembly. take
care with the orientation of the loading motor. (Install so
that the loading motor label faces upward.)

(4) When the motor pulley has been replaced, choose the
fitting dimension as indicated in Fig.2-2-7a.

Page 43

2.5 DlSASSEMBLY/ASSEMBLY OF THE MECHANISM
ASSEMBLY

2.5.1 Introduction

The disassembly and assembly of the mechanism assem-
bly should usually be performed in the ASSEMBLY mode.
(Table 2-5-1)

Note that the mechanism is in the cassette in (C-IN) mode
when the mechanism assembly is taken out of the set and
that the C-IN mode should be switched to the ASSEMBLY
mode in this case.

To set the ASSEMBLY mode, apply 3 V DC to the electrodes
on the upper part of the loading motor as shown in Fig. 2-5-

MODE

PARTS

LOADlNG END

l

Z

ROTARY a
ENCORDER L2»

R ENC

Table 2-54

2.5.2 Mechanism Modes

The mechanism has 6 modes as shown in Table 2-6-1. The
current mode can be confirmed by the positioning of the O "
marking on the sub-cam gear and the A" marking on the
mechanism

See the following figures (Figs. 25-1 to 6) for details.

Note:

- This mechanism assembly has another ASSEMBLY
made. However, this mode cannot be identified from the
markings because it corresponds to an intermediate po-
sition between the C-IN (©) mode and S-FF (©) mode.
This mode can be confirmed by the rotary encoder
phase. See Fig. 2-5-7.

1. Checking the mechanism mode

Fig. 2-5-2

Fig. 2-5-3

2-21

Page 50

5. © EXIT Guide Arm Assembly/ (9 Swing Arm Assembly

Fig. 2-8-5

6. ® Sub Deck Assembly/@Main Brake (Sup) Assembly/
@ Main Brake (Take up) Assembly

15
($2)

E

Fig. 2-8-6
2-28

: EXIT Guide Arm Assembly phase alignment.

EXIT Guide Arm Assembly

This protrusion is
combined to
the dent of CHARGE O
ARM ASS'Y.
Q
\
Charge Arm Assembly
TGeTaFaIiEtrheH - - - -

l EXIT Guide Arm
l Assembly

l Arm Gear 2
I Assembly

: When attaching the sub deck assembly, make
sure to adjust the phase of the control plate.

SPRING HOOKED

MAIN BRAKE(S) REVERSE-SIDE

Fig. 2-8-68