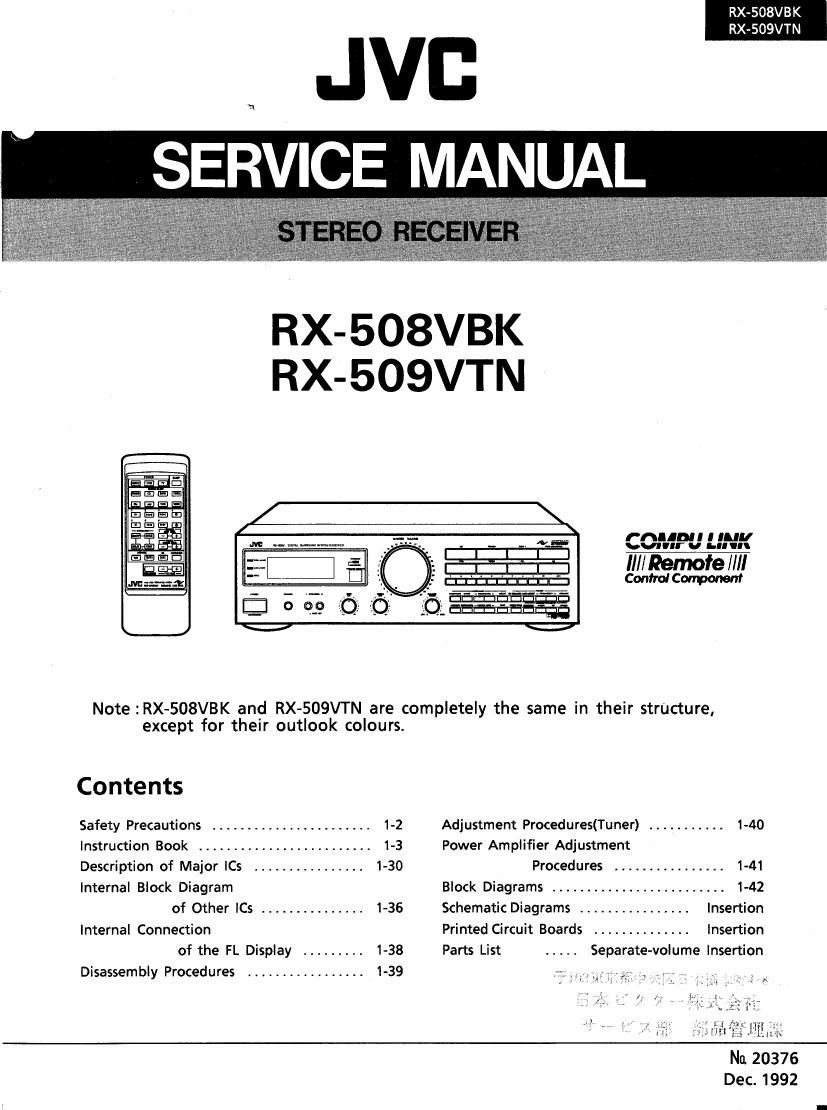
Jvc RX 509 VTN Service Manual

This is the 113 pages manual for Jvc RX 509 VTN Service Manual.
Read or download the pdf for free. If you want to contribute, please mail your pdfs to info@audioservicemanuals.com.

Page: 1 / 113
left right
Jvc RX 509 VTN Service Manual

Extracted text from Jvc RX 509 VTN Service Manual (Ocr-read)


Page 1

RX-SOBVBK
RX-509VTN

a JVB
SERVICE MANUAL

RX-508VBK
RX-509VTN

I'flllflll l lull
\pv-"r u b" In

Ill/ Remote llll
Confrol Component

Note :RX-508VBK and RX-509VTN are completely the same in their strueture,
except for their outlook colours.

Contents

Safety Precautions ....................... 1-2 Adjustment Procedures(Tuner) ........... 1-40

Instruction Book ......................... 1-3 Power Amplifier Adjustment

Description of Major le ................ 1-30 Procedures ................ 1-41

Internal Block Diagram Block Diagrams ......................... 1-42
of Other ICs ............... 1-36 Schematic Diagrams ................ Insertion

Internal Connection Printed Circuit Boards .............. insertion
of the FL Display ......... 1-38 Parts List Separate-volume Insertion

Disassembly Procedures ................. 1-39

IQ»:

Nu 20376
Dec. 1992

Page 2

RX-508VBK

RXv509VTN

a Safety Precautions

l. The design of this product contains special hardware and many circuits and components

specially for safety purposes. For continued protection, no changes should be made to the
original design unless authorized in writing by the manufacturer. Replacement parts must
be identical to those used in the original circuits. Services should be performed by
qualified personnel only.

.Alterations of the design or circuitry of the product should not be made. Any design

alterations of the product should not be made. Any design alterations or additions will
void the manufacturer's warranty and will further relieve the manufacture of responsibility
for personal injury or property damage resulting therefrom.

.Many electrical and mechanical parts in the products have special safety-related

characteristics. These characteristics are often not evident from visual inspection nor can
the protection afforded by them necessarily be obtained by using replacement components
rated for higher voltage, wattage, etc. Replacement parts which have these special safety
characteristics are identified in the Parts List of Service Manual. Electrical components
having such features are identified by shading on the schematics and by (AA) on the Parts
List in the Service Manual. The use of a substitute repalcement which does not have the
same safety characteristics as the recommended replacement parts shown in the Parts List of
Service Manual may create shock, fire, or other hazards.

.The leads in the products are routed and dressed with ties, clamps, tubings, barriers and

the like to be separated from live parts, high temperature parts, moving parts and/or sharp
edges for the prevention of electric shock and fire hazard. When service is required, the
original lead routing and dress should be observed, and it should be confirmed that they
have been returned to normal, after reuassembling.

. Leakage currnet check (Electrical shock hazard testing)

After re-assembling the product, always perform an isolation check on the exposed metal
parts of the product (antenna terminals, knobs, metal cabinet, screw heads, headphone jack,
contorl shafts, etc.) to be sure the product is safe to operate without danger of electrical
shock.

Do not use a line isolation transformer during this check.

0 Plug the AC line cord directly into the AC outlet Using a "Leakage Current Tester",
measure the leakage current from each exposed metal parts of the cabinet, particularily
any exposed metal part having a return path to the chassis, to a known good earth
ground. Any leakage current must not exceed 0.5mA AC (r.m.s.).

0 Alternate check method
Plug the AC line cord directly into the AC outlet. Use an AC voltmeter having, 1,000
ohms per volt or more sensitivity in the following manner. Connect a 1,5000 10 W
resistor paralleled by a 0.15 pF AC-type capacitor between an exposed metal part and a
known good earth ground. AC VOLTMETER

b

Measure the AC voltage across the resistor @ (Having 1000
with the AC voltmeter. Ohm/"5, . . .
Move the resistor connection to each exposed a 0. ° "we ens't'v'tn
metal part, particularly any exposed metal part
having a return path to the chassis, and 0.15,; AC TYPE
meausre the AC voltage across the resistor. - Place this
Now, reverse the plug in the AC outlet and M probe on
repeat each measurement. Any voltage 1500!) low >each eXPOSEd
measured must not exceed 0.75VAC (r.m.s.). meta'pm'
This corresponds to 0.5 mA AC (r.m.s.). Good Earth ground

- Warning

. This equipment has been designed and manufactured to meet international safety standards.
. It is the legal responsibility of the repairer to ensure that these safety standards are

maintained.

. Repairs must be made in accordance with the relevant safety standards.
. It is essential that safety critical components are replaced by approved parts.
. lf mains voltage selector is provided, check setting for local voltage.

1-2 (No. 20376)

Page 8

RX-508VBK

RX-509VTN
.
i
at
COMPU uNK-3 COMPU LINK»3 SYNCHRO jacks an the back of the receiver connect the COMPU LINK
Connections remote control system. This system connects other JVC audio components with the receiver

to make listening and recording more convenient, To use this system, attach the cables provided
with your IV C components to the COMPU LINK-3 SYNCHRO jacks on the rear panel of each
component, Then connect the cables to the receiver.

NOTES:

- COMPU LINK-3 is an upgraded versilm of COMPU LINK -I . If your equipment
provides COMPU LINK-I jacks, you can still connect your equipment, but slight
imperfections may result. Automatic Power ON/OFF, for example, may not always
fimction properly.

- Refer to page 24 for details about the COMPU LINK remote control system.

1
l
l

A CAUTION! Do not connect Tape Deck 2 to the COMPU LINK jacks. It may
cause the COMPU LINK system to malfunction.


CD PLAVER TAPEDECK I

TURNTABLE

t
i
t
t

other Audio Connections Use the socket on the back of the receivertoconnect the power supply of any audio components.
By pressing the POWER switch on the remote control, you can turn the receiver, and all

M omm- connected components, on or off at the same time
SWITCHED


m m In the United States, AC outlets have a capacity of 150 watts.

A CAUTION! Do not connect any components that consume more power than the
capacity oi the AC outlet This capacity is indicated below the socket on the
back at the receiver,

Page 6

1-8 (No. 20376)

Page 17

Receiving an AM/FM Broadcast

< FREDUENCV >

[:i:]

Manual Tuning

Automatic Tuning

FM MODEMUTE

[:1

To receive an AWFM broadcast, select either AM or FM using the AM button or FM button.
Then tune to the precise frequency using the FREQUENCY buttons.

Tuning

Tune to the frequency of a desired station using the FREQUENCY buttons. Pressing the right
button increases the frequency, and pressing the left button decreases the frequency. Tapping
the FREQUENCY button once changes the frequency in steps of 10 kHz for AM and 0. 1 MHz
for FM.

There are two tuning modes: Manual and Automatic.
If you know the frequency of a desired station, hold downthe FREQUENCY button to start the
frequency changing quickly. Release the FREQUENCY button near the desired station and tap
it repeatedly until you arrive at the correct frequencyi
If you want to scan frequencies for a desired station, hold down the FREQUENCY button to

start the frequency changing quickly, When you release the FREQUENCY button, the
frequency continues to change until it reaches a station.

When a station is correctly tuned, the TUNE " light appears on the display window,

Once a tuned frequency is preset, it can be directly recalled using the TUNER buttons. For
details, see pages 16-17,

NOTE: When you use automatic tuning, weak stations are ignored. To pick up weak
stations, use manual tuning.

IMPORTANT! if the receiver is tuned to a slaiion but the TUNED light does not
appear, try rotating the antenna for better reception.

Selecting an FM Reception Mode

Pressing the FM MODE/MUTE switch switches between these modes.

The MUTE-AUTO light appears in the display window. You hear either stereo sound or
monaural sound, depending on the broadcast If it is a stereo broadcast, the STEREO" light
appears, This mode is also useful for suppressing static noise" between stations.

The MUTE-AUTO light disappears. You hear monaural sound even if a broadcast is in
stereo. This mode is also useful when a stereo broadcast is noisy because of a weak signal.

NOTE: Using the Automatic Tuning mode, the sound ofa broadcast with a weak signal
may be muted. In this care, select the monauml mode.

Page 15

(No. 20376) 1-17

RX- 508VB K
RX-509VTN

Page 19

Automatic Presetting

Searching for a Preset

Station

'3

AUTO MEMORY

Cl

PRESET SCAN

C]

To use automatic presetting to preset up to 40 stations automatically, follow these steps:

Step 1 Press the SOURCE selector button to select AM or FM,

Step 2 Using the TUNING buttons, move to the lowest frequency from which you want
scanning to begin.

Step 3 Press the AUTO MEMORY button
The AUTO MEMORY light appears in the display window.

Step 4 Using the TUNER buttons, enter a channel number (1 through 40) to the first tuned
stations From that point, scanning starts and stations are assigned channel numbers
in ascending order,

IMPORTANT! You must enter the channel number while the AUTO MEMORY light
appears. If this light disappears before you enter the channel number, press the
AUTO MEMORY button again.

Frequencies are scanned in ascending order, When a station is tuned in, scanning stops and the
TUNED light and preset number appearr The station is preset about 4 seconds later and the
MEMORY" light appears, If you do not want to preset this station, press the AUTO
MEMORY button within 4 seconds. Scanning restarts without presetting that station,

When the MEMORY light disappears, scanning continues until one of the following occurs:

- Another station is tuned in
~ The upper limit of the tuning range is reached
v All 40 channel numbers have been assigned

When Auto Presetting is completed, the last preset station is received.

NOTE: To stop scanning at any time, press either TUNING button once,

When you lose the preset number of a desired station, use the Preset Scan function to find the
stations Follow these steps:
Step 1 Press the PRESET SCAN button,

The receiver runs upward in sequence through the preset channels. You will hear the
sound of each channel for 4 seconds while the corresponding channel number blinks.

Step 2 When you find the desired station, press the PRESET SCAN button again.
Scanning stops.

NOTE: Scanning ends when one cycle of 40 channels is completed The receiver
returns to the previous station,

Page 17

(No. 20376) 1-19

RX-508VBK
RX-509VTN

Page 95

PARTS LIST

Note : All printed circuit boards and its assemblies are not available as service parts.

Contents
General 'Exploded View and Parts List ............................................. 3-3
Printed Circuit Board Ass'y and Parts List .......................................... 3~7
I ENH-216 [:I Source Selector , Power Supply & Power Amplifier PC Board Assy .... 3 - 7
I END-090 E] Front & Power Primary PC Board Assy .............................. 3-11
IENP-044 El Surround PC Board Ass'y .......................................... 3-14
IENA-095. Tuner PC Board Assy ............................................. 3-16
Accessories List .......... _. ......................................................... 3-18
Packing Materials and Part Numbers ............................................... 3-19

RX-509VTN

(No,20376)3*1