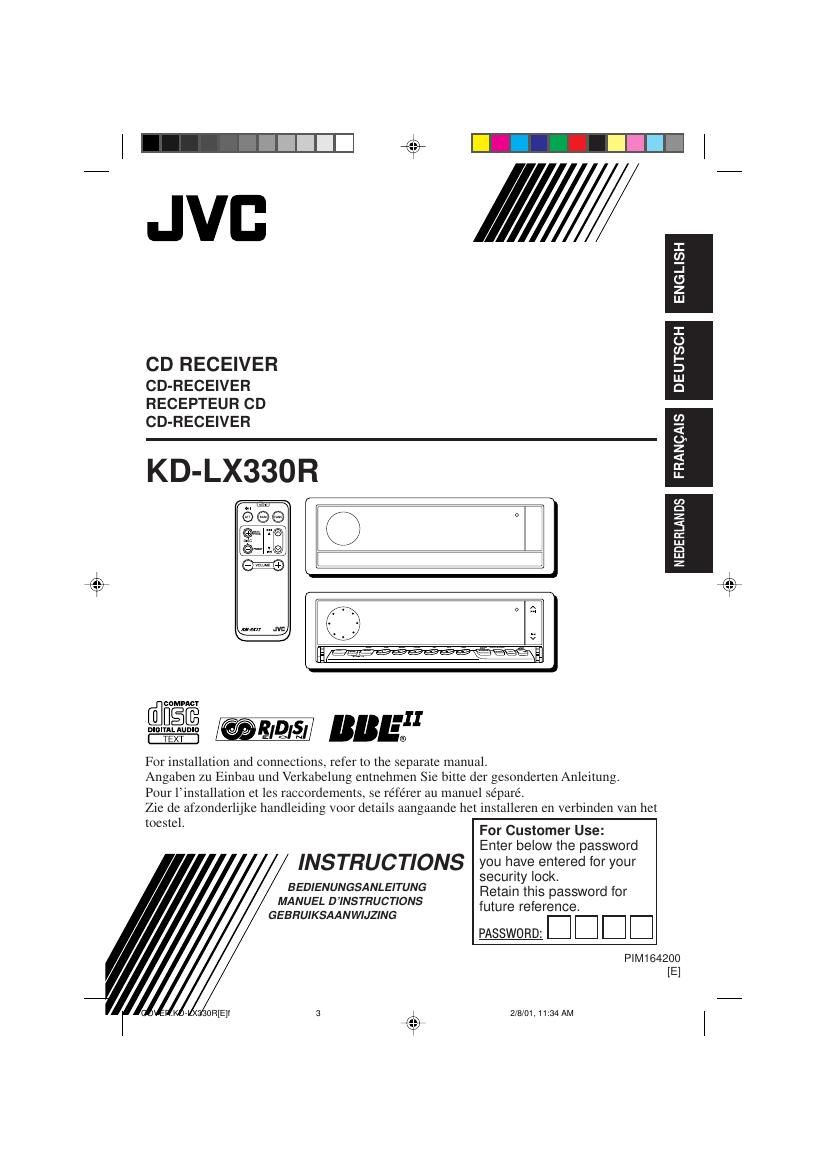
Jvc KDLX 330 R Owners Manual

This is the 88 pages manual for Jvc KDLX 330 R Owners Manual.
Read or download the pdf for free. If you want to contribute, please mail your pdfs to info@audioservicemanuals.com.

Page: 1 / 88
left right
Jvc KDLX 330 R Owners Manual

Extracted text from Jvc KDLX 330 R Owners Manual (Ocr-read)


Page 1

2 ENGLISH CAUTION on Volume Setting CDs produce very little noise compared with other sources. If the volume level is adjusted for the tuner, for example, the speakers may be damaged by the sudden increase in the output level. Therefore, lower the volume before playing a disc and adjust it as required during playback. How to reset your unit Press the reset button on the front panel using a ball-point pen or a similar tool. This will reset the built-in microcomputer. Note:Your preset adjustments Ñ such as preset channels or sound adjustments Ñ will also be erased. Position And Reproduction Of Labels IMPORTANT FOR LASER PRODUCTS Precautions:1. CLASS 1 LASER PRODUCT 2.CAUTION: Invisible laser radiation when open and interlock failed or defeated. Avoid direct exposure to beam. 3.CAUTION: Do not open the top cover. There are no user-serviceable parts inside. Leave all servicing to qualified service personnel. 4.CAUTION: This CD player uses invisible laser radiation and is equipped with safety switches to prevent radiation emission when unloading CDs. It is dangerous to defeat the safety switches. 5.CAUTION: Use of controls, adjustments or performance of procedures other than those specified herein may result in hazardous radiation exposure. Name/Rating plate Note: For security reasons, a numbered ID card is provided with this unit, and the same ID number is imprinted on the unitÕs chassis. Keep the card in a safe place, as it will help the authorities to identify your unit if stolen. Bottom panel of the main unit Caution: This product contains a laser component of higher laser class than Class 1. CLASS LASER1 PRODUCT CAUTION: Invisible laser radiation when open and interlock failed or defeated. AVOID DIRECT EXPOSURE TO BEAM. (e)ADVARSEL: Usynlig laser- stråling ved åbning, når sikkerhedsafbrydere er ude af funkti on. Undgåudsæt- telse for stråling. (d)VARNING: Osynlig laser- strålning när denna del är öppnad och spärren är urkopplad. Betrakta ej strålen. (s)VA RO : Avattaessa ja suojalukitus ohitettaessa olet alttiina näkymättö- mälle lasersäteilylle. Älä katso säteeseen. (f) EN02-03.KD-LX330R[E]f2/5/01, 10:15 AM 2

Page 2

3 ENGLISH Thank you for purchasing a JVC product. Please read all instructions carefully before operation, to ensure your complete understanding and to obtain the best possible performance from the unit. CONTENTS BEFORE USE*For safety....¥ Do not raise the volume level too much, as this will block outside sounds, making driving dangerous. ¥ Stop the car before performing any complicated operations.* Temperature inside the car....If you have parked the car for a long time in hot or cold weather, wait until the temperature in the car becomes normal before operating the unit. About the demonstration mode (DEMO MODE)... When shipped from the factory, ÒDEMO MODEÓ is set to ÒDEMO ONÓ in this unit. The demonstration will start automatically if no sound comes in for 3 minutes. (See page 26.) To activate the display demonstration manually While holding DISP, press ¢ until ÒDEMOÓ appears on the display. Various functions and display illumination modes equipped with this unit will be demonstrated repeatedly in sequence. During the display demonstration, ÒDEMOÓ flashes on the display. To turn off the display demonstration, press ¢ again for a few seconds while holding DISP. ¥ The display demonstration will turn off automatically after about 1 hour. OTHER MAIN FUNCTIONS ............... 22 Setting the clock ...................................... 22 Changing the general settings (PSM) ...... 22 Controlling the volume automatically (Audio Cruise) ....................................... 26 Assigning names to the sources .............. 28 Using the security lock .............................. 30 CD CHANGER OPERATIONS ............. 32 Playing CDs ............................................. 32 Selecting CD playback modes .................. 33 EXTERNAL COMPONENT OPERATIONS ... 35 Playing an external component ................ 35 Using a subwoofer ................................... 35 DAB TUNER OPERATIONS ............... 36 Tuning into an ensemble and one of the services ................................................. 36 Storing DAB services in memory ............. 37 Tuning into a preset DAB service ............. 38 What you can do more with DAB .............. 39 ADDITIONAL INFORMATION ............. 40 TROUBLESHOOTING ...................... 41 MAINTENANCE ............................ 42 Handling CDs .......................................... 42 SPECIFICATIONS .......................... 43 LOCATION OF THE BUTTONS ............ 4 Control panel ........................................... 4 Remote controller .................................... 5 Preparing the remote controller ................ 6 BASIC OPERATIONS ...................... 7 RADIO BASIC OPERATIONS ............. 8 Listening to the radio ................................ 8 Storing stations in memory ....................... 9 Tuning into a preset station ....................... 10 RDS OPERATIONS ........................ 11 What you can do with RDS EON .............. 11 Other convenient RDS functions and adjustments ........................................... 14 CD OPERATIONS .......................... 16 Playing a CD ............................................ 16 Locating a track or a particular portion on a CD ................................................. 17 Selecting CD playback modes .................. 17 Prohibiting CD ejection ............................. 18 Playing a CD Text .................................... 18 SOUND ADJUSTMENTS .................. 19 Adjusting the sound ................................. 19 Using the sound control memory ............. 20 Storing your own sound adjustments ....... 21 EN02-03.KD-LX330R[E]f2/5/01, 10:15 AM 3

Page 58

15 ENGLISH Changing the display mode while listening to an FM station You can change the initial indication on the display to either station name (PS NAME) or to station frequency (FREQUENCY), while listening to an FM RDS station. ¥ See also ÒChanging the general settings (PSM)Ó on page 22. 1Press and hold SEL (select) for more than 2 seconds so that one of the PSM items appears on the display. 2Press ¢ or 4 to select ÒTUNER DISPÓ (tuner display). 3Turn the control dial to set to the desired indication (ÒPS NAMEÓ or ÒFREQUENCYÓ). 4Press SEL (select) to finish the setting. Note:By pressing DISP, you can also change the display while listening to an FM RDS station. Each time you press the button, the following information appears on the display: ¥Then, the display goes back to the original indication in several seconds. Setting the T A volume level You can preset the volume level for TA Standby Reception. When a traffic programme is received, the volume level automatically changes to the preset level. ¥ See also ÒChanging the general settings (PSM)Ó on page 22. 1Press and hold SEL (select) for more than 2 seconds so that one of the PSM items appears on the display. 2Press ¢ or 4 to select ÒTA VOLÓ (TA volume). 3Turn the control dial to set to the desired volume. You can set it from ÒVOL 00Ó to ÒVOL 50.Ó 4Press SEL (select) to finish the setting. Automatic clock adjustment When shipped from the factory, the clock built in this unit is set to be readjusted automatically using the CT (Clock Time) data in the RDS signal. If you do not want to use automatic clock adjustment, follow the procedure below. ¥ See also ÒChanging the general settings (PSM)Ó on page 22. 1Press and hold SEL (select) for more than 2 seconds so that one of the PSM items appears on the display. 2Press ¢ or 4 to select ÒAUTO ADJ.Ó 3Turn the control dial to select ÒADJ OFF.Ó Now automatic clock adjustment is canceled. 4Press SEL (select) to finish the setting. To reactivate clock adjustment, repeat the same procedure and select ÒADJ ONÓ in step 3. Note:You must stay tuned to the same station for more than 2 minutes after setting ÒAUTO ADJÓ to ÒADJ ON.Ó Otherwise, the clock time will not be adjusted. (This is because the unit takes up to 2 minutes to capture the CT data in the RDS signal.) Station Frequency (FREQUENCY)Station name (PS NAME) Programme type (PTY) EN11-15.KD-LX110R[E]f2/6/01, 2:37 PM 15

Page 81

38 ENGLISH MAINTENANCE CAUTIONS:¥ Do not insert 8 cm CDs (single CDs) into the loading slot. (Such CDs cannot be ejected.) ¥ Do not insert any CD of unusual shape Ð like a heart or flower; otherwise, it will cause a malfunction. ¥ Do not expose CDs to direct sunlight or any heat source or place them in a place subject to high temperature and humidity. Do not leave them in a car. ¥ Do not use any solvent (for example, conventional record cleaner, spray, thinner, benzine, etc.) to clean CDs. Handling CDs This unit has been designed to reproduce the CDs bearing the following marks. You can play back your original CD-Rs (Recordable) and CD-RWs (Rewritable) on this receiver. This unit is not compatible with MP3. How to handle CDs When removing a CD from its case, press down the center holder of the case and lift the CD out, holding it by the edges. ¥ Always hold the CD by the edges. Do not touch its recording surface. When storing a CD into its case, gently inser t the CD around the center holder (with the printed surface facing up). ¥ Make sure to store CDs into the cases after use. To keep CDs clean A dirty CD may not play correctly. If a CD does become dirty, wipe it with a soft cloth in a straight line from center to edge. To play new CDs New CDs may have some rough spots around the inner and outer edges. If such a CD is used, this unit may reject the CD. To remove these rough spots, rub the edges with a pencil or ball-point pen, etc. About mistracking: Mistracking may result from driving on extremely rough roads. This does not damage the unit and the CD, but will be annoying. We recommend that you stop CD play while driving on such rough roads. Moisture condensation Moisture may condense on the lens inside the CD player in the following cases: ¥ After starting the heater in the car ¥ If it becomes very humid inside the car Should this occur, the CD player may malfunction. In this case, eject the CD and leave the unit turned on for a few hours until the moisture evaporates. When playing a CD-R or CD-RW User-edited CD-Rs (Recordable) and CD-RWs (Rewritable) can be played back only if they are already Òfinalized.Ó ¥ You can play back your original CD-Rs or CD- RWs recorded in music CD format. (However, they may not be played back depending on their characteristics or recording conditions.) ¥ Before playing back CD-Rs or CD-RWs, read their instructions or cautions carefully. ¥ Some CD-Rs or CD-RWs may not be played back on this unit because of their disc characteristics, damage or stain on them, or if the playerÕs lens is dirty. ¥ CD-Rs or CD-RWs are susceptible to high temperatures or high humidity; so do not leave them inside your car. ¥ CD-RWs may require a longer readout time. (This is caused by the fact that the reflectance of CD-RWs is lower than for regular CDs.) COMPACT DIGITAL AUDIO Center holder EN32-39.KD-LX110R[E]f2/6/01, 2:33 PM 38

Page 87

B3A3 A1 A2 A4 B4B1 B2 * * * * INPUT RL LINE OUT (FRONT) LINE OUT (REAR) L R L R L R INPUT RL L R RL RL PRECAUTIONS on power supply and speaker connections: ¥DO NOT connect the speaker leads of the power cord to the car battery; otherwise, the unit will be seriously damaged. ¥ Connect the black lead (ground), yellow lead (to car battery, constant 12 V), and red lead (to an accessory terminal) correctly. ¥ BEFORE connecting the speaker leads of the power cord to the speakers, check the speaker wiring in your car. Ð If the speaker wiring in your car is as illustrated in Fig. 1 and Fig. 2 below, DO NOT connect the unit using that original speaker wiring. If you do, the unit will be seriously damaged. Redo the speaker wiring so that you can connect the unit to the speakers as illustrated in Fig. 3. Ð If the speaker wiring in your car is as illustrated in Fig. 3, you can connect the unit using the original speaker wiring in your car. Ð If you are not sure of the speaker wiring of your car, consult your JVC IN-CAR ENTERTAINMENT dealer. VORSICHTSMASSREGELN beim Anschlie§en der Stromversorgung und Lautsprecher: ¥Die Lautsprecherleitungen des Netzkabels NICHT an der Autobatterie anschlie§en, da sonst das GerŠt schwer beschŠdigt wird. ¥ Die schwarze Leitung (Erdung), die gelbe Leitung (zur Autobatterie, konstant 12 V) und die rote Leitung (zur Zubehšranschlu§klemme) richtig anschlie§en. ¥ VOR dem Anschlie§en der Lautsprecherleitungen des Spannunsgversorgungskabels an die Lautsprecher, die Lautsprecherverdrahtung in Ihrem Auto ŸberprŸfen. ÐIst die Lautsprecherverdrahtung wie unten in ÒFig. 1Ó und ÒFig. 2Ó abgebildet, das GerŠt NICHT mit der Originalverdrahtung der Lautsprecher anschlie§en, da sonst das GerŠt schwer beschŠdigt wird. Die Lautsprecherverdrahtung erneuern, so da§ Sie das GerŠt an den Lautsprechern wie in ÒFig. 3Ó abgebildet anschlie§en kšnnen. ÐIst die Lautsprecherverdrahtung in Ihrem Auto wie in ÒFig. 3Ó abgebildet, kšnnen Sie das GerŠt mit der Originalverdrahtung der Lautsprecher in Ihrem Auto anschlie§en. Ð Sind Sie sich Ÿber die Lautsprecherverdrahtung in Ihrem Auto nicht sicher, wenden Sie sich an Ihren AutohŠndler. PRECAUTIONS sur lÕalimentation et la connexion des enceintes: ¥NE CONNECTEZ PAS les fils dÕenceintes du cordon dÕalimentation ˆ la batterie; sinon, lÕappareil serait sŽrieusement endommagŽ. ¥ Connectez correctement le fil noir (a la masse), le fil jaune (a la batterie de la voiture,12 V constant) et le fil rouge (ˆ la prise accessoire). ¥AVANT de connecter les fils dÕenceintes du cordon dÕalimentation aux enceintes, vŽrifiez le c-blage des enceintes de votre voiture. Ð Si le c-blage des enceintes de votre voiture est comme montrŽ sur la Fig. 1 ou Fig. 2 ci-dessous, NE CONNECTEZ PAS lÕappareil en utiliscant ce c-blage original des enceintes. Si vous le faites, lÕappareil sera sŽrieusement endommagŽ. Recommencez le c-blage des enceintes de faon que vous puissiez connecter lÕappareil aux enceintes comme montrŽ sur la Fig. 3. Ð Si le c-blage des enceintes de votre voiture est comme montrŽ sur la Fig. 3, vous pouvez connecter lÕappareil en utiliscant ce c-blage original dÕenceintes pour votre voiture. Ð Si vous nÕtes pas sžrs du c-blage dÕenceintes de votre voiture, consulter le concessionnaire de votre voiture. VOORZORGSMAATREGELEN bij het verbinden van de stroomkabeldraad met de speakers: ¥Verbind de speakerdraden van de stroomkabel NIET met de accu van de auto; als u dit wel doet, zal het apparaat ernstige schade oplopen. ¥ Sluit de zwarte draad (aarde), de gele draad (naar de accu van de auto, constant 12 V) en de rode draad ( naar de aansluitklem van de accessoire ) op de juiste wijze aan. ¥ VOORDAT u de speakerdraden van de stroomkabel met de speakers verbindt, moet u de bedrading van de speakers in uw auto controleren. ÐAls de bedrading van de speakers eruitziet zoals hieronder staat afgebeeld in Fig. 1 en Fig. 2, mag het apparaat NIET worden aangesloten met behulp van deze oorspronkelijke speakerbedrading. Als u dat wel doet, zal het apparaat ernstige schade oplopen. Pas de bedrading van de speakers aan, zodat u het apparaat met de speakers kunt verbinden, zoals staat afgebeeld in Fig. 3. Ð Als de bedrading van de speakers eruitziet zoals staat afgebeeld in Fig. 3, kunt u het apparaat aansluiten met behulp van de oorspronkelijke speakerbedrading in uw auto. Ð Als u twijfels hebt over de speakerbedrading in uw auto, moet u contact opnemen met uw autodealer. You can connect an amplifier and other equipment to upgrade your car stereo system. ¥ Connect the remote lead (blue with white stripe) to the remote lead of the other equipment so that it can be controlled through this unit. ¥ For amplifier only: Ð Connect this unitÕs line-out terminals to the amplifierÕs line-in terminals. Ð Disconnect the speakers from this unit, connect them to the amplifier. Leave the speaker leads of this unit unused. Ð For KD-LX330R only: The line output level of this unit is kept high to maintain the hi-fi sounds reproduced from this unit. When connecting an external amplifier to this unit, turn down the gain control on the external amplifier to obtain the best performance from this unit.Sie kšnnen einen VerstŠrker oder ein anderes GerŠt anschlie§en, um Ihre Autostereoanlage zu erweitern. ¥Schlie§en Sie das Fernbedienungskabel (blau mit wei§em Streifen) an das Fernbedienungskabel des anderen GerŠts an, so da§ es Ÿber dieses GerŠt gesteuert werden kann. ¥Nur fŸr den VerstŠrker: Ð Die Anschlu§klemmen am Ausgang dieses GerŠt an den Anschlu§klemmen des Eingangs des VerstŠrkers anschlie§en. Ð Die Lautsprecher von diesem GerŠt abtrennen und am VerstŠrker anschlie§en. Die Lautsprecherleitungen dieses GerŠts unbenutzt lassen. Ð Nur fŸr den KD-LX330R: Der Ausgangspegel dieses GerŠts wird auf einem hohen Wert gehalten, um den Hifi-Klang zu unterstŸtzen, den dieses GerŠt reproduziert. Wenn Sie einen externen VerstŠrker an dieses GerŠt anschlie§en, stellen Sie den VerstŠrkungsregler des externen VerstŠrkers herunter, um die bestmšgliche Leistung dieses GerŠts zu erzielen. Vous pouvez connecter un amplificateur ou autre appareil pour amŽliorer votre systme autoradio. ¥Connectez le fil de commande ˆ distance (bleu avec bande blanche) au fil de commande ˆ distance de lÕautre appareil de faon quÕil puisse tre commandŽ via cet appareil. ¥Pour lÕamplificateur seulement: Ð Raccorder les bornes de sortie ligne de cet appareil aux bornes dÕentrŽe ligne de lÕamplificateur. Ð DŽconnectez les enceintes de cet appareil et connectez-les ˆ lÕamplificateur. Laissez les fils dÕenceintes de cet appareil inutilisŽs. Ð Pour le KD-LX330R seulement: Le niveau de sortie de ligne de cet appareil est maintenu ˆ un niveau ŽlevŽ pour maintenir une qualitŽ Hi-Fi pour les sons reproduits par cet appareil. Lors de la connexion dÕun amplificateur extŽrieur ˆ cet appareil, diminuez le rŽglage du gain sur lÕamplificateur extŽrieur pour obtenir les meilleures performances de cet appareil. Het is mogelijk om uw autostereosysteem uit te breiden met een versterker of andere apparatuur. ¥ Verbind de externe kabel (blauw met witte streep) met de externe kabel van het andere apparatuur zodat deze op afstand vanaf deze apparaat kan worden bediend. ¥ Alleen voor een versterker: Ð Verbind de uitgang van het apparaat met de ingang van de versterker. Ð Koppel de speakers van dit apparaat los en verbind ze aan de versterker. Ð Alleen voor KD-LX330R: Het uitgangsniveau van het geluid is hoog om het hifi-geluid van deze eenheid te behouden. Wanneer u een extern apparaat op deze eenheid aansluit, moet u erop letten dat u de versterkingsfactor van de externe versterker laag houdt, zodat deze eenheid de beste prestaties levert. CConnections Adding Other Equipment / AnschlŸsse zum HinzufŸgen von anderer AusrŸstung / Raccordement pour ajouter dÕautres appareils / Aansluitingen voor het toevoegen van andere apparatuur Amplifier / VerstŠrker / Amplificateur / Versterker Signal cord (not supplied with this unit) Einzelleitung (nicht mit diesem GerŠt mitgeliefert) Cordon de signal (non fourni avec cet appareil)Signaalkabel (wordt niet bij dit apparaat geleverd) You can connect a JVC CD changer and/or a JVC DAB (Digital Audio Broadcasting) tuner. ¥ For their connections, refer to the instructions supplied with them. Sie kšnnen einen CD-Wechsler und/oder einen DAB- Tuner (Tuner fŸr digitalen Rundfunk) von JVC anschlie§en. ¥Weitere Informationen Ÿber den Anschlu§ kšnnen Sie der Bedienungscanleitung entnehmen, die dem jeweiligen GerŠt beiliegt. or oder ouof CD changer and DAB tuner / CD-Wechsler und DAB-Tuner / Changeur CD et tuner DAB / CD-wisselaar en DAB-tuner CAUTION / VORSICHT / PRECAUTION / LET OP!: ¥ Before connecting the CD changer and/or the DAB tuner, make sure that the unit is turned off. ¥ Bevor Sie den CD-Wechsler und/oder den DAB-Tuner anschlie§en, vergewissern Sie sich, da§ das GerŠt ausgeschaltet ist. ¥ Avant de connecter le changeur CD et/ou le tuner DAB, sÕassurer que lÕunitŽ est Žteinte. ¥ Zorg ervoor dat de apparaat is uitgeschakeld alvorens u de en/of DAB-tuner CD-wisselaar aansluit. External component / Externe Komponente / Appareil extŽrieur / Extern apparaat Signal cord (not supplied with this unit) Einzelleitung (nicht mit diesem GerŠt mitgeliefert) Cordon de signal (non fourni avec cet appareil)Signaalkabel (niet meegeleverd) FOR KD-LX330R / F-R DEN KD-LX330R / POUR LE KD-LX330R / VOOR KD-LX330R FOR KD-LX110R / F-R DEN KD-LX110R / POUR LE KD-LX110R / VOOR KD-LX110R Vous pouvez connecter un changeur CD JVC et/ou un tuner DAB (Digital Audio Broadcast) JVC. ¥Pour leurs connexions, rŽfŽrez-vous aux modes dÕemploi qui les accompagnent. Het is mogelijk een JVC CD-wisselaar en/of JVC DAB-tuner (Digital Audio Broadcasting) aan te sluiten. ¥ Zie de instructies van deze apparaten voor meer informatie over het tot stand brengen van deze aansluiting. CD changer jack Buchse fŸr CD-Wechsler Prise du changeur CDAansluiting voor CD-wisselaarLine Input Adaptor KS-U57 (not supplied with this unit) Line-Eingangsadapter KS-U57 (nicht mit diesem GerŠt mitgeliefert) Adaptateur dÕentrŽe de ligne KS-U57 (non fourni avec cet appareil)Line Input Adapter KS-U57 (niet meegeleverd) Amplifier VerstŠker AmplificateurVersterkerSubwoofer Subwoofer Caisson de grave Subwoofer SUBWOOFER OUT Signal cord (not supplied with this unit) Einzelleitung (nicht mit diesem GerŠt mitgeliefert) Cordon de signal (non fourni avec cet appareil)Signaalkabel (niet meegeleverd)KD-LX330R LINE INSource equipment Externes GerŠt Appareil sourceAndere apparaat L R L R L R L R External component Externe Komponente Appareil extŽrieurExtern apparaat KD-LX110R Signal cord (not supplied with this unit) Einzelleitung (nicht mit diesem GerŠt mitgeliefert) Cordon de signal (non fourni avec cet appareil)Signaalkabel (niet meegeleverd) KD-LX330R KD-LX110R CAUTION / VORSICHT / PRECAUTION / LET OP: ¥ To prevent internal heat buildup inside this unit, place this unit UNDER the other equipment. ¥ Zur Vermeidung eines Hitzestaus in diesem GerŠt, dieses GerŠt UNTER die andere GerŠteansrŸstung stellen. ¥ Pour Žviter un Žchauffement interne de cet appareil, placez-le SOUS lÕautre appareil. ¥ Om interne verhitting van het apparaat te voorkomen, dient u ervoor te zorgen dat het apparaat ONDER de andere apparatuur wordt geplaatst. Y-connector (not supplied with this unit) Y-Anschlu§ (nicht mitgeliefert) Connecteur Y (non fourni avec cet appareil)Y-connector (niet meegeleverd) Rear speakers Hintere Lautsprecher Enceintes arrire AchterspeakersJVC Amplifier JVC VerstŠrker JVC AmplificateurJVC Versterker For KD-LX330R only: You can connect another power amplifier for front speakers. Nur fŸr den KD-LX330R: Sie kšnnen einen anderen LeistungsverstŠrker fŸr die vorderen Lautsprecher anschlie§en. Pour le KD-LX330R seulement: Vous pouvez connecter un autre amplificateur de puissance pour les enceintes avant. Alleen voor KD-LX330R: U kunt nog een eindversterker voor de voorspeakers aansluiten.Front speakers Vordere Lautsprecher Enceintes avantVoorspeakers JVC Amplifier JVC VerstŠrker JVC AmplificateurJVC Versterker L R+ - +- +- +- L R+ - +- +- +- L R+ - +- +- +- Fig. 1 Fig. 3Fig. 2 ¥ You can connect both components in series as illustrated above. ¥Es ist mšglich, beide Komponenten in einer Serienschaltung entsprechend der obigen Darstellung anzuschlie§en. ¥ Vous pouvez connecter les deux appareils en sŽrie comme montrŽ ci-dessus.¥Beide apparaten zijn volgens bovenstaande illustratie in serie aan te sluiten. Connecting cord supplied with your CD changer Verbindungskabel, das zum Lieferumfang des CD-Wechsler gehšrt Cordon de connexion fourni avec votre changeur CDVerbindingskabel die met de CD-wisselaar wordt meegeleverd Connecting cord supplied with your DAB tunerVerbindungskabel, das zum Lieferumfang des DAB-Tuners gehšrt Cordon de connexion fourni avec votre tuner DABVerbindingskabel die met de DAB-tuner wordt meegeleverd JVC CD changer CD-Wechsler von JVC Changeur CD JVCJVC CD-wisselaar KD-LX330R KD-LX110RCut the rear speaker leads of the carÕs ISO connector and connect them to the amplifier. Die Leitungen des ISO-Steckers der hinteren Lautsprecher durchtrennen und am VerstŠrker anschlie§en. Coupez les fils des enceintes arrire du connecteur ISO de la voiture et connectez-les ˆ lÕamplificateur.Knip de draden van de achterste luidspreker van de ISO-connector van de auto door en sluit deze draden aan op de versterker. Rear speakers Hintere Lautsprecher Enceintes arrireAchterspeakers KD-LX330RRemote lead (Blue with white stripe) Fernbedienungsleitung (Blau mit wei§em Streifen) Fil dÕalimentation ˆ distance (Bleu avec bande blanche)Antennedraad (Blauw met witte streep) JVC DAB tuner DAB-Tuner von JVC Tuner DAB JVCJVC DAB-tunerJVC CD changer CD-Wechsler von JVC Changeur CD JVCJVC CD-wisselaar JVC DAB tuner DAB-Tuner von JVC Tuner DAB JVCJVC DAB-tuner Remote lead Fernbedienungsleitung Fil dÕalimentation ˆ distanceAntennedraad To power aerial if any Zur Motorantenne, sofern vorhanden Ë lÕantenne automatique, sÕil y en a uneNaar de antenne (indien aanwezig) Connecting cord supplied with your DAB tuner or CD changer Verbindungskabel, das zum Lieferumfang des DAB-Tuners oder CD-Wechslers gehšrt Cordon de connexion fourni avec votre tuner DAB ou changeur CDVerbindingskabel die met de DAB-tuner of CD-wisselaar wordt meegeleverd Front speakers Vordere Lautsprecher Enceintes avantVoorspeakers InstalLX330R&110R.ENGEFRNL2/6/01, 4:19 PM 4