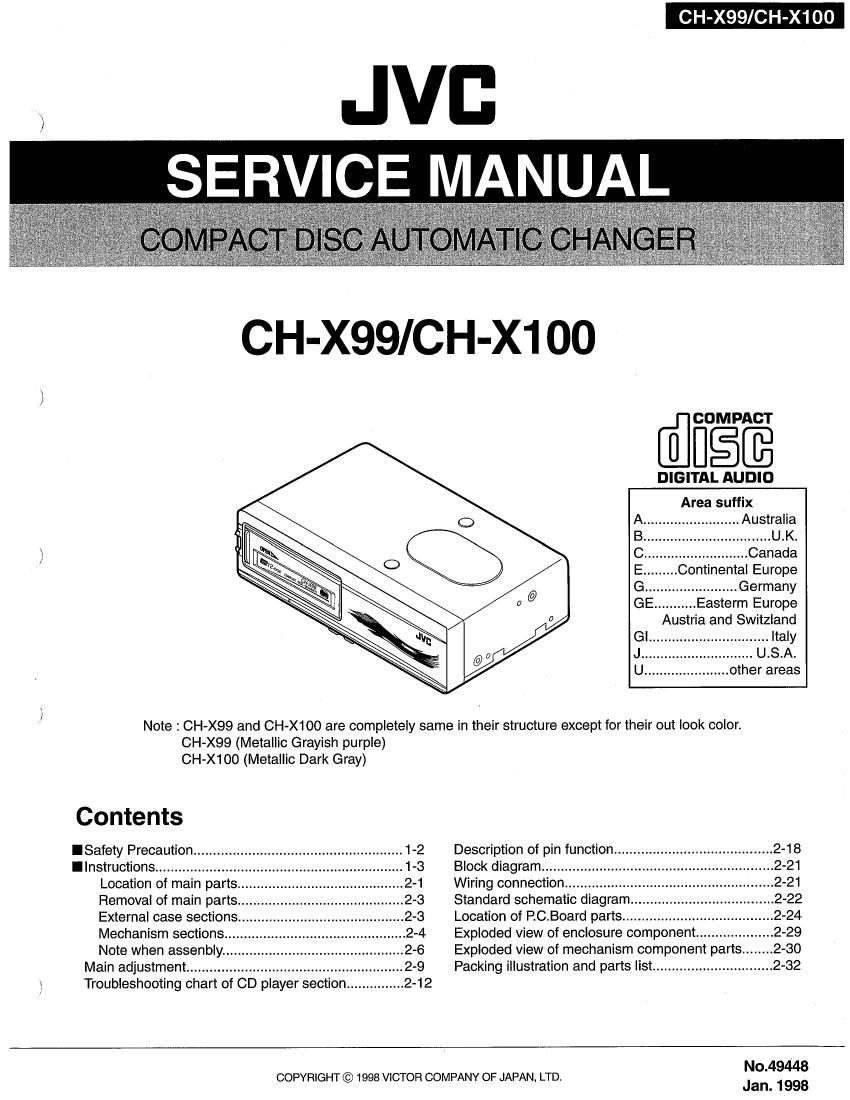
Jvc CHX 100 Service Manual

This is the 56 pages manual for Jvc CHX 100 Service Manual.
Read or download the pdf for free. If you want to contribute, please mail your pdfs to info@audioservicemanuals.com.

Page: 1 / 56
left right
Jvc CHX 100 Service Manual

Extracted text from Jvc CHX 100 Service Manual (Ocr-read)


Page 1

CH-X99/CH-X100

.JVG
SERVICE MANUAL

CH-X99/CH-X1 00

\./

COMPACT

USE

DIGITAL AUDIO

Area suffix
. Australia

................. Germany
GE ........... Easterm Europe
Austria and Switzland
Gl... ..... Italy
. U.S.A.
U ...................... other areas
I
/ Note : CH-X99 and CH-X100 are completely same in their structure except for their out look color.
CH-XQQ (Metallic Grayish purple)
CH-X100 (Metallic Dark Gray)
Contents
ISafety Precaution. Description of pin function. ...2-18


.2-21
.2-21
.2-22
.2-24
.2-29
.2-30
...2-32

Ilnstructions...
Location of maIn parts.

Removal of main parts... -

External case sections...
Mechanism sections.

Note when assenbly..

Main adjustment ........................................

3 Troubleshooting chart of CD player sectio

Block diagram.
Wiring connection.
Standard schematic diagram
Location of P.C.Board parts...
Exploded view of enclosure component.
Exploded view of mechanism component part
Packing illustration and parts list..

No.49448

COPYRIGHT © 1995 VICTOR COMPANY or JAPAN, LTD.
Jan. 1 998

Page 2

CH-X99/CH-X100

Safety Precautions

J

(USA) Only

Important for Laser Products

1.
2.

3.

CLASS 1 LASER PRODUCT

DANGER: Invisible laser radiation when open and in-
terlock failed or defeated. Avoid direct exposure to beam.
CAUTION: Do not open the bottom cover. There are no
user serviceable parts inside the unit; leave all servicing to
qualified service personnel.

- CAUTION: The compact disc player uses invisible laser

radiation and is equipped with safety switches which pre-
vent emission of radiation when unloading cartridge and
the safety interlocks have failed or are defeated. It is
dangerous to defeat the safety switches.

. CAUTION: Use of controls of adjustments or perfor-

mance of procedures other than those specified herein
may result in hazardous radiation exposure.

. CAUTION: The laser is able to function, if safety switches

are out of function. The laser light is invisible, avoid
exposure, do not disassemble the laser unit, but replace
the complete unit.

BIEIG Only
Important for Laser Products

1.
2.

3.

CLASS 1 LASER PRODUCT

DANGER: Invisible laser radiation when open and in-
terlock failed or defeated. Avoid direct exposure to beam.
CAUTION: Do not open the bottom cover. There are no
user serviceable pans inside the unit; leave all sen/icing to
qualified service personnel.

. CAUTION: The compact disc player uses invisible laser

radiation and is equipped with safety switches which pre-
vent emission of radiation when unloading cartridge and
the safety interlocks have failed or are defeated. It is
dangerous to defeat the safety switches.

.CAUTION: Use of controls of adjustments or perfor-

mance of procedures other than those specified herein
may result in hazardous radiation exposure.

ADVERSEL: Usynling laserstraling ved abning. nar
sik-kerhedsafbrydere er ude af funktion. Undga
udsaettelse for strafing.

VAROITUS: Varmuuskytkimen ollessa pois pearls
kun Iaite avafaan, sielié kehittyy nékyma'tbbté. Alia
pane ltseasi sateilyn alliiksl.

VARNING: Osynling laserstéining uppstar vid
komponentens oppning nar sékerhetsbrytaren ée
translagen.

ADVARSEL: Usynling Iaserstraling ved Apnlng nar
sik»kerhetsbryteren er ude at funkticn Unnga
utsettelse for stréling.

Identification And Certification Labels

NAME/RATIING PLATE

o l O

O | O 0

Rear panel of the unit

US JVC CORP. 41 SLATER DRIVE
ELMWOOD PARK, NJ. 07407
MANUFACTURED AT _
MADE IN_

Product complies with DHHS Rules 21
CFR Subchapter J in effect at date of
manufacture.

MANUFACTURED

Notes

*1 The date of manufacture.

*2 The ID code of manufacturing plant.
*3 Marking of country origin.

Position And Reproduction Of Labels
NAME/RATllNG PLATE

lo| O

l .7 r

O O 0
Rear panel of the unit

CLASS 1

LASER PRODUCT

Obs:
Apparaten innehaller laser-
komponent av hogre laserklass

an kiass 1.
Top panel of the unit
r - 1 Gerateoberseite
L____ r____..' Panneau supérieur de I"appereil

DANGER: lmm IBM W Um hw- VARNIMG: Oxynfln kw- VAN: Mm II slur
radiation Mun anon aid slrlllnu rad Mutiny, Mr ruining My am «at will»: mm mt
Worm. Wald! uwmmu lllliim "Militant:
Mill) maroon 4 Im mm- Itfllopphfl. Boil-III. Ii WWII: M htsu
mean (a) inform. (d) Mitt (3) MI- (l)

\g/

Page 9

Microcomputer reset button

After completing installation and connection, load
the magazine and press the reset button using
a ball-point pen or other pointed instmment to
reset the microcomputer

Normally do not use this button. However, when
the power supply ls interrupted such as for re
placement of the cars battery, press this button.
Also press it when the built-in microcomputer
does not operate properly due to noise or when
the changer does notfunction correctly when the
controller is operated.

Botdn de reposicionamiento del micro-
computador

Despues de completar la mstalacion y la
conexicm. cargue el magazini y presione el
boton de reposiclonamlento utilizando un
bollgrafo u otro instrumento en punta para
reposicionar el microcomputador.

Normalmente. este botOn no so use. Sin emr
barge, cuando la fuente cle energla es
interrumpida como ser en caso de reemplazo
de la baterla del automovil, presione este baton.
Presionelo tambien cuahdo el mlcrocomputador
incorporado no funcione adecuadamente
debidc al ruido o si el camblador no funciona
correctamente cuando 59 Opera el controlador.

Microcomputer reset button
Baton de reposiclcn de la mlcrocomputadora
Touche de remise a ze'ra du microprocesseur

CH-X99/CH-X100

Touche de remise a ze'ro du micro-
processeur

Aprés avoir terminer I'installatian a! les
racoordements, charger/e magasin puis appuyer
sur la touchs ds remiss in ze'ro en utilisan! un
stylo a bille ou un autre instrument poinlu pour
réinitialiserle microprocesseur. Norma/amenine
pas utiliser oelte touche,

Cependant, quandl'allmehtatr'on estinterrompus
comme pour la remplacement de la batter/e de
la voiture, appuyer suI cette Iouche. La presser
égalsmsn! si la microprocesseur ne fonctionne
pas con'ectement a cause de parasites ou si Ie
changeurne fonctionne pas oornectement quand
Ie contra/ear est utilise.

EMPLACEMENT DES
(LOCATION OF CONTROLS UBICACION DE LOS CONTROLES COMMANDES
0 CD magazine slot 0 Ranura del magazln de CD 0 Fanetle de magasin CD
0 Door 0 Puerta 0 Valet
0 Microcomputer reset button 0 Bolcn de reposiciOn del mlcrocomputador o Touche de remiseal ze'ro du microprocesseur
13
HANDLING COMPACT DISCS AND MANIPULACION DE COMPACT xIchgNI-I'MIEgIDBEg Ell-533:3
MAGAZINES DISC Y MAGAZINES MAGASINS

How to handle CDs
0 Use compact discs with the mark shown.

0 Do not touch the recorded surface of the disc
(reflective side, opposite to the label) when
handling the discs.

0 Storage
Make sure to keep discs in theircases. If discs
are piled on top of one another without their
cases. they may be damaged. Do not putdiscs
where they will be exposed to direct sunlight
or in a place subject to high temperatures and
humidity. Avoid leaving discs in your car.

Hold down the center holder.
Presione el sujetador central.
Appuyer au milieu do support.

Lilt it out without touching the recorded surface,
Levantelo para sacarlo Slrl tocar la superficie grabada,
Le Isvsr sans toucher a la surface enloglstree.

14


cémo manipular compact disc
0 Utillce compact disc con la marca indicada.

@figfi
DIGITAL AUDIO
o No toque Ia superficie grabada (Iado con

reflejos. opuesto a la ethueta) mientras
manipula Ics discos

o Cdmo guardar lcs discos
Guarde Ios discos en sus cajas. No apile dis-
cos Sin sus Galas, ya que podnan dafiarse.
No ponga los discos donde queden
expuestos a la luz solar dlrecta 0 en lugares
con alta temperature: 0 humedad. No los deje
en el automcvil.

Manlpulatlon des disques
audionumériques

o Utiliser des disquss audionuméfiques avec
la marque montrée.

0 Ne pas toucher a la surface enrsgistre'e du
disque (la face réfléchissante, le verso de
I'etiquelte) en manipulant Ies disques.

o Stockage

Eien conserver Ies disques dans Ieurs boites.
5/ else dlsques son! empi/és Ies uns sur les
autres sans leurs Defies, lls peuvent étre
abfmésr Ne pas mettre des disques oLI ils
pourral'ent étre exposes a la lumiere directe
du solsil ou dans un end/cit su/e! a de fortes
temperatures ou a I hum/dire. E viter de Iaisser
des disques dans vatre voiture.

Insert with the label facing up.
lnserte con la ethueta hacla arrlba.
Mettre en place eves lériquette au-dsssus.

Press gently on the disc to insert
Freslone suayemente el disco para lnserlalo.
Appuyer Iegeremenr surle dlsque pour la mettre err place.

1-9