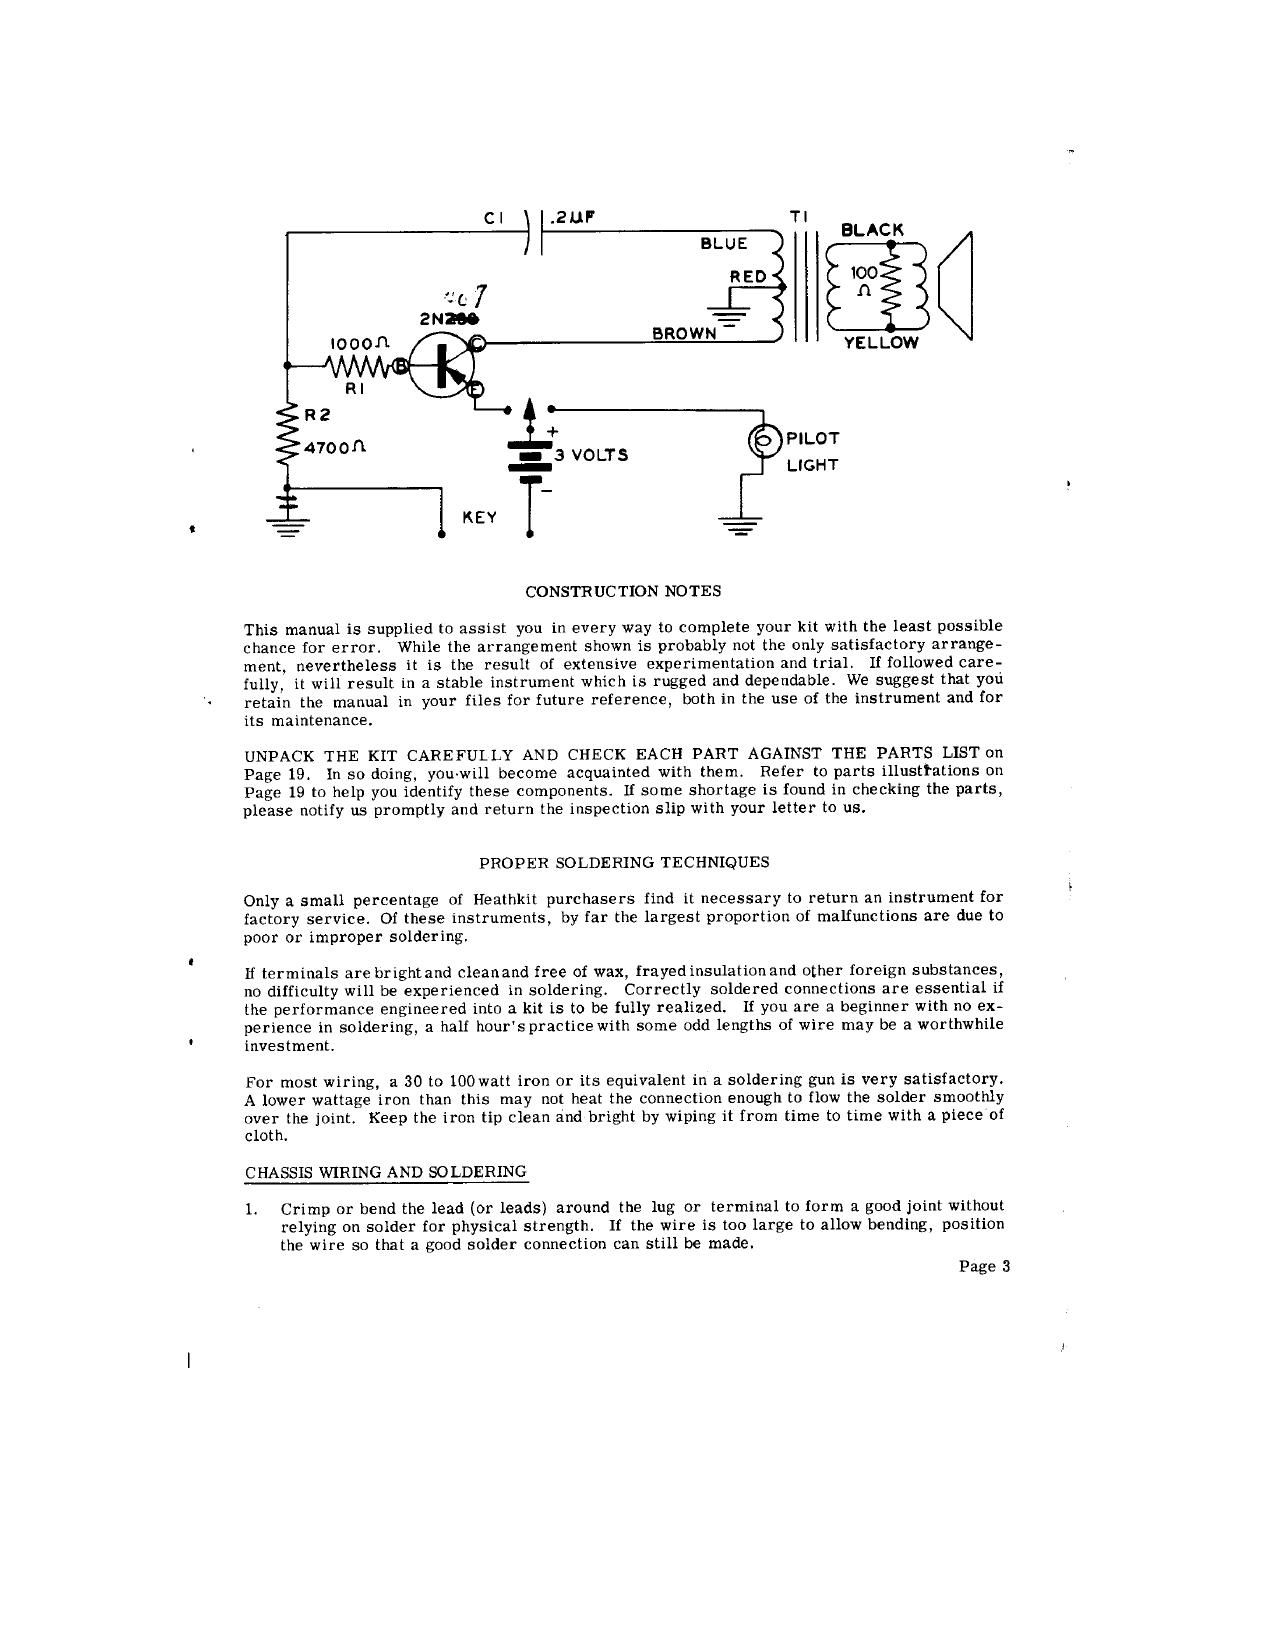
Heathkit CO 1 Schematic

This is the 1 pages manual for Heathkit CO 1 Schematic.
Read or download the pdf for free. If you want to contribute, please mail your pdfs to info@audioservicemanuals.com.

Page: 1 / 1
left
Heathkit CO 1 Schematic

Extracted text from Heathkit CO 1 Schematic (Ocr-read)


Page 1

BLACK

YELLOW

2 v0 Ts PILOT
- L LIGHT

'-i «T ?

CONSI'R UCTION NOTES

This manual is supplied to assist you in every way to complete your kit with the least possible
chance for error. While the arrangement shown is probably not the only satisfactory arrange-
ment, nevertheless it is the result of extensive experimentation and trial. Iitollowed care-
fully, it will result in a stable instrument which is rugged and dependable. We suggest that you
retain the manual in your tiles for future reference, both in the use of the instrument and for
its maintenance.

UNPACK THE KIT CAREFULLY AND CHECK EACH PART AGAINST THE PARTS LIST on
Page 19. In so doing, you~will become acquainted with them. Refer to parts illustrations on
Page 19 to help you identify these components, If some shortage is found in checking the parts,
please notify us promptly and return the inspection slip with your letter to us.

PROPER SOLDERING TECHNIQUES

Only a small percentage of Heathkit purchasers find it necessary to return an instrument for
factory service. of these instruments, by far the largest propertion of malfunctions are due to
poor or improper soldering,

If terminals are bright and cleanand free of wax, frayedinsulation and other foreign substances,
no difficulty will be experienced in soldering. Correctly soldered connections are essential if
the performance engineered into a kit is to be fully realized. If you are a beginner with no ex-
perience in soldering, a half hour'spracticewith some odd lengths of wire may be a worthwhile
investment.

For most wiring, a 30 to 100 watt iron or its equivalent in a soldering gun is very satisfactory.
A lower wattage iron than this may not heat the connection enough to flow the solder smoothly
over the joint. Keep the iron tip clean and bright by wiping it from time to time with a piece of
Cloth.

CHASSIS WIRING AND SOLDERING

1. Crimp or bend the lead (or leads) around the lug or terminal to form a good joint without
relying on solder for physical strength. It the wire is too large to allow bending, position
the wire so that a good solder connection can still be made.

Page 3