Grundig RR 225 Service Manual

This is the 10 pages manual for Grundig RR 225 Service Manual.
Read or download the pdf for free. If you want to contribute, please mail your pdfs to info@audioservicemanuals.com.

Page: 1 / 10
left right
Grundig RR 225 Service Manual

Extracted text from Grundig RR 225 Service Manual (Ocr-read)


Page 1

GnunDIG SERVICE MANUAL

5/86

® Dix *32700

RR 225/225 L/RKM 265

1. Allgomolnos

Die Zahlen im Text und bei den Abbildungen sind mit den Positionsnum-
mem der Ersatzteilliste identisch. Teile - die in der Ersatztellliste nicht vor-
kommen - sind mit Buohstaben gekennzeichnet. Nicht abgebildete Posi-
tionen tinden Sie in der Ersatzteilliste.

lst es ertorderlich. lackgesicherte Schrauben zu Ibsen. mussen diese
nach AbscthB der Reparatur wieder verlackt werden.

Saubere Gummllaufflechen tragen wesentlich zur Betriebssicherheit der
Mechanik bei. diese slnd mlt Reinigungsmittel (l'estbenzin) zu reinigen.
Mussen Klebestellen erneuert werden, so ist bei Polystyrol auf Pblystyrol
Methylenchlond Oder Benzoi, bei Polystyrol auf Metall Haftkleber zu ver.
wenden.

Magnetische Werkzeuge diirfen nicht in die Nehe des Magnetkopfes ge-
bracht werden.

Vor Service-Arbeiten uberprtiten Sie bitte, ob die Tonwelle, die Gummlan-
dmckrolle, sowie der Magnetkopf frei von BandabrlebruckstAnden sind.
Zum Re gen dleserTeIle elgnet sich ein spiritus-oder relnigungsbenzin-
getran es Wattestabchen.

Nach jeder Reparatur am Laufwerk sind die Kopfe 1 15, 116, die Tonwelle
sowie die Andrucknolle mit Spiritus oder Reinigungsbenzln zu reinigen.

2. Riickwsnd ahnehmen

- Batterielechdeckel abnehmen, 5 Schrauben herausdrehen und Rack-
wand abnehmen.

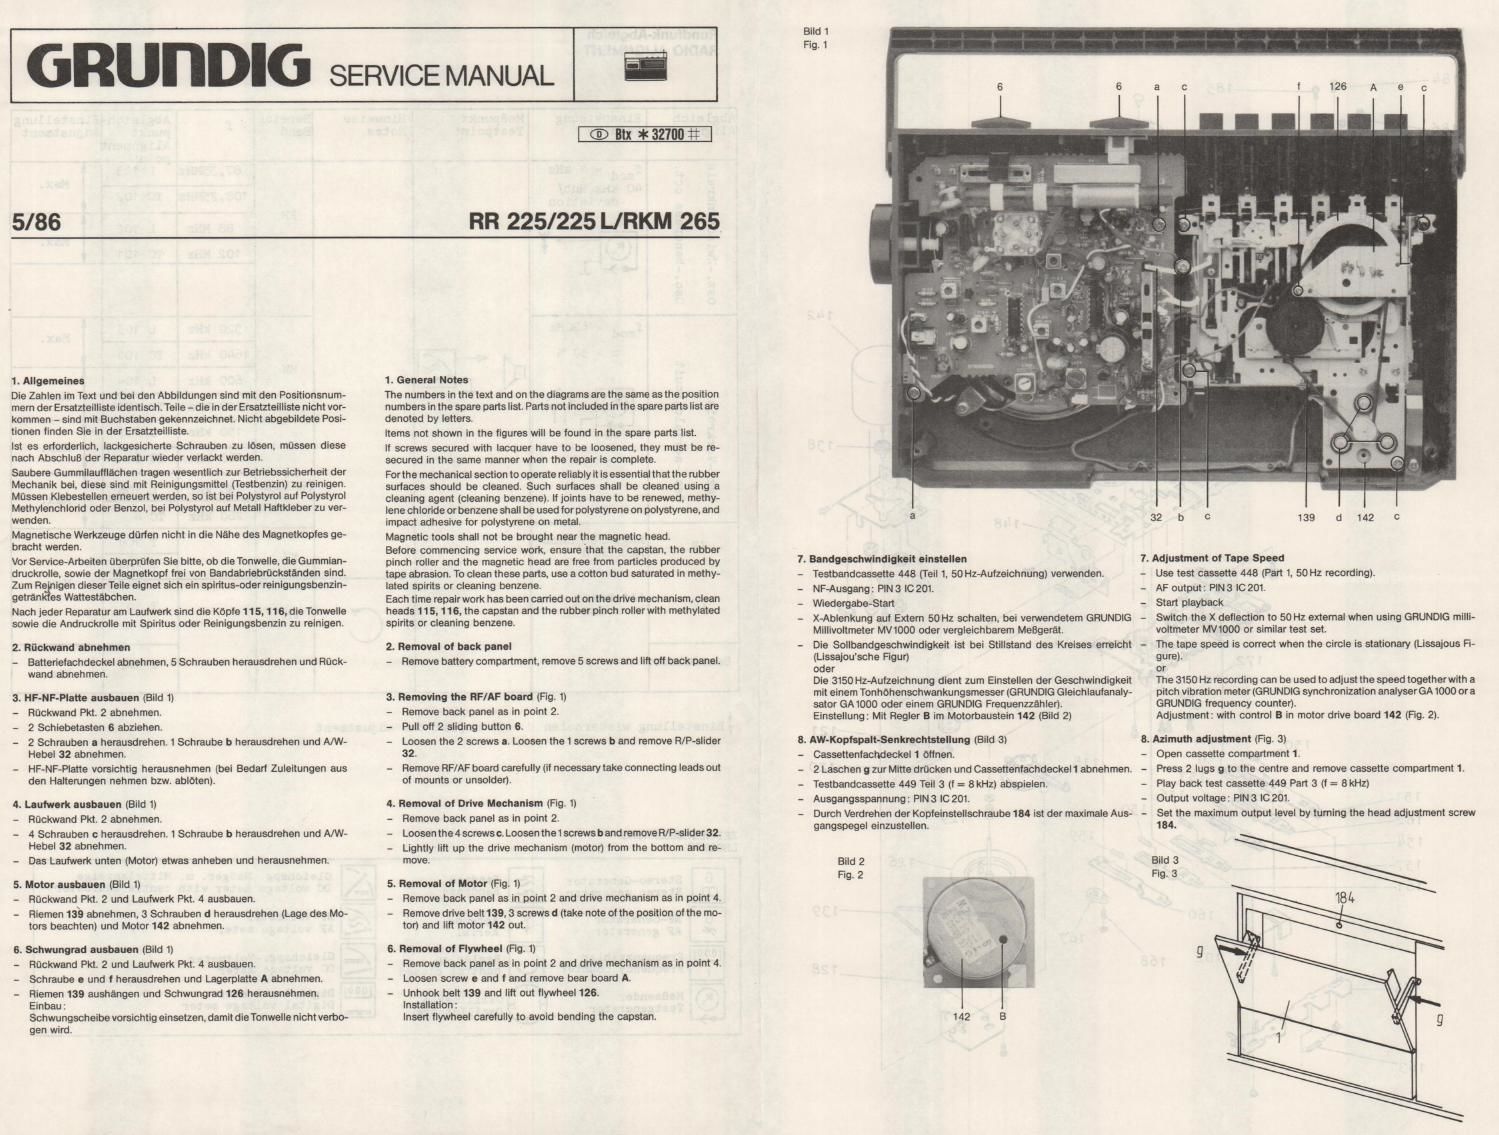
3. HF-NF-Platte ausbauen (Bild 1)
- Ritckwand Pkt. 2 abnehmen.
- 2 Schiebetasten 6 abziehen.

- 2 Schrauben a herausdrehen. 1 Schraube b herausdrehen und Alw-
Hebel 32 abnehmen.

- HEMP-Platte vorsichtig herausnehmen (bei Bedart Zuleitungen aus
den Halterungen nehmen bzw. abloten).

4. Laufwerk auobnuen (Bild 1)
- Ruckwand Pkt. 2 abnehmen.

- 4 Schrauben c herausdrehen. 1 Schnaube b herausdrehen und Alw-
Hebel 32 abnehmen.

- Des Laulwerk unten (Motor) etwas anheben und herausnehmen.

5. Motor oulbauen (Bild 1)
- Ruokwand Pitt. 2 und Laufwerk Pkt. 4 ausbauen.

- Riemen 13\9 abnehmen, 3 Schrauben d herausdrehen (Lage des Mo-
tors beachten) und Motor 142 abnehrnen.

6. Schwungrad ausbauon (Biid 1)
- RDckwand Pkt. 2 und Leufwerk Pkl. 4 ausbauen.
- Schraube e und therausdrehen und Lagerplatte A abnehmen.

- Riemen 139 aushangen und Schwungrad 125 herausnehmen.
Einbau:
Schwungscheibe vorsichtig einsetzen, damit dIeTonwelle nicht verbo-
gen wird.

1. General Notes

The numbers in the text and on the diagrams are the same as the position
numbers in the spare partsiist. Parts not included inthe some partslislare
denoted by letters.

Items not shown in the figures will be found In the spare parts list.

If screws secured with lacquer have to be loosened, they must be re»
secured in the same manner when the repair is complete.

Forthe mechanical section to operate reliably it is essential that the rubber
surfaces should be cleaned. Such surfaces shall be cleaned using a
cleaning agent (cleaning benzene). Itjoints have to be renewed. methy-
lene chloride or benzene shall be used for polystyrene on polystyrene. and
impact adhesive for polystyrene on metal.

Magnetic tools shall not be brought near the magnetic head.

Betare commencing service work. ensure that the capstan. the rubber
pinch roller and the magnetic head are free from particles produced by
tape abrasion. To clean these parts, use a cotton bud saturated in methy-
lated spirits or cleaning benzene.

Each time repairwork has been carried out on the drive mechanism. clean
heads 115, 116, the capstan and the rubber pinch roller with methylated
spirits or cleaning benzene.

2. Removal of back panel
- Remove battery compartment. remove 5 screws and lift off back panel.

3. Removing the RF/AF board (Fig. 1)
- Remove back panel as in point 2.
- Pull oil 2 sliding button 6.

- Loosen the 2 screws I. Loosen the 1 screws b and remove RIP-slider
32.

- Remove RF/AF board carefully (it necessary take connecting leads out
of mounts or unsolder).

4. Removal 01 Drive Mechanism (Fla. 1)
- Remove back panel as in point 2.
- Loosenthe4 screws 1:. Loosenthet screwsband remove RIP-slideraz.

- Lightly lift up the drive mechanism (motor) from the bottom and re-
move.

5. Removal of Motor (Fig. 1)
-- Remove back panel as in point 2 and drive mechanism as in point 4.

- Remove drive belt139. 3 screws d (take note of the position of the mo-
tor) and lift motor 142 out.

6. Removal 01 Flywheel (Fig. 1)
- Remove back panel as In point 2 and drive mechanism as in point 4.
- Loosen screw e and f and remove bear board A.

- Unhook belt 139 and lift out flywheel 126.
Installation:
Insert flywheel carefully to avoid bending the capstan.

Bild 1
Fig. 1

7. Bondgeschwindlgkolt olnmllon

- Testbandcassette 448 (T eiI 1. 50 HzAufzeichnung) veMenden.
- NF-Ausgang: PING IC 201.

- WIedergabe-Start

- X-Ablenkung aut Extem 50 Hz schalten. bei verwendetem GRUNDIG
Millivoltmeter MV1000 oder vergieichbarem MeBgerat.

- Die Sollbandgeschwindlgkeit ist bei Stillstand des Kraises erreicht
(Lissaiou'sche Flgur)
oder
Die 3150 Hz-Aufzeichnung dient zum Einstellen der Geschwindigkeit
mit einem Tonhohenschwankungsmesser (GRUNDIG Gleichlaufanalyv
sator GA 1000 oder einem GRUNDIG Frequenzzahler).
Einstellung: Mit Regler 3 im Motorbaustein 142 (Bild 2)

B. AW-Koptspalt-Senkrechtstellung (Bild 3]

- Cassettentachdeckel 1 bffnen.

- 2 Laschen g zur Mltta dritcken und Cassettentachdeckelt abnehmen.
- Testbandcassette 449 Teil 3 (t = 8kHz) abspielen.

- Ausgangsspannung: FIN 3 IC 201.

- Durch Vendrehen der Kopteinstellschraube 184 ist der maximale Aus-
gangspegel einzustellan.

Bild 2
Fig. 2

. Adjustment of Tape Speed
Use test cassette 448 (Part 1, 50 Hz recording).
AF output: PIN 3 IC 201.
Start playback
Switch the X deflection to 50 Hz external when using GRUNDIG milli-
voltmeter MV1000 or similar test set.
The tape speed is correct when the circle is stationary (Lissajous Fi-
gure).
or
The 3150 Hz recording can be used to adjusttha speed togetherwlth a
pitch vibration meter (GRUNDIG synchronization analyserGA1000 ora
GRUNDIG frequency counter).
Adjustment: with control B In motor drive board 142 (Fig. 2).

. Azimuth ndlunmant (Fig. 3)
Open cassette compartment 1.
Press 2 lugs g to the centre and remove cassette compartment 1.
Play back test cassette 449 Part 3 (t = aKHz)
Output voltage: PIN3 IC 201,

Set the maximum output level by turning the head adjustment screw
1.