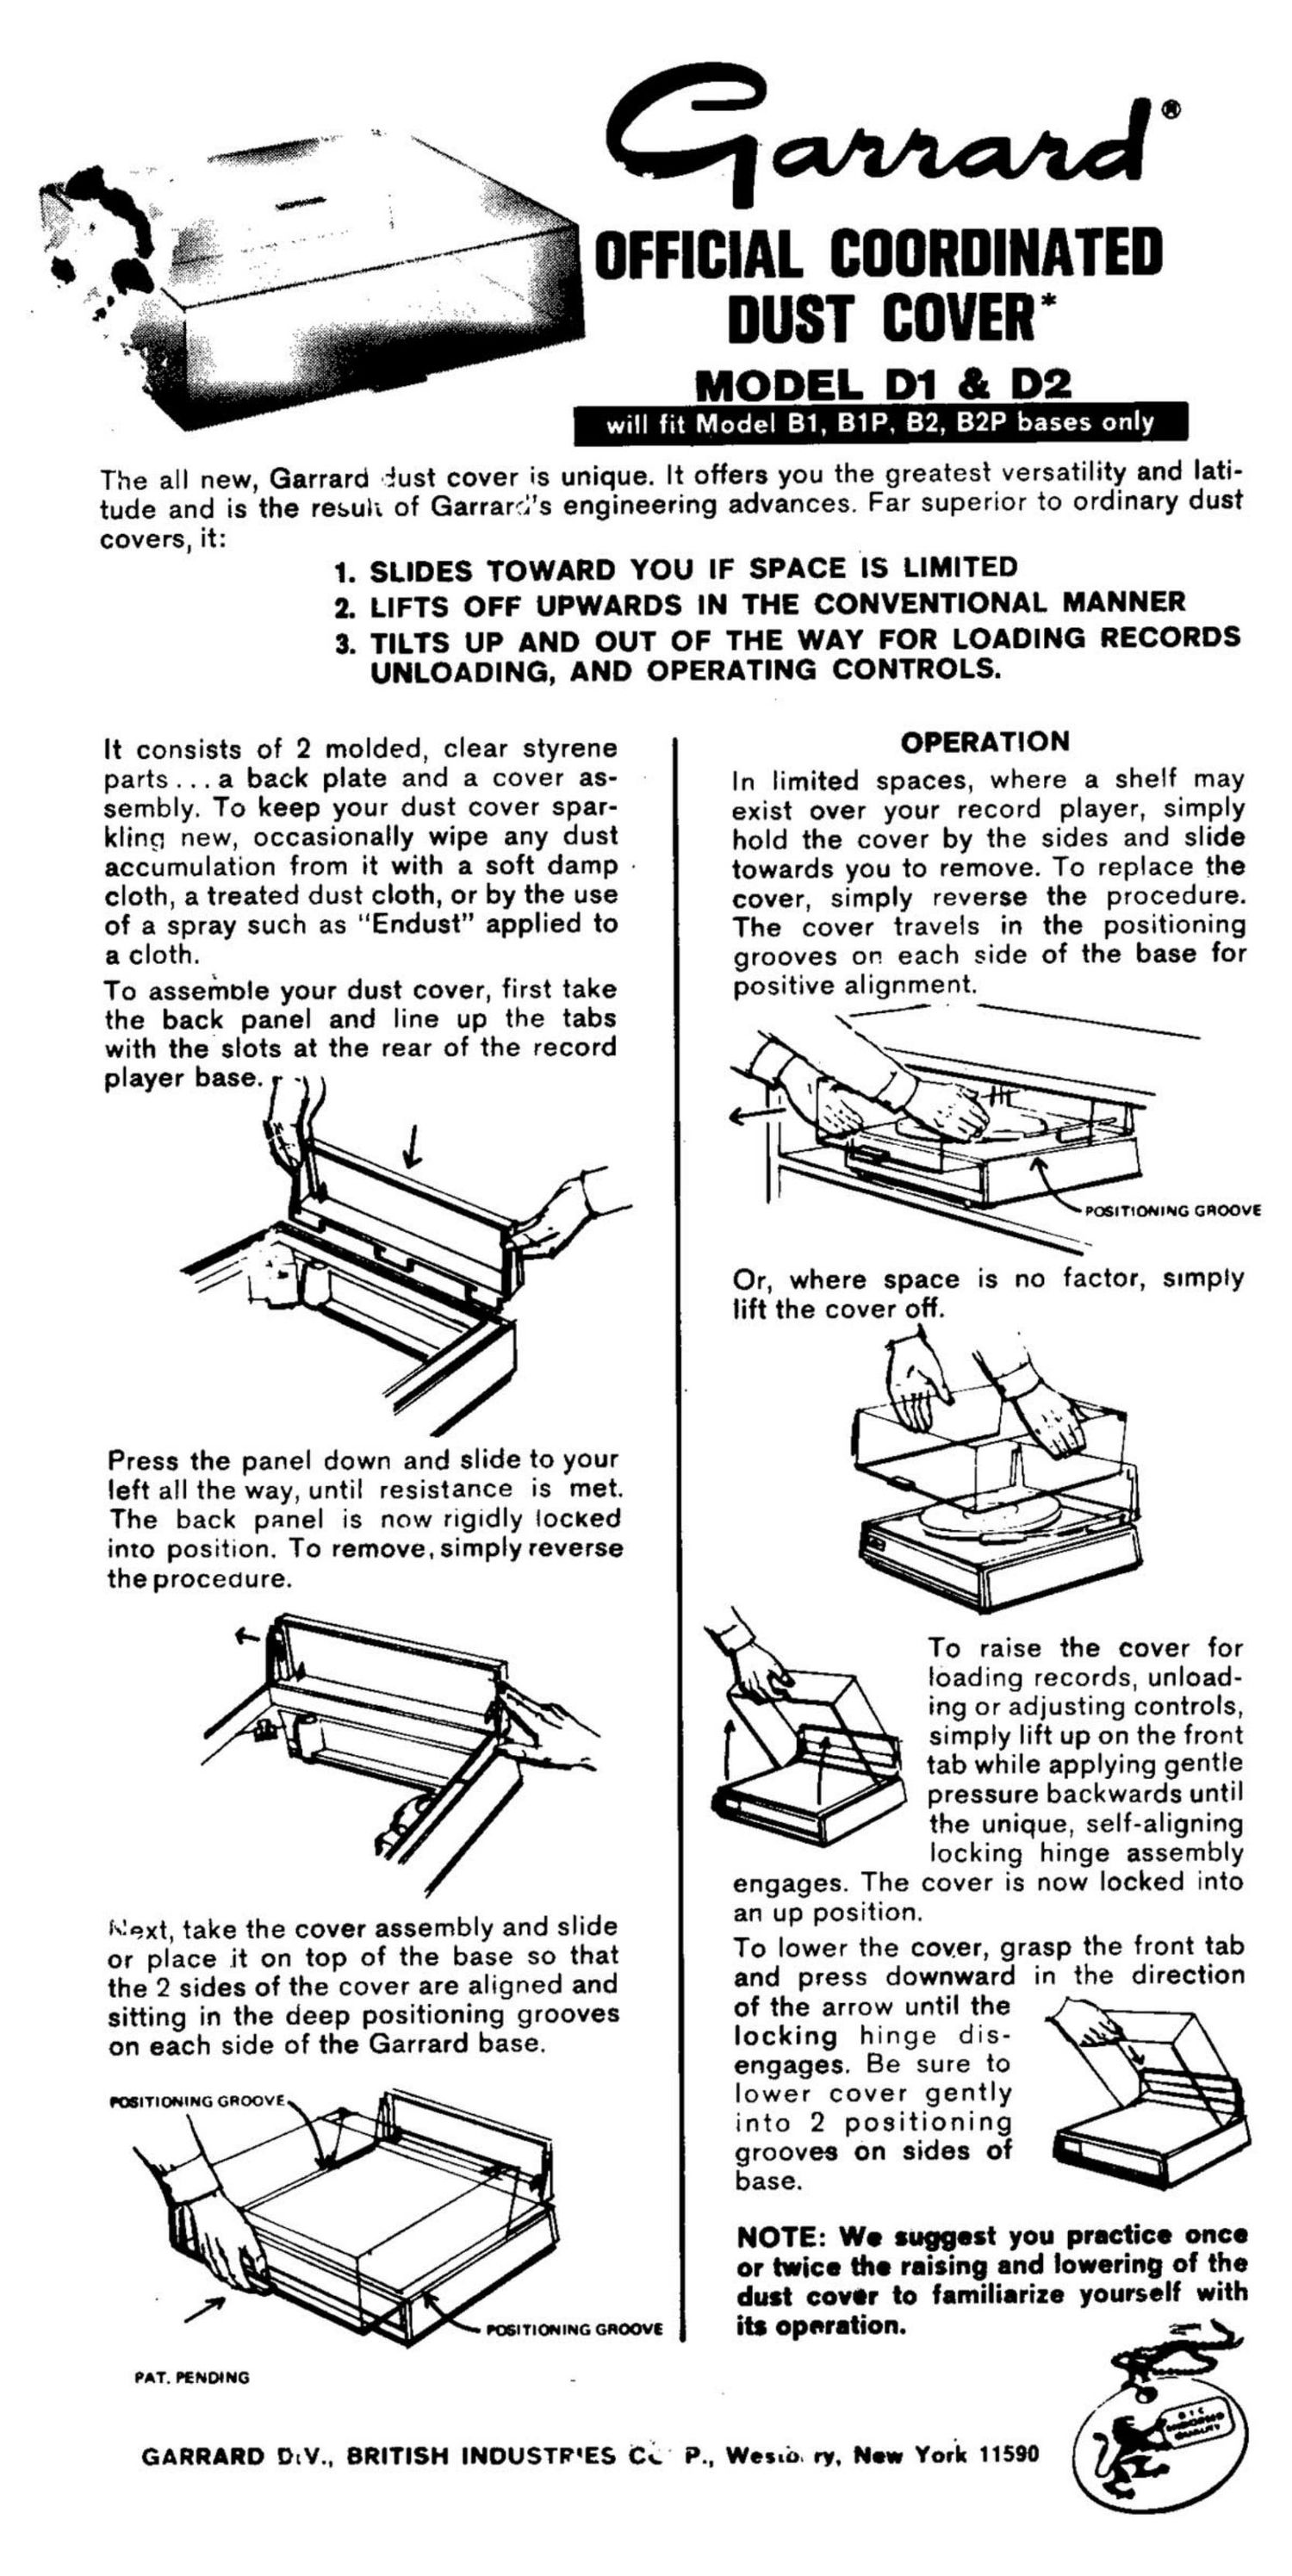
Garrard d 1 owners manual

This is the 1 pages manual for garrard d 1 owners manual.
Read or download the pdf for free. If you want to contribute, please mail your pdfs to info@audioservicemanuals.com.

Page: 1 / 1
left
garrard d 1 owners manual

Extracted text from garrard d 1 owners manual (Ocr-read)


Page 1

OFFICIAL BUORDINATED

BUST COVER

MODEL D1 & D2

will fit Model B1, BIP, B2, B2P bases only

The all new, Garrard dust cover is unique. It offers you the greatest versatility and lati-
tude and is the result of Garrard's engineering advances. Far superior to ordinary dust

covers, it:

I. SLIDES TOWARD YOU IF SPACE IS LIMITED
2. LIFTS OFF UPWARDS IN THE CONVENTIONAL MANNER

3. TILTS UP AND OUT OF THE WAY FOR LOADING RECORDS
UNLOADING, AND OPERATING CONTROLS.

It consists of 2 molded, clear styrene
parts. . . a back plate and a cover as-
sembly. To keep your dust cover spar-
kling new, occasionally wipe any dust

accumulation from it with a soft damp -

cloth, a treated dust cloth, or by the use
of a spray such as Endust applied to
a cloth.

To assemble your dust cover, first take
the back panel and line up the tabs
with the slots at the rear of the record
player base. ~

Press the panel down and slide to your

left all the way, until resistance is met.

The back panel is now rigidly locked

into position. To remove.simply reverse

the procedure.

Next, take the cover assembly and slide
or place .it on top of the base so that
the 2 sides of the cover are aligned and
sitting in the deep positioning grooves
on each side of the Garrard base.

FAT. PENDING

GARRARD DiV., BRITISH INDUSTP'ES CL' 9., Wesnb. ry, New York 11590

OPERATION

In limited spaces, where a shelf may
exist over your record player, simply
hold the cover by the sides and slide
towards you to remove. To replace the
cover, simply reverse the procedure.
The cover travels in the positioning
grooves on each side of the base for
positive alignment.

Or, where space is no factor, simply
lift the cover off.


To raise the cover for
loading records, unload-
ing or adjusting controls,
simply lift up on the front
tab while applying gentle
pressure backwards until
the unique, self-aligning
locking hinge assembly
engages. The cover is now locked into
an up position.

To lower the cover, grasp the front tab
and press downward in the direction
of the arrow until the
locking hinge dis-
engages. Be sure to
lower cover gently
into 2 positioning
grooves on sides of
base.

NOTE: We suggest you practice once
or twice the raising and lowering of the
dust cover to familiarize yourself with

its operation. a- F