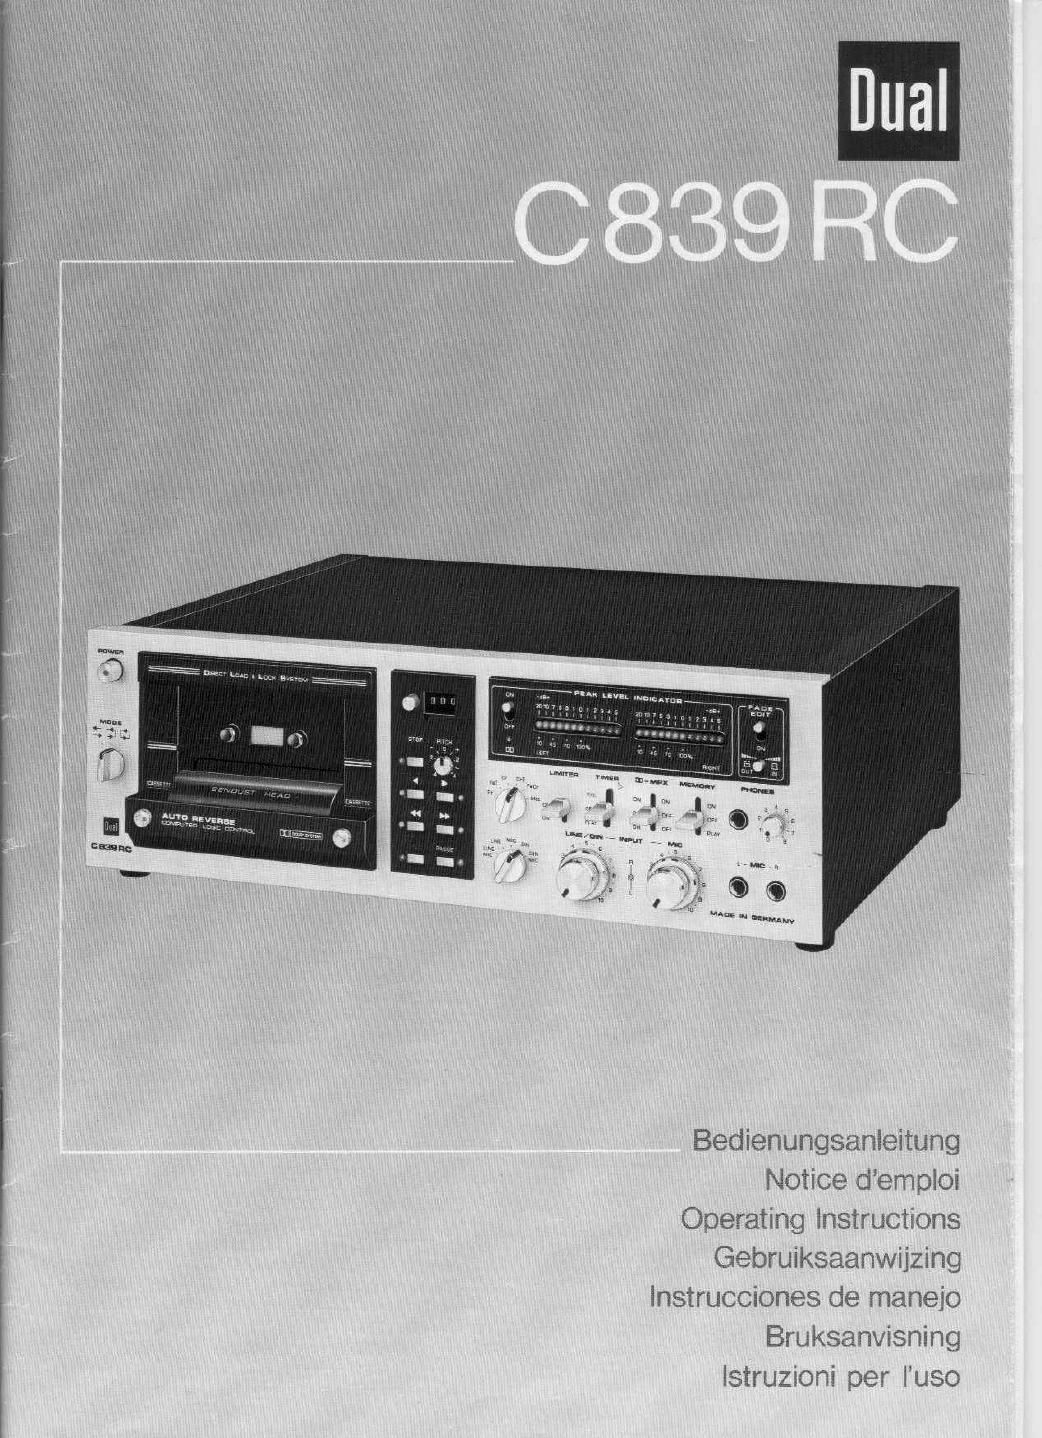
Dual C 839 RC Owners Manual

This is the 38 pages manual for Dual C 839 RC Owners Manual.
Read or download the pdf for free. If you want to contribute, please mail your pdfs to info@audioservicemanuals.com.

Page: 1 / 38
left right
Dual C 839 RC Owners Manual

Extracted text from Dual C 839 RC Owners Manual (Ocr-read)


Page 2

Ssh: geehrter Kunde,

bitte lesen Sie vor der ersten Inbetriebnahme lhres neuen Gerates diese An-
leitung sorgfaltig durch. Sie bewahren sich dadurch vor Schéden, die durch
falschen AnschlulS oder unsachgemaiSe Bedienung entstehen kennen.

Die fiir die erstmalige lnbetriebnahme notwendigen Hinweise, sowie Erlaute»
rungen zur Bedienung Ihres Gerates finden Sie auf den Seiten 9 - 12.
Eine Gesamtabbildung mit Kurzbeschreibung aller Bedienungselementefinden
Sie auf den ausklappbaren Umschlagseiten.

Wirwiinschen lhnen nun viei Freude mit lhrem Dual C 839 RC.

Cher- umi mélomane:

veuillez lire soigneusement cette notice avant la premiere mise en service de
votre nouvaau Dual afin d'eviter des dommages qui pourraient résulterd'un
mauvais branchement ou dune manipulation erronée,

Vous trouverez pages 13 - l7 des informations nécessaires pour la premiere
mise en marche ainsi que des renseignements sur le fonctionnement de
l'appareil. Vous trouvez une illustration de la platine ainsi qu'une description
de tous les elements de commande sur les pages de couverture qui sent a
rabattre.

Nous vous souhaitons beaucoup de joie avec votre platine Dual C 839 RC.

Dear customer.

please rwd these instructions carefully before you start using your Dual so
that you will not encounter any problems resulting from faulty connections
or handling.

However, you should read the instructions carefully before you operate the
turntable for the first time. On pages 17 - 20 you will find detailed in
structions for the operation of your unit. The first page is flapped and you
will find a brief description of all control elements.

Good listening with your Dual C 839 RC.

Zea genuine client,

least u voordat u het apparaat in bedrijf stelt eerst deze gebruiksaanwijzing
zorgvuldig door. Hiermee voorkomt U schade aan het apparaat door onjuiste
bediening of door onjuiste aansluiting.

De voor de eerste in gebruikname benodigde aanwijzingen vindt u op de
pagina's 20 - 24. Een totaal-oveizicht met korte beschrijving van alle be
dieningselementen vindt u op de uitklapbare pagina.

Wij wensen u veel plezier mat uw Dual C 839 RC.

Enimldo clients:

lea. por favor, estas instrucciones detenidamente antes de realizar cualquier
operacion en su aparatc. Con ello evitara posibles dahos producidos por
conexiones indebidas 0 per manejos improcedentes.

Las indicaciones generales para poner en marcha el tocadiscos por primera
vez, asi como observaciones para ei manejo del mismo Ias encontraré en las
péginas 25 - 29. Una vista general del aparato con definiciones resumidas
de todos los elementos de mando la encontrara abriendo la hoja plegable.

Le deseamos mucha satisfacion con su nuevo Dual C 839 RC.

En gott rfid,

vi rekommenderar Er att noga lasa igenom dessa instruktioner innan Ni boriar
anvénda Er nya anlaggning sé att Ni darigenom undviker att géra felkopplingar
etc som kan skada denamma.

Pa sidorna 29 - 32 finner Ni en kortfattad beskrivning av ert kassettdack
och p3 den utvikbara sidan en oversiktsbild med hanvisningar.

Vi onskar Er lycka till med Er nya Dual C 839 RC.

Gentili clienti,

leggete attentamente queste istruzioni prima di mettere in moto per la prima
volta il vostro nuovo apparecchio. Eviterete cosi dei danni causati da un col-
legamento errato 0 da manovre sbagliate.

Gli awertimenti per la prima messa in servizio e Ie spiegazioni per I'uso del-
Iapparecchio si trovano alle pagine 32 - 36. Nellinterno della copertina
ripiegabile sono raffigurati e brevemente descritti tutti gli elementi di manov»
rai

Ci auguriamo che il Dual C 839 RC sia pervoi sorgente di molte soddisfazioni.

2

Page 8

(21) Selector de entradas

(22) Selector de tipo de clnta de seis posiciona para
adapter eI aparato al tipo de cinta utilizado

(23) U MITER, para evitar un sobrenivel de la grabacién

(24) LINE/DIN INPUT, control de nivel de registro
para sntrada DIN 0 LINE

(25) TIME R, puesta en marcha para grabacidn o repro-
ducclén mediante un reloj externo

(26) m -MPX, para grabacion o reproduccién de bajo
nivel de ruldo, en combinacion con filtro MPX

(27) MIC INPUT, control de nivel para entrada por
microfono, apto para mezcla con otras entradas

(28) MEMORY, cuando el selector se encuentra en
pos. ON, se para automaticamente Ia cinta al
alcanzar al contador Ia poslcion 000
en marcha rapida, tanto directa Como inverse
(rebobinado)

(29) PEAK LEVEL INDICATOR LED, bandaluminosa
para indloar el valor de pico del nivel

(30) MIC L/R, hambrillas de conexidn de micréfono
para canal derecho e izquierdo

(31) PHONES, hembrilla para conexién de auriculares
para control simulténeo

(32) Control de volumen de voz de auriculares

(33) FADE EDIT, permite una atenuacién continua y
regulable cIe pasajes de cinta grabada

Funktionu/aammarflmning

(1) POWER Strombrytare
(2) MODE Bandriktningsvaliare
(3) CASSETTE Slar ifranalla bandtransportfunktioner
(4) Avtagbar for rengoring och azimutinstallning
(5) Kassettschakt
(6) Belyst bandtransport
(7) Dammskydd -- oppnas automatiskt vid pasattning
(8) CASSETTE Slér 'nrén alla bandtransportfunktioner
(9) Tangent for nollstallning av rakneverket "000"
(10) STOP Stopptangent
(11) 4 Startar in- och aVSpeIning at vénster
(12) « Snabbspolning (hoger-. vanster)
(13) REC Inspelningstangent
(14) > Startar in- och avspelning at hoger
(15) » Snabbspolning (vanster -~ hoger)
(16) PAUSE Paustangent for momentan bandstopp
(17) PITCH Finjustering av hastighetenvid atergivning
(Tonhéjdskontroll)
(18) Rakneverk
(19) ON/O)FF TiII/frén for utstyrningsinstrumenten
(LED
(20) m " Indikation for inkopplad Dolby NR
(21) Omkopplare for val av programkalla
(22) Bandtypsvaljare - 6-steg
(23) IJMITER Automatlsk nivabegransare vid Inspelning
(24) LINE/DIN INPUT Utstyrningsreglage for DIN-
och LINE-ingangar
(25) TIMER Start for in- och avspelning via en extern
klocka
(26) II] -MPX For brusfri in- och avspelning i kombt
med MPX-filtret
(27) MIC INPUT Utstyrningsreglage for mikrofonin-
gangarna, mixbar med de 6vriga ingéngarna
(28) MEMORY Minnesomkopplare vid ON, bandet
stannar vid snabbspolning nar rakneverket star
pa 000.
Omkopplare i Iage PLAY, bandet gar vidare i
motriktningen

(29) PEAK LEVEL INDIKATOR LED LysdIodInSruA
ment med toppvérde

(30) MIC L/R Mikrofonanslutning for hoger och
vanster kanal

(31) PHONES HorIursanslutning for medhorning

(32) Volymkontroll for hprlursuttaget

(3(3) FADE EDIT Efterhandsredigering - upp- och
nedtoning av den inspelade signalen

I eomandi

(1) POWER interruttore di rate
(2) MODE selettore direzione nastro
(3) CASSETTE arracta tutta Ia meccanica di traino
al memento del prelevamento della cassette
(4) Copenura amovibile per la pulizia delle testine e
degli elementi di trasmlsionee per la regolazione
azimutale
(5) Vano cassette
(6) Indicazione ilIuminata del movimento del nastro
(7) Coperchio parapolvere, si apre automaticamente
tramite l'interruttore di rate
(8) CASSETTE arresta tutta Ia meccanicadi traino aI
memento del prelevamento della cassette
(9) Tasto azzeratore, per portare il contagiri allo 000"
(10) STOP tasto di arresto
(11) 4 avvia riproduzione e registrazione in direzione
di marcia sinistra
(12) « ritorno rapido (da destra-o- a sinistra)
(13) REC tasto di registrazione
(14) > avvia riproduzione e registrazione in direzione
di marcia destra
(15) » awolgimento rapido (da sinistra -~ a destra)
(16) PAUSE per preparare Ia registrazione e per brevi
arresti del nastro
(I7) PITCH cambia laveIocIta del nastro in rlproduzione
(18) Contatore per trovae un daerminato punto sul nastro
(19) ON/OFF per spegnere l'indlcatore Iivello di picco
(20) m * spla luminosa indica che iI sistema Dolby NR
e inserito
(21) Selettore d'ingresso
(22) Selettore per la commutazione so 6 tipi diversi
di nastri
(23) LIMITER evita eocessivi picchi in registrazione
(24) LINE/DIN INPUT controlli pilotaggio per
ingressi DIN e LINE
(25) TIMER avvia riproduzione e registrazlone via un
interruttore automatico esterno
(26) m -MPX per registrazioni e riproduzioni senza
fruscii, accoppiato aI filtro MPX
(27) MIC INPUT controllo pilotaggio per Ingressi mic-
rofono, miscelabile con gli aItri ingressi
(28) MEMORY Selector en posicién ON: En ambos
semidos de marcha raplda 5e para la cinta auto-
maticamente al Ilegar el contador al punto 000
Selector en posicién PLAY: La cinta continua
marchando en sentido contrario.
(29) PEAK LEVEL INDICATOR LED. banda Iumlnosa
para inidicar eI valor punta del nivel
(30) MIC L/R prese per microfono peril canale
sinistro e destro
(31) PHONES press per cuffia stereo per il controIIo
simultaneo della registrazione in corso
(32) ControIIo volume cuffia
(33) FADE EDIT per la dissolvenza a smorzamento
variabile all'inizio ed alla fine di registrazionl su
nastro

Page 13

Roccordoment au secteur

Les appareils originaux sont réglés sur 230 V/50 et 60 H2 ou
120 V/50 et 60 Hz. La commutation sur una autre tension sec
teur ne doit etre effectuée que par la revendeur ou la service
acres-vents Dual, ccmpte tenu dos prescriptions de securité
existentes.

Aunt do brandur wot-I app-nil, asurezwout one I: tension
indiqu sur la plaque! aluminium coincide one I: tension
actour.

Raccordomont a la chains HiFi on a Iamplificateur
do reproduction

Au dos de la platine a casettes HiFi stereo se trouvent les prises
suiventas (Fig. 1):

DIN REC/PE:

Prise normalisée DIN s 5 poles pour I'enregistternent et la lec-
ture, prévue pour le raccordement a un amplificateur et a un
ampli-tuner avec le céble portant la réi. 226 816.

En liaison avec Iadaptateur d'anregistrement, reference 226 818,
il est également possible deflectuer un enregistrement direct
dans les deux sens avec un autre magnétophone.

LINE OUTPUT L/R:

Prises de sortie pour le branchement d'un amplificateurou d'un
ampli-tuner avec liaisons par tichas RCA (Cynch). Le branche
ment sefiectue avec le cable portant la reference 226 817.
L|NE INPUT L/R:

Prises d'entrée pour le raccordement d'un amplificateur ou d'un
ampli-tuner avec liaisons par fiches RCA lench). Le branche-
ment s'effectue avec la cable portant Ia reference 226 817,
Votre appareil est ainsi relié a toutes les sources de programme
branohées sur l'amplificateur cu lamplituner.

Le cable spécial et l'adaptateur dc réenregistrement son! on
vente en tant qu'aowssoires spéciaux chez votre revendeur.

Régulutour do nivom do sortie

Le niveau do sortie des prises LINE OUTPUT et de la prise DIN
pout ctra réglé a I'aide dos régulateurs de niveau de sortie
LEVEL L/Fl.

L'intensité sonore du magnetophone a cassettes peut ainsi
etre adaptée a celle d'une autre source sonore.

Reproduction do menus enmistrées

Marsha - arm

L'appareil est mis en marche aver: la touche POWER (1);
l'éclairage du compartment des casettes (6) indique qua l'ap-
pareil est préta tonctionner. Le couvercle de protection bascule
simultanément par-dessus Ies tétes vers I'arriere.

Selection du type do bands

Votra magnétophone a memes HiFi est équipé dun commu-
tateur sélecteur detype de bandea six positions l22),oui facilite
lutilisation de nombreux types de bandes qui sont déja utilises
de nos jours at forum leur apparition sur la marctté a Iavenir.
Avec le oommutateur sélecteurde type do bande a six positions
(22), Vous feita varier la correction de distorsion, la prémagné
tisation et la sensibilité, I'apparsil étant en position d'enregistre
merit. Veillez donc bien a régler Ie oommutateur sur la position
corrects pour l'enregistrement et la reproduction!

Churchez la bande utilisée dans la tableau (page 3) ou sur le
ccmpas dos types de bandss faisant partie de l'envoi et selec
tionnez la position de travail optimale pour cette bande a
laide du commutateur (22).

Le compas ties type: do bandes est concu de maniere a pouvoir
ctre range dans un coffret de camette et touiours a pcrtée de la
main. Pour cela, repliez-le au niveau dos rainures.

Une feuille avec étiouettes aurocollantes pour les six types de
canoes et avec la symbols Dolby est jointe a la brochure se rapv
portant a votre appareil pour VOUS taciliter le marquage de vos
cassettes.

Pour les types de bandes ne figurant pas darts legableau, la liste
ci-aprés des ceractéristiqucs des bandes yous aidere a trouver la
bonne position du commutateur.

23mm: Correction

tateur Categorie bandes de distorsion Bandes type

Fe Fe 3180/120ps BASF Super LH
Fe I Fe lhigh energy) 3180/120us Maxell UDX l

Cr CrOz 3180/ 70:15 BASF Chrom-Super
Cr ll CrOz (Cobalt) 3180/ 701.15 Maxell UDXL ll
FeCr FeQ' (2ccrnposants) 3180/ 70145 EASF Ferrochrcm
Met Bandes fer our 3180/ 70115 3 M Scotch metafhe

Les musicafiettes doivent étre ioufis avec le commutateur sur
Fe ou Cr salon les indications figurant sir la cassette. En Iab-
sence de oette indication on de toute autre information sur Ie
type de bande, réglez le commutateur sur Fe,

Fonctionnement "Automarso"

Vctre magnétophone a casettes offre une possibilité de mani-
pulation unique en son genre: le service "Autoreverse".

Vous pouvez paper sur le champ d'un sens de défilement a
|autre,et parconséquent,d'un enregistrementstéréc a unautre
sans devoir retoumer ou rebobiner la casetta.

Grace 3 la conception double dos elements d'entralnement, de
la téted'enregistrement/reprod nation at de la tete d'efiacement,
il est possible de procéder ncn seulement a la lecture dans les
deux sens de défilement, mais aussi a I'enrogistrement.

Pour lenregistrement et la lecture, il est posible de preselec-
tionner a l'aide du ccmmutateur MODE (2)

- si la bande doit sarréter automatiquement lorsqu'elle
est achevee dans le sens de déiilement selectionné

si la bande défilant vers Ia droite doit etre commutée
automatiquement sur détilement vers la gauche lors-
qu'elle est achevee on

[I] si elle doit étre programmeesur lecture ininterrompue.
Attention: Sur cette position. lenregistrement se tait
de iacon ininterrompue.

Mite on place at prélévoment de lo cassette

Grace au companiment cassette unique on son genre lDLL).
la cassette pout étre miss an place sans aucune commutation
préalable. Prendre la cassette de facon a ce que la bande se
trouve on has. Placer tout d'aborcl Iarete supérieure de la cas-
sette clans le companiment et l'amener en position verticals
jusqu'a cs qu'elle sencliquette de tacon nettement perceptible
(Fig. 2). La bande est maintenant automatiquement transportee
un peu plus en avant dans le but de tendre le bobinage de la
bands.

Si la bande demarre vers la gauche 4(11), le transport estégole»
ment interrompu en fin de bande si Ie commutateur MODE (2)
est sur :2].

La cassette peut etre sortie sans auoune ditticulté quelle cue
soit Ia position de tonctionnement, sans appuyer auparavant
sur la touche STOP (10). Lesdeux touches CASSETTE (3) + (8)
interrompent automatiquement l'entrainernent de la bande et
repoussent les tétes magnetiques au moment 00 la cassette est
retiree,

Gréce au microprocesseur incorporé, la fonction selecticnnée
auparavant reste mémorisée également lorsuue la cassette a été
retiree et se déroule Iorsque la nouvelle cassette a été mise en
place.

Dolby Nr (on) + Filtre MPX

Le systeme Dolby reduit en permanence le souffle de la bands
at augmente ainsi la plage dynamique de l'enregistrement.

Pour la lecture denregistrement dolbvses, marques du symbole
m , ou donregistrements personnels dolbysés, comma decrit a
la page 14, veuillez actionner le oommutateur m systeme Dolby incorporé fonctionne automatiquernent at no
necessite aucun réglage particulier avec les bandes mentionnées
a la page 3 - on avec des bandes analogues.

Le niveau de la cassette de test Dolby 400 Hz indique one mo»
dulation d'env. 0 dB sur les bandes lumineuses LED (29).

13

Page 18

Dolby Nr (m) + MPX«filter

The Dolby noise reduction system gives a lasting reduction of
inherent tape noise and thereby increases the dynamic range of
recording.

To play casettes that have been recorded with Dolby system
and which have the Dolby trademark III, or Dolby zied recor-
dings which you have made yourself as described on page 18,
press the switch marked in ~MPX (28). The built-in Dolby sy-
stern then works automatically and needs no special adjustment
when used in conjunction with tapes listed on the page 3 or
their equivalents.

The level of the 400 Hz-Dolby-test cassette shows a level at the
LED BU-light bands (29) of approximately 0 dB.

The Dolby Nr (111) switch is coupled with the MPX filter; this
means disturbing high frequencies during tape recording of VHF
programs is filtered out.

Select the correct switch position in accordance with the follo-
wing table.

Switch Dolby-Nr. MPx-filter Recording source
Top On On VH F radio
Center Off Off

Bottom On Off Records

On playing dolbyized recordings select the lower switch position.

Counter and mommy device

The index counter (18) is a convenient means of noting and
quickly locating specific spots on a recorded tape. It functions
during recording, playback and fast winding in either direoion.
It is good practice to set the index counter reset'(9) at the be»
ginning of a tape and then you can note the connter position
at the beginning of a particular section and subsequently find
it easily. By means of the MEMORY feature (28),which works
in combination with the counter (18). you can find a predator»
mined position on the tape during playback. You mark this
position in that you press the reset key (9), Should you now
want to find the position at any other position on the tape
either ahead or behind the desired position, press one of the
keys « (12) or » (16) and turn the MEMORY switch (28) to
"ON". This will cause the tape to stop exactly at the desired
position. If you have selected the position PLAY, the device
will start to playback in the other direction once the desired
position has been reached. In this way, a particular piece can
be played over and over again without having to press the
start keys H14) or<(11).

Fast forward and reverse

» (15) fast wind from left-r right
« (12) fat wind from right-> left

Thehlncticns"fastfon~ard" » and "fast reverse" « are um
to find particular points on thetape and for rewinding the tape.
These two keys also cancel the functions start and REC.

In both directions the drive is tumed off when the end of tape
has been reached.

sun

The record and playback are initiated in the respective tape
direction using the keys b (14) and 4 (11). The start key can be
pressed before inserting the cassette, a feeler will register the
inserted cassette and start the drive.

PAUSE

The PAUSE button (16) is usd for preparing to record and to
stop for brief interruptions during recording or playback.
The function you have selected is maintained when the pause
button is pressed. Pressing the pause button a second time re-
turns the equipment to the pieceding mode of operation,

Autostop

The device is equipped with electronic tape monitoring, which
interrupts tape movement during functional disturbances (es
pecially those which are cauwd by the cwettel and prevents
the notorious "tape salad". Depending upon the position of
the MODE switch (2) the tape direction is first reversed, whereby

18

cassette takeup problems can often be cured. Should the dis-
turbance be also present in the other direction, tape play is
interrupted.

If the switch is in [:3 position, the tape direction will be con
stantly reversed in the case of a malfunction.

Monitoring using hudphones

The PHONES jack (31) may be used for stereo headphones
having an impedance of A -- 2000 Ohm for monitoring re-
cording or playback.

The corresponding control (32) is used to adjust the volume
on both channels.

TIMER connection

Should the line cord be connected through a normal timer, the
start time for the device can be preset.

For this, press the POWEHbutton (1), place the timer switch
(25) to "PLAY", insert the cassette with the take-up side on
the left and select the desired mode by means of the MODE-
switch (1). As soon as the timer places the device on the power,
play will begin, lnthis way, a correspondingly prepamd record-
ing can be started using a timer.

Prepare the recording as described below. and set the TIMER
switch (25) to the REC. position. A blocking feature prevents
selecting this function by mistake. The switch lever must there-
fore be pressed simultaneously right and to the upwards.

LIMITER

With the LIMITER key (23) pressedan automatic level limiting
device is switched on when recording. This is dependent on the
position of the level controls.

First of all set the recording level manually and then press the
LIMITER button (23), Use this function when there is a danger
that - despite careful level control setting - the level of loud
passages leg. in unknown pieces of music) could cause over-
modulation.

PITCH control

By means of the PITCH control (17) the tape speed and thus
the pitch can be varied by t 4 % during playback.

During recording, the correct speed is kept independent of the
setting of the PITCH control (17).

Making your own cassette recordings

Thanks to the great number of features in your omens deck,

making your own cassette recordings should not cause you any

trouble. Privately made recordings leg. from records) are ge»

nerally of a better quality than the pro-recorded casettes of the

same title

In addition to the notes previously given for playback, the follo-

wing points should be observed when recording:

' Set the tape selection Mitch (22) awording to the type of
tape being used.

' m (26) if necessary turn on the MPX filter

' Set the counter (18) to 000".

Recording preparation and level setting

In the following sequence press the keys PAUSE (16), REC
(13) and one of the start keys p (14) or <(11I. The REC key
must be held down until the start key has been pressed. The
light next to the REC key (13) shows that the unit is ready for
recording) Using the input selection switch (21) choose the
desired input souroe:

LINE/MIC Cynch and microphone input mixdnle

LINE Only Cynch input

MIC Microphone input only

DIN DIN input only

DIN/MIC DIN and microphone input mixable

The tape recording level is set using the control pairs INPUT
LIN/DIN (24) or INPUT MIC (21), Using the switch positions
LINE/MIC or DIN/MIC the microphone input wn be mixed
with the other recording sources. The two stereo channels can
be controlled separately: using the friction coupling they can

Page 36

Guru 3 manutenzione

Flaccomandiamo di pulire di tanto in tanto Ie testinel i perni di
traino, i mlli di pressione a le guide del nastro. A queslo scope
5i pub svitare Ia copertura (4).

In questo modo 5i pub anche facilmente effettuare la regulaziona
azimutale girando la vita (ill, 3). Questoperazione dovrebbe
essere pero riservata allo specialistat

Per effettuare dei lavori di manutenzione pit) estesi nella zona
delle testine e degli organi di trasmissione bisogna levare il
coperchlo parapolvere (7), A questo soopo disinserire Iinterr
ruttore POWER (1), levare la copertura (4), posizlonare il
coperchio parapolvere verso l'alto e girarlo dapprima a sinistra
verso lesterno

Per Ia pulizia si use un panno di lino inumidito daloool oppure
un bastoncino tipo "cotton floc. Non usare, per iavore,degli
oggetli metallici e non toccare gli specchi delle testine con le
dita,

Dato che tutti i punti di lubrificazione sono stati sufficient?
meme oliati, in condizioni normali dwarcizio, il vostro apparen-
chio funzionera regalarmente per anni. Non tentate di lubrifir
care voi stessi questi pumi; si devono usare soltanto Iuhrificanli
speciali. Senza canosoere bane i meccanismi e la pane elettroi
nica b consigliabile afiidare tutti gli interventi o Ie riparazioni
al vostm rivenditore specializzato oppure alla piiJ vicina offi-
cina d'assistenza autorilzata.

Eliminazione di disturbi

Se doveste notare dei difetti di funzionamento al vostro registra»
tore a cassette, controllate, per favore, se eventualmente non
scno dovuti ad un semplice errors d'uso. Lelanco seguente vi
aiuteré a trovare il difetto.

Se ci fossero dei disturbi inspiegabili, rivolgetevi al vostro riven~
ditore specializzato oppure al pilJ vicino centre dassistenza Dual.
( possibile cause uppure rimedio al difetto).

Lapparecchio non si accende.
L'alimentaziona di corrente é interrotta, cattivo contatto
con la press!

L'appareochio si spegne 1 ~ 2 secondi dope I'accensione.
" La cassetta ha troppo attrito, girare il nastro a mano un
poco avanti uribobinarlo ( « (12), »(15) In casi estre-
mi si pub rimediare allmcastro della bobina tramite
scam, per es. battendo Ia cassette sul tavolo.
" Introducendo Ia cassette, il nastro si é infilato dietro i|
perno di traina

ll nastro non si awia, malgrado Che il controllo del regolare
scorrimento del nastro (6) e la spia luminoso vicino al taste
d'awiamento sono illuminati,

II taste PAUSE (16) non é premuto.

La riproduzione varia nei numeri di giri,
' ll nastro glra troppo piano oppure e awolto troppo
stretto.
" | ruIIi di prassione dei perni trainanastro sono sporchi
di polvere a di abrasioni dal nastro. Pulire come descritto
nel capitolo "Cure, manutenzione'i

Non awiene una ripmduzione attraversu Iamplificatore, mal»
grade che la cuffia funzuoni perfenamenta,
La connessicne con Iampllficatore e interrotta oppure
non corretta.
|| controllo del livello d'uscita e girato indietm,

Dopo lintroduIione delta cassena il nastro si awia subito,
L'interruttore TIMER (25) e su "PLAY".

Dopo I'azionamento del taste dawiamento v (14) o 4 (11)
l'apparecchio si spegne subito ancora,
E Ia fine del nastro e l'interruttora MODE (2) e su _,.

Si aziona il tasto d'awlamento > (14) e lappareechio va in
direzione {(11).
' E la fine del nastro e I'interruttore MODE (2) e su
, Ia direzione del nastro viene commutata automar
ticamente.

ll mmandc dl registrazione non viene mguitot
* Le Iinguette sulle cassette, some descritto a pagina 351
sono state tolte

La registrazione personals presenta distorsioni.
* La fonte di registrazione causa Ie distorsioni.
* La testina 5 sports. Pulira coma descritto nel capitolo
"Cura, manutanzione",
" || selettore del nastro (22) non era regolato sul nastro
attualmente in use.

La registrazuone personals presenta fruscii
' II nastroe troppo logorato,
|I tasto I1] rMPX (26) non A state azionato.

La vecchia registrazione non viene canmllata perfettamente.
La tastina di cancellaziona 9 Sparta Pulire some descritto
nel capitolo "Cura, manutenzioneC II selettors del nastro

(22) non é regulate sul nastro attualmente in uso.

L'apparecchio si spegna in anticipo durante la ribobinatura.
* || taste Memory (28) e in posizione ON, Iapparecchio
si spegne a 000". Premere iI taste » (15) o « (12).
finchéi numeri vanno oltre Ia posizione 000".
L'indicatore di pilomggio PEAK LEVEL INDICATOR (29)
non funziona.
' L'interruttore (19) b in posizione OFF.

L'appareccmo non é DID controllabile tramite i tasti (11) fine
a (15).
* Interferenze a cause della rete di corrente. Spegnere
I'appareochio brevemente e cominciare dz capo.

Dati tecnici (Valor) tipici)
L'apparecchio rispette e supera in tutti i suoi valori quanta
prescritto dalle norme DIN 45 500 per 9 apparecchi HiFit

Velocith dal mstro 4,75 cm/s
Pinch (molaziom dIi numi dl um)

Campo di regolazione : 4 %
Flunuuiani hmi di velocifi

(deviazioni nei numeri di girl)

W.R.M.S. 10.03%
secondo DIN,solo riproduzione 3 0,06 96
secondo DIN, registrazione/riproduzione 1 0,09 %

Bind! di fuqumu (relative al campo di tolleranza DIN)

nastro Fe 30 - 18 000 Hz
nastro Cr02 30 - 19 000 Hz
nastro FeCr 30 - 19 000 Hz
nastro ferro pure 30 - 20 000 Hz
Rapportn mule/diner (can Dolby NR)

Fe 64 dB
Cr02 64 dB
FeCr 67 dB
nastro ferro pun: 67 dB
Dlafonia a 1000 Hz

con Ialtra traccia stereo 35 dB
con la controtraccia 60 dB
Amnuaziona di nmllazicne a 1000 Hz 70 dB

Frlquann oscillator. (oscillators in controfase) 105 kHz

lngmsi (sensibilité per 0 dB)
microlono (presa coassiale da 1/4")
ricevente/amplificatore lpresa DIN)
rioevente/ampfificatore (prese RCA) 40
Unite (regolablli)
rioevente/amplificatore (presa DIN)
ricevente/amplificatore (prese RCA) 0 e 580 mV/ 2 kOhm
cuffia (press coassiale da 1/4) 4 7 2000 Ohm
Tempo di rihobinatun per cassette C 60 65 sec,

025 mV/IO kOhm
05 mV/ 6,3 kOhm
mV/82 kOhm

0 - 580 mV/10 kOhm

Tension: di rate 115 e 230 Volt
Frequouu di me 50/60 Hz
Pat-nu amrbiu 40 Watt

Dual Gebn'Jder Steidinger - 7742 St. Georgen/Schwarzwald

247 302%

Pvimsdineynwwhynal