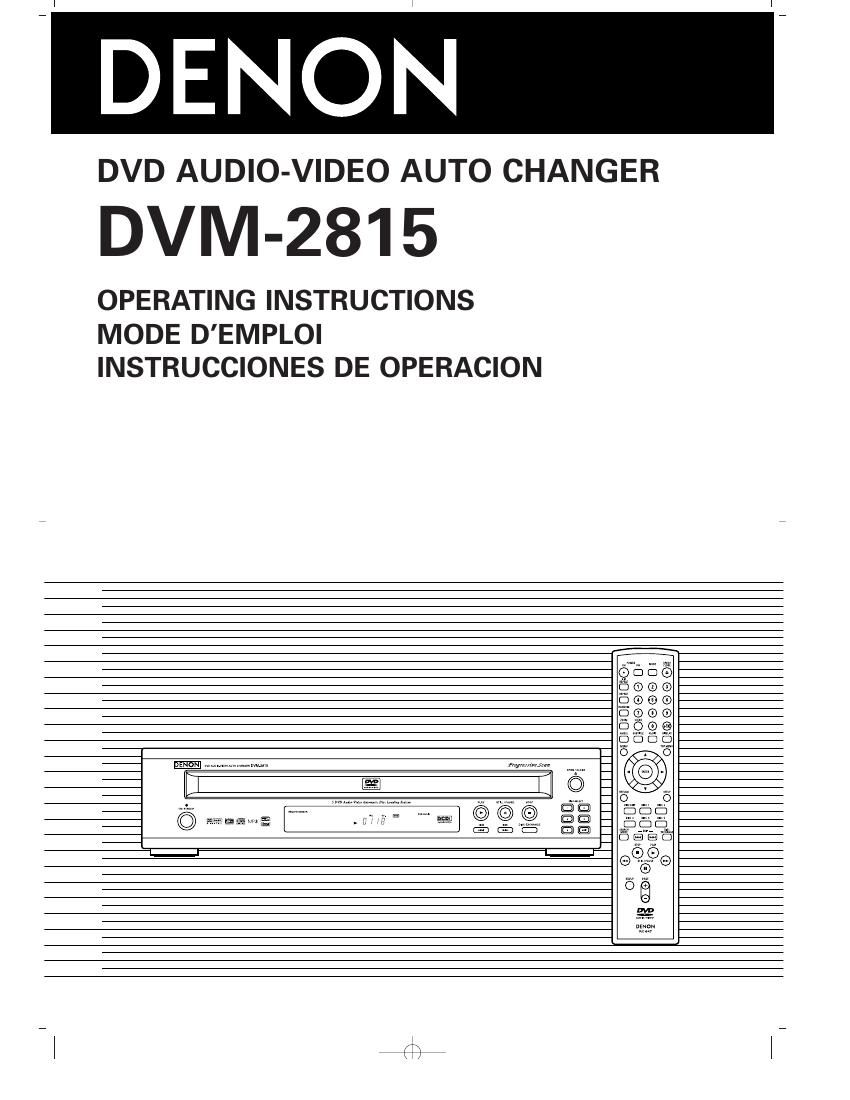
Denon DVM 2815 Owners Manual

This is the 92 pages manual for Denon DVM 2815 Owners Manual.
Read or download the pdf for free. If you want to contribute, please mail your pdfs to info@audioservicemanuals.com.

Page: 1 / 92
left right
Denon DVM 2815 Owners Manual

Extracted text from Denon DVM 2815 Owners Manual (Ocr-read)


Page 1

-“ 2-“ EN PRECAUTIONS This unit employs a laser. Only a qualified service person should remove the cover or attempt to service this device, due to possible eye injury. CAUTION:USE OF CONTROLS OR ADJUSTMENTS OR PERFORMANCE OF PROCEDURES OTHER THAN THOSE SPECI- FIED HEREIN MAY RESULT IN HAZARDOUS RADIATION EXPOSURE. CAUTION:VISIBLE AND INVISIBLE LASER RADIATION WHEN OPEN AND INTERLOCK DEFEATED. DO NOT STARE INTO BEAM. LOCATION:INSIDE, NEAR THE DECK MECHANISM. Laser Safety WARNING :TO REDUCE THE RISK OF FIRE OR ELECTRIC SHOCK, DO NOT EXPOSE THIS APPLIANCE TO RAIN OR MOISTURE. The lightning flash with arrowhead symbol, within an equilateral triangle, is intended to aler t the user to the presence of uninsulated dangerous voltage within the products enclosure that may be of sufficient magnitude to constitute a risk of electric shock to persons. The exclamation point within an equilateral triangle is intended to alert the user to the presence of impor tant operating and maintenance (servicing) instructions in the literature accompanying the appliance. CAUTION:TO REDUCE THE RISK OF ELECTRIC SHOCK, DO NOT REMOVE COVER (OR BACK). NO USER SERVICEABLE PARTS INSIDE. REFER SERVICING TO QUALIFIED SERVICE PERSONNEL. CAUTION RISK OF ELECTRIC SHOCK DO NOT OPEN RADIO-TV INTERFERENCE This equipment has been tested and found to comply with the limits for a Class B digital device, pursuant to Part 15 of the FCC Rules. These limits are designed to provide reasonable protection against harmful interference in a residential installation. This equipment generates, uses, and can radiate radio frequency energy and, if not installed and used in accordance with the instructions, may cause harmful interference to radio communications. However, there is no guarantee that interference will not occur in a particular installation. If this equipment does cause harmful interference to radio or television reception, which can be determined by turning the equipment off and on, the user is encouraged to try to correct the interference by one or more of the following measures: 1) Reorient or relocate the receiving antenna. 2) Increase the separation between the equipment and receiver. 3) Connect the equipment into an outlet on a circuit different from that to which the receiver is connected. 4) Consult the dealer or an experienced radio/TV technician for help. This Class B digital apparatus complies with Canadian ICES-003. Cet appareil numérique de la classe B est conforme à la norme NMB-003 du Canada. FCC WARNING- This equipment may generate or use radio frequency energy. Changes or modifications to this equipment may cause harmful interference unless the modifications are expressly approved in the instruction manual. The user could lose the authority to operate this equipment if an unauthorized change or modification is made. CAUTION: TO PREVENT ELECTRIC SHOCK, MATCH WIDE BLADE OF PLUG TO WIDE SLOT, FULLY INSERT. ATTENTION: POUR ÉVITER LES CHOC ÉLECTRIQUES, INTRODUIRE LA LAME LA PLUS LARGE DE LA FICHE DANS LA BORNE CORRESPONDANTE DE LA PRISE ET POUSSER JUSQUAU FOND. Nonuse periods - Turn the unit off when it is not in use. Unplug the unit from the household AC outlet if it is not to be used for a long time. Unplug the unit during lightning storms. A NOTE ABOUT RECYCLINGThis products packaging materials are recyclable and can be reused. Please dispose of any materials in accordance with your local recycling regulations. Batteries should never be thrown away or incinerated but disposed of in accordance with your local regulations concerning chemical wastes. ¡Keep the set away from moisture water and dust. ¡Never disassemble or modify the set in any way.¡Do not put heavy objects on the AC power cord.¡Keep the AC power cord away from heat appliances. ¡Once the AC power cord is damaged be sure to replace with a new one.

Page 2

-“ 3-“ EN English 1) Read Instructions - All the safety and operating instructions should be read before the product is operated. 2) Retain Instructions - The safety and operating instruc- tions should be retained for future reference. 3) Heed Warnings - All warnings on the product and in the operating instructions should be adhered to. 4) Follow Instructions - All operating and use instruc- tions should be followed. 5) Cleaning - Unplug this product from the wall outlet before cleaning. Do not use liquid cleaners or aerosol cleaners. Use a damp cloth for cleaning. 6) Attachments - Do not use attachments not recom- mended by the product manufacturer as they may cause hazards. 7) Water and Moisture - Do not use this product near water - for example, near a bath tub, wash bowl, kitchen sink, or laundry tub; in a wet basement; or near a swimming pool; and the like. 8) Accessories - Do not place this product on an unsta- ble cart, stand, tripod, bracket, or table. The product may fall, causing serious injury to a child or adult, and serious damage to the product. Use only with a cart, stand, tripod, bracket, or table recommended by the manufacturer, or sold with the product. Any mounting of the product should follow the manufacturers instructions, and should use a mounting accesso- ry recommended by the manu- facturer. 9) A product and cart combination should be moved with care. Quick stops, excessive force, and uneven surfaces may cause the product and cart combination to overturn. 10) Ventilation - Slots and openings in the cabinet are provided for ventilation and to ensure reliable opera- tion of the product and to protect it from overheating, and these openings must not be blocked or covered. The openings should never be blocked by placing the product on a bed, sofa, rug, or other similar surface. This product should not be placed in a built-in instal- lation such as a bookcase or rack unless proper ven- tilation is provided or the manufacturer's instructions have been adhered to. 11) Power Sources - This product should be operated only from the type of power source indicated on the marking label. If you are not sure of the type of power supply to your home, consult your product dealer or local power company. For products intended to oper- ate from battery power, or other sources, refer to the operating instructions. 12) Grounding or Polarization - This product may be equipped with a polarized alternating-current line plug (a plug having one blade wider than the other). This plug will fit into the power outlet only one way. This is a safety feature. If you are unable to insert the plug fully into the outlet, try reversing the plug. If the plug should still fail to fit, contact your electrician to replace your obsolete outlet. Do not defeat the safety purpose of the polarized plug.13) Power-Cord Protection - Power-supply cords should be routed so that they are not likely to be walked on or pinched by items placed upon or against them, paying particular attention to cords at plugs, conve- nience receptacles, and the point where they exit from the product. 14) Lightning - For added protection for this product dur- ing a lightning storm, or when it is left unattended and unused for long periods of time, unplug it from the wall outlet. This will prevent damage to the product due to lightning and power-line surges. 15) Power lines - An outside antenna system should not be located in the vicinity of overhead power lines or other electric light or power circuits, or where it can fall into such power lines or circuits. When installing an outside antenna system, extreme care should be taken to keep from touching such power lines or cir- cuits as contact with them might be fatal. 16) Overloading - Do not overload wall outlets, extension cords, or integral convenience receptacles as this can result in a risk of fire or electric shock. 17) Object and Liquid Entry - Never push objects of any kind into this product through openings as they may touch dangerous voltage points or short-out parts that could result in a fire or electric shock. Never spill liq- uid of any kind on the product. 18) Servicing - Do not attempt to service this product yourself as opening or removing covers may expose you to dangerous voltage or other hazards. Refer all servicing to qualified service personnel. 19) Damage Requiring Service - Unplug this product from the wall outlet and refer servicing to qualified service personnel under the following conditions: a) When the power-supply cord or plug is damaged, b) If liquid has been spilled, or objects have fallen into the product, c) If the product has been exposed to rain or water, d) If the product does not operate normally by follow- ing the operating instructions. Adjust only those controls that are covered by the operating instruc- tions as an improper adjustment of other controls may result in damage and will often require exten- sive work by a qualified technician to restore the product to its normal operation, e) If the product has been dropped or damaged in any way. f) When the product exhibits a distinct change in per- formance - this indicates a need for service. 20) Replacement Parts - When replacement parts are required, be sure the service technician has used replacement parts specified by the manufacturer or have the same characteristics as the original part. Unauthorized substitutions may result in fire, electric shock, or other hazards. 21) Safety Check - Upon completion of any service or repairs to this product, ask the service technician to perform safety checks to determine that the product is in proper operating condition. 22) Heat - The product should be situated away from heat sources such as radiators, heat registers, stoves, or other products (including amplifiers) that produce heat. PORTABLE CART WARNING (Symbol provided by RETAC) S3125A Important Safeguards

Page 12

-“ 13-“ EN English Connection to an audio system Stereo system NOTES - If output Dolby Digital audio, connect to a Dolby Digital decoder, and set Dolby Digital to on for audio output in the setup mode. (See page 26) - If output DTS audio, connect to a DTS decoder, and set DTS to ON for audio output in the setup mode. (See page 26) - Unless connected to a Dolby Digital decoder, or a DTS decoder, set Dolby Digital or DTS to OFF for audio output in the setup mode. Playing a DVD using incorrect settings may generate noise distortion, and may also damage the speakers. (See page 26) - The audio source on a disc in a 5.1 channel Dolby Digital surround format cannot be recorded as digital sound by an MD or DAT deck. - Set Dolby Digital and DTS to OFF for audio output in the setup mode for method 1 only. Playing a DVD using incorrect settings may generate noise distortion, and may also damage the speakers. (Refer to page 26 to set ON for Dolby Digital and DTS) AUDIO DVD Audio Input Jacks Digital Audio Input Jacks Analog Audio Out Digital Audio Out - Method 1 DVD Player + Stereo system - Method 2 DVD Player + Dolby Digital decoder or DTS decoder Dolby Digital decoder or DTS decoder Method 1 Method 2 HOOK UPS The following show examples of connections commonly used to connect the DVD player either TV and other components. If using this DVD player to playback a DVD in a 5.1 channel Dolby Digital surround or DTS surround format, the DVD player outputs a Dolby Digital or DTS data stream from its OPTICAL or COAXIAL DIGITAL AUDIO OUT jacks. 5.1 channel Dolby Digital Surround sound and DTS sound can also be output from the 5.1 CH OUTPUT jacks. By hooking the player up to a Dolby Digital or DTS decoder, you can enjoy a more convincing, realistic ambience with powerful and high-quality surround sound of a professional standard, which can be heard in movie theaters. Use an audio coaxial or optical digital cable (not included) for the audio connections. Use audio cables (commercially available ) for the 5.1 CH audio connection. Notes ¡Be sure to turn off the power to all components in the system before connecting another component. ¡Refer to the Instruction Manuals for your TV, stereo system and any other components to be connected to the DVD player.

Page 79

-“20 -“ SP En el modo de parada, pre- sione el botón MODE . -Aparecer á la pantalla TODOS LOS GRUPOS. Presione el botón PLAY para ini- ciar la reproducción. 2 1 DVD-A Esta función cambia el orden de reproducción de las pistas en lugar de reproducirlas en el orden original. Cuando se reproducen pistas aleatoria- mente en un disco sencillo En el modo de parada, presione una vez el botó n RANDOM o pre- sione dos veces el botó n MODE . Presione el bot ón PLAY para comenzar le reproducci ón aleatoria. Cuando se reproducen pistas aleatoriamente en m ás de un disco En el modo de parada, presione dos veces el bot ónRANDOM o presione tres veces el botó n MODE . Presione el bot ón PLAY para comenzar le reproducci ón aleatoria. NOTAS:- Si hay otros discos que no son CDs en la bandeja de disco, la pantalla mostrar á - al lado del n úmero de disco. Si no hay ningú n disco colocado en la bande- ja, esta área estar á en blanco. - Si desea repetir la pista actual estando en la selecció n aleatoria, presione repetidamente el bot ón REPEAT , hasta que TRACK aparezca durante la reproducció n. Si desea repetir la selección aleatoria completa, presione repetidamente el bot ón REPEAT hasta que DISC aparezca durante la reproducció n. - Remí tase a la pá gina 22 para má s información sobre la reproduc- ció n de MP3, WMA, y JPEG 2 1 2 1 CD Reproducción aleatoria ALEATORIO AREATORIA PROGRAMADA SIN INDICACIÓN CD [AUDIO] REPRODUCCIÓN DE UN DISCO En el modo de parada, pre- sione el botón MODE tres veces. -Aparecer á la pantalla de selección de grupo. Presione los botones de cur- sor (Ko L) para seleccionar el grupo que desea reproducir de forma aleatoria y, a contin- uación, presione el botón ENTER . -Aparecer á la pantalla ALEATORIO.Presione el botón PLAY . -La reproducción aleatoria comen- zar á. 3 2 1 DVD-A ALL GROUP ALL GROUP PLAYBACK SIN IND CAC ÓN DVD AUD O Reproducción de todos los grupos TODO1 1 02 252 1 03 30 TODO1/1 ALEATORIO DVD AUDIO TODO TOTAL 2 05 55ALEATORIO AREATORIA PROGRAMADA SIN IND CACIÓN Este reproductor de DVD puede reproducir imágenes y sonido de datos grabados en formato MP3, JPEG y WMA en discos CD-R y CD-RW. El reproductor de DVD tambi én puede reproducir archivos JPEG almacenados en un disco Kodak Picture CD. El usuario puede disfrutar de imágenes en su televisor reproduciendo CDs fotogr áficos. * Picture CD (CD fotogr áfico) es un servicio que permite con- vertir una fotografía tomada con una cámara convencional en datos digitales que se guardan en un CD. WMA JPEG MP3 Reproducción de archivos MP3 / JPEG / WMA Información acerca de los discos MP3, JPEG y WMA -Un archivo cuya extensió n es .mp3 (MP3) se denomina archivo MP3 . -Un archivo cuya extensi ón es .jpg (JPG) o .jpeg (JPEG) se denomina archivo JPEG. El reproductor de DVD puede reproducir im ágenes que se ajustan a la especificaci ón Exif*. * Este es un formato de archivo (Archivo de Imagen Intercambiable) establecido por la Asociación Japonesa de Desarrollo de la Industria Electr ónica (JEIDA). -Un archivo cuya extensión es .wma (WMA) se denomina archivo WMA. -Los archivos cuya extensi ón no es .mp3 (MP3), .jpg (JPG), .jpeg (JPEG) o .wma (WMA), no aparecen en el men ú MP3, JPEG o WMA. -Si el archivo no ha sido grabado en formato MP3, JPEG o WMA, podr á producirse ruido incluso si la extensión del archivo es .mp3 (MP3), .jpg (JPG), .jpeg (JPEG) o .wma (WMA). Cuando se inserta un disco que contiene archivos MP3, JPEG o WMA en el reproductor de DVD, el men ú de pistas aparece en la pantalla de TV y el n úmero de pistas se visu- aliza en el panel delantero. Coloque el disco en la bandeja con la etiqueta hacia arriba. Para discos que contienen pistas MP3, JPEG o WMA: -Aparece un men ú de pistas MP3, JPEG o WMA en la pantalla.-El símbolo aparece arriba del nombre del grupo.-El símbolo aparece arriba de los archivos MP3.-El símbolo aparece arriba de los archivos JPEG.-El símbolo aparece arriba de los archivos WMA.-Si la imagen se extiende más allá de los límites de la pan- talla, aparece una flecha que apunta hacia abajo L, indi- cando que el usuario puede ver otra parte de la imagen en la siguiente página. De igual forma, una flecha que apunta hacia arriba Kindica que el usuario puede ver otra parte de la imagen en la página anterior. El n úmero de la página actual y el n úmero total de páginas aparecen a la derecha de la flecha que apunta hacia abajo L. -El sistema puede reconocer hasta 255 grupos (o carpetas) y hasta 256 pistas. (Esto se aplica a aquellos casos en que se han grabado archivos MP3, JPEG y WMA mezclados.) -Si el grupo no contiene archivos MP3, JPEG o WMA, el grupo no se visualiza. -El reproductor de DVD puede reproducir datos grabados en un disco segú n la norma ISO 9660 Nivel 1, Nivel 2 o Joliet. -También es posible reproducir discos que contienen datos grabados en multisesión. -Para m ás detalles acerca de los sistemas de grabaci ón, consulte el manual de instrucciones de la unidad CD-R / CD-RW o del software de escritura. 1 Archivos MP3 utilizables Comentarios Frecuencia de muestreo 44.1 kHz 48 kHz - Esta prohibido grabar sonido MP3 en un dispositivo digital cuando la conexi ón se real- iza de forma digital. Tipo MPEG1 capa de audio 3 - Se recomienda usar archivos MP3 grabados a una velocidad en bits fija de 112 kbps o superior. Archivos JPEG utilizables Comentarios Tamaño de la imagen Límite superior:6300 x 5100 puntosLímite inferior: 32 x 32 puntos - Cuando una imagen JPEG se extiende más allá de los límites de la pantalla, su tamaño se reduce para poder mostrarla en la pantalla. ALEATORIO [5DISCO]CD [AUDIO] CD [AUDIO] CD [AUDIO] Para obtener más información acerca de Picture CD, consulte en una tienda que ofrezca el servicio de revelado de Kodak Inc.