Creek obh 14 owners manual

This is the 2 pages manual for creek obh 14 owners manual.
Read or download the pdf for free. If you want to contribute, please mail your pdfs to info@audioservicemanuals.com.

Page: 1 / 2
left right
creek obh 14 owners manual

Extracted text from creek obh 14 owners manual (Ocr-read)


Page 1

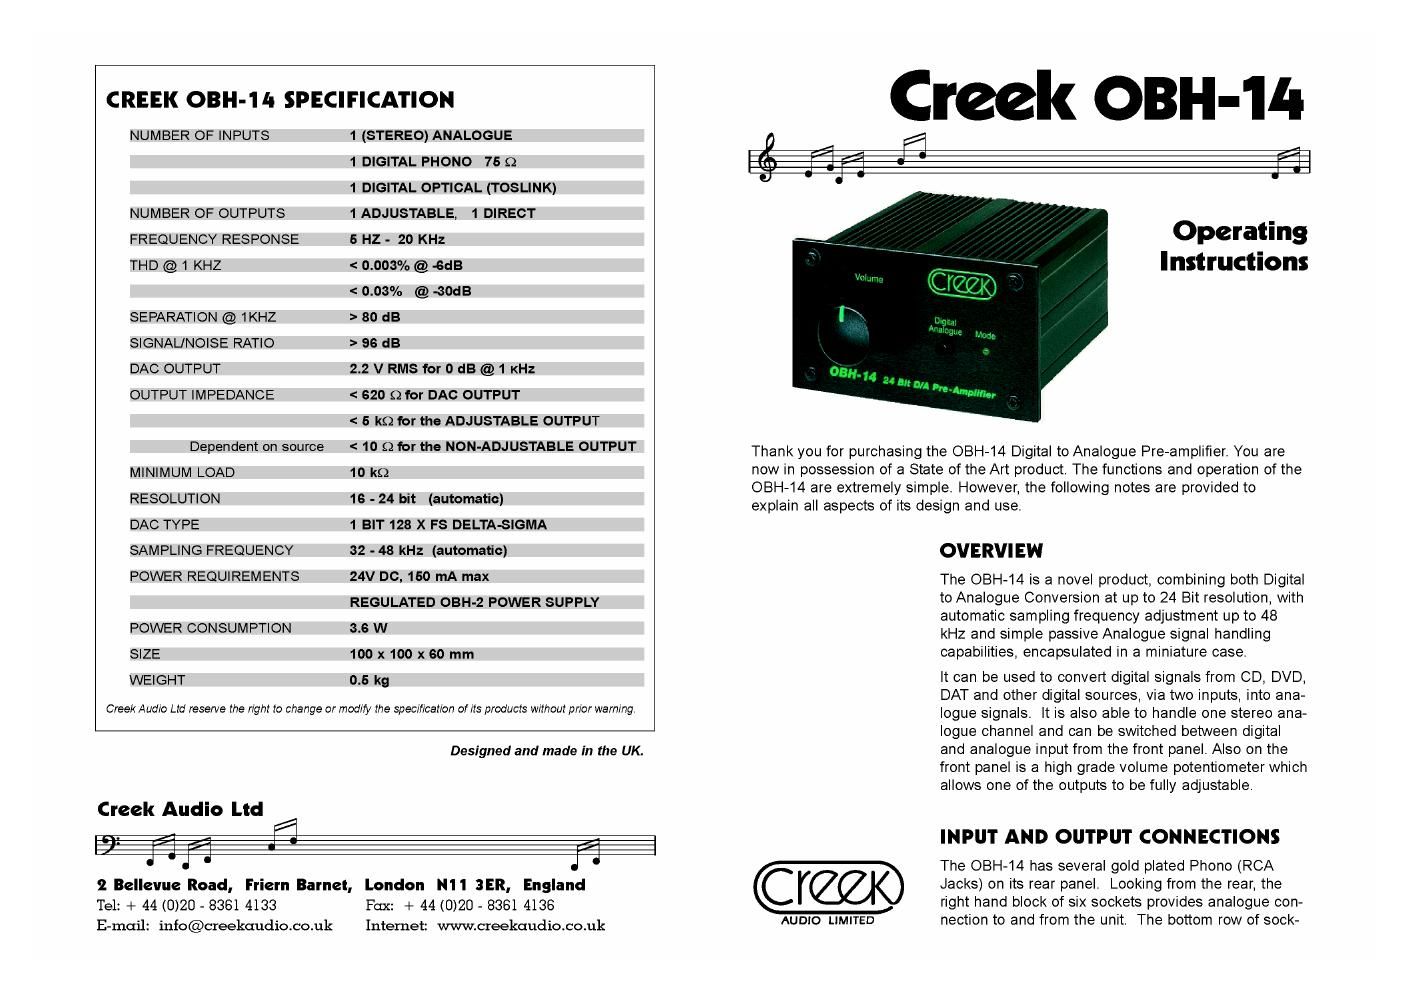
NUMBER OF INPUTS

NUMBER OF OUTPUTS
FREQUENCY RESPONSE
THD @ 1 KHZ

SEPARATION @ 1KHZ
SIGNAL/NOISE RATIO
DAC OUTPUT

OUTPUT IMPEDANCE

Dependent on source
MINIMUM LOAD
RESOLUTION
DAC TYPE
SAMPLING FREQUENCY
POWER REQUIREMENTS

POWER CONSUMPTION
SIZE
WEIGHT

CREEK OBH-1ll SPECIFICATION

1 (STEREO) ANALOGUE

1 DIGITAL PHONO 76 Q

1 DIGITAL OPTICAL (TOSLINK)

1 ADJUSTABLE, 1 DIRECT

6 HZ - 20 KHz

< 0.003% @ 6dB

< 0.03% @ -30dB

> 80 dB

> 96 dB

2.2 V RMS for 0 dB @1KHz

< 620 Q for DAC OUTPUT

< 5 kn Tor the ADJUSTABLE OUTPUT
< 10 Q for the NON-ADJUSTABLE OUTPUT
10 kn

16 - 24 bit (automatic)

1 BIT 128 X FS DELTA-SIGMA

32 - 48 kHz (automatic)

24V DC. 150 mA max

REGULATED OBH-2 POWER SUPPLY
3.6 W

100 x100 x 60 mm

0.5 kg

Creek Audio Ltd reserve the right to change or modify the specification of its products without prior warning.

Creek Audio Ltd

Designed and made in fire UK.

'15

r, I

J.

.L__L

."11

44

j

2 Bellevue Road, Friern Barnet, London N11 3ER, England

Tel: + 44 (0)20 - 8361 4133
E-mail: info@creekaudio.co.uk

Fax: + 44 (0)20 - 8361 4138
Internet: wwwcreekqudio.co.uk

A
I

."V

Operating
Instructions

Thank you for purchasing the OBH-14 Digital to Analogue Pre-amplifier. You are
now in possession of a State of the Art product. The functions and operation of the
OBH-14 are extremely simple. However, the following notes are provided to
explain all aspects of its design and use.

Ci

AUDIO LIMITED

OVERVIEW

The OBH-14 is a novel product, combining both Digital
to Analogue Conversion at up to 24 Bit resolution, with
automatic sampling frequency adjustment up to 48
kHz and simple passive Analogue signal handling
capabilities, encapsulated in a miniature case.

It can be used to convert digital signals from CD, DVD,
DAT and other digital sources, via two inputs, into ana-
logue signals. It is also able to handle one stereo ana-
logue channel and can be switched between digital
and analogue input from the front panel. Also on the
front panel is a high grade volume potentiometer which
allows one of the outputs to be fully adjustable.

INPUT AND OUTPUT CONNECTIONS

The OBH-14 has several gold plated Phono (RCA
Jacks) on its rear panel. Looking from the rear, the
right hand block of six sockets provides analogue con-
nection to and from the unit. The bottom row of sock-

Page 2

ets are for the right channel and the top row for the left. The left hand sockets
are inputs for line level analogue signals. The middle sockets are fixed level
outputs from either digital or analogue sources. The right hand sockets are
adjustable analogue outputs from either the analogue or processed digital
inputs. On the left side of the OBH-14 there is a single phono (RCA Jack)
socket, which is for inputting digital signals from various sources by co-axial
cable. Next to it there is an optical (TORX) socket for inputting digital signals
from various sources by fibre optic link. To use the TORX connector, first
remove the plastic bung that covers the socket by gently pulling it out. If not in
use, keep the TORX socket covered by refitting the plastic bung.

POWER SUPPLY

The OBH-14 is supplied with a Creek OBH-2 high grade regulated power sup-
ply. The OBH-2 should be located in a ventilated place. Exiting from the OBH-
2 there are two cables, one for the mains and one for the OBH-14. The thin
cable with a small 2.1mm DC jack plug should be connected to the OBH-14, by
plugging it into the DC input socket in the middle of the rear panel. The second
cable is thicker and should have a mains plug fitted suitable forthe country of
use. Plug this into a wall socket or distribution block. It should be noted that,
with two pin mains sockets, it is possible to reverse the plugs polarity in the
wall socket, which may provide a noticeable improvement or reduction in sound
quality. Experiment with this for best results. It is not necessary to switch-on
the unit as it is designed to run constantly. If it needs to be switched off, the
2.1mm plug should be unplugged from the rear of the OBH-14, orthe mains
plug should be removed from the socket or switched off from the wall socket.

INSTALLATION

Connect the DC jack from the Power supply to the socket on the rear panel.
Plug a digital interconnect from source (CD, DVD, DAT) into either co-ax or
TORX connector. Plug a pair of high quality interconnects from the fixed or
variable output sockets on the rear of the OBH-14 to the input of a Pre-amp or
Integrated amp.

The volume control on the front panel of the OBH-14 and the variable output
sockets at the back will allow it to be used as a Pre-amplifier, so it can drive the
input of a Power amplifier directly, without the need for extra amplification. Plug
the mains plug into the wall socket or distribution block and power up your sys-
tem.

OPERATION

Select digital or analogue signal path from the push button marked Mode on
the front panel of the OBH-14. When the Mode' button is out the OBH-14 is in
Analogue mode, and the digital section is switched off, to prevent interference
problems. During this time the LED on the front panel will glow Green. When
the button is in the in' position and the LED is glowing Yellow, it is in Digital
mode. The two digital input sockets are common, so only one digital input

should be used at any time. However, both inputs could be connected to differ-
ent sources as long as these are not used simultaneously. If the OBH-14 is
used to drive a Power amplifier and volume adjustments are required, the con-
trol knob on the front panel of the OBH-14 can be used to increase or decrease
the level from either Analogue or Digital.

1. Due to the nature of the OBH-14 design, if it is switched on while the Power
amplifier or Integrated amplifier is connected and running, it is possible that an
unpleasant noise will be heard from the loudspeakers. Therefore, do not switch
on the power until the level is at zero, or the amplifier is switched off first.

2. The OBH-14 should be placed away from the stay fields of transformers or
other interference signals for best results. If in doubt consult your supplying
dealer for advice.

3. The OBH-14 draws very small amounts of current and will not increase your
electricity bill if left on permanent/y. However. if it is switched off and on, it will
take a few minutes to warm up and sound normal again.

4. When new, the OBH-14 will require at least 24 hours of use to Burn In and
optimise its sonic performance. If let? on the floor it should be treated with care,
as it contains mains voltages. There are no user serviceable parts inside.

WIRING DIAGRAMS

CD Player

OBH
Power Supply

Amplifier