Bose ps1 l1 rev1 schematics

This is the 57 pages manual for bose ps1 l1 rev1 schematics.
Read or download the pdf for free. If you want to contribute, please mail your pdfs to info@audioservicemanuals.com.

Page: 1 / 57
left right
bose ps1 l1 rev1 schematics

Extracted text from bose ps1 l1 rev1 schematics (Ocr-read)


Page 1

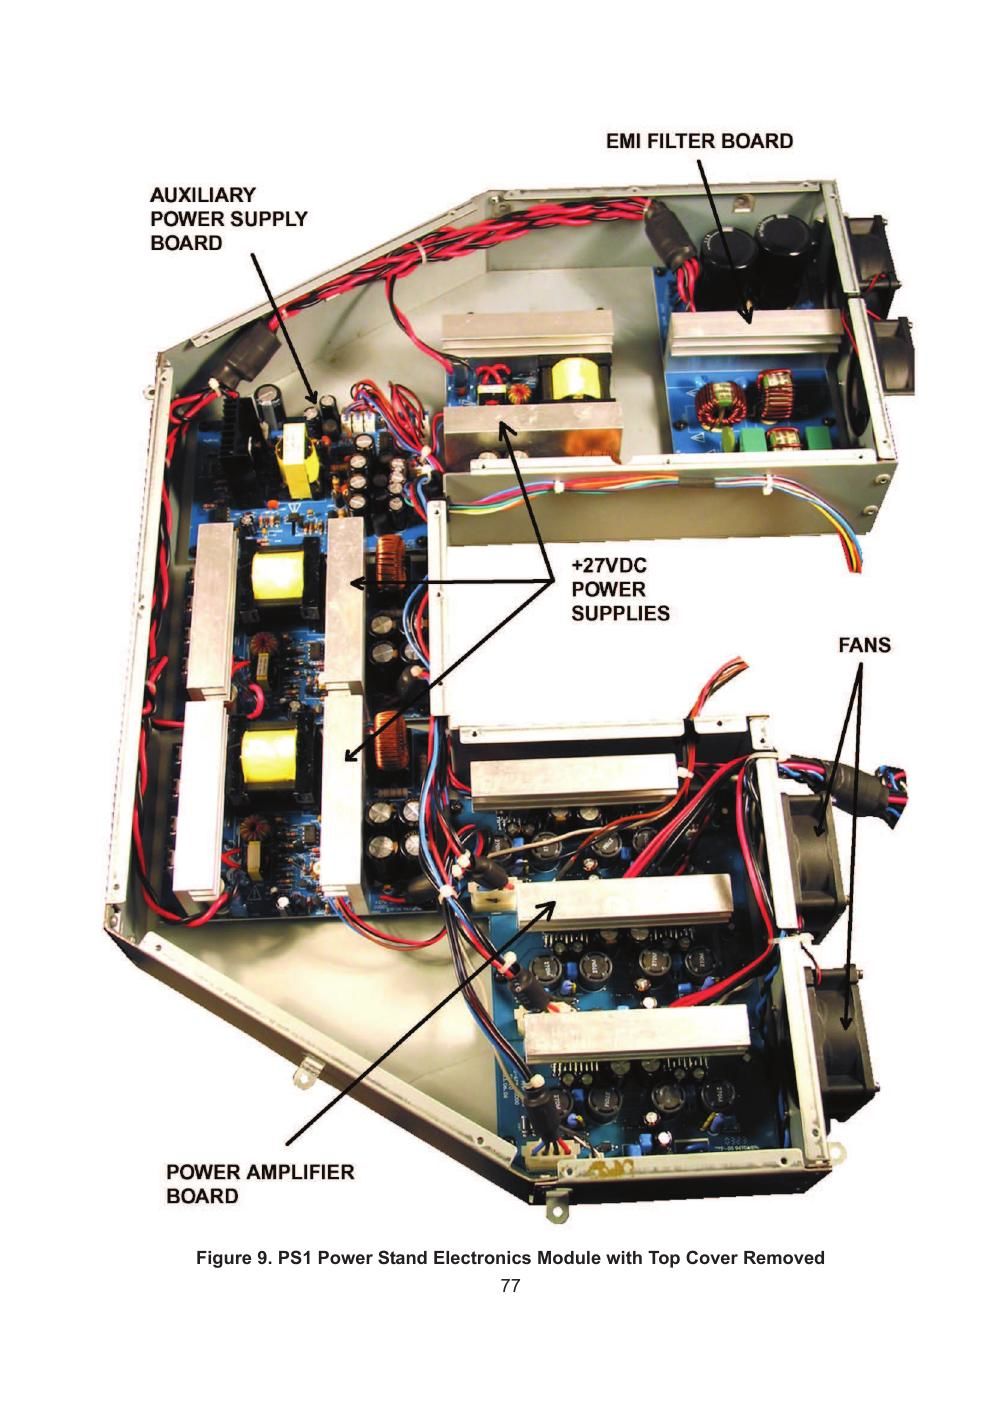
EMI FILTER BOARD

AUXILIARY
POWER SUPPLY

+27VDC
POWER
SUPPLIES

POWER AMPLIFIER
BOARD

Figure 9. PS1 Power Stand Electronics Module with Top Cover Removed
77

Page 2

Disassembly Procedures

Power Stand Procedures

Note: Refer to Figure 9 for the following
procedures.

1. Lower Housing Removal

1.1 Place the power stand on a soft surface
so that the line array opening faces down.

1.2 Using a Phillips-head screwdriver,
remove the 19 screws that secure the lower
housing to the upper housing. Lift off the
lower housing.

2. Amplifier Housing Removal
2.1 Perform procedure 1.

2.2 Make a note of the wiring, and discon-
nect the wiring harnesses and connectors
that run to the amplifier housing. The ampli-
fier housing is the large metal box with the
four fans.

2.3 Using a Phillips-head screwdriver,
remove the four screws that secure the
power stand base plate to the bottom of the
line array cavity. Lift it off of the cavity. Be
careful not to damage any wires.

2.4 Once all of the wiring is disconnected,
use a Phillips-head screwdriver to remove
the 16 screws that secure the amplifier
housing to the power stand upper housing.
Carefully lift the amplifier housing out of the
power stand upper housing.

3. Line Array Cavity Removal
3.1 Perform procedure 2.

3.2 Using a Phillips-head screwdriver,
remove the three screws that secure the line
array cavity to the upper housing. Lift the line
array cavity off of the upper housing. The
power stand foot pedal will disengage from
the shaft.

78