Amc wm 100 a owners manual

This is the 2 pages manual for amc wm 100 a owners manual.
Read or download the pdf for free. If you want to contribute, please mail your pdfs to info@audioservicemanuals.com.

Page: 1 / 2
left right
amc wm 100 a owners manual

Extracted text from amc wm 100 a owners manual (Ocr-read)


Page 1

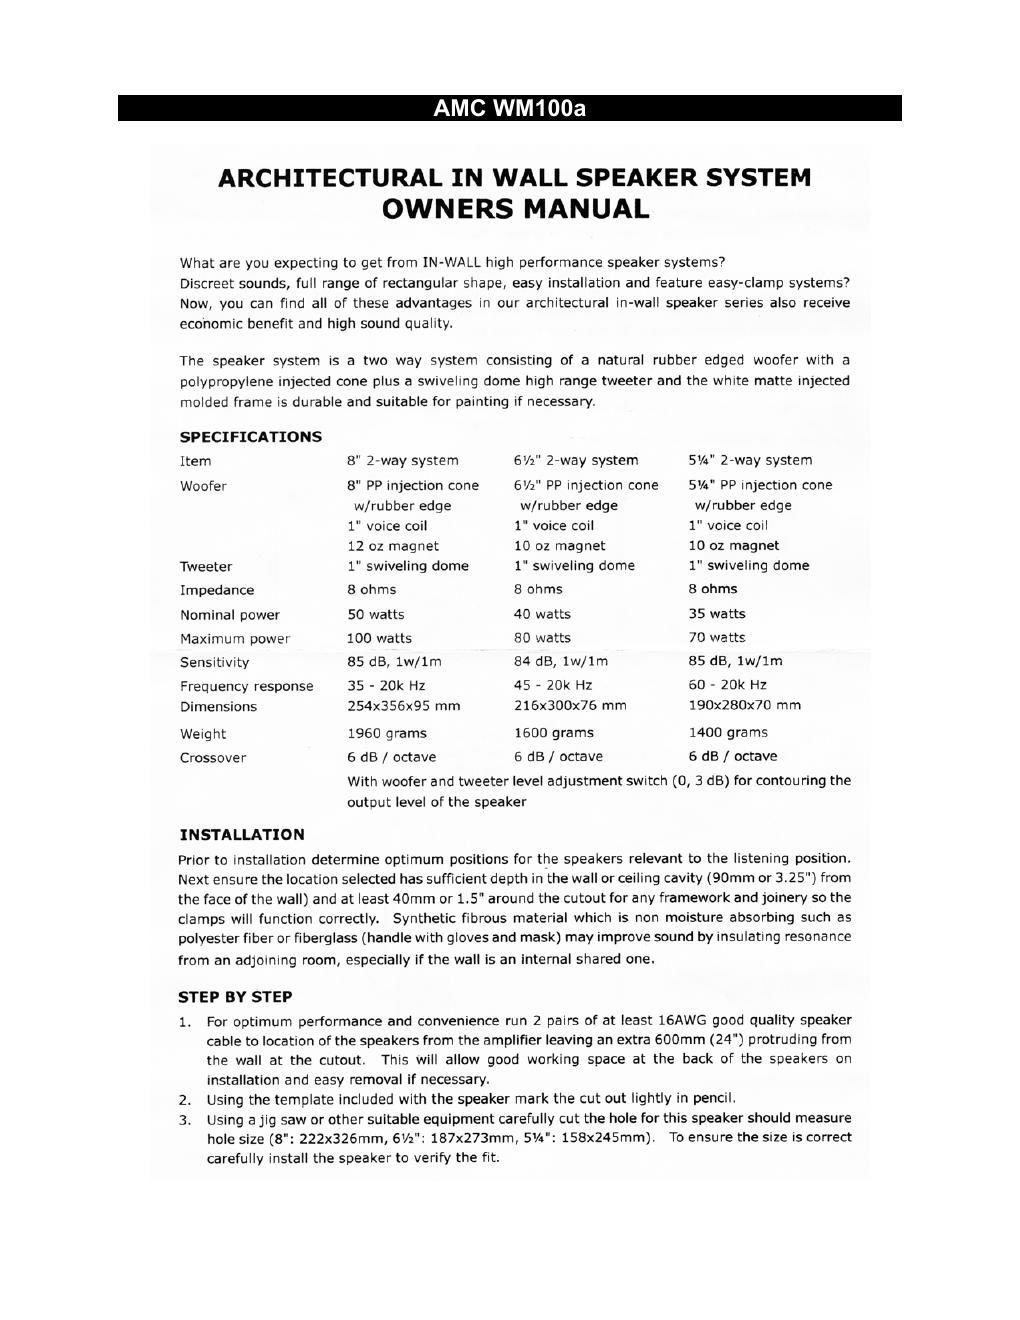
AMC WM100a

ARCHITECTURAL IN WALL SPEAKER SYSTEM
OWNERS MANUAL

What are you expecting to get from IN-WALL high performance speaker systems?

Discreet sounds, full range of rectangular shape, easy installation and feature easy-clamp systems7
Now, you can find all of these advantages in our architectural in-wall speaker series also receive
economic benefit and high sound quality

The speaker system is a two way system consisting of a natural rubber edged woofer With a
polypropylene injected cone plus a swuveling dome high range tweeter and the white matte injected
molded frame is durable and suitable for painting if necessary.

SPECIFICATIONS
Item 8" 2-way system 6V2 2-way system 5%" 2-way system
Woofer 8 PP injection cone 6V2" PP injection cone 5%" PP injection cone
w/rubber edge w/rubber edge w/rubber edge
1 voice coil 1" voice coil 1" voice coil
12 oz magnet 10 oz magnet 10 oz magnet
Tweeter 1" swiveling dome 1" swiveling dome 1" swiveling dome
Impedance 8 ohms 8 ohms 8 ohms
Nominal power 50 watts 40 watts 35 watts
Maximum power 100 watts 80 watts 70 watts
Sensitivuty 85 dB, lw/lm 84 dB, lw/lm 85 dB, 1w/1m
Frequency response 35 - 20k Hz 45 - 20k Hz 60 - 20k Hz
Dimensions 254x356x95 mm 216x300x76 mm 190x280x70 mm
Weight 1960 grams 1600 grams 1400 grams
Crossover 6 dB / octave 6 dB / octave 6 dB / octave
With woofer and tweeter level adjustment switch (0, 3 dB) for contouring the
output level of the speaker
INSTALLATION

Prior to installation determine optimum positions for the speakers relevant to the listening positioni
Next ensure the location selected has sufficient depth in the wall or ceiling cavity (90mm or 3.25") from
the face of the wall) and at least 40mm or 1.5" around the cutout for any framework and joinery so the
clamps will function correctly. Synthetic fibrous material which is non moisture absorbing such as
polyester fiber or fiberglass (handle with gloves and mask) may improve sound by insulating resonance
from an adjoining room, especially if the wall is an internal shared one.

STEP BY STEP

1. For optimum performance and convenience run 2 pairs of at least 16AWG good quality speaker
cable to location of the speakers from the amplifier leaving an extra 600mm (24) protruding from
the wall at the cutout. This will allow good working space at the back of the speakers on
installation and easy removal if necessary

2. Using the template included with the speaker mark the cut out lightly in pencil.

3. Using a jig saw or other suitable equipment carefully cut the hole for this speaker should measure
hole size (8: 222x326mm, 6V2": 187x273mm, 5%": 158x245mm). To ensure the size is correct
carefully install the speaker to verify the fit.

Page 2

AMC WM100a

4. With a hooked piece of strong wire inserted at the corner of the speaker, gently pull to remove the
grille and expose the mounting screws which will be tightened to operate the wall clamps,

5. Now that it all fits properly, strip 10mm or so of PVC from the cable and connect the tWisted copper
end to be inserted In the speakers play in phase. Put the + wire to the red terminal at the amp
and at the speaker.

6. As best as possible ensure the mounting screws allow the speaker to fit into the wall Without too
much play and then tighten the clamping screws through the front panel so the clamps draw up on
the other side of the wall. when the speaker is squarely mounted the screw can a!l be tightened,

7, Replace the grille and repeat for the other speaker being installed.

LOUDSPEAKER PLACEMENT

STEP 1 STEP 2
Using template provided, trace hole pattern on Attach loudspeaker Wires to speaker terminals,
the wall. position speaker frame into cutout.

Cut hole in the wall, following trace pattern.

SPEAKER

STEP 3 STEP 4
Carefully tighten the mounting screws. The When satisfied the speaker IS operational, insert
mounting clamp will secure the speaker in place the grille.

as the screws are tightened.

GRILLE

SCREW
DRIVER

Printed in Taiwan
WE0309