Amc cdm 7 laser adjustment en

This is the 1 pages manual for amc cdm 7 laser adjustment en.
Read or download the pdf for free. If you want to contribute, please mail your pdfs to info@audioservicemanuals.com.

Page: 1 / 1
left
amc cdm 7 laser adjustment en

Extracted text from amc cdm 7 laser adjustment en (Ocr-read)


Page 1

AMC CDM7
LASER ADJUSTMENT PROCEDURE

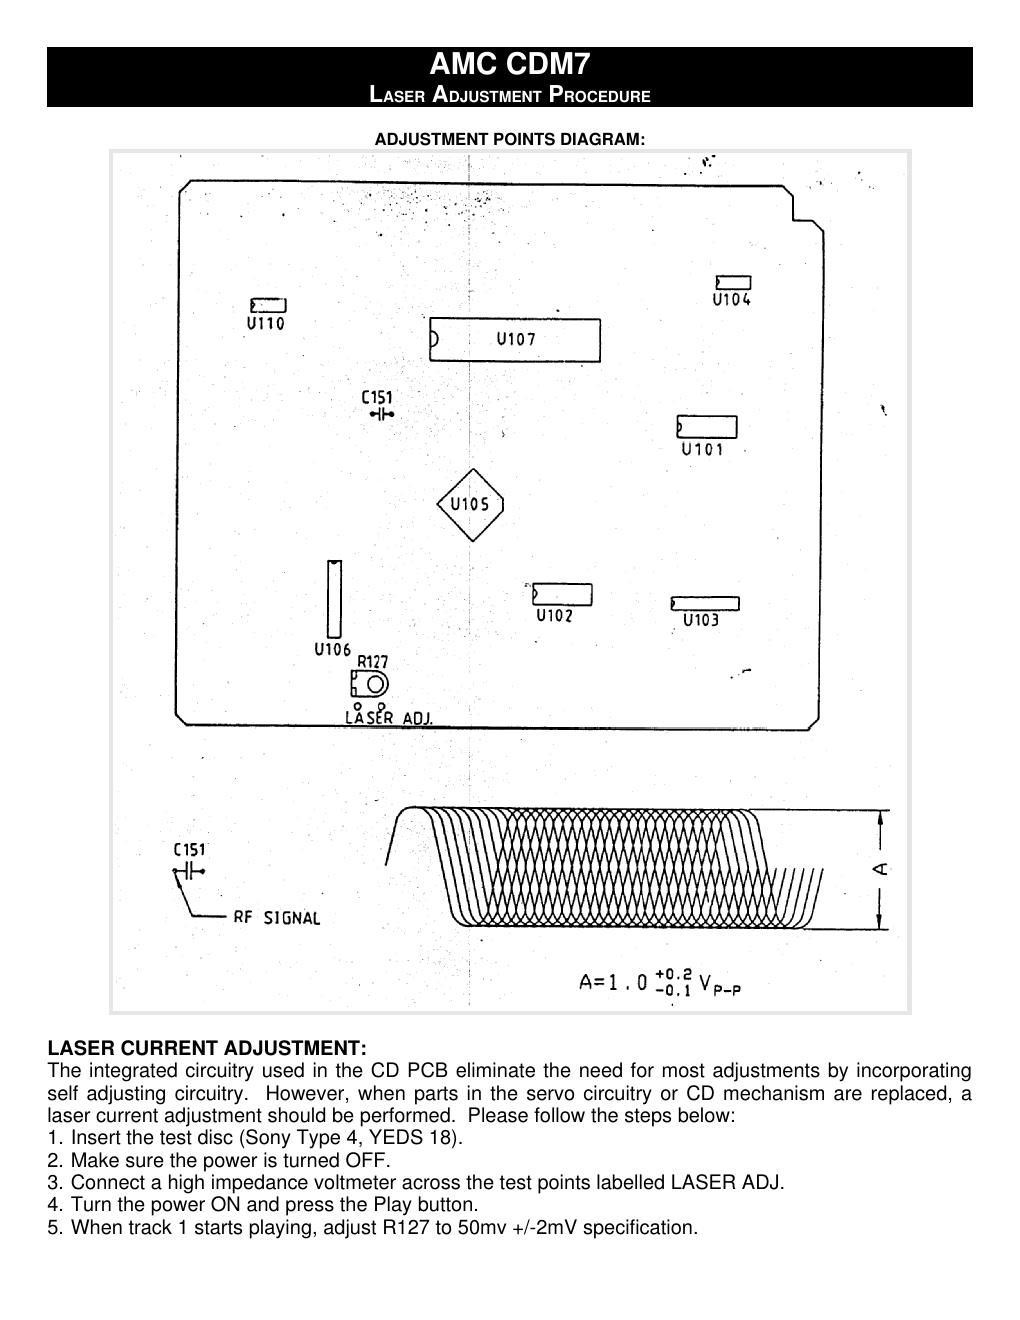
ADJUSTMENT POINTS DIAGRAM:

/ R
:1
E2] U101.
uno
) U107
[151
4+.
U1 or
U10? u103
uros R127 F
\ L333: ADJ.

l'lll'llrrr;iirrrrrl\
Nil

(151

V:
RF SIGNAL

\llllllllllllllllllllllll

\\ lll
LASER CURRENT ADJUSTMENT:

l
l l,696.6%.3626.0WlVllllltllllll
The integrated circuitry used in the CD PCB eliminate the need for most adjustments by incorporating

_¢_u_ 3AA, _ _ A»;33.0.0_t,A_¢,A_¢.t,o,b.g¢.a,ga_
self adjusting circuitry. However, when parts in the servo circuitry or CD mechanism are replaced, a
laser current adjustment should be performed. Please follow the steps below:
1. Insert the test disc (Sony Type 4, YEDS 18).
2. Make sure the power is turned OFF.
3. Connect a high impedance voltmeter across the test points labelled LASER ADJ.
4. Turn the power ON and press the Play button.
5. When track 1 starts playing, adjust R127 to 50mv +/-2mV specification.

A=1'0:3:TvP-P